
This tutorial will show you how to solve all of Teocida’s key puzzles. Warning! This guide contain spoilers!
Guide to Key Puzzle Solutions
Key 1
The first key puzzle requires you to enter a diagram with four squares, each with a different component on each side. Other diagrams can be found by moving up or down the page. Each of the four gadgets in the room to the right contains a square with separate sides, similar to the previous room, and a button that cycles through which lines are white and which are black. If you try to access the door below them without solving the problem, two eyes glow red.
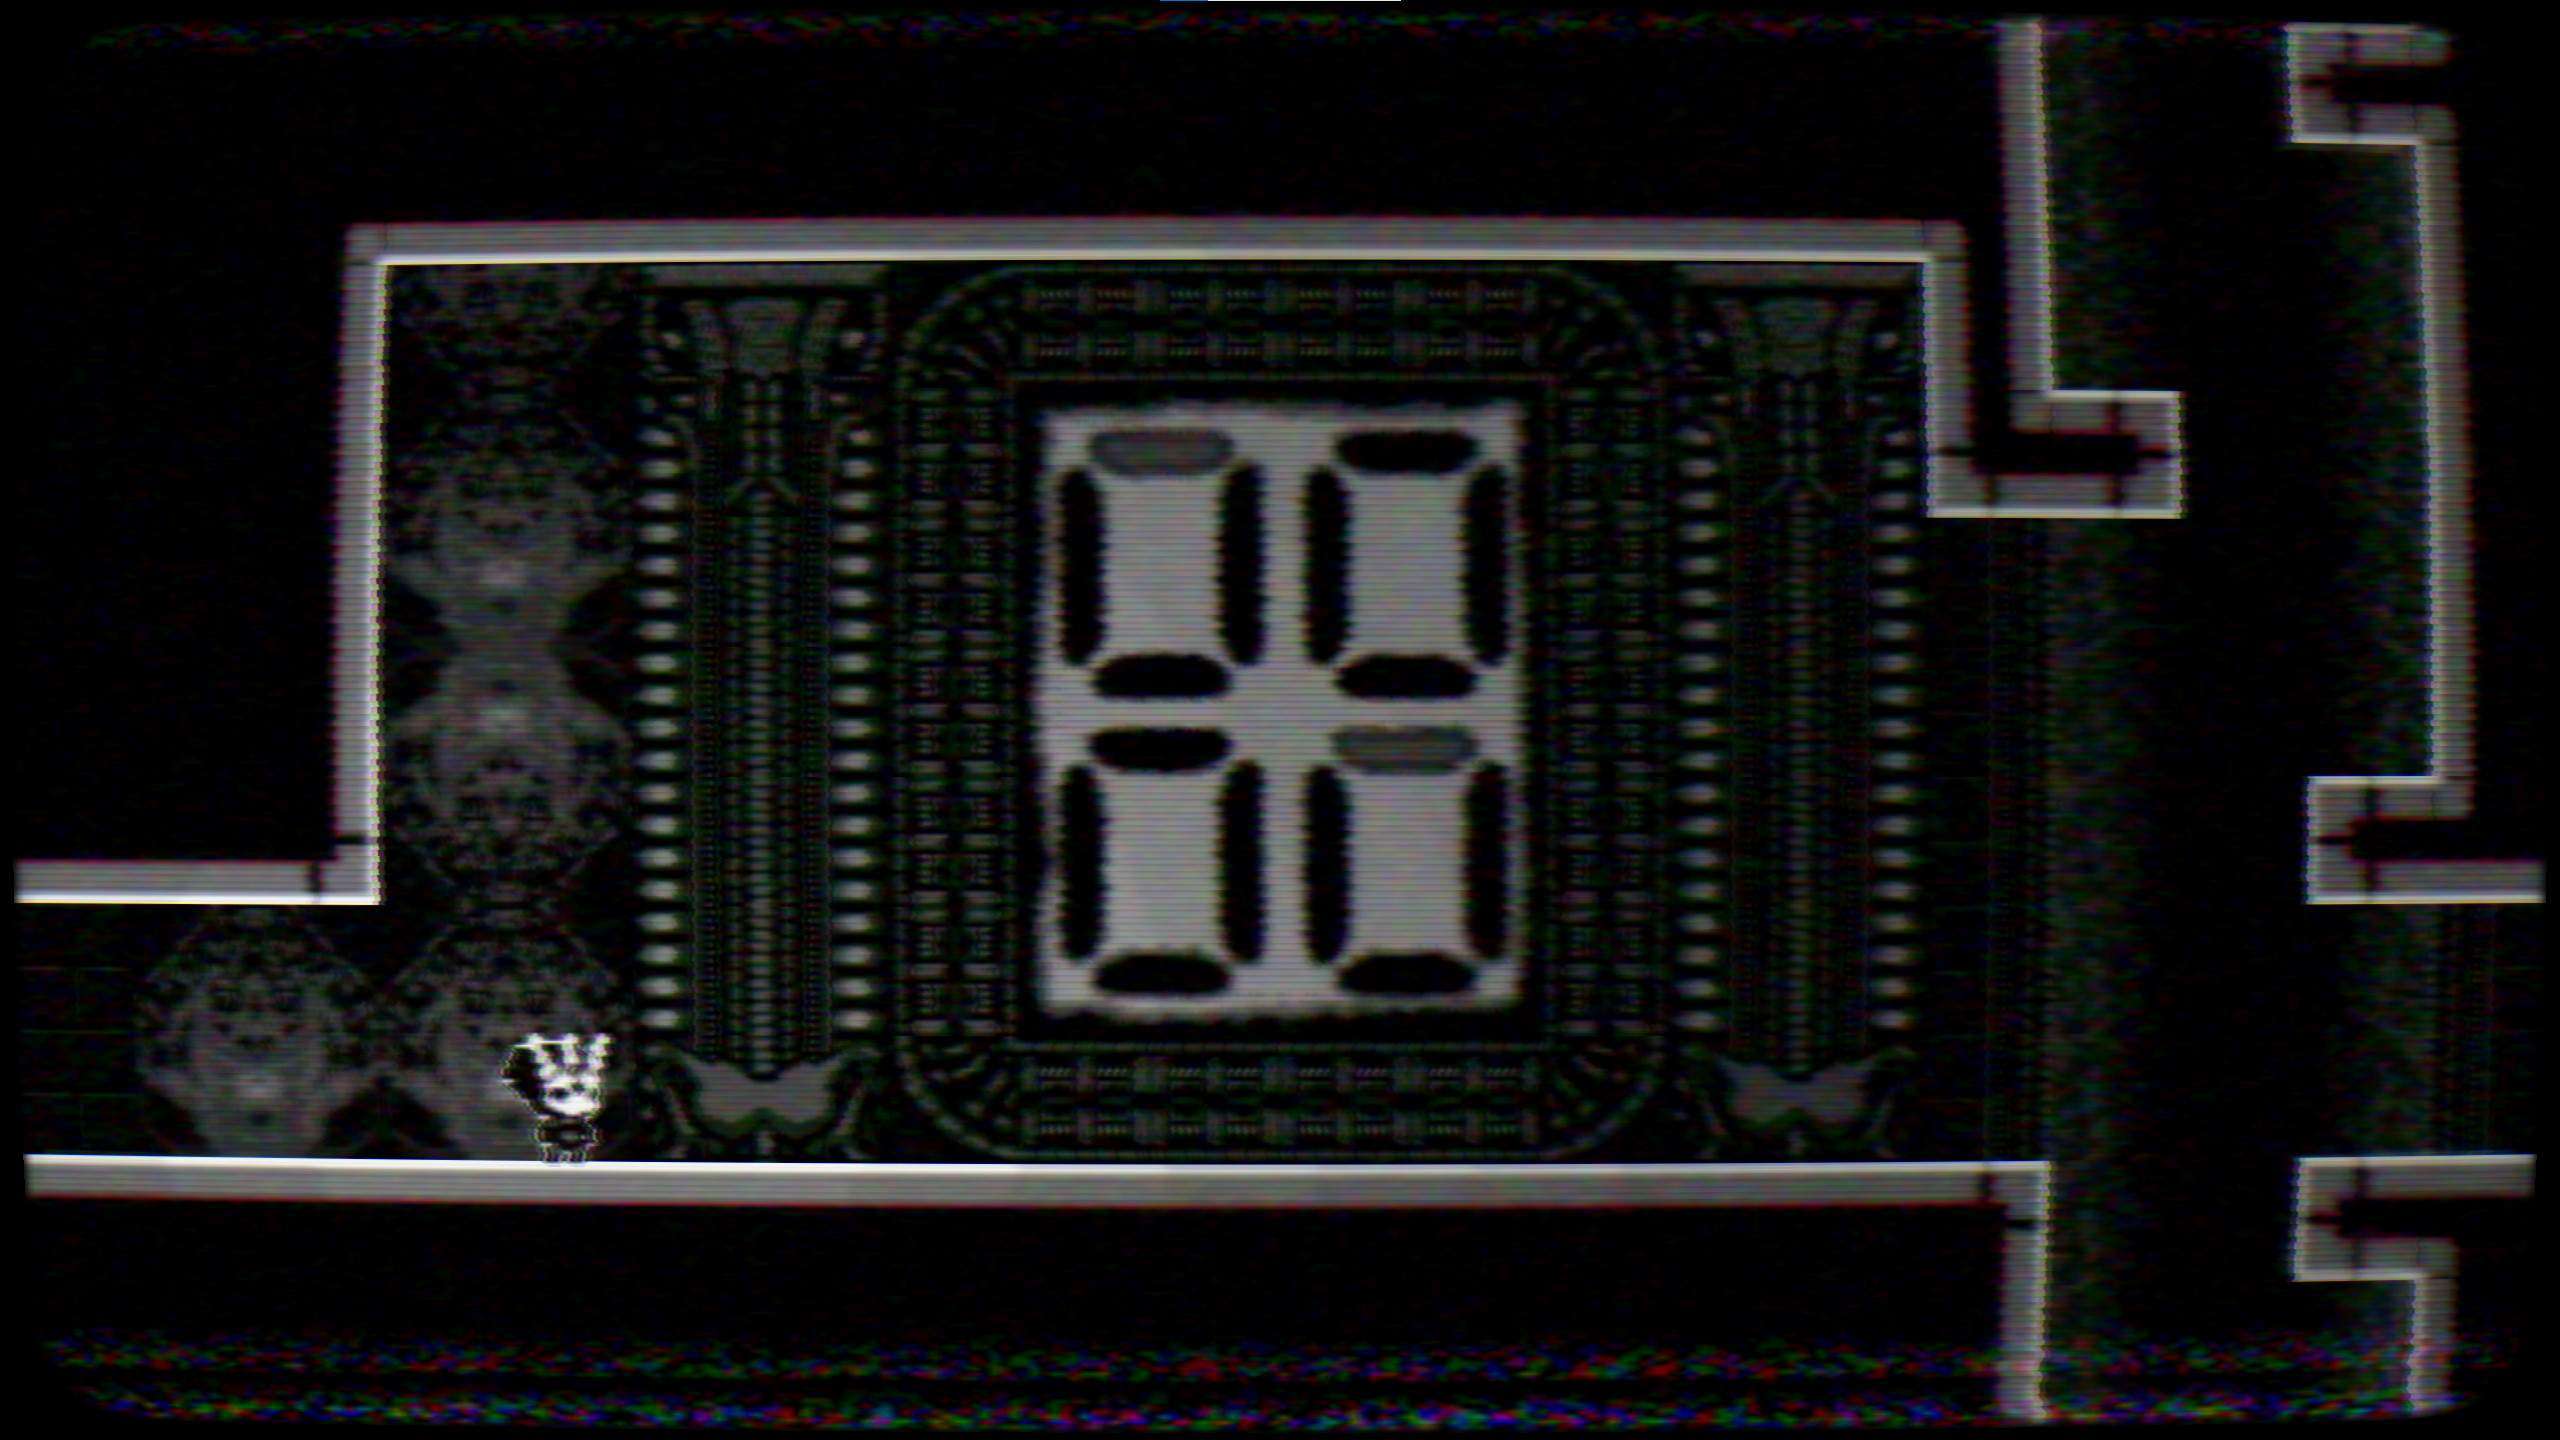
Hint: Compare the diagrams, and look above the eyes in the room with the buttons.
Solution: The diagrams, when combined, show which squares should be displayed on the devices with the buttons. For example, if you combine the diagrams the top-left square has a grey C. Above the eyes, there’s an icon that says “grey lines = black lines” Press the button on the first device, which corresponds to the top-left square, until it shows a black C, with a white line on the right. Second device needs the top and left lines to be white, third device needs only the top line to be white, and the fourth device requires the bottom and right lines to be white.
Key 2
Key two doesn’t have a puzzle to it. You’ll receive it on your first trip to level six.
Key 3
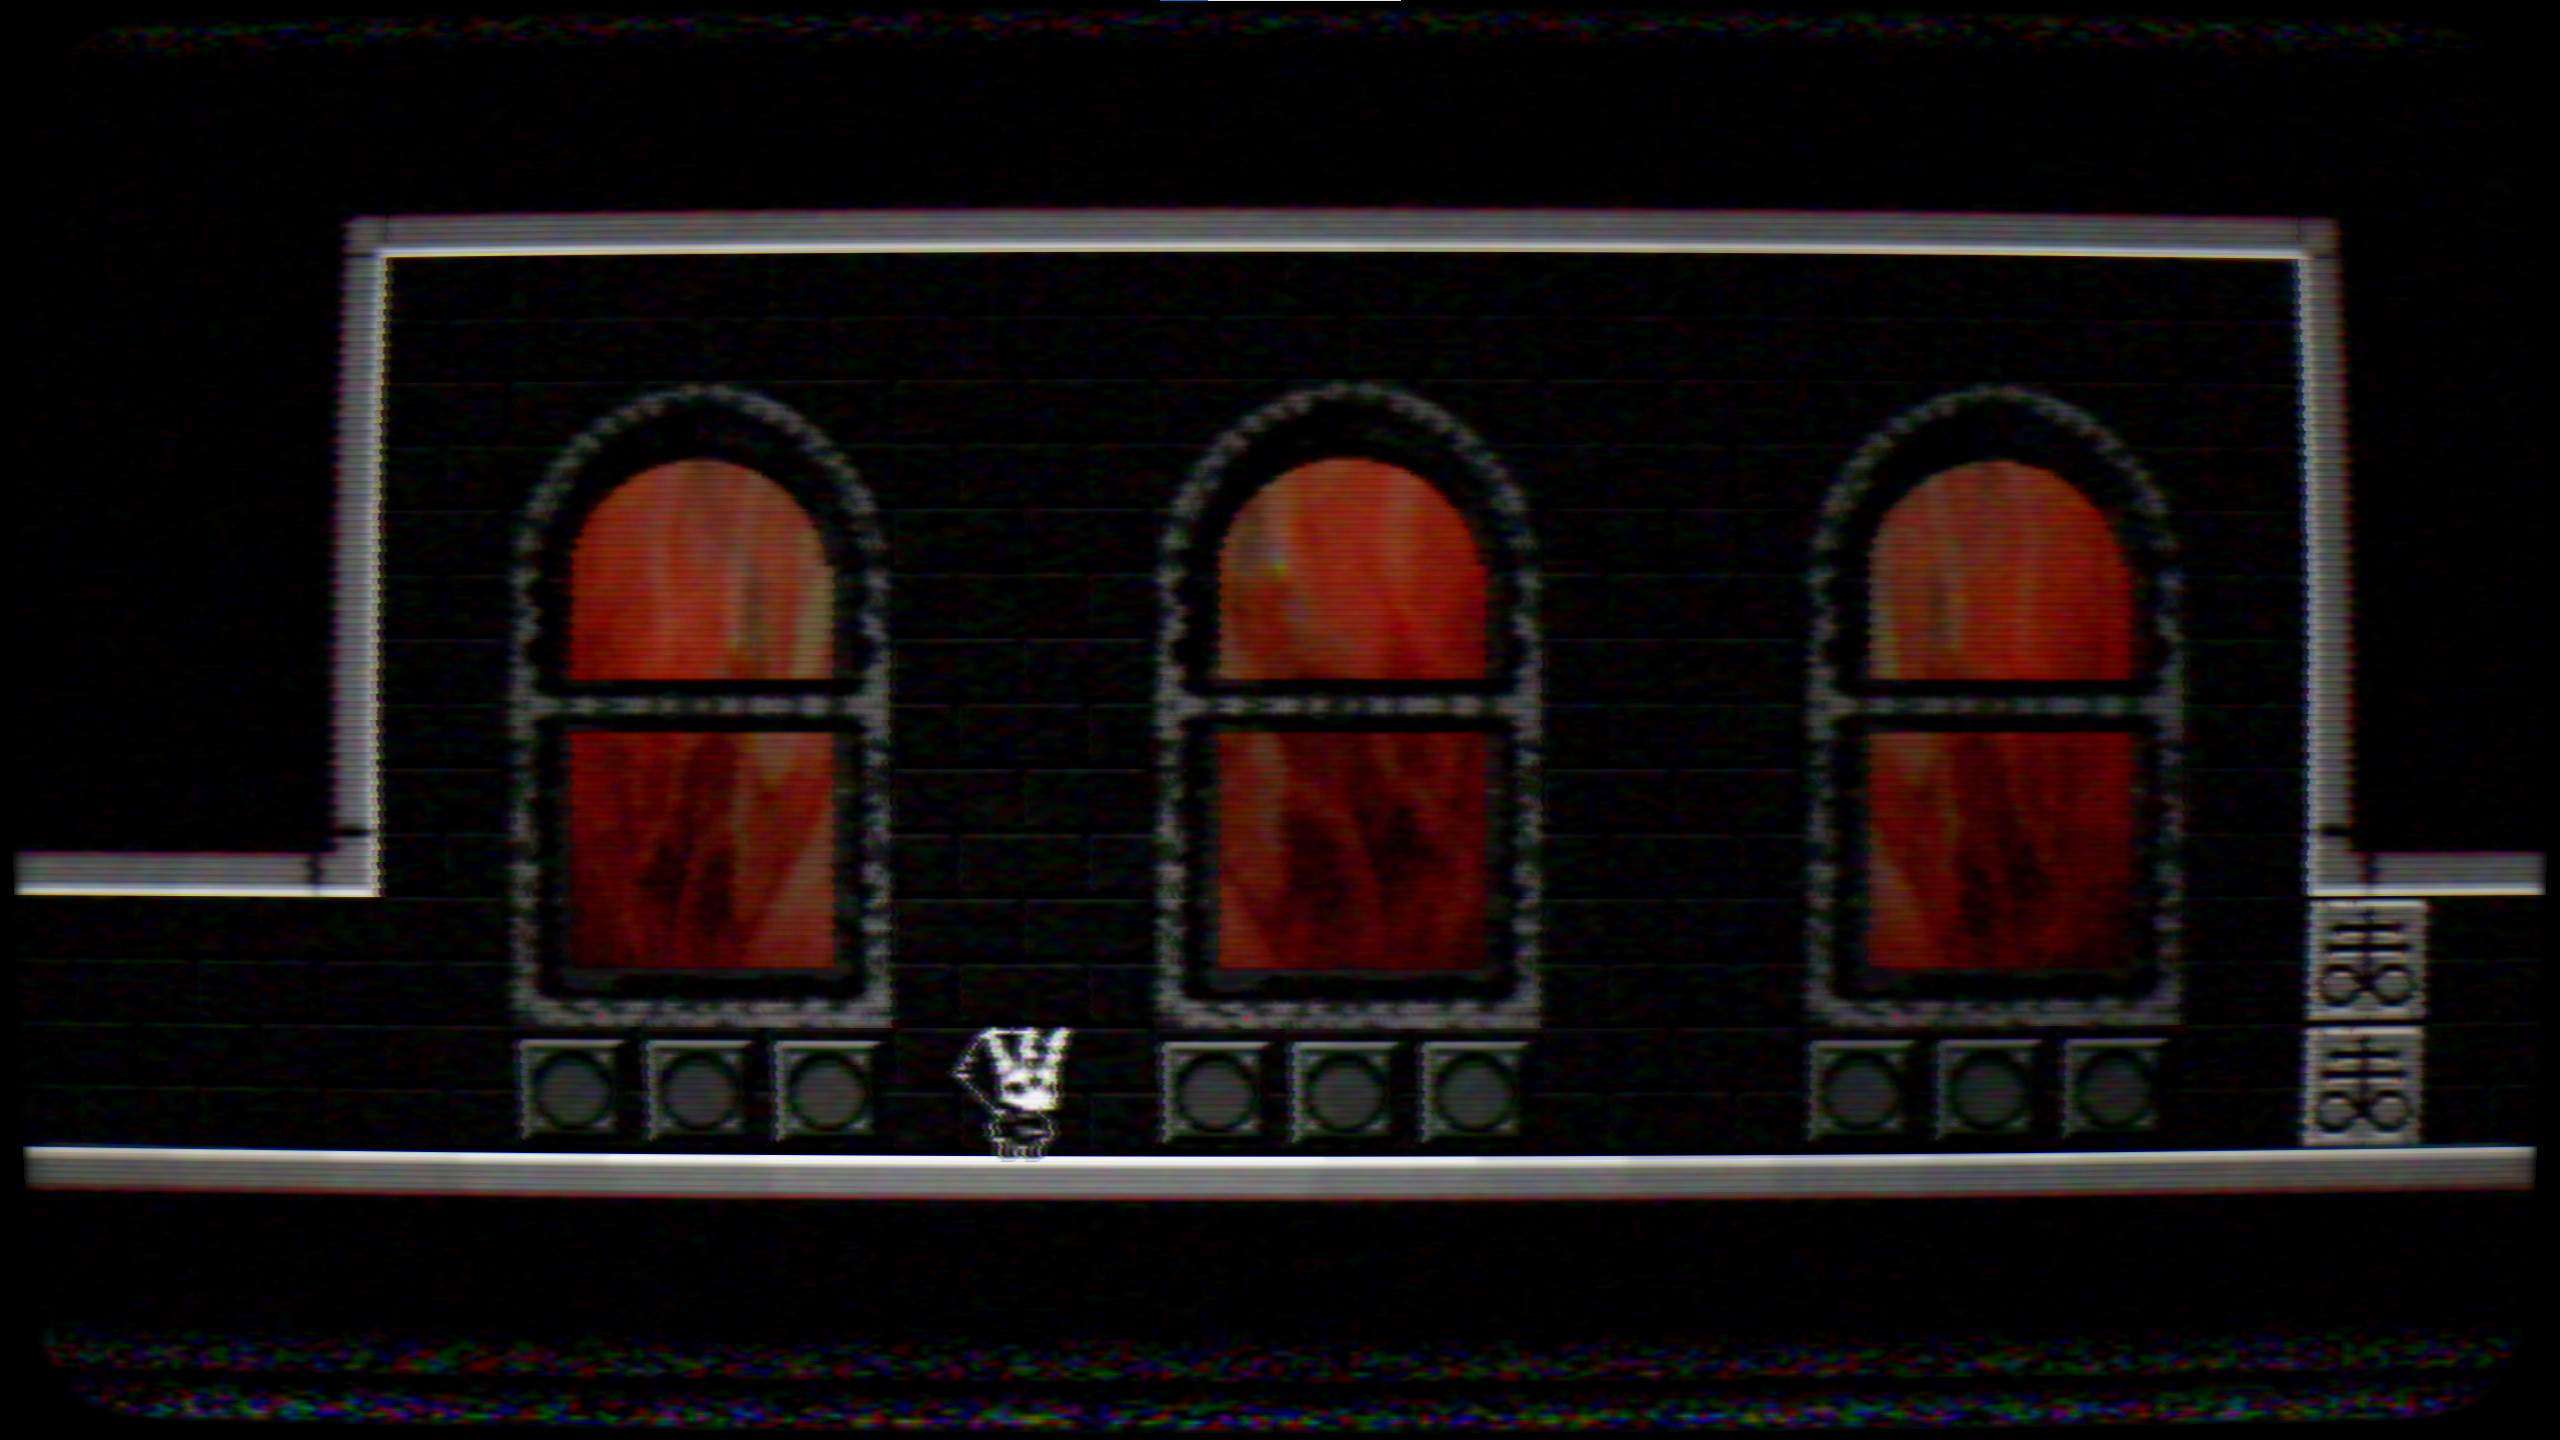
The third key puzzle has three windows, each with three buttons beneath them. If you place a totem while standing before a button, it gets pressed.
Hint: Look around the hub area for somewhere similar.
Solution: In the hub area is another set of three windows, each with skulls under them corresponding to which button needs to be pressed. The first window has only the middle button pressed, the second window has all buttons pressed, and the third has the buttons on the left and right pressed.
After this, all you have to do is jump over a pit of spikes.
Key 4
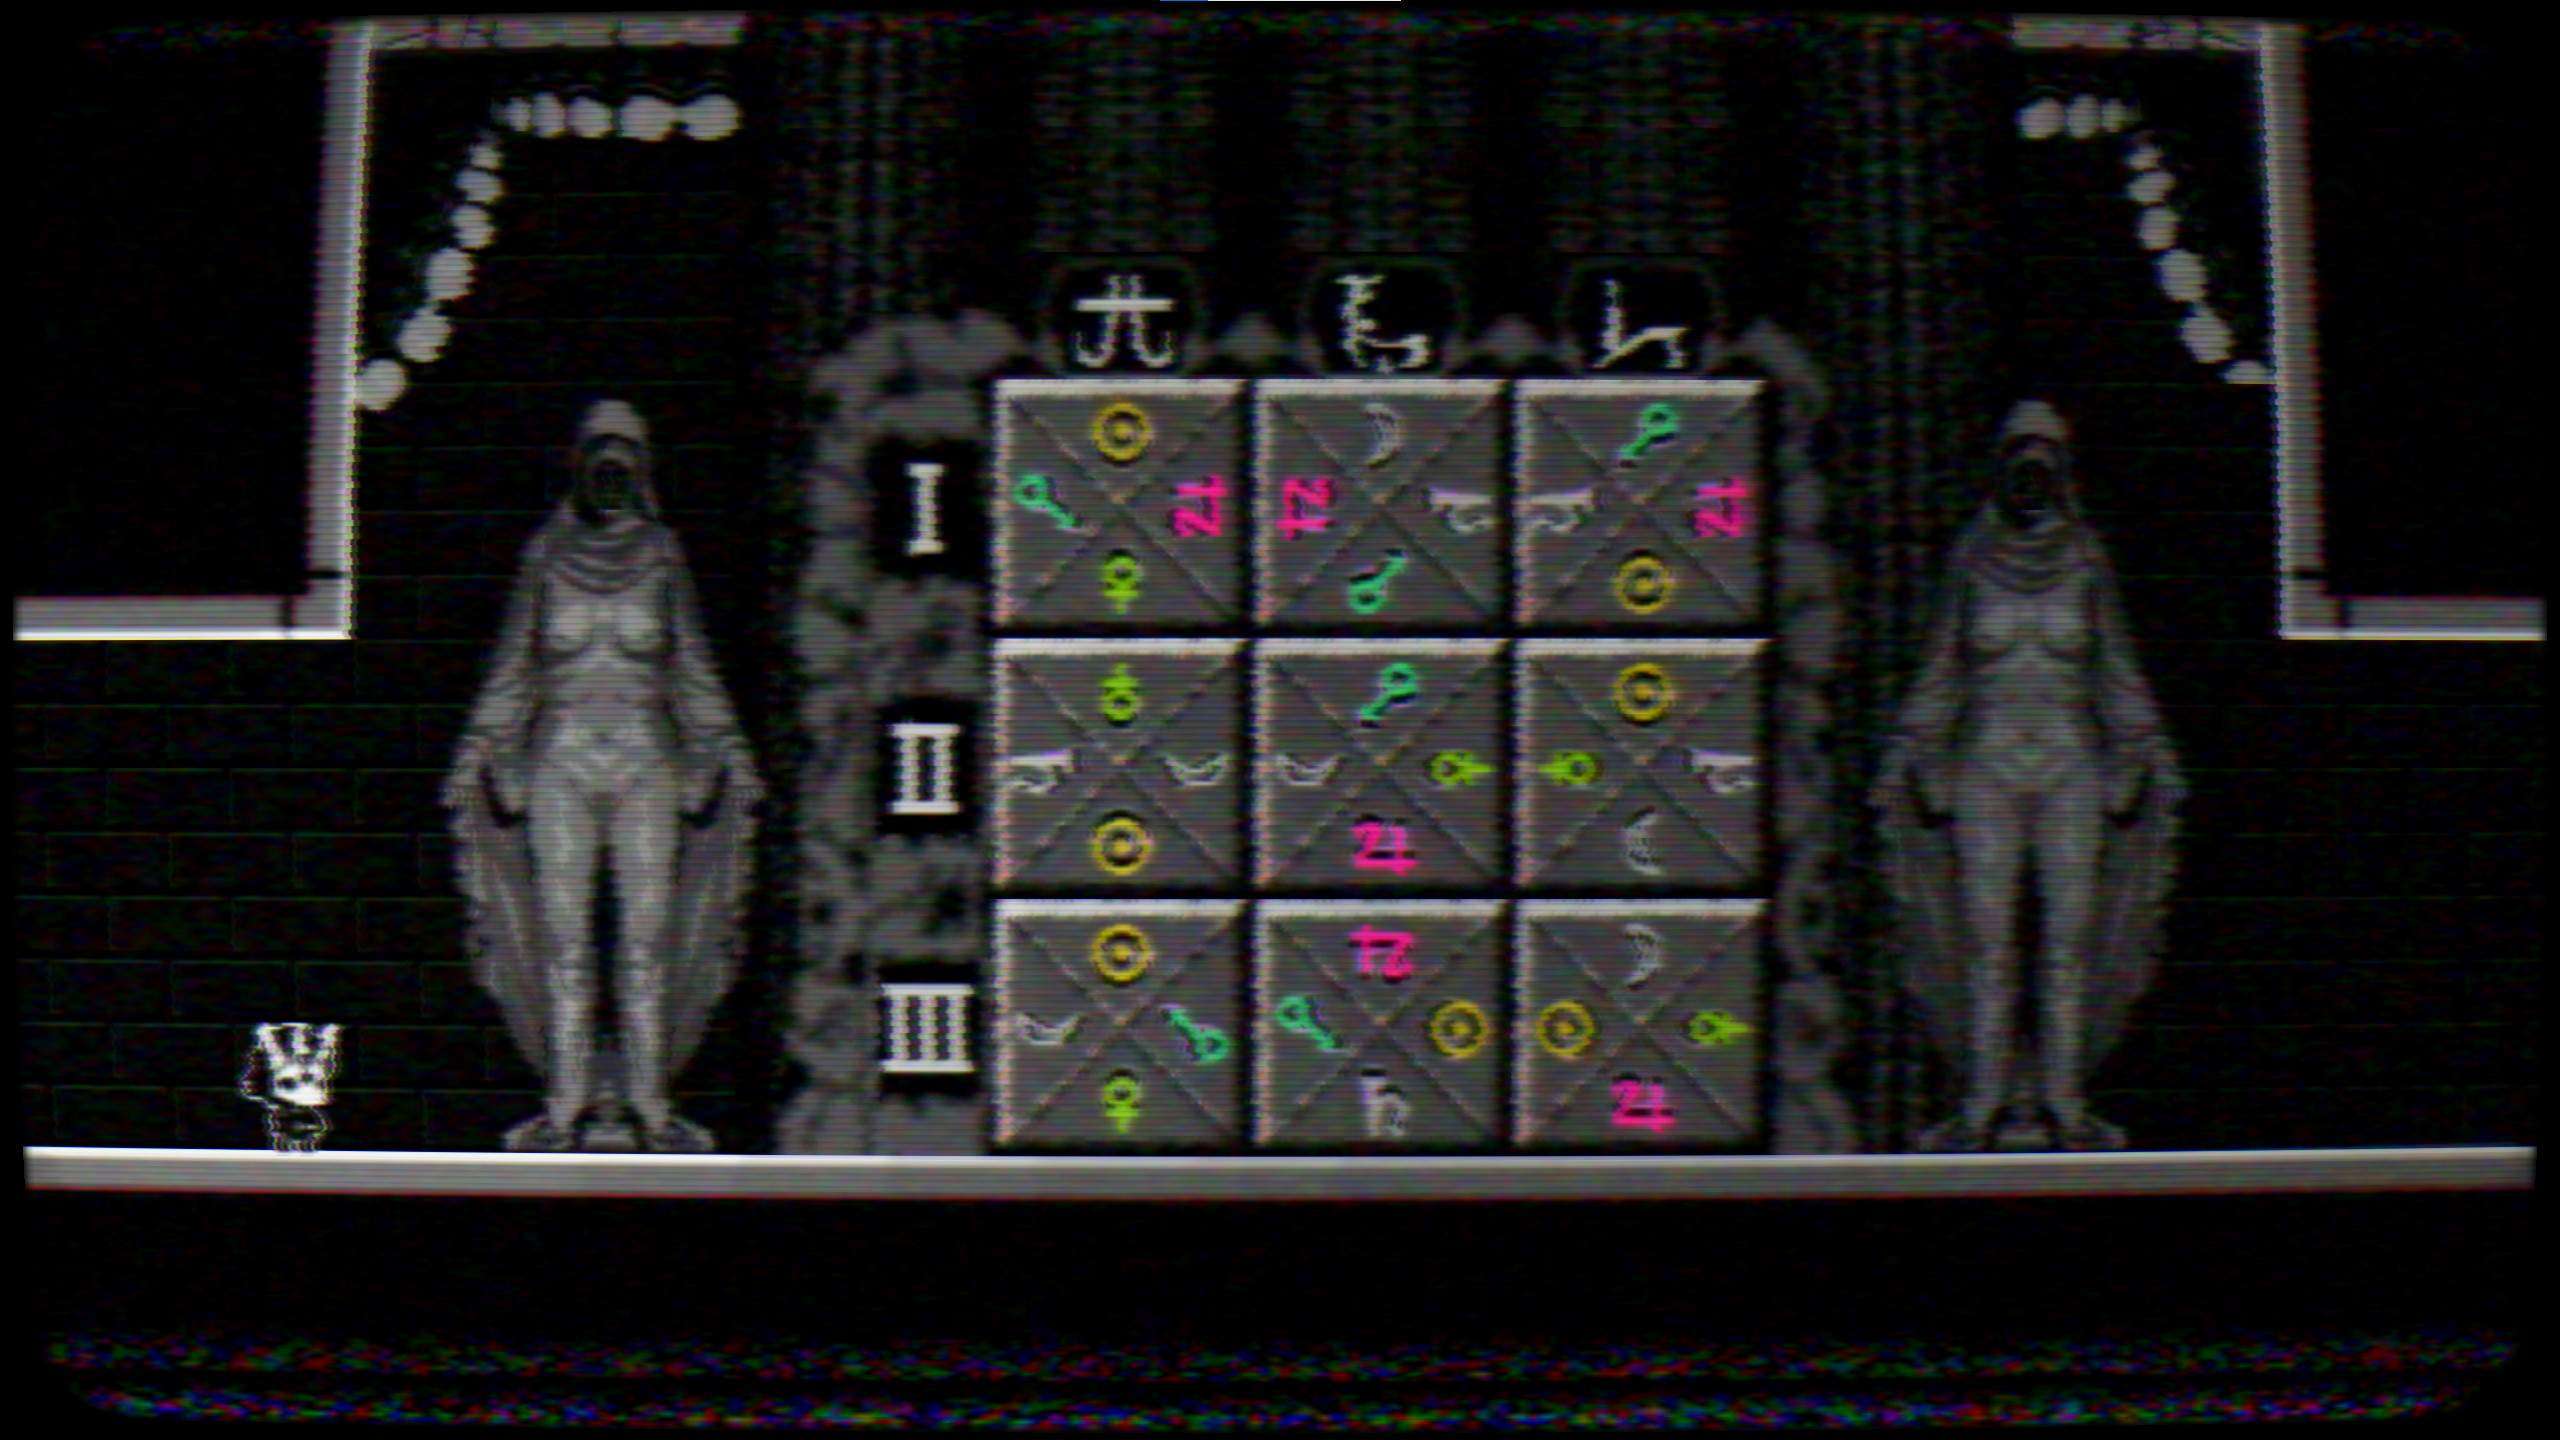
The fourth key puzzle is a 3×3 grid of squares, each individual square having symbols on each side. Creating a totem in front of one of the squares rotates it. After looking at the puzzle, the room you walk through to get there now has something that keeps popping up and down which has three symbols which cycle each time it appears.
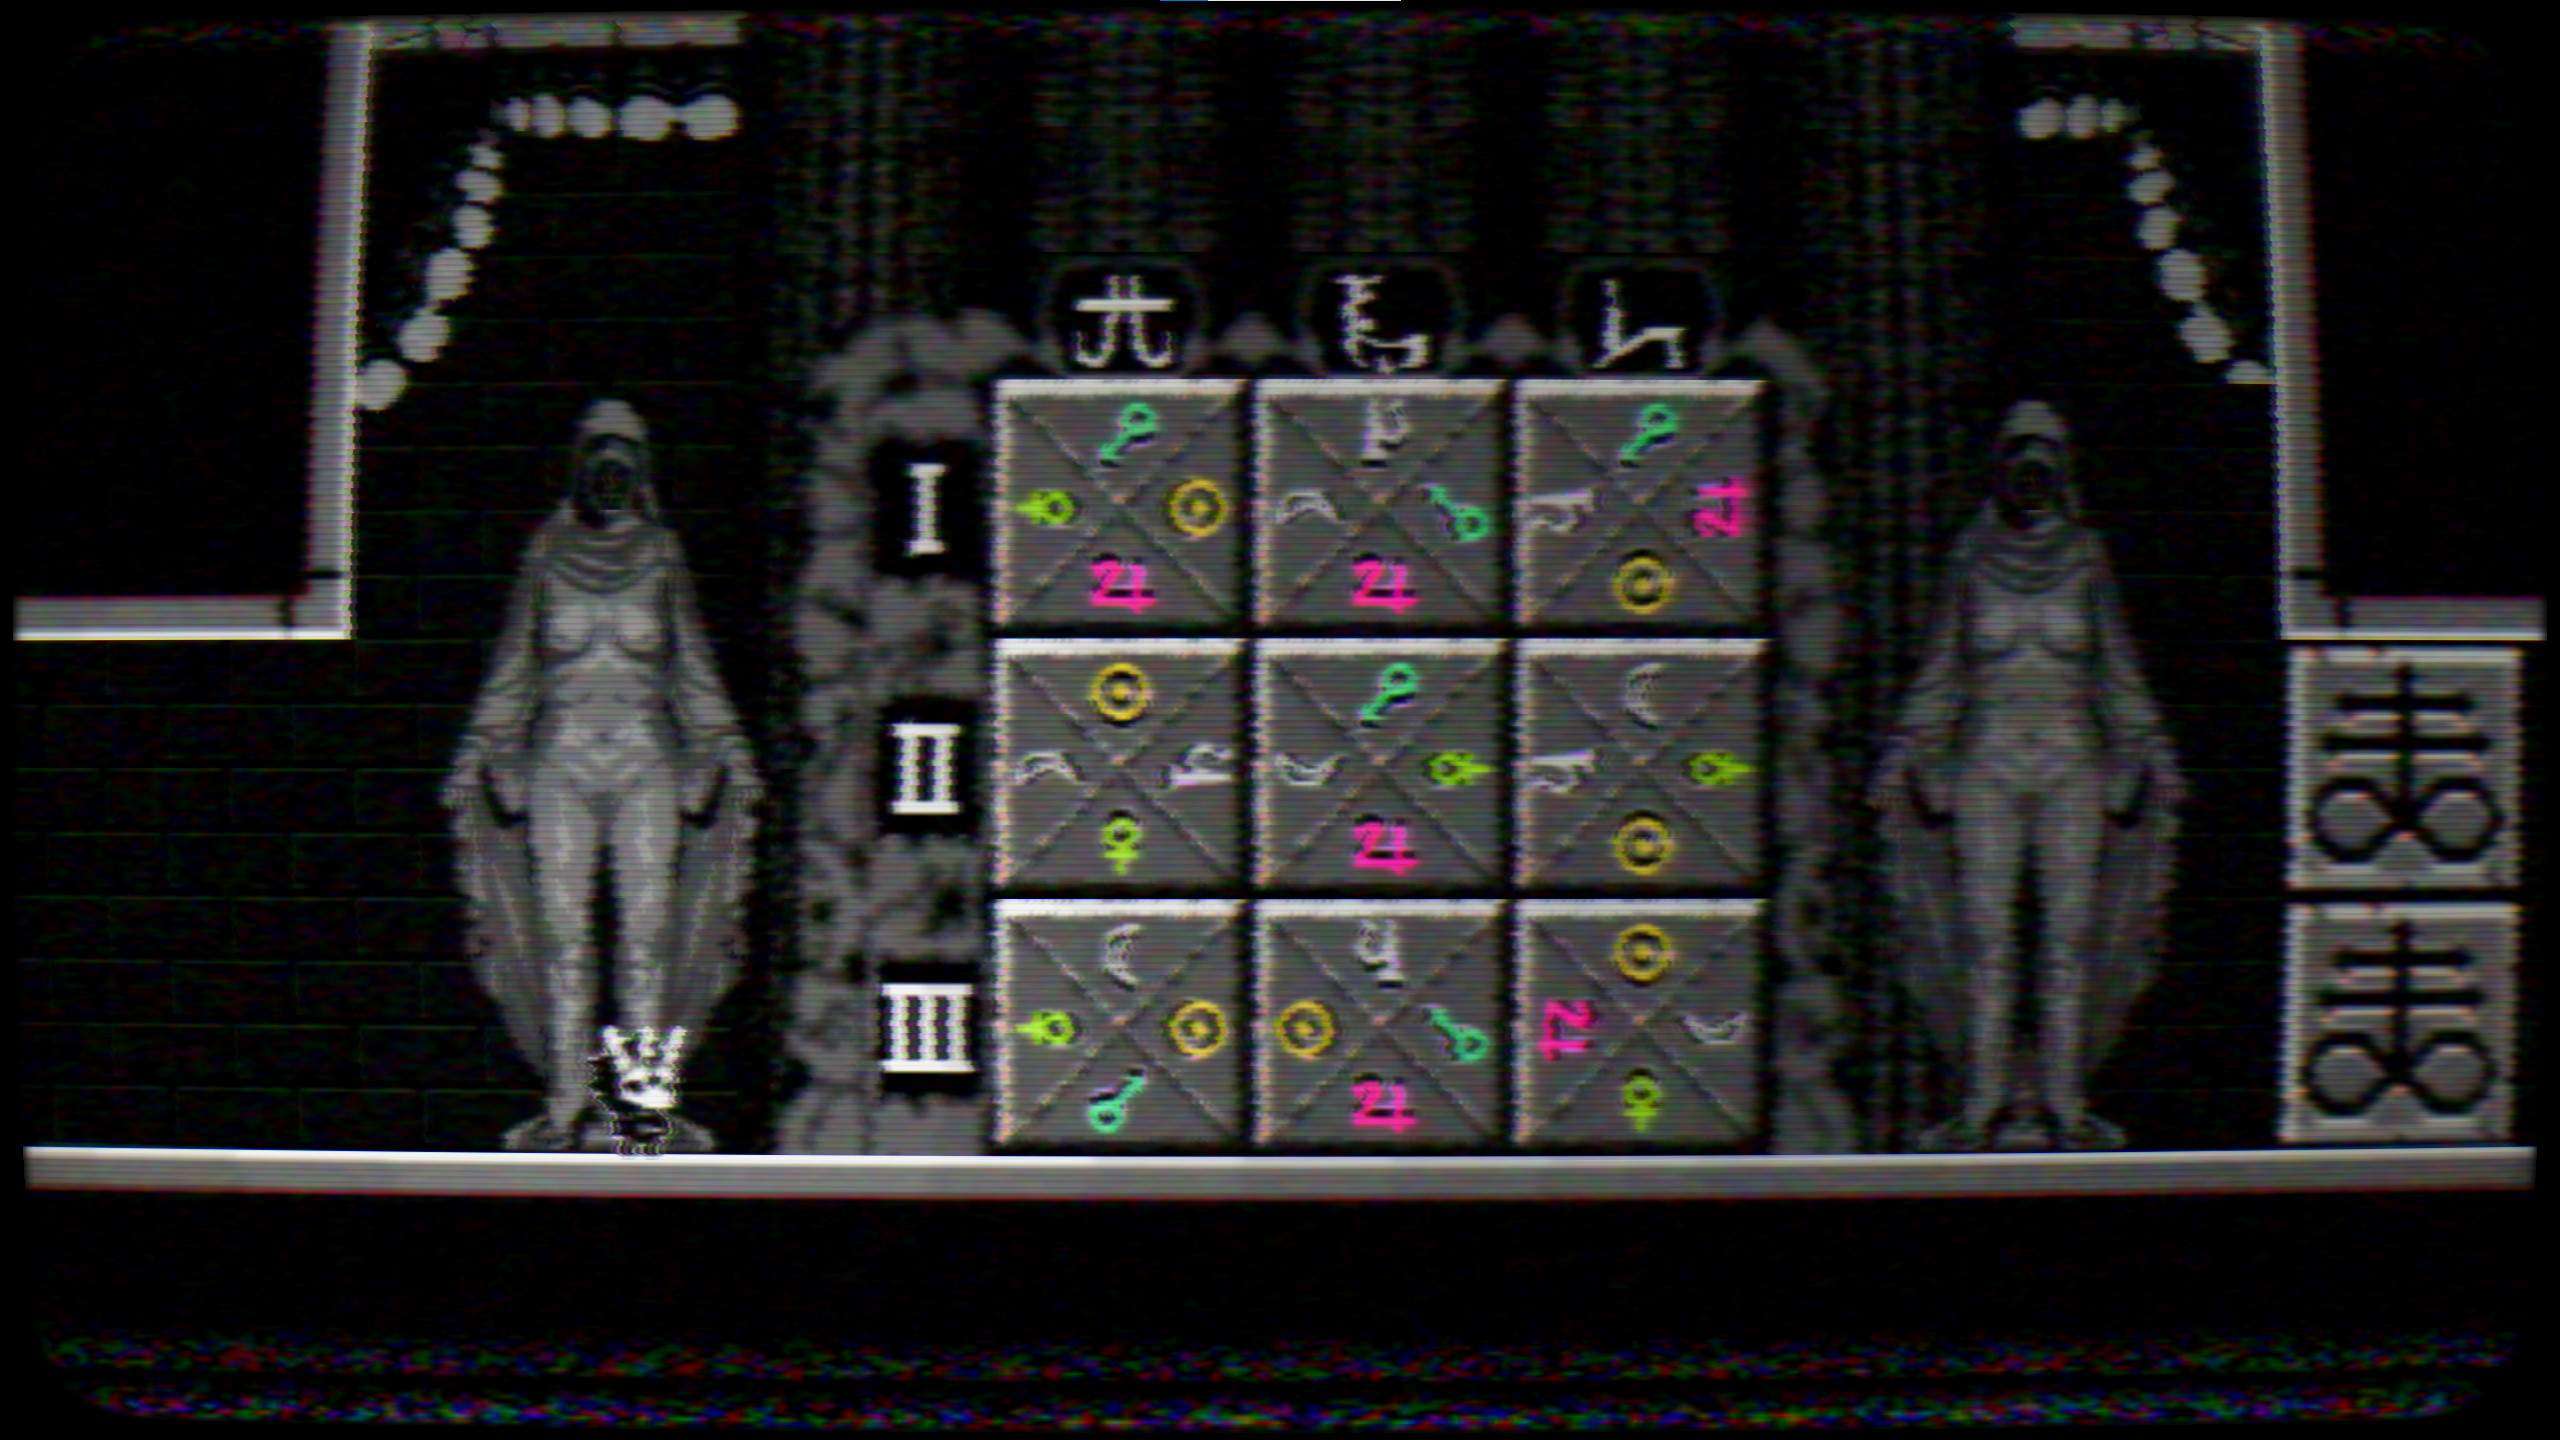
Hint: The symbols on the sides of each square need to be touching the same symbol. For example, if the top-left square has a yellow circle on the right, the top-middle square needs to have a yellow circle on the left, so they touch.
Hint 2: The symbols shown by the thing that keeps popping up point towards one of the squares on the 3×3, and one of the icons on it. The orientation of the icon it shows is important.
Solution: The pink “four” symbol on the bottom-right needs to be on the bottom. You should be able to figure it out from there.
Key 5
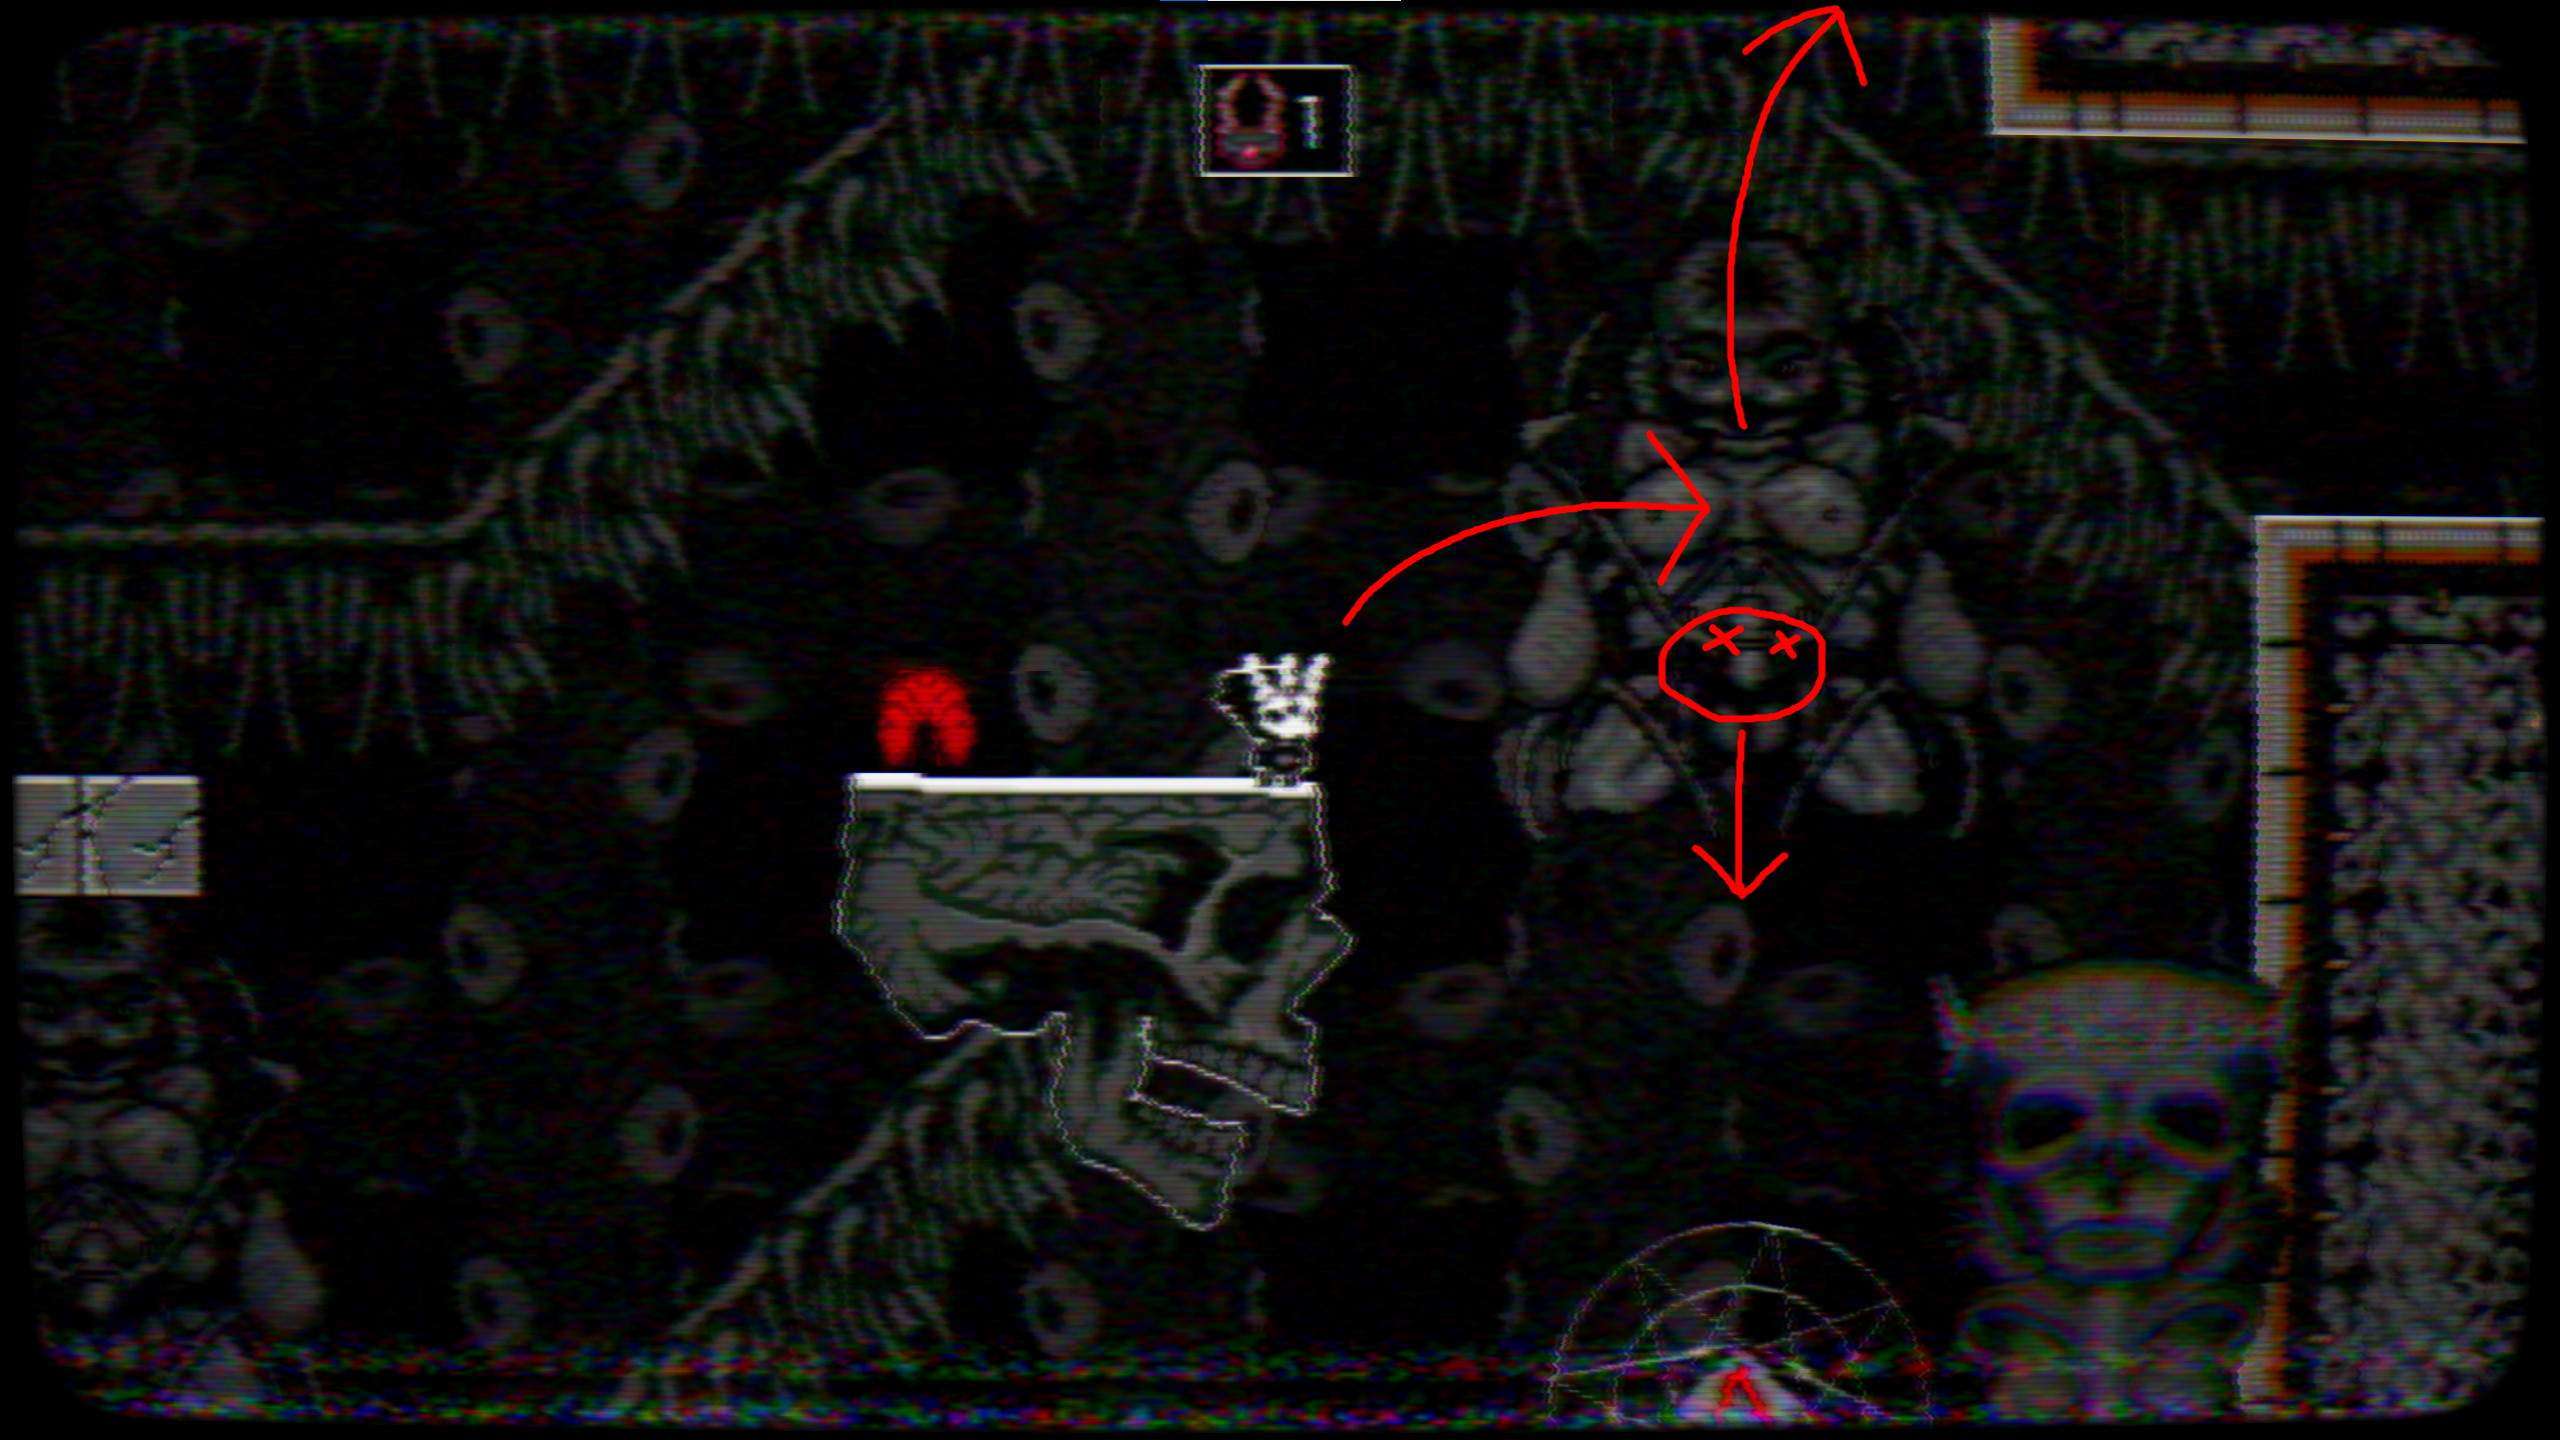
The fifth key puzzle is an empty room, with a block on the right.

Hint: Where’s that noise coming from?
Solution: Look down to find the red creature. When you look back up, the door will be open.
The next room has a door locked by three buttons, and a tablet dude.
Hint: Remember, walls aren’t necessarily solid, and the buttons make sound when something stands on them.
Solution: Jump from the door to the top-left of the screen, and you’ll go through the wall. Walk in a bit until the sound and effect plays for the button being pressed, and put down a totem. Jump from the door to the top-right and do the same. Finally, walk through the wall under the door (only the side with the tablet guy can be walked through) and place the third totem on the last button. Here is a diagram of where the buttons are:
Key 6
The door to the sixth key puzzle is in a room with no entrance.
Hint: Remember, walls aren’t necessarily solid.
Solution: The platform closest to the door is above a wall that can be passed through. Here is the path to the door:
The sixth key puzzle is a room with a tablet guy in the middle, who says “Please make it stop!”.
Hint: What in this room can you stop?
Solution: Open the options menu and turn the music volume all the way down.
Key 7
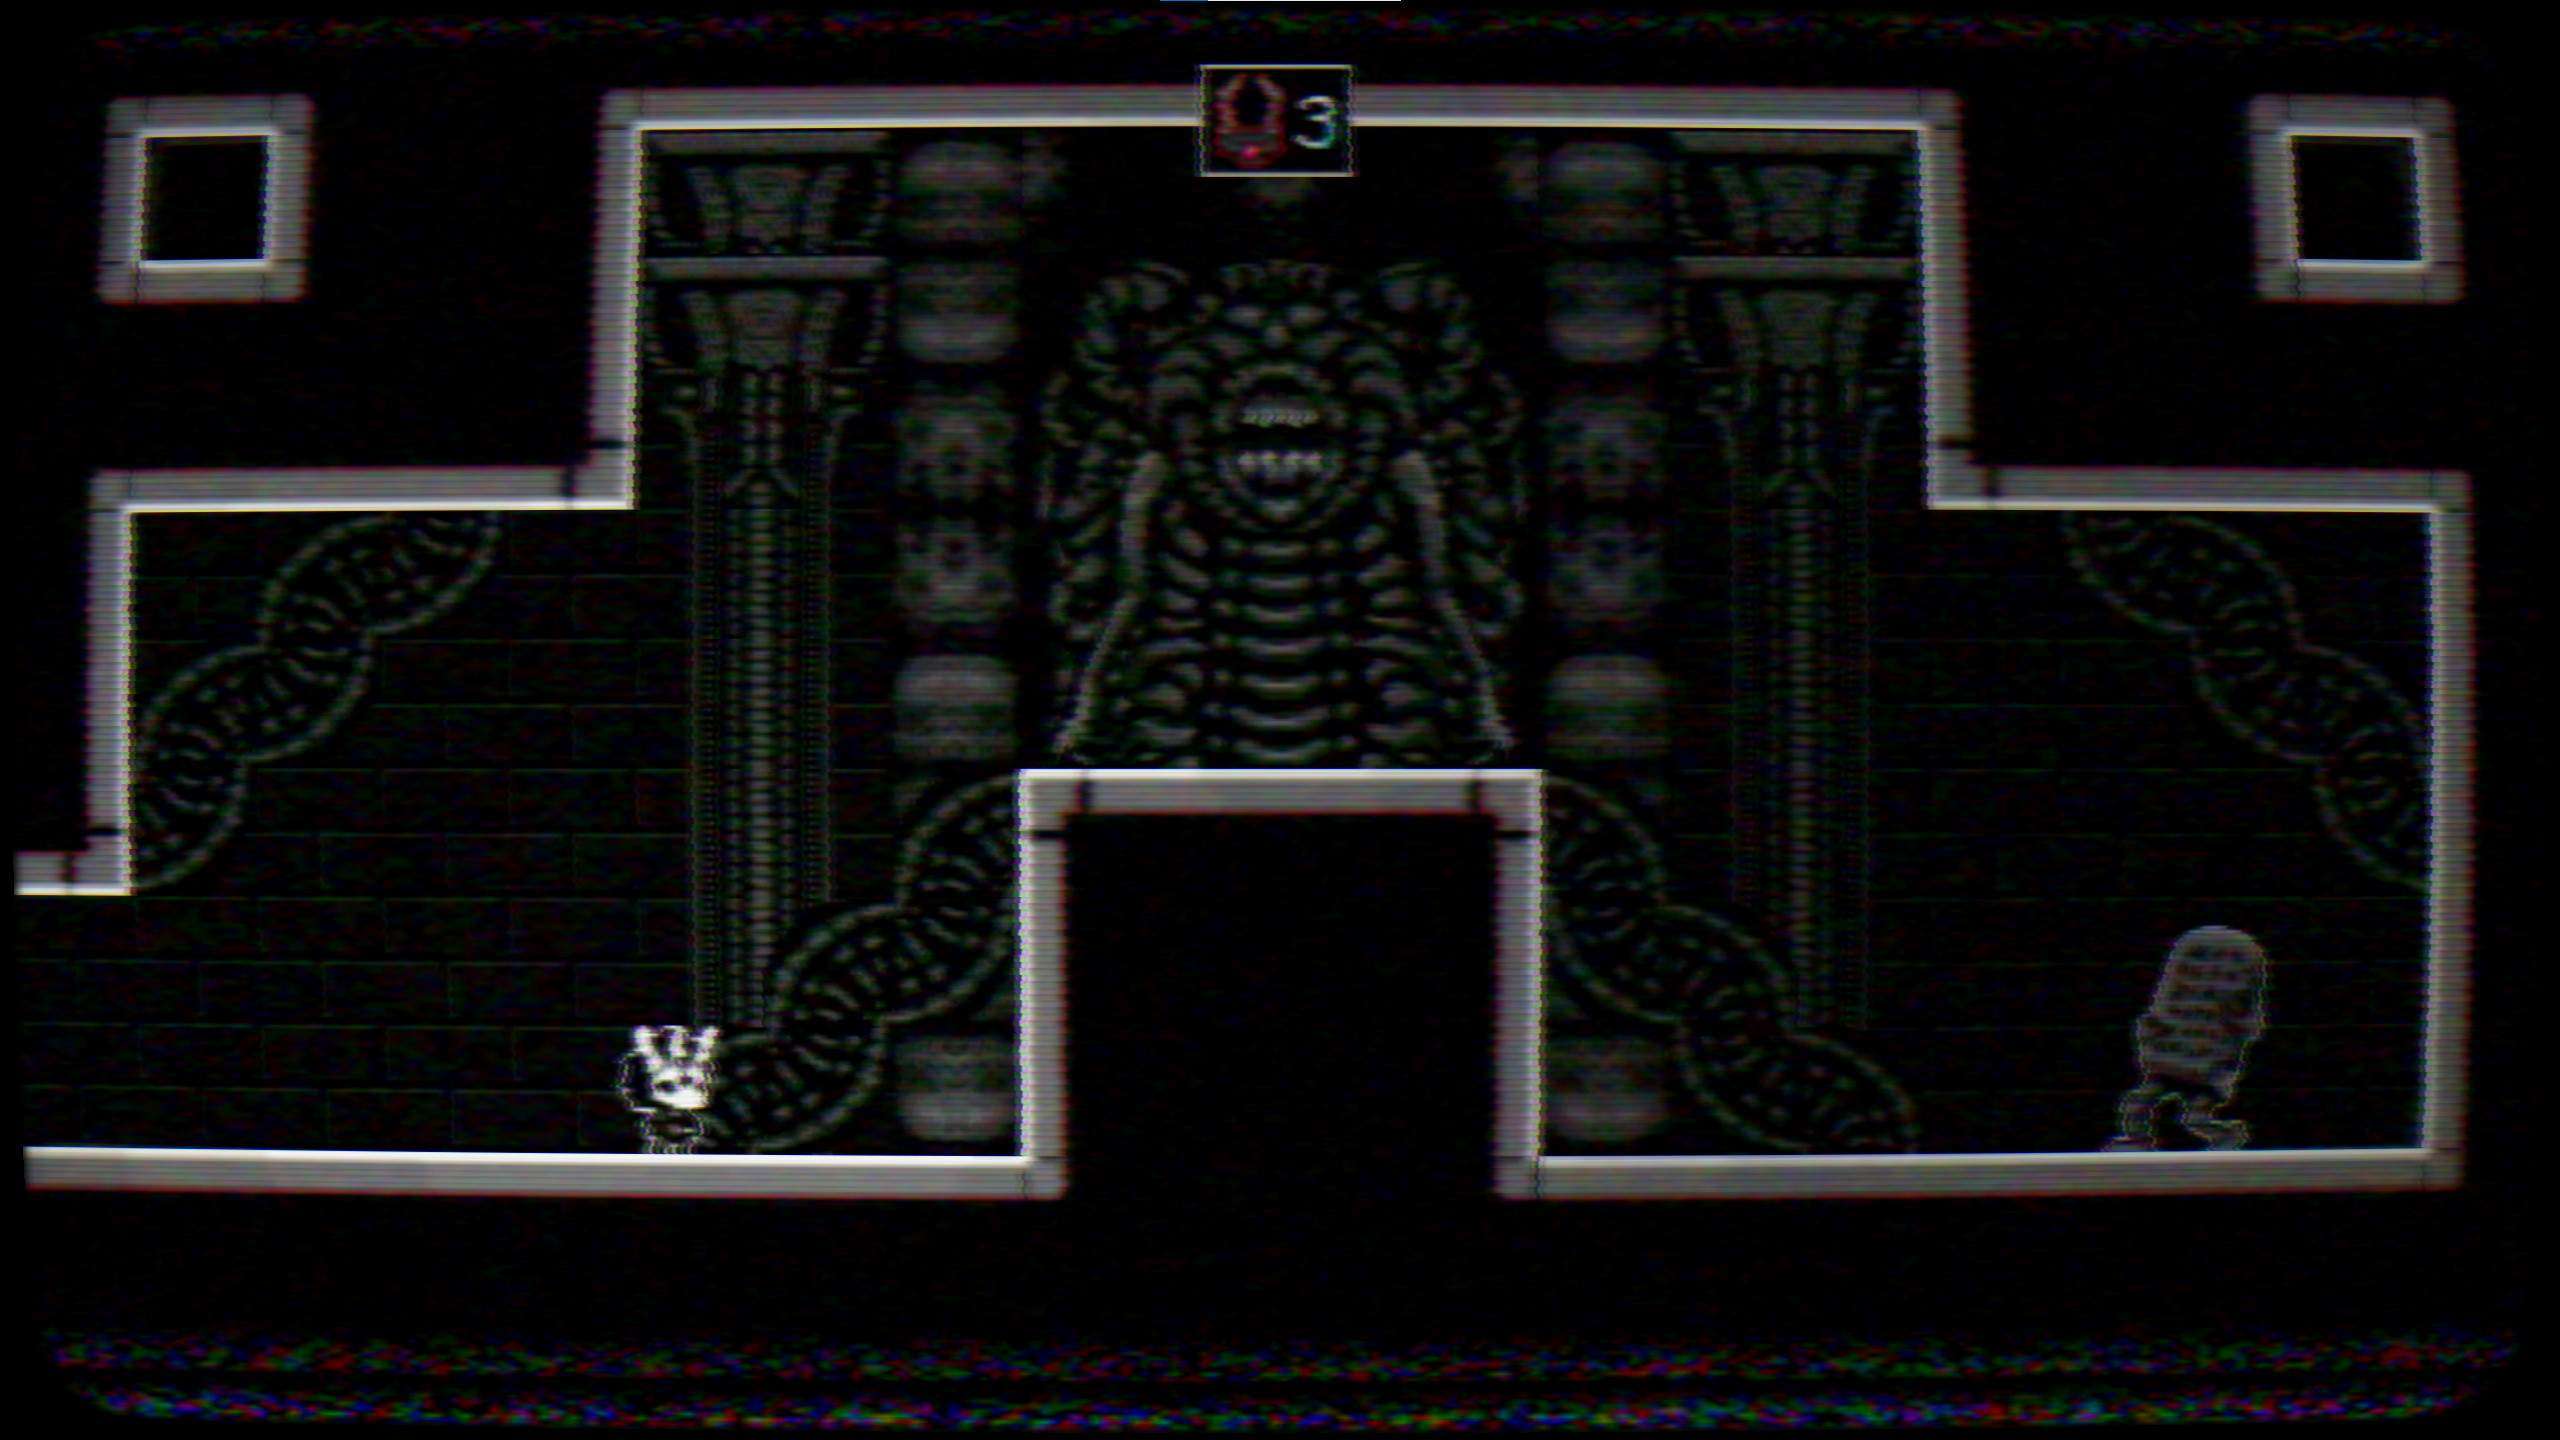
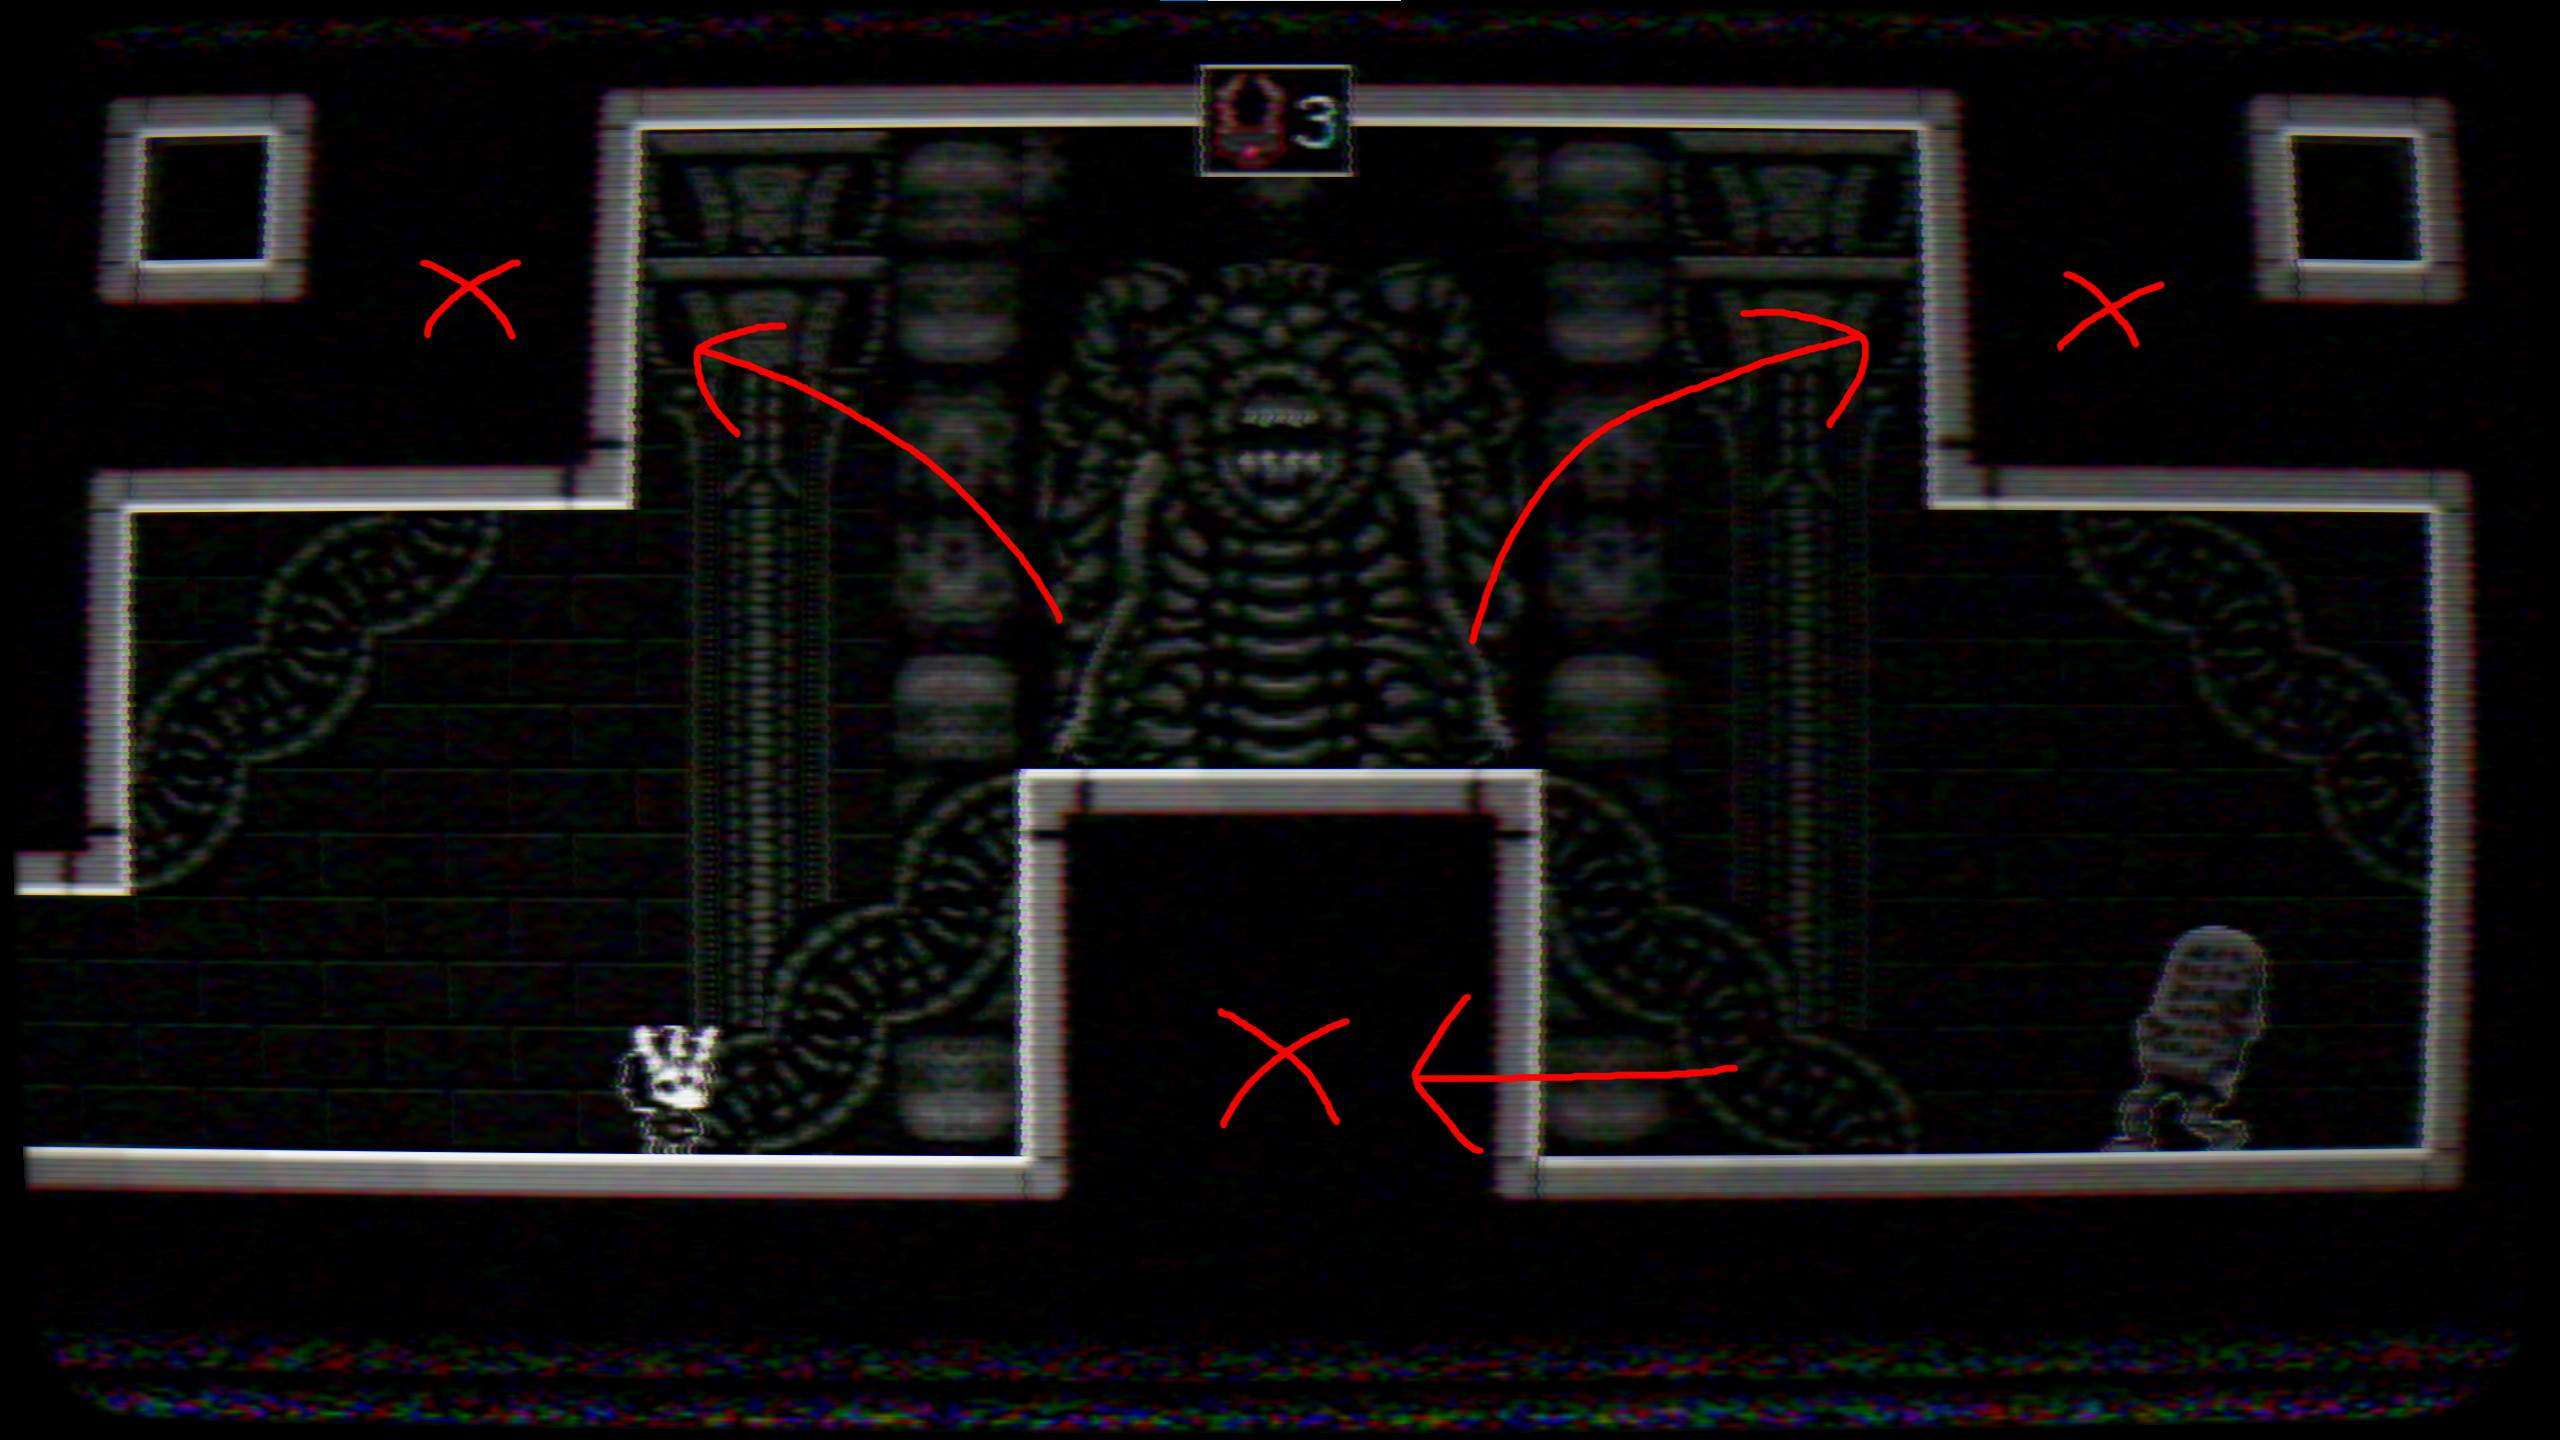
The door to the seventh key is hidden in level two. In the huge room with the pillars that go up and down and kill you on touch, there’s a door close to the bottom-right most corner with no route to it.
Hint: The room doesn’t have a roof.
Solution: Close to the exit of the room is a red multi-jump symbol. Jump as high up as you can with it and drop a totem to reactivate it in mid-air, then continue to jump over the top of the level and to the right. Hold right and you’ll eventually fall down to the secret door. Here is a diagram of exactly what to do:
A little tip: In the room with the baby, pay attention to the picture above it. Maybe take a screenshot, it might come in handy.
Key 8
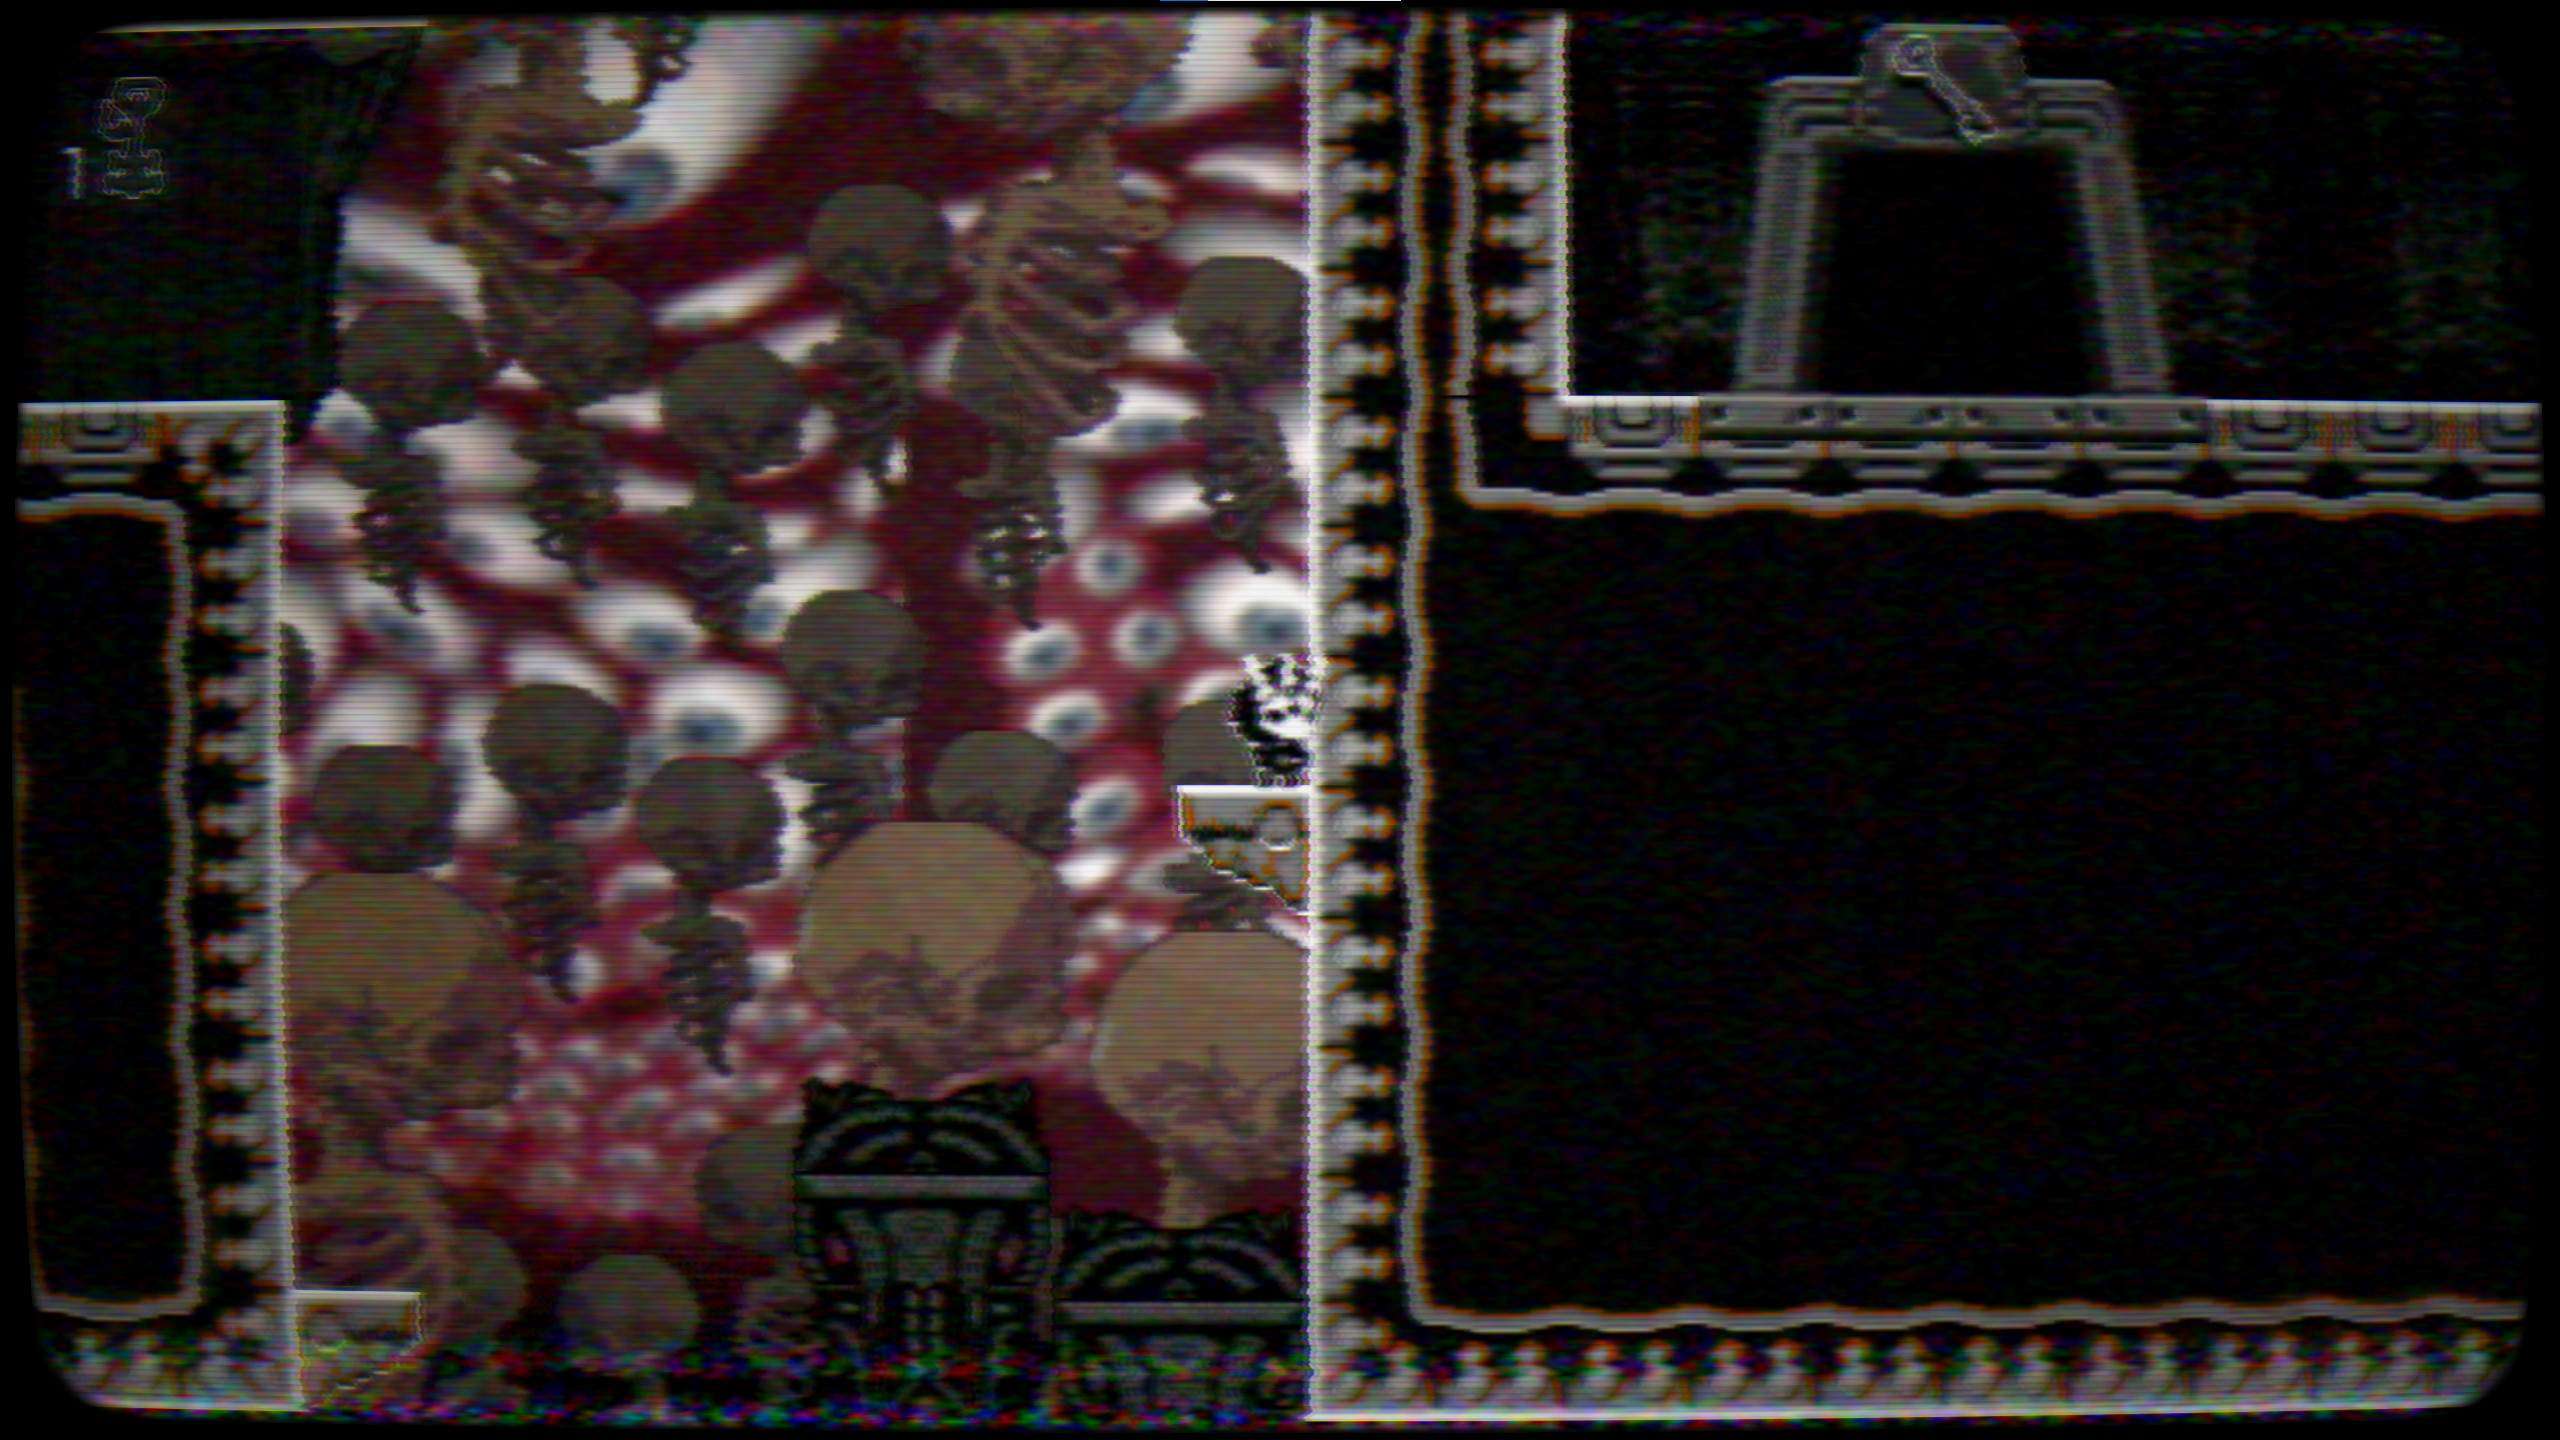
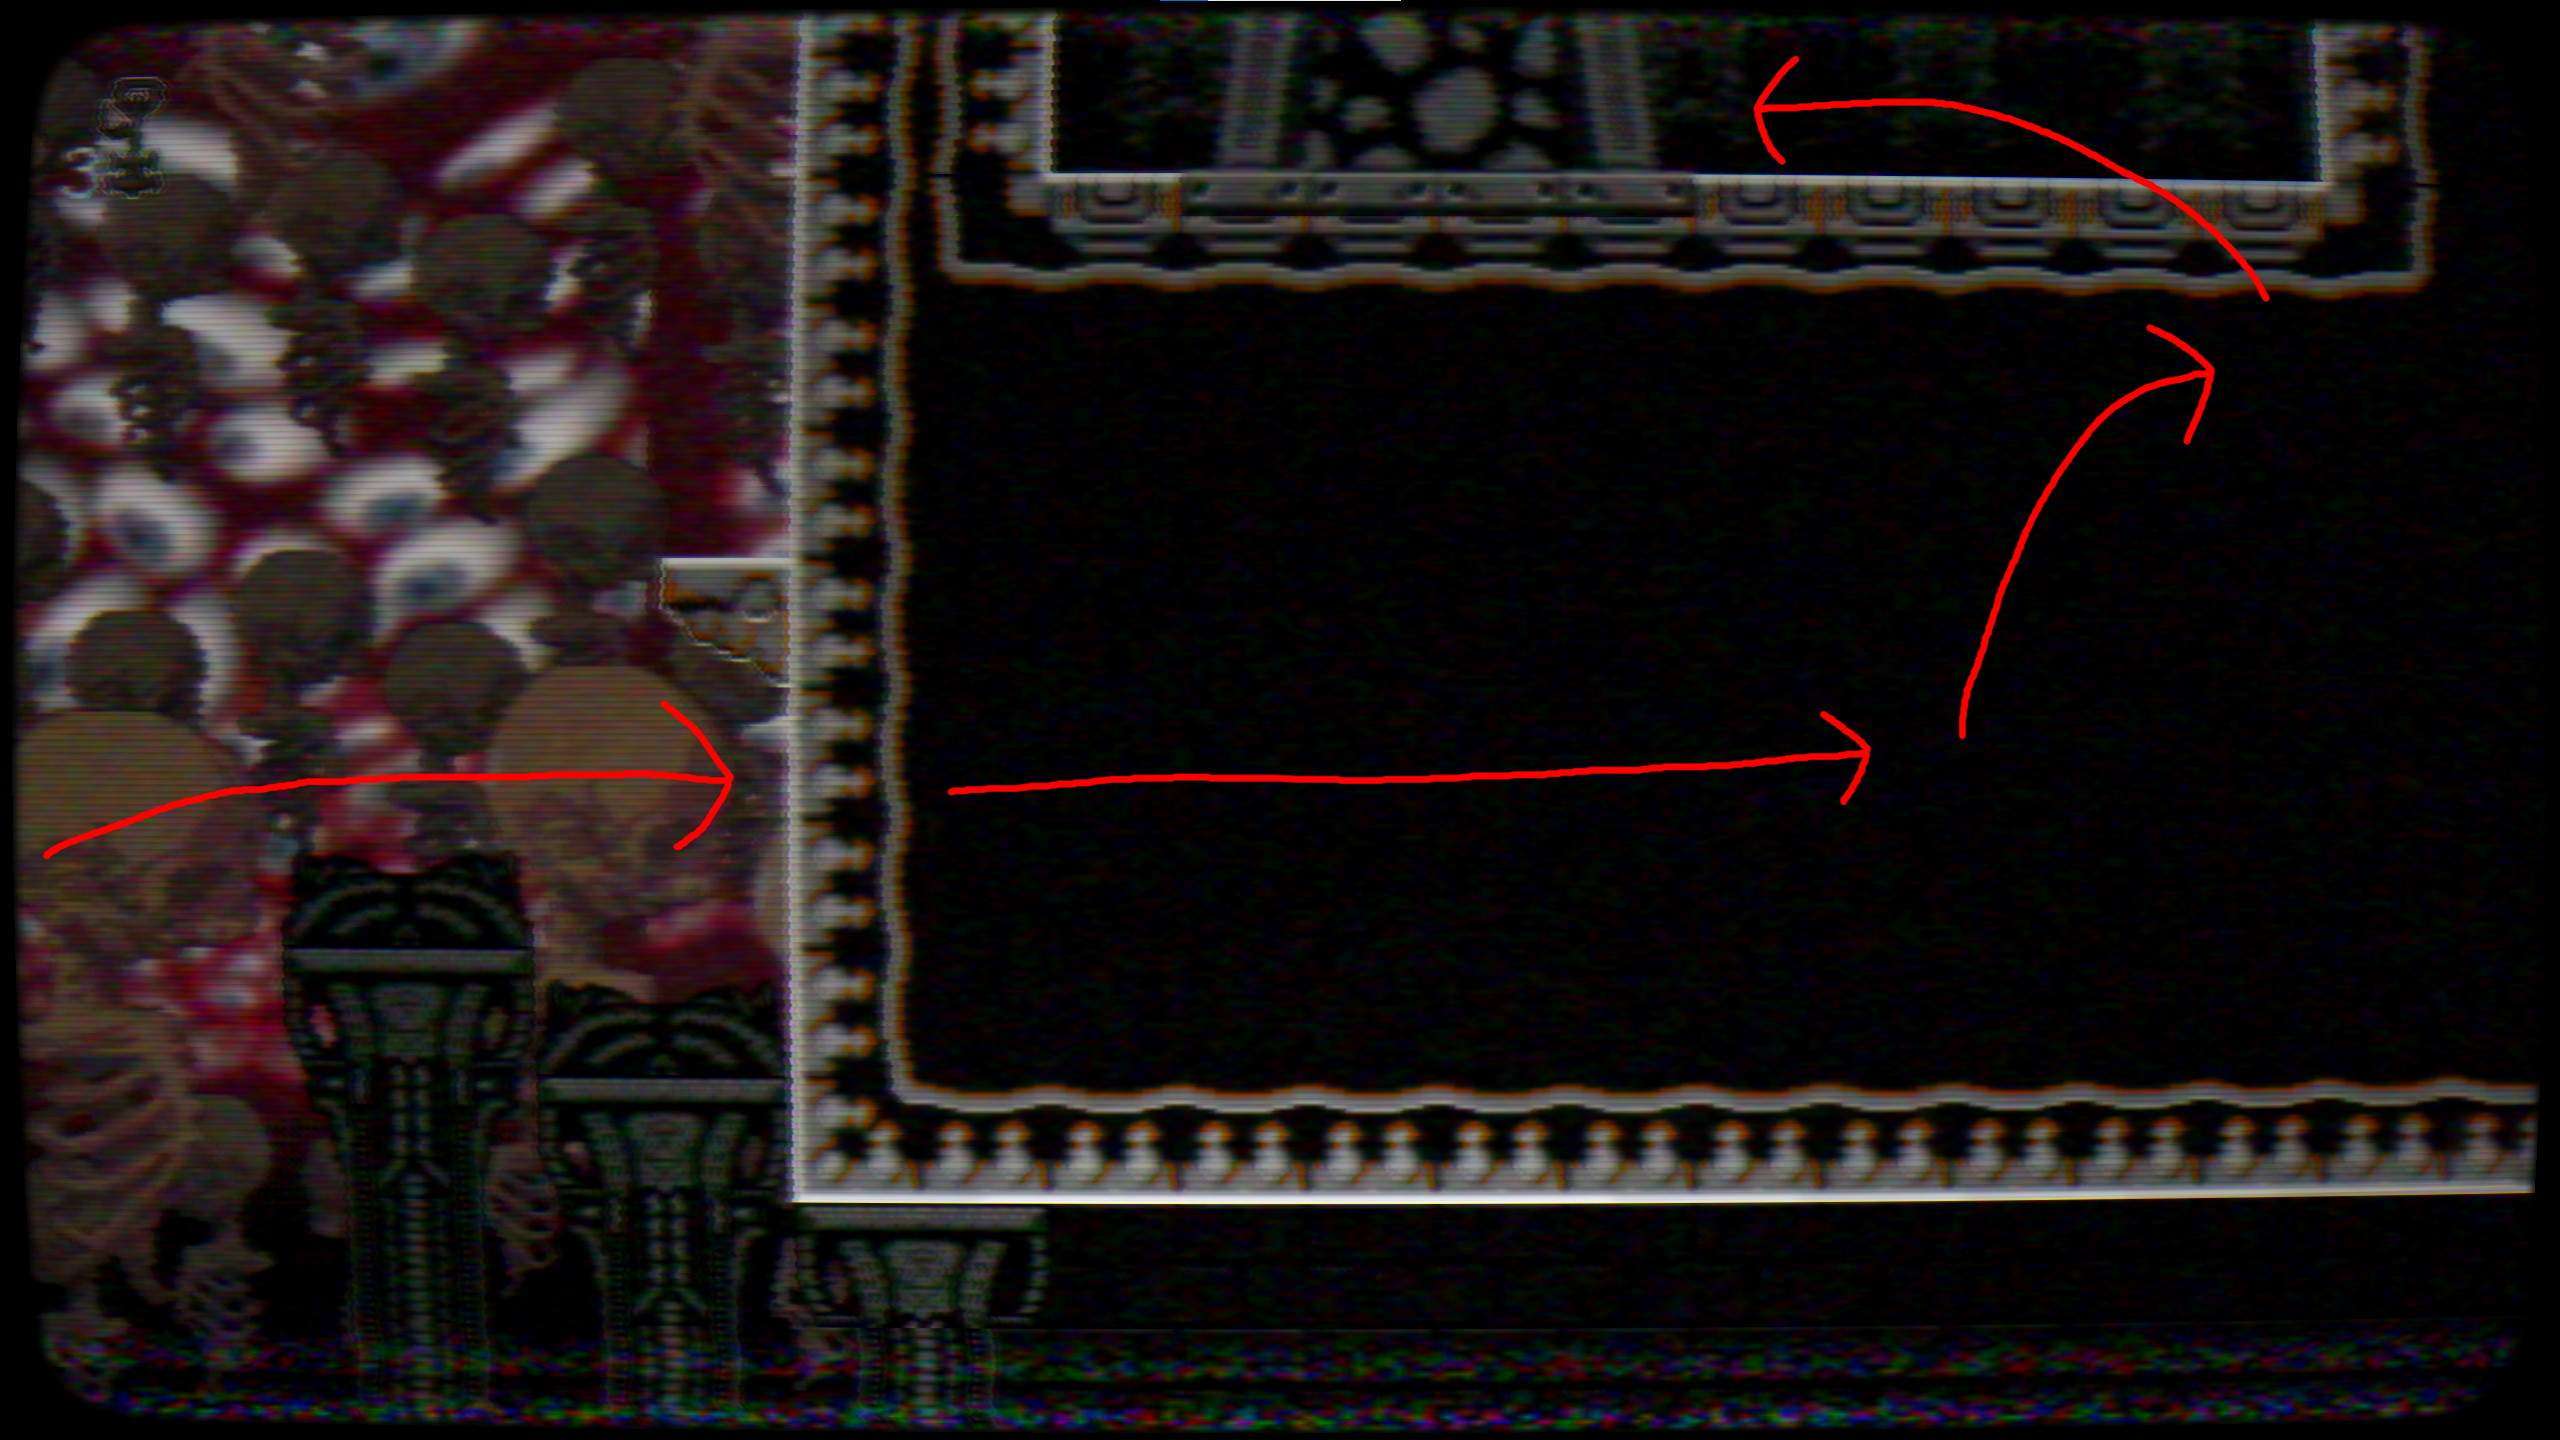
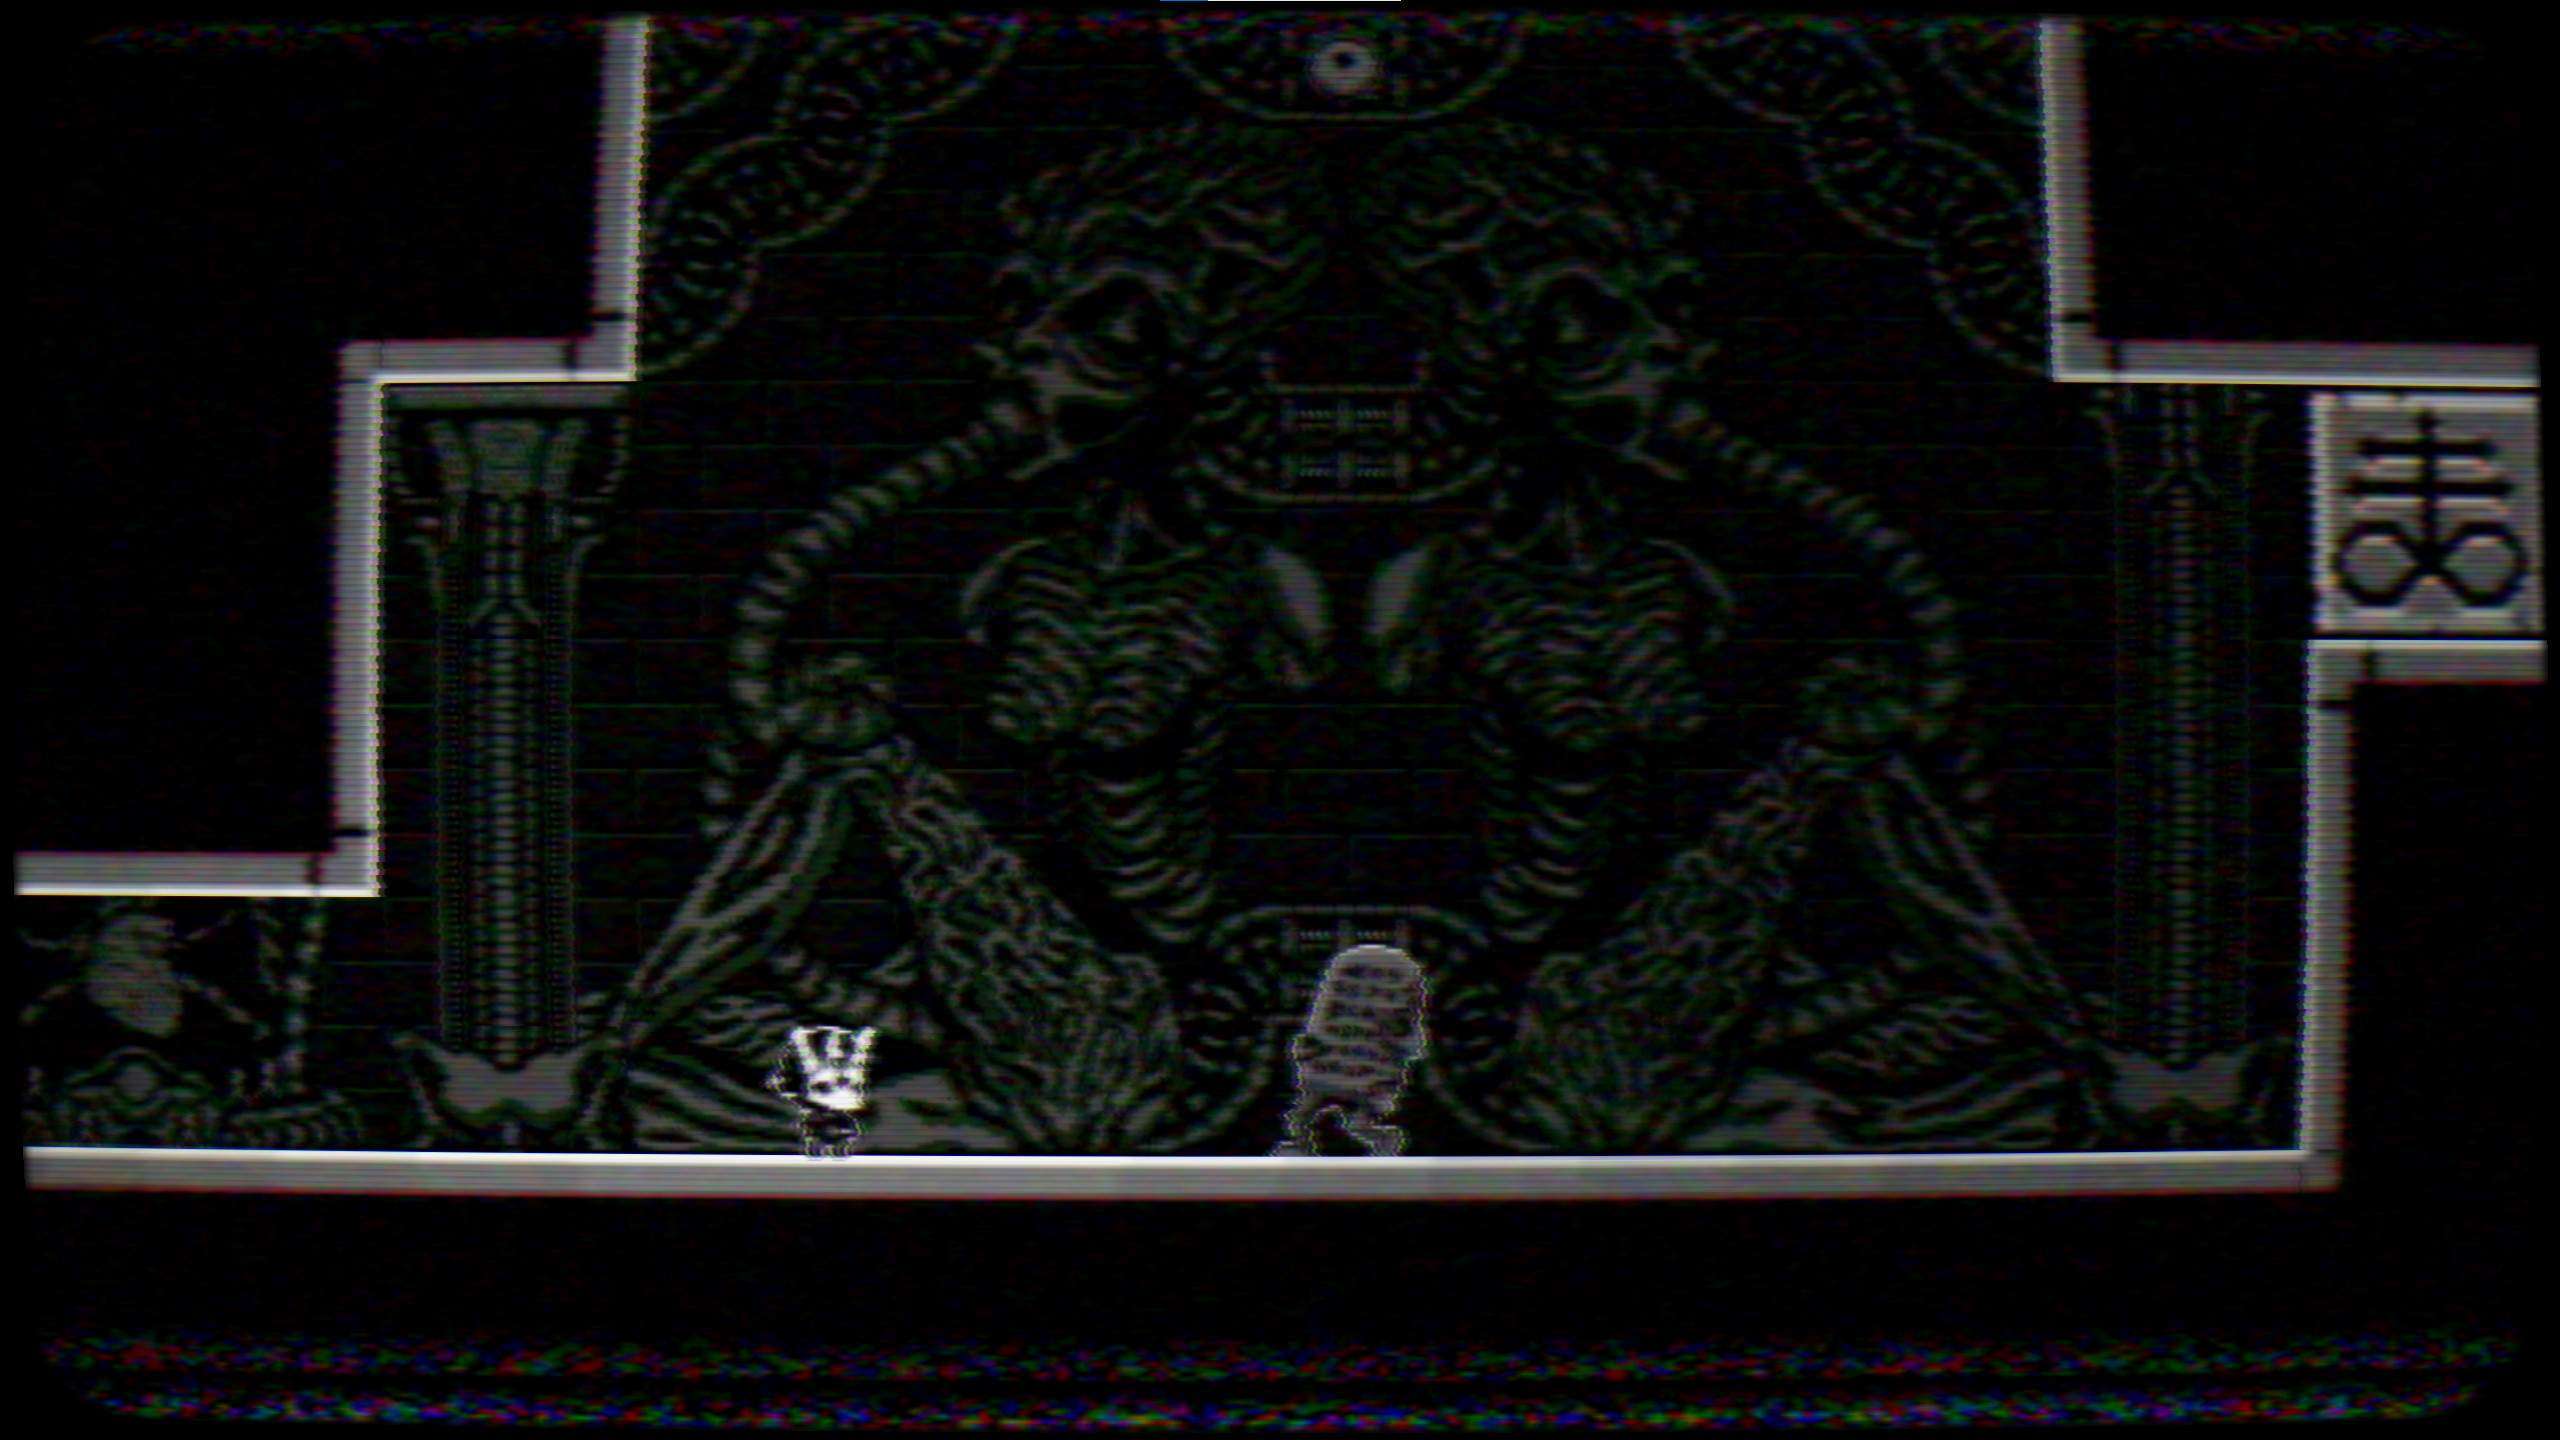
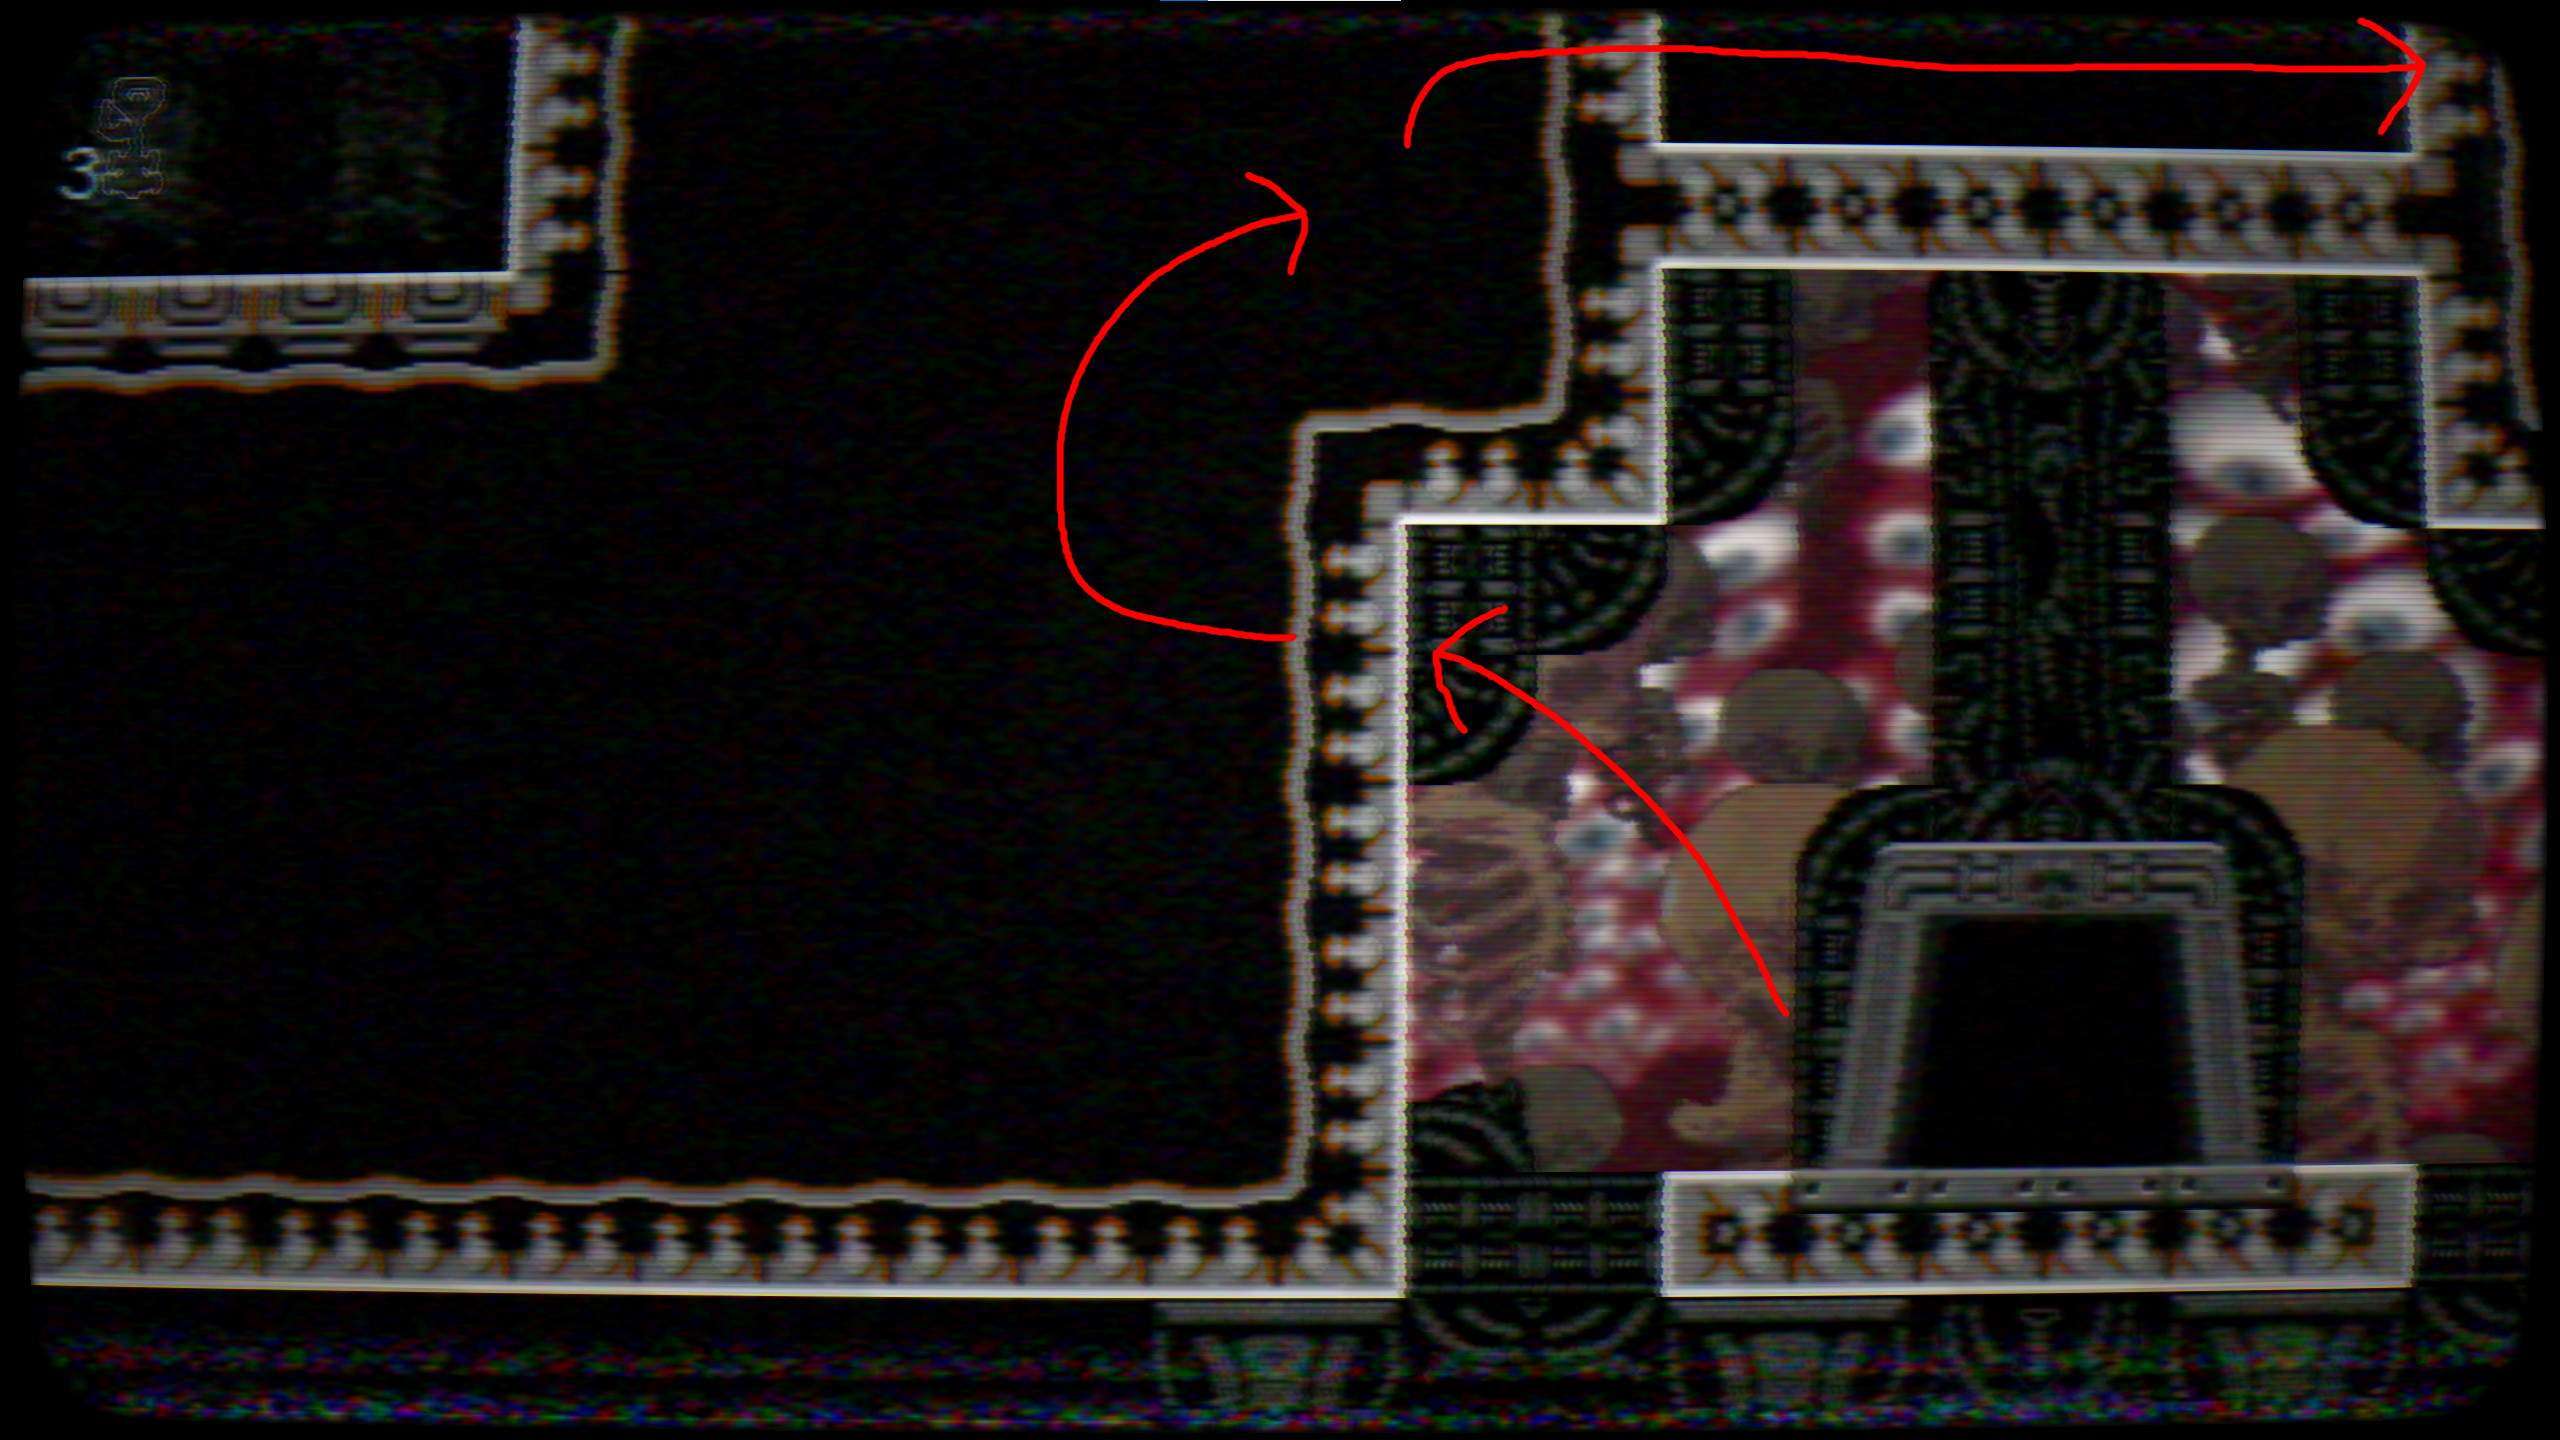
The eighth and final key puzzle is the hardest and longest by far, requiring multiple puzzles to be completed beforehand. First of all, you need to get access to the room with no entrance above the path to level six.
Hint: Remember, walls aren’t necessarily solid.
Solution: Before you drop down to the door for level six, stand on the platform with a door on it. Double jump to the wall on the left, as high as possible, and you’ll enter a hidden pathway in the wall. Head left until the camera stops moving, then double jump to the right towards the area above the door. Pass through this small section and keep heading right, which’ll lead you to the room with the first puzzle. Here is the path to the door:
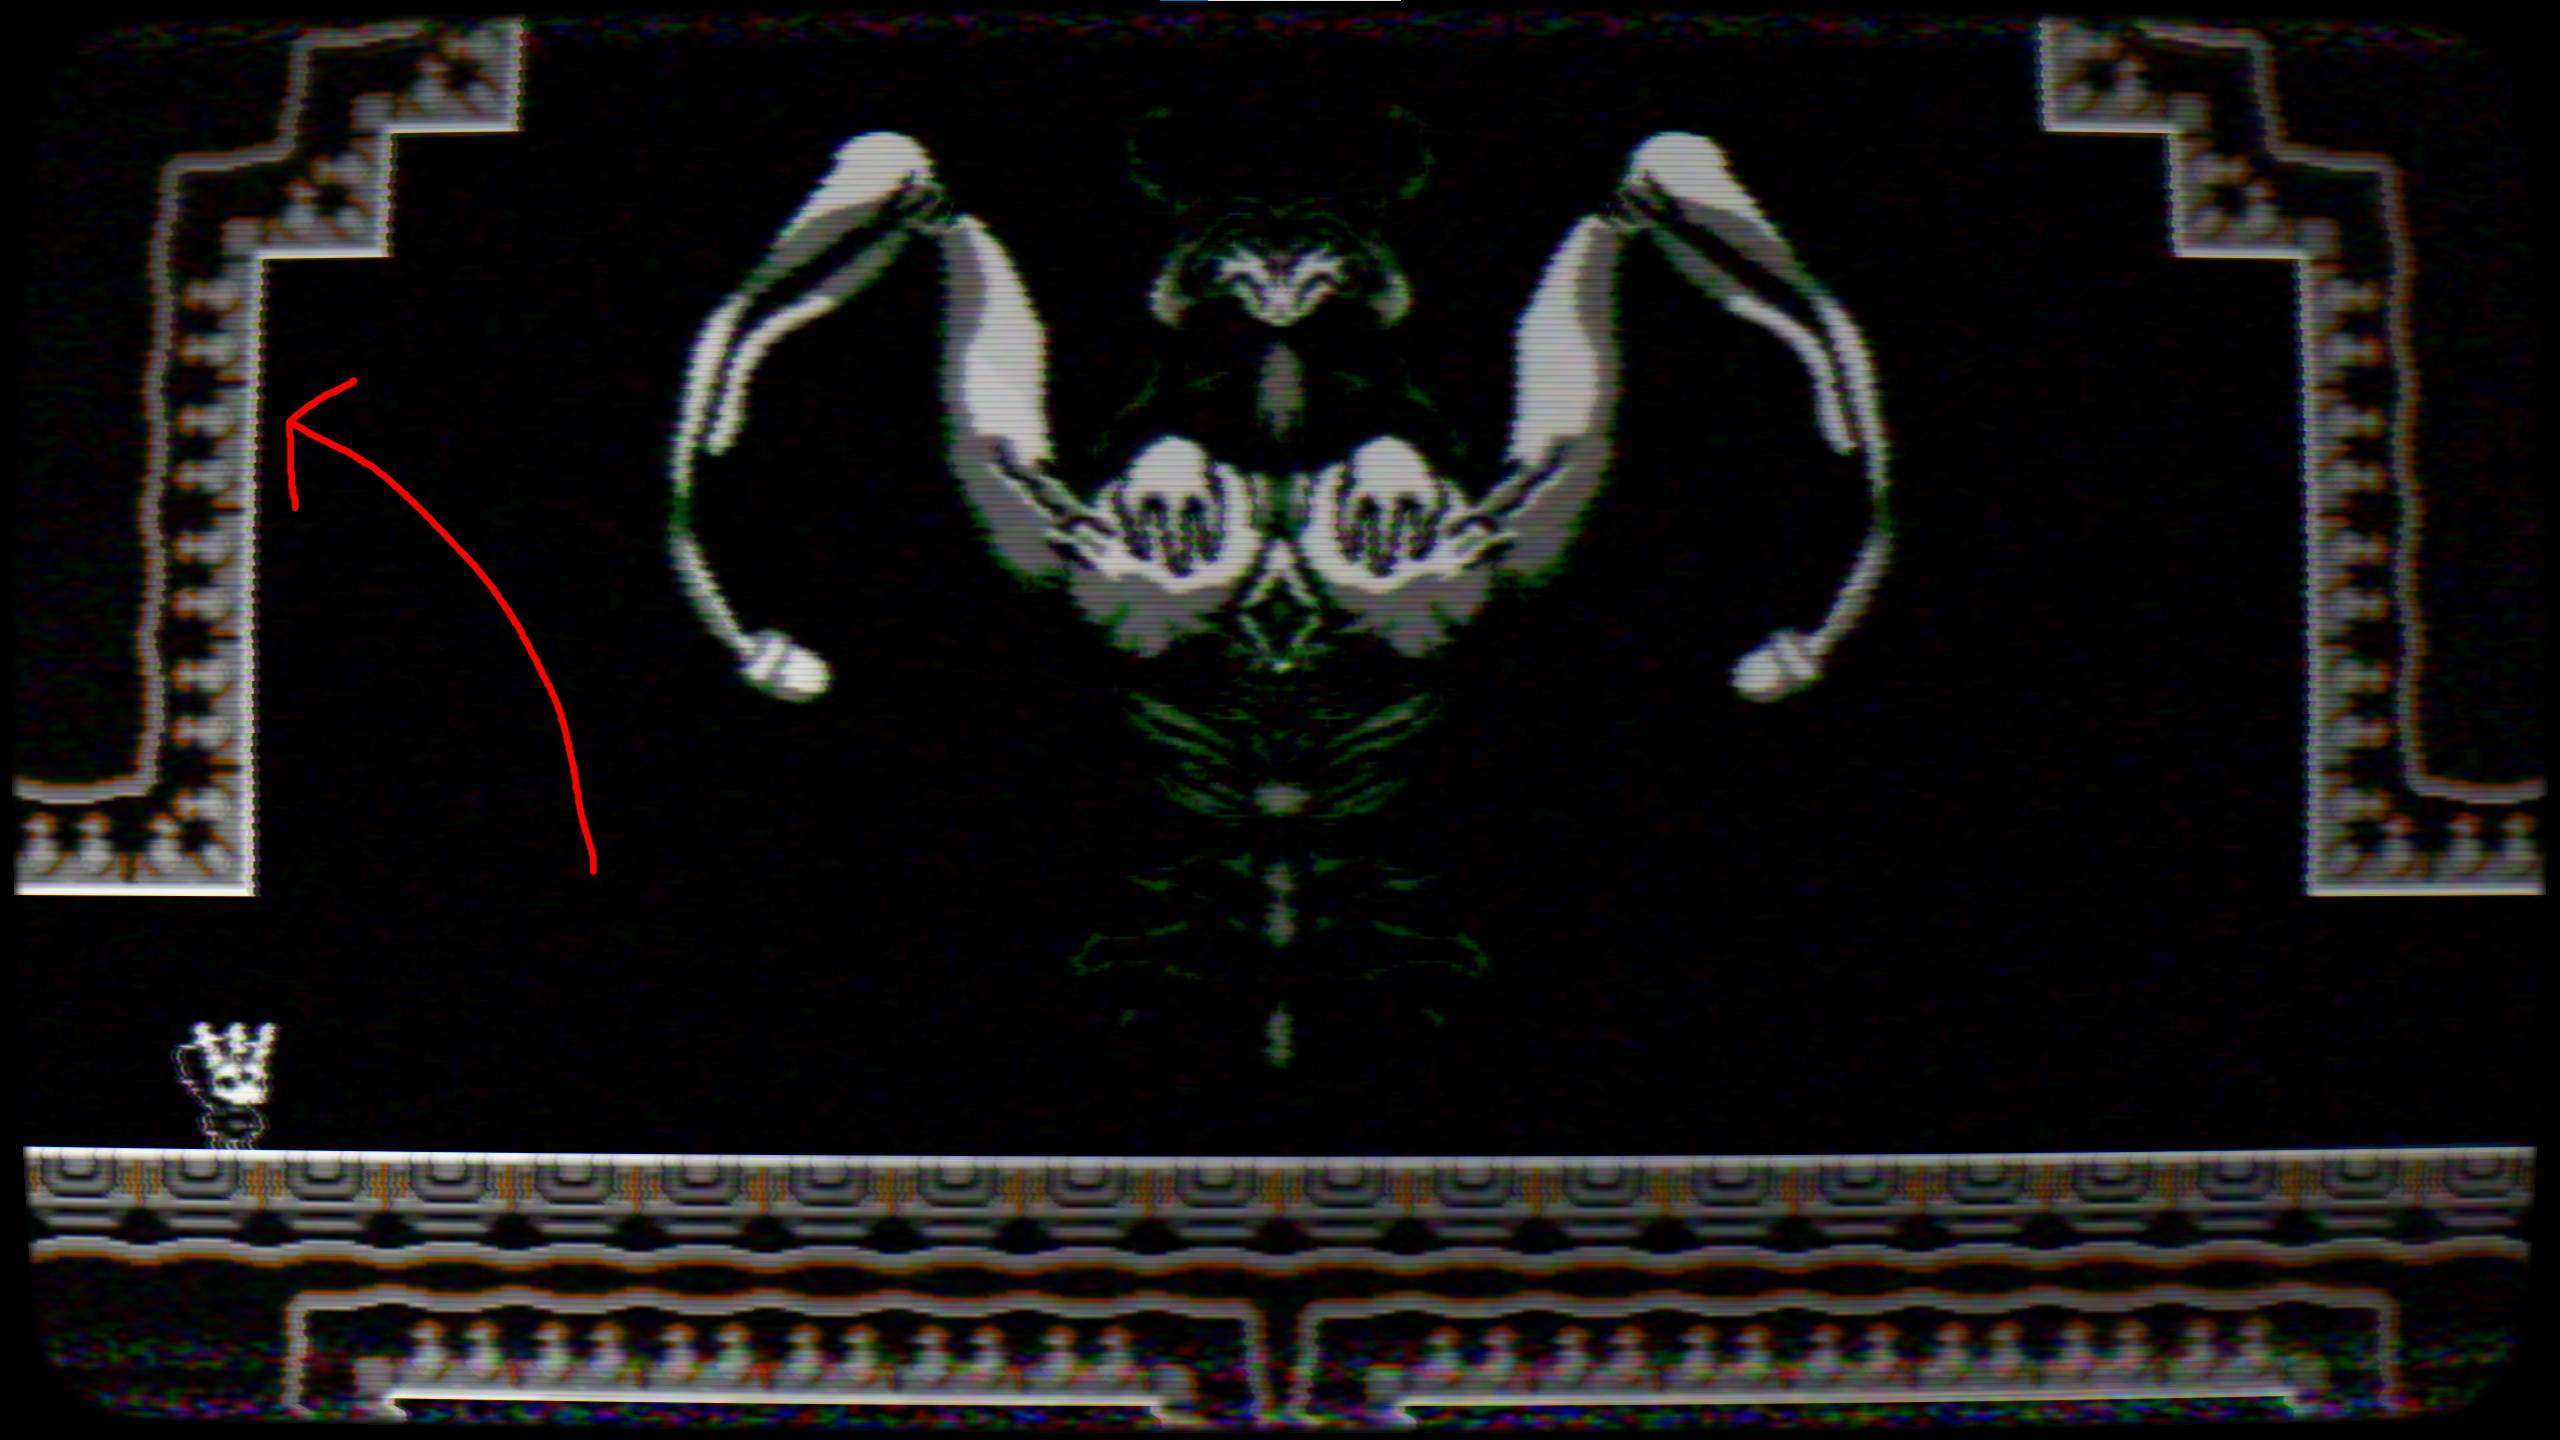
Now you’re in a room with something fairly lewd in the background. If you head to the right, you’ll re-enter the room from the left.

Hint: You may have already seen a hint in the game for what to do next.
Hint 2: Check the image on the path to key seven on level two.
Solution: The image on the path to key seven seems to show an area with a similar shape in the background, but there’s an extra path above where you entered. Jump into the wall above the way out of the room and pass into a new room. Here is the exact location:
Take a screenshot of what you see now. From this point on it’d be nearly impossible to avoid spoiling so if you want to try and figure this out yourself, stop reading here. This is the most fun part of the game in my opinion, so I’d suggest you take your time to try everything else before reading further.
Serious spoiler warning, do not read further if you don’t want to be spoiled
As you can probably tell, the background of the new room has some text written with symbols, more specifically text telling us the next part of the puzzle. Now you need to learn how to read this symbol alphabet. An important thing to point out here is that this text is in Portuguese, so after decoding the letters themselves you’ll need to translate the text. For those who can’t be bothered to save a screenshot, here’s mine:
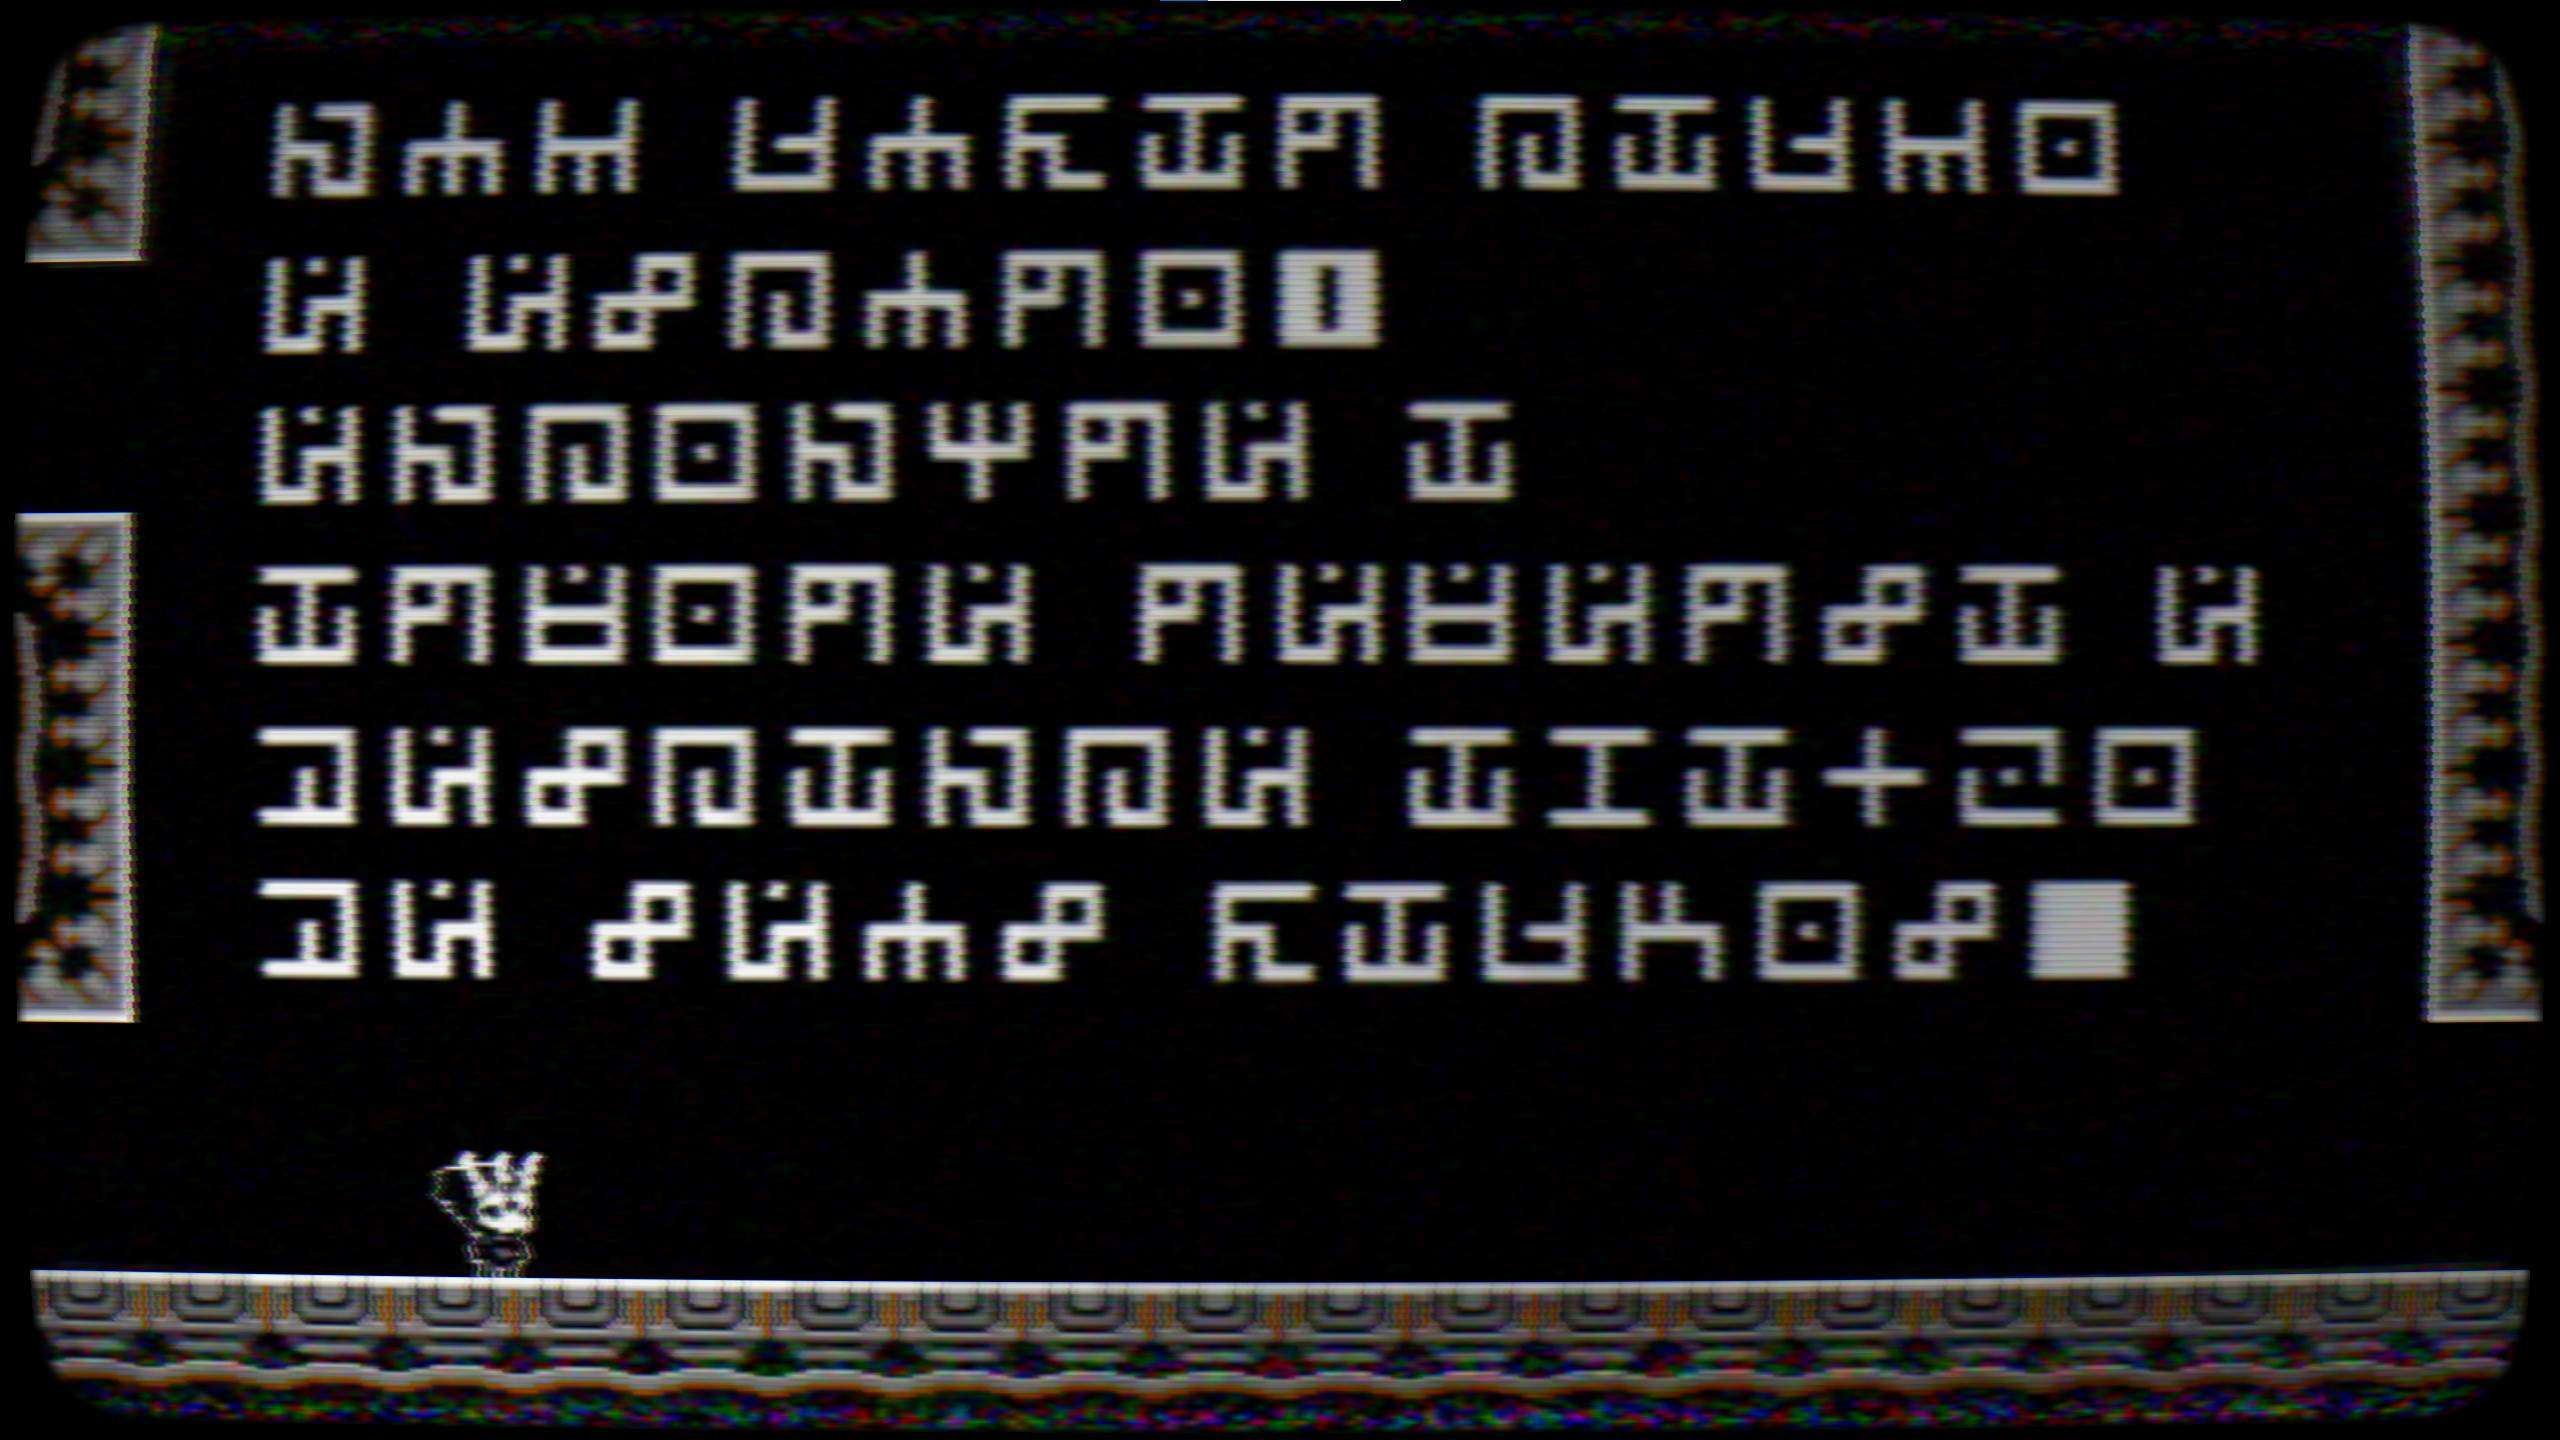
Hint: Have you seen any of these symbols before? We need to find 26 of them.
Hint 2: This game does have meta elements: The solution to this part can’t be found within the program.
Solution: Each achievement has one of the symbols as its icon, and there are 26 of them. The order of the achievements in steam dictates which letter is which: the first achievement in the list is A, the second is B, etc. Another important thing to note is that one of the achievements is actually gained after completion of the next step, so you’ll only have at most 25 symbols to work with, meaning you’ll be missing a letter and some of the letters will have to be shifted to the next (ie what might seem to be an M may be an N since you might not have L). Solution 2 will tell you which symbol and letter is missing, but you don’t need to know it and you can still decode it without too much difficulty.
Solution 2: The symbol you’re missing is from the Infinity achievement and looks like an m with horns. The letter it translates to is M.
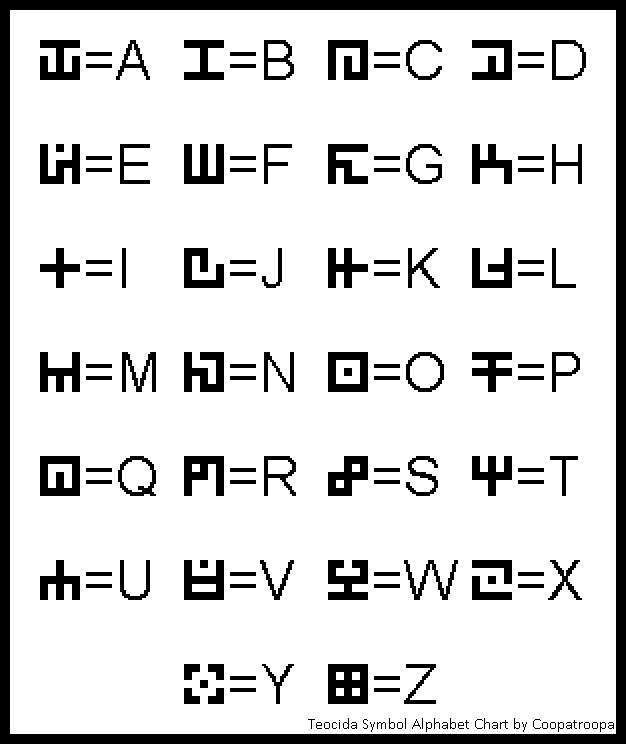
Solution 3: For those of you too lazy to make your own, here’s a chart showing which symbols mean which letter.
Even bigger spoilers ahead, don’t read further unless the last part has been completed already
If you’ve translated the text you should be able to figure out what to do next, and while I’d really recommend you do the whole decoding thing for yourself this wouldn’t be a very good guide unless I helped out a little, so…
Hint: If you’ve translated the text but are still a little stuck, you need to go to one of the rooms under the door to level six.
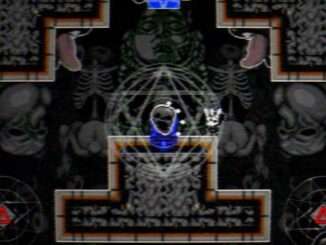
Solution: “Num lugar calmo e escuro, encontre a arvore reversa e descance abaixo de seus galhos.” or, in english, “In a quiet, dark place, find the reverse tree and rest beneath its branches.”. In the second room below the door to level six is a endless corridor with the kabbalistic tree of life upside down. Stand under that tree and wait.
Be the first to comment