
The Last Spell has 20 different weapons, 12 Primary Attributes, 18 Secondary Attributes, 8 Perk Trees in 5 different Tiers, 5 Maps and 7 difficulty settings. This game was in early access for 2 years and just got its full release. That doesn’t sound difficult, does it? Thousands of people should have played this game enough to provide information.
So why are all those guides so outdated and why are there so few new guides?
Because: As soon as you have a decent strategy, it is loosing its value the moment you progress further in this game.
I have beaten the Apoc Hardcore Challenge. And in order to beat it, I’ve learned a lot of this game with a good portion of help from the community.
In my opinion, it is the common knowledge that helps you the most to progress further into the game! I will try my very best, to provide you as much game knowledge as possible, that can be commonly used.
What is the Apoc Hardcore Challenge?
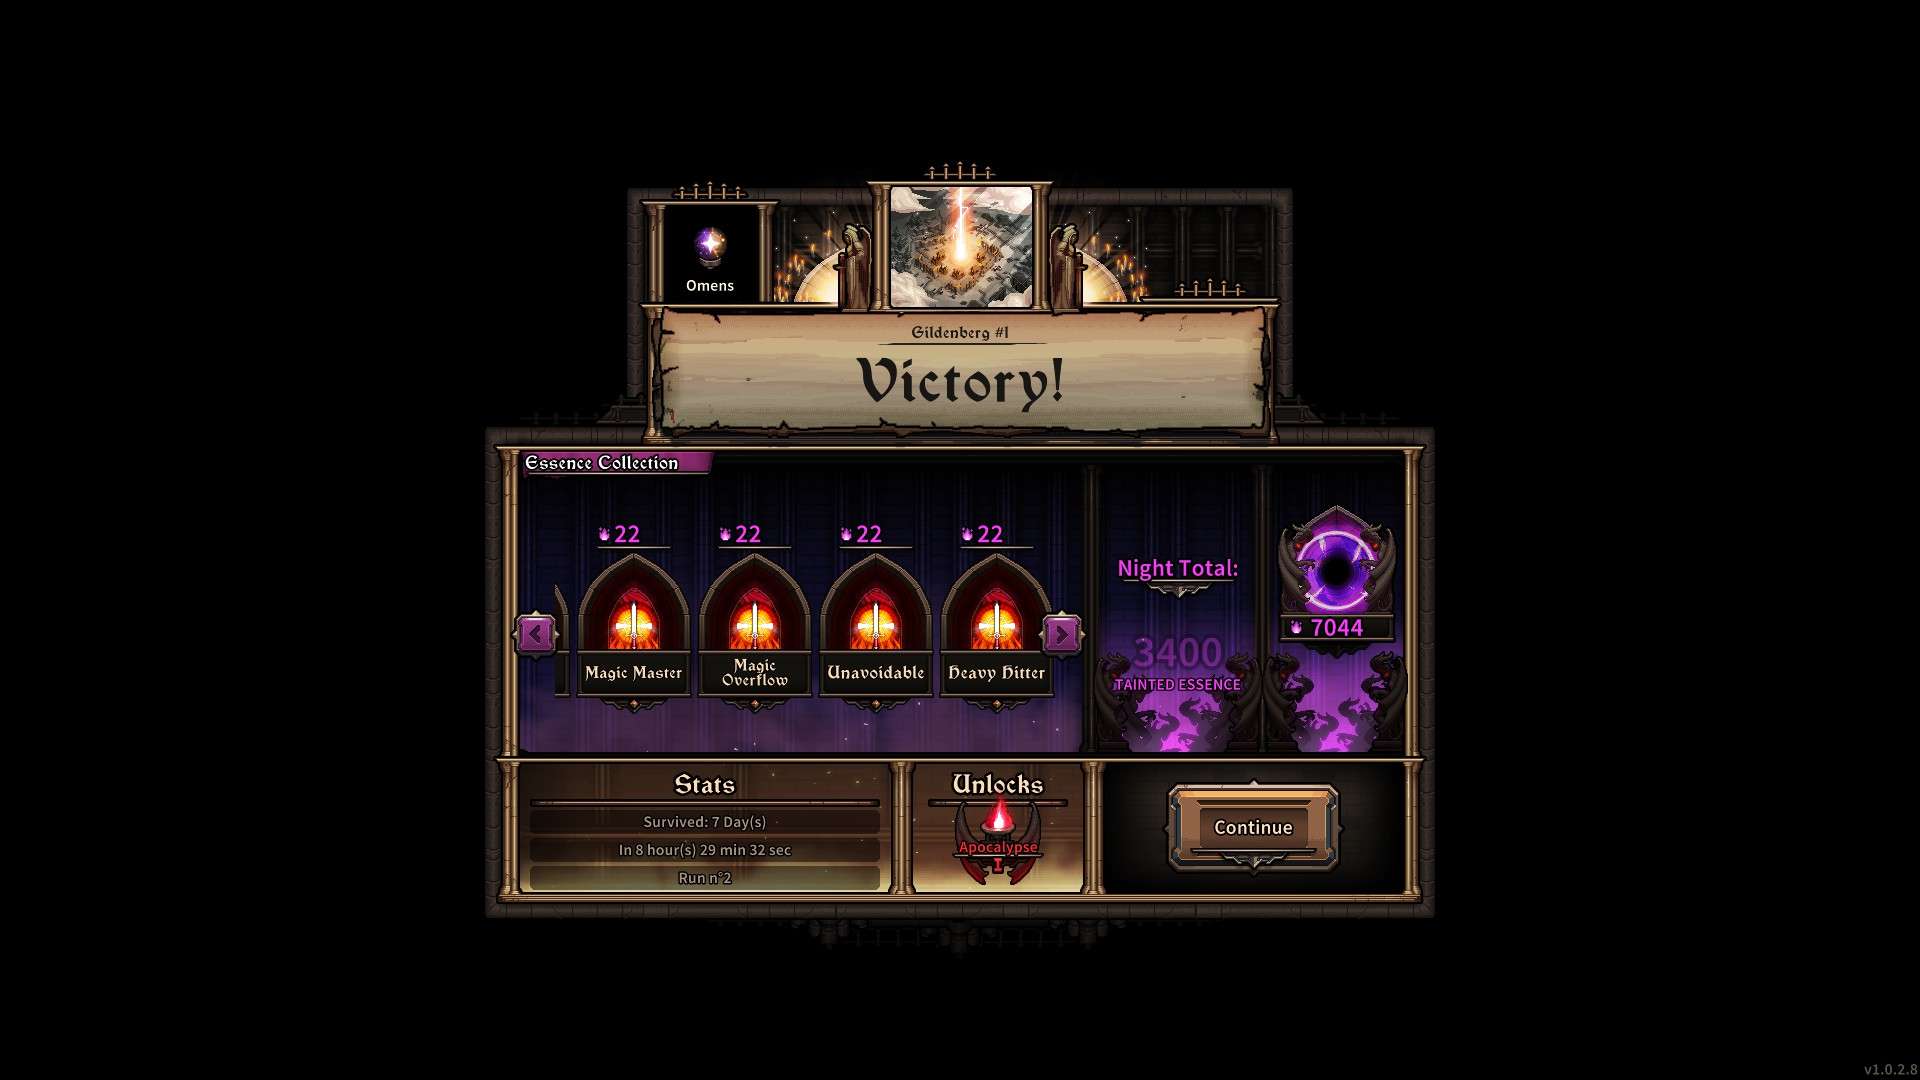
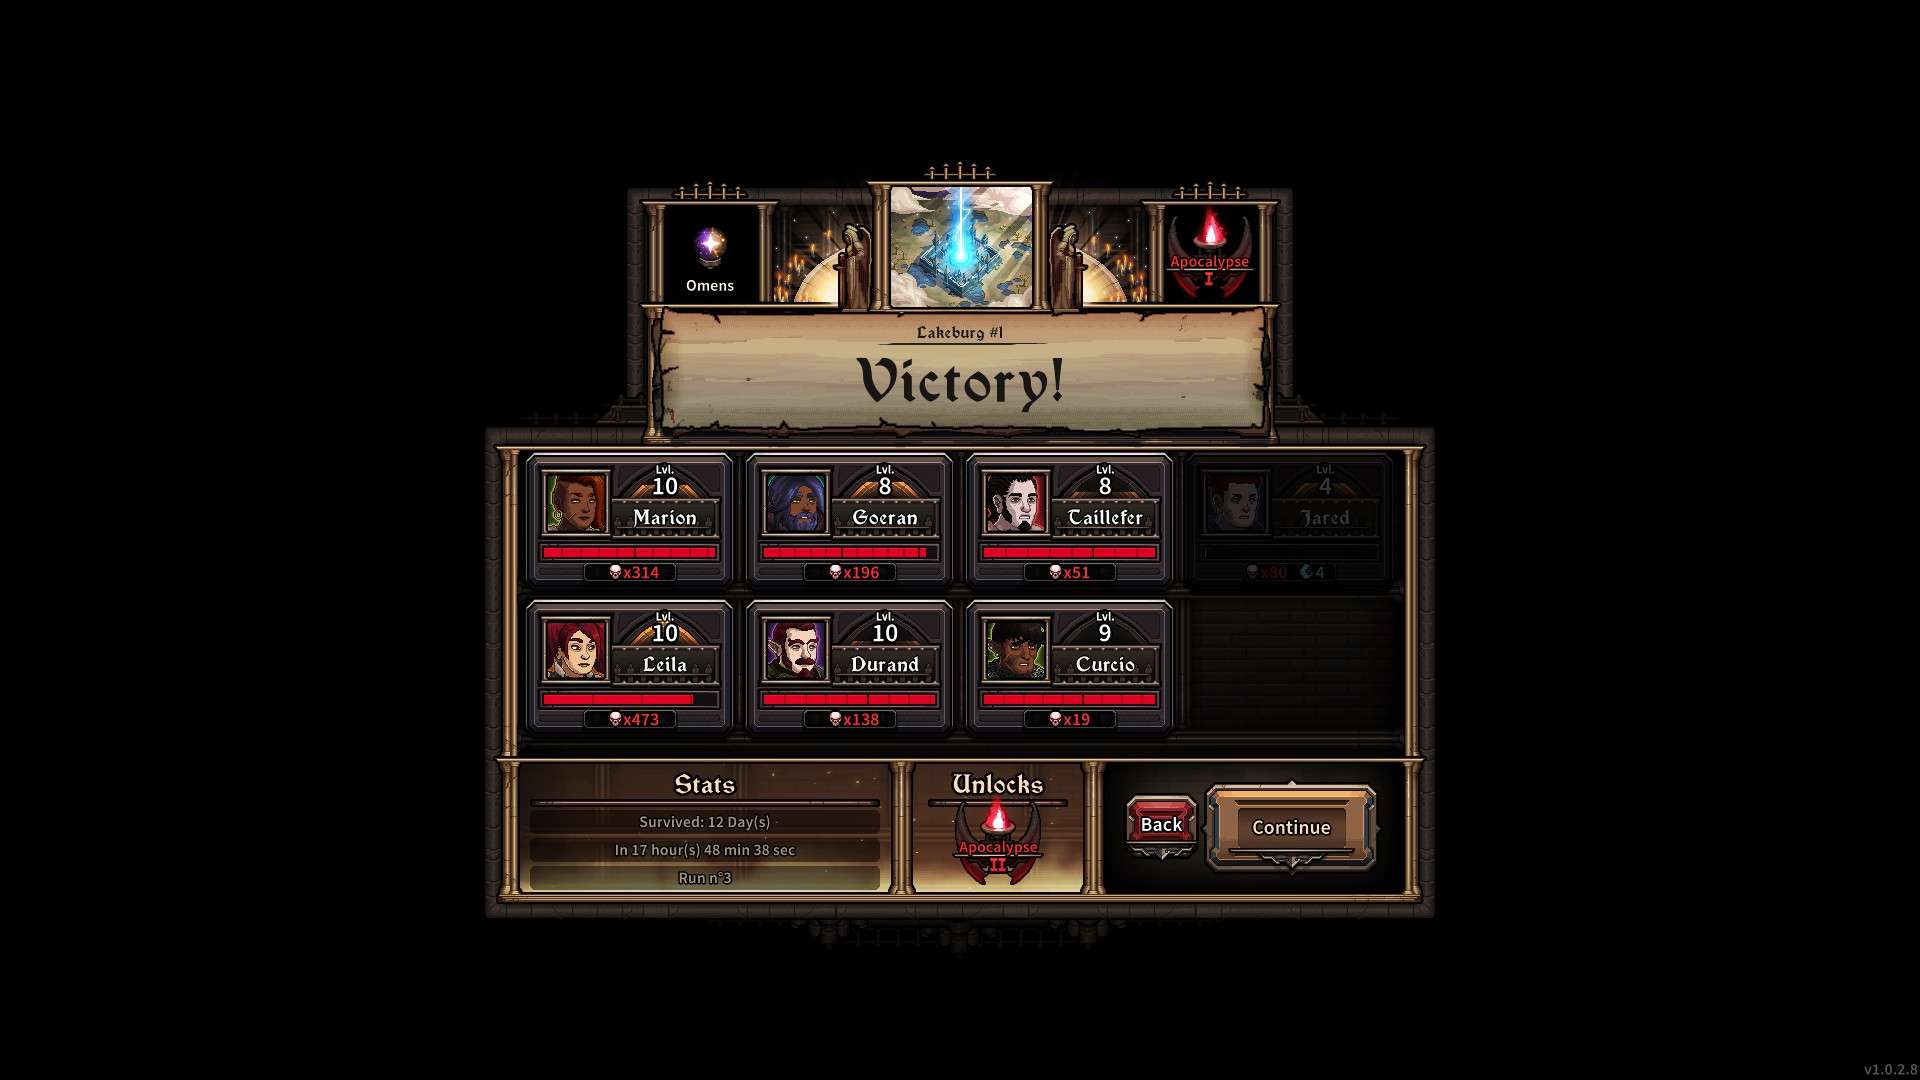
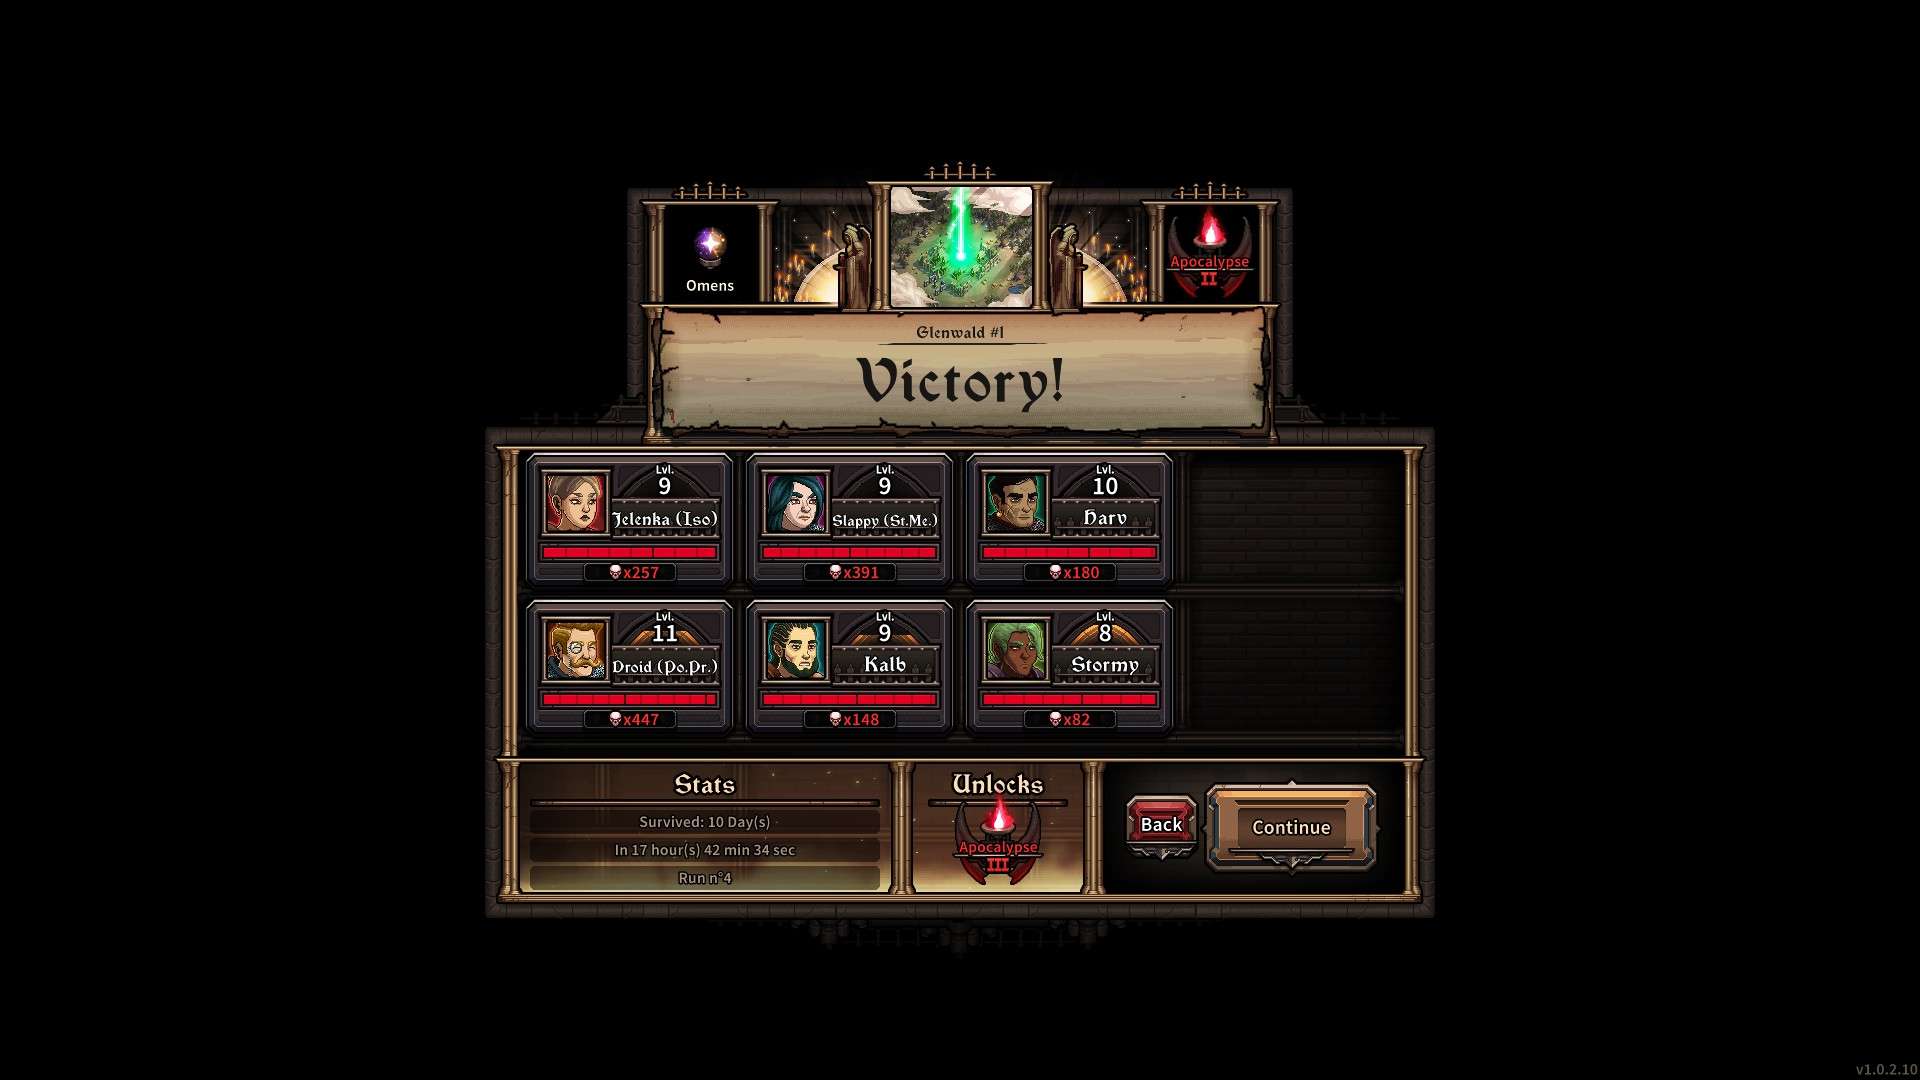
After succesfully beating the last Harpye on Gildenberg, we unlock Apocalypse 1. Now that more and more people have beaten Gildenberg on the first run, they start Lakeburg on Apoc 1, then going Glenwald on Apoc 2…
But is the game beatable, if we set the difficulty higher with every new map, beating them all on the first try, without getting our circle destroyed, all the way until all magic is banished for good!?
Beat every map in the following order on the first try:
- Swampfurt
- Gildenberg
- Lakeburg – Apocalypse 1
- Glenwald – Apocalypse 2
- Elderlicht – Apocalypse 3
- Glintfein – Apocalypse 4
- Do not use Boundless Mode!
- Make a Screenshot of every beaten map (Except Swampfurt; If you use Boundless, the Mode will appear on the victory screen, automatically failing the challenge)
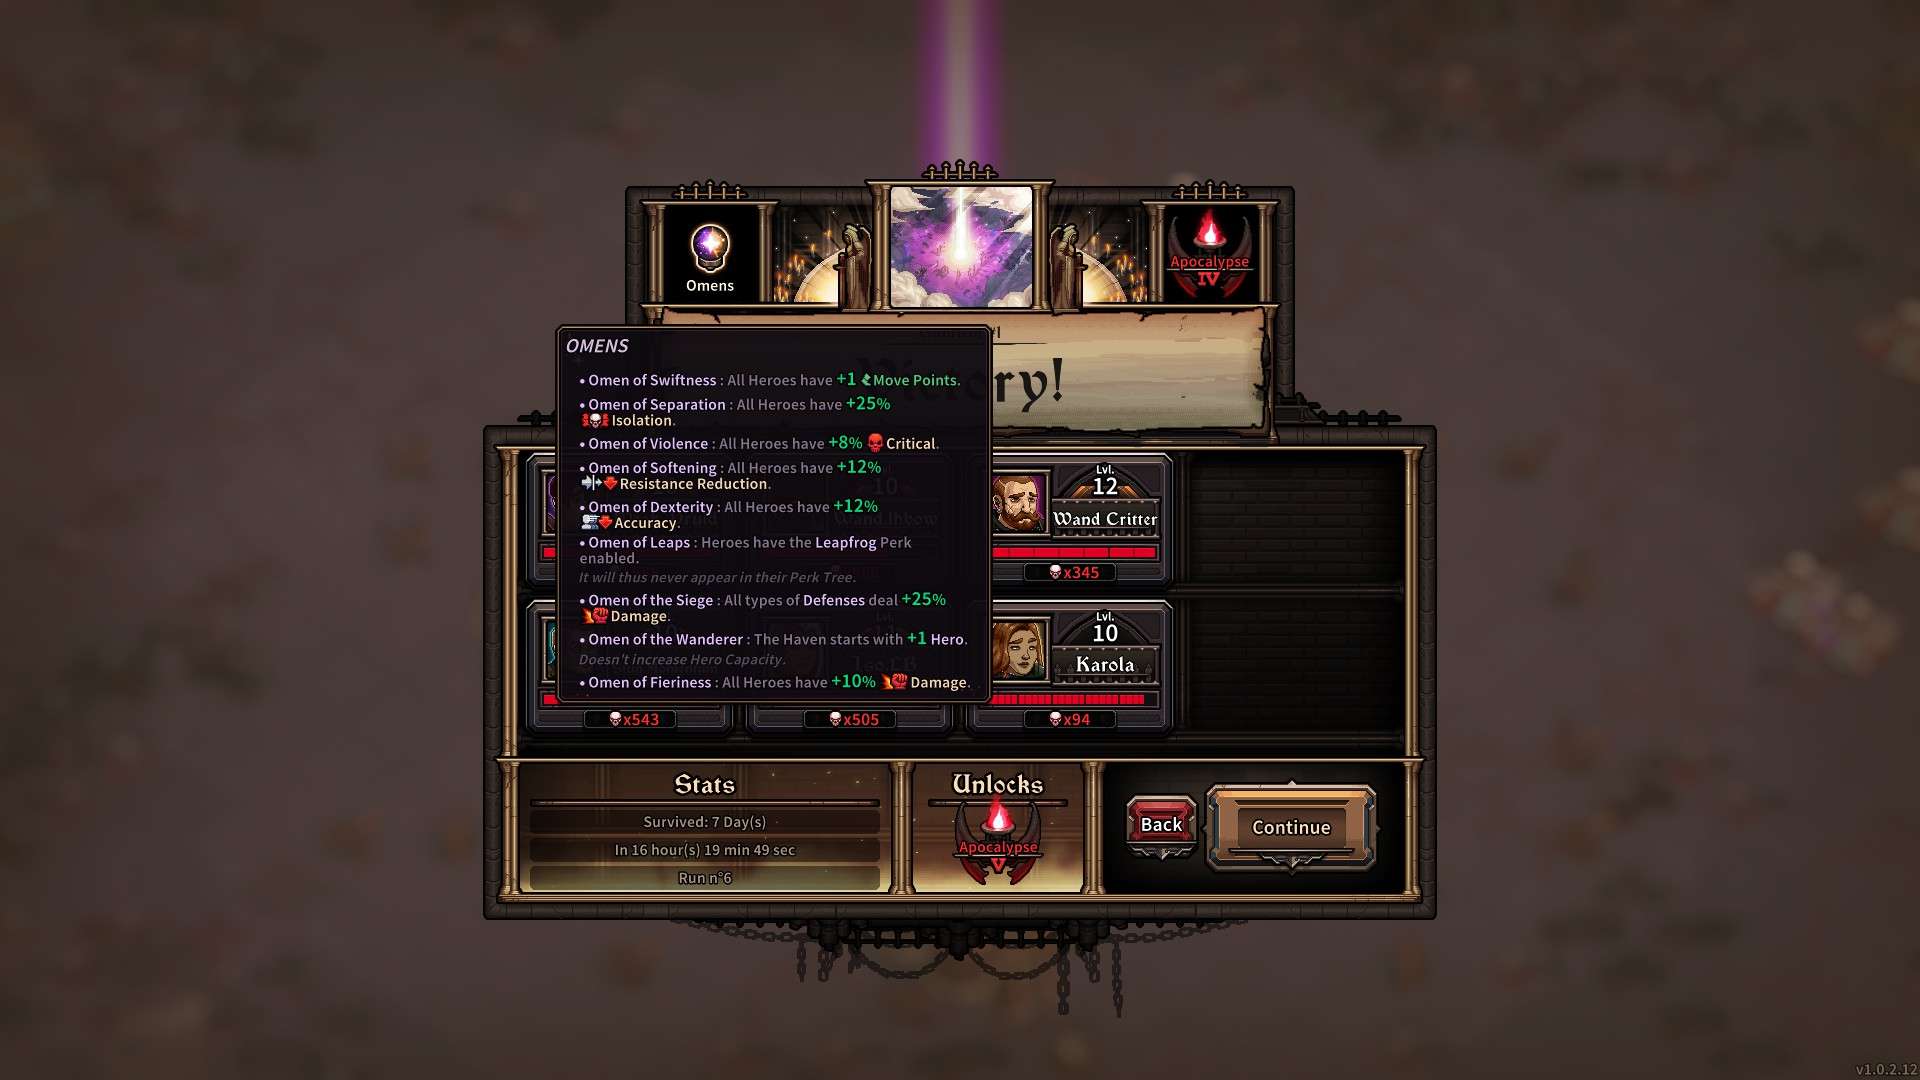
- You win the challenge, if you have a Victory Screen on Glintfein, where Apocalypse 4 is shown, Apocalypse 5 had been unlocked and on the bottom left of the victory screen a “Run No 6” information is shown.
Subjectively I think that I can call myself fit, to provide a decent guide for you to approach the game.
Turn Based Strategy
There are 2 Types of Strategy Games: Real Time Strategy and Turn Based Strategy. Do not mistake this game with RTS, although it can have a fast paced playflow.
Action Points(AP) and Movement Points(MP) are the most imporant ressources. Your turn ends, when you press end turn, but your heroes ressources eventually run out, when you have no AP and MP left.
You can see the range of enemies movement in their turn, if you hold Alt.
Theory: You want to use your MP and AP in a way, where your hero will get out of the enemies Range at the end of his turn.
Note: Please keep in mind, anyone can approach this game and yes, although that may sound trivial to some people, other people may never crossed a thought about this.
Experience
There are 2 Types of Experiences
Shared Experience and Kill Experience. When a hero kills an enemy, he gets his part of the shared experience and the kill experience. A good way to check, on how far your hero progressed with experience, is his kill counter in his character sheet!
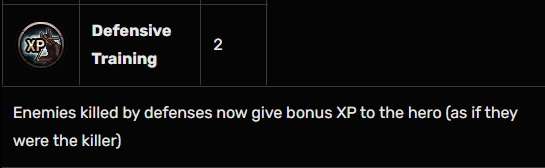
A Defense like a Ballista, Catapult or Trap take the kill experience and only share shared experience to all players. A hero picking the defensive training perk, will get the Kill Experience of said defenses.
When 2 heroes pick the same perk, both will get the full amount of killer experience, per kill.
Do not fall for the trap of picking +Exp on level up. Your hero will get his levels eventually. Picking +Exp does not value itself over other attributes. Theoretically you want to pick +Exp, to get a level to even it up; And you out value it when you get 2 level ups out of it.
Theory: Picking +Exp means that you only delay a level up.
BUT the Inn provides heroes equally to the level of your highest level’d hero. Starting a game with a hero, that has high Experience and giving him the mandatory, if not all the kills possible, he will get his part of shared Experience and the kill experience.
Pair it up with defensive training and you most likely won’t need other heroes for this strategy.
Theory: You can pump a hero with all Experience possible, to ramp him up, to get access to high level heroes in the Inn early on in the game.
Defences
Ballistae, Catapults and Traps are Defences.
As stated before, Defences take Kill Experience, if you don’t have the perk.
In the early game, you want to build catapults first, here is why:
Ballistae and Traps cannot be controlled, they damage enemies automatically at the end of the enemies movement, before the enemies start attacking.
Catapults provide:
- Higher Skill Range
- If placed centrally, they can support different sides.
- Physical Damage
- This damage type can melt armor and provides the perfect support for Magical and Ranged Damage only sides.
- Average Damage
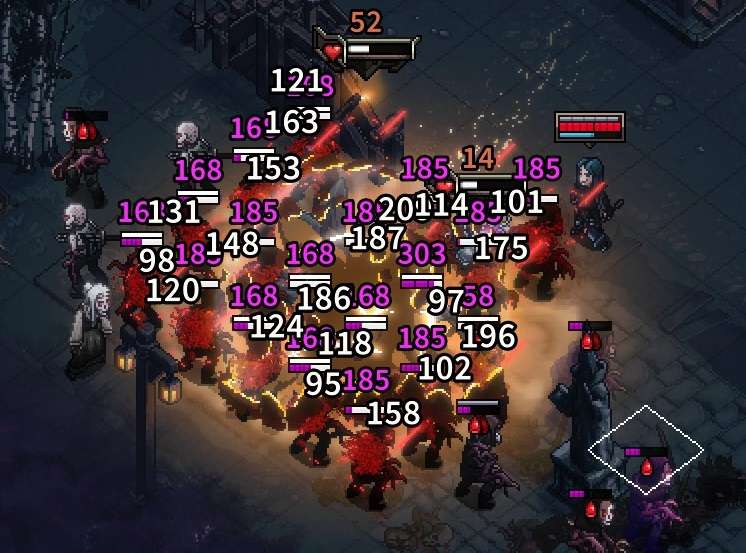
- You might think, that’s a contra, but no, remember: Defenses take Kill Experience. A good setup of low life enemies makes it possible for heroes on that side to clean it up, so they get the Kill Experience.
- More AoE
- Manual Attacks
- Especially if you have sides that have to operate with an Isolation Hero, manually thinning down weak enemies can provide the perfect setup to isolate enemies. Even far into the lategame.
- Undodgeable Attacks
- For those Runner, Crawler, Dodger and Hunter nights.
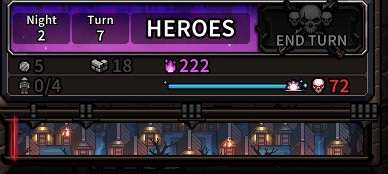
You can see the progress of the night on the top left corner.
When you reach the end of the night, a number is shown on how many enemies are left to kill. A good rule of thumb is to use Catapults in that time frame.
Theory: Use Catapults in the early to make Experience better accessable for your heroes and in the late game to thin down bulks, for easier setups.
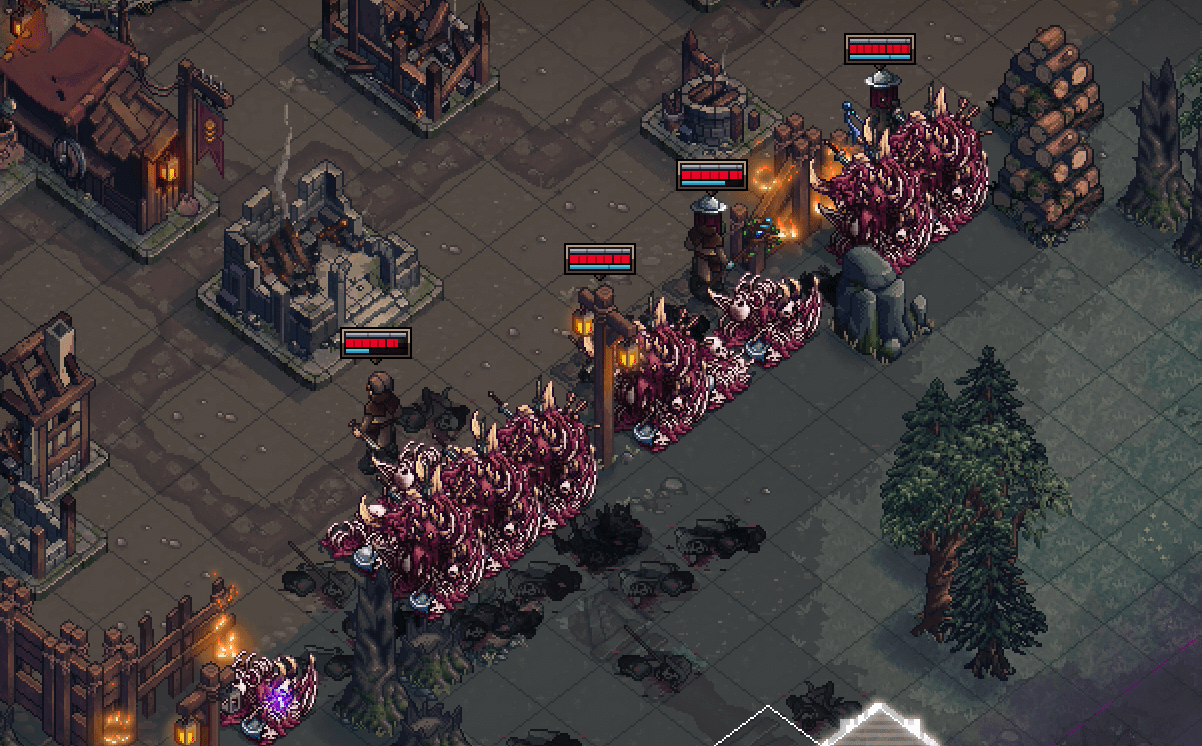
Walls
Before we start talking about walls, this is the code on what enemies prefer to focus:
Clawer types:
1. <!-- Attack Heroes: aggro within 2 tiles -->

2. <!-- Attack Walls: aggro within 1 tiles-->

3. <!--Attack MagicCircle: default goal-->

4. <!-- Attack Buildings (except walls): no aggro, just hit them if they happen to be adjacent after moving-->
The following text regards Clawers only, but is adaptable to other enemies.
So basically any clawer always chooses a path within reason to the magic circle. If all pathes to the magic circle are blocked he pretty much goes straight at the circle destroying everything on its way.
If a hero stays 2 tiles next to an enemy, the enemy will walk to the hero. Same goes for Walls with 1 tile.
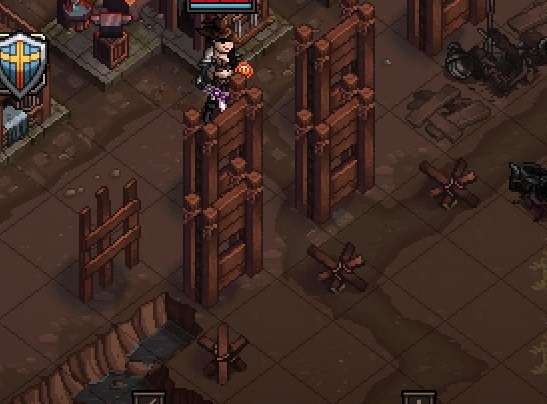
There are different types of walls and every Wall has its Pros and Contras. (O = Empty Field, X = Wall)
Wall
XXXXXXXX
OOOOOOO
You straight up Wall everything off.
- +Single melee units attacking single wall units
- +Enemies stack in front of the wall
- +Easier to generate Corpses
- +Perfect Orb Laser Setup
- +Stragglers are no threat
- +Very good Propagation Setup
- +Wall falls slow
- -Stone Walls block Vision
- -Cost heavy
- -Difficult Isolation Setups
- -Most AoEs don’t work properly
- -Difficult to enter or leave Walls
- -Vulnerable to Splitter and Boomer AoE
Theory: If you don’t run Isolation setups and have efficient ways to kill Boomers and Splitters, while having consistent access to lots of Materials, this strategy is perfect for you.
But the further you progress in difficulties, the harder it gets to pull of that strategy.
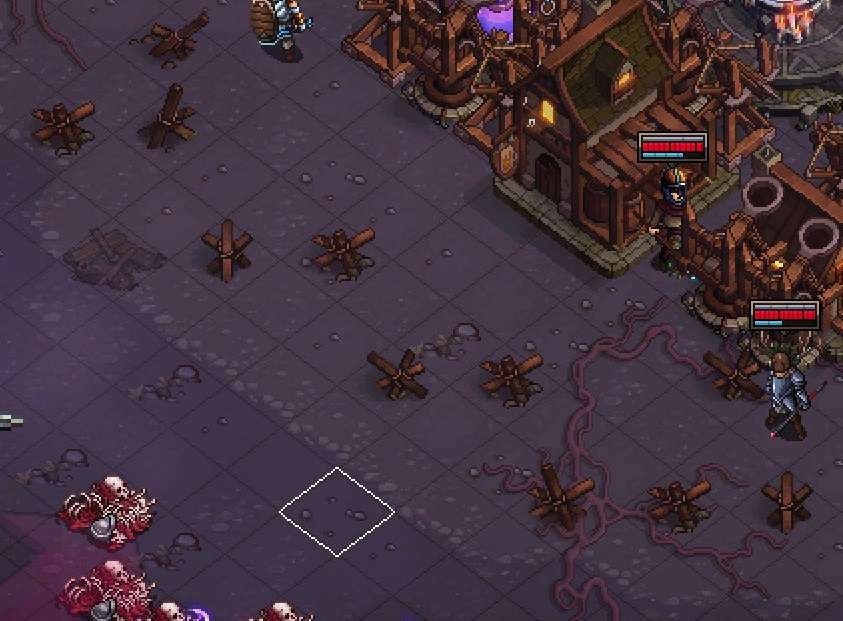
Chess Wall
XOXOXOXO
OXOXOXOX
You place your Walls in a Chess-like manner.
- +Cheap
- +Isolation Setups
- +Forcing Enemies into mandatory of AoE Setups
- +Splitters and Lancers only attack 1 Unit
- +No Vision Block
- +Winged prefer landing in the Chess field (for Isolation)
- +Easy access to Setup for Shortbows 4th Skill
- +/- Diagonal Propagation is recommended
- -Boomers can destroy up to 5 Units
- -Difficult Propagation Setups
- -Difficult to Leap through
- -Wall falls fast
Theory: The idea is to have multiple enemies focus one wall, to set them up in an AoE lucrative position. Also this makes it easier to isolate single enemies, to get better access to the Isolation Setups.
The Problem is, that you will sacrifice your Defenses that way eventually. But the Overkill gets compensated mathematically, the less HP a defence (like a Barricade) has.
Example: 3 Units attack 1 Barricade: (Barricade HP:) 20 – (3 Units combined Damage:) 300 = -270 (Overkill damage)
The overkill damage would had been guaranteed damage to the 1. Wall instead.
Cheap Chess Wall
XOOXOOXO
OXOOXOOX
You place your Walls in a more efficient Chess-like manner.
- +Extreme Cheap
- +Funnily, enemies tend to isolate themselves more often, when they approach this wall
- +Up to 3 Units are guaranteed to attack the same Wall Unit
- +Boomers can only destroy 2 Walls at max
- +Splitters and Lancers can only attack 1 Wall max
- +Leaping is not mandatory
- +/- Enemies set a straight path before they approach the wall (+ for Propagation / +/- for different AoEs)
- +/- Easy passable (+ for heroes / – for enemies)
- +/- Isolation and Propagation Setup (it really is a personal preference, if that’s a + or a -)
- -Wall falls extremely fast
Theory: The Chess Wall provides at least some Wall function, as the Cheap Chess Wall is just a joke of a Wall, BUT it IS a Wall. And sometimes, when Materials are warningly low, having a Wall that functions as the Chess Wall is more than nothing.
This Wall has saved my life more often, than I would wish for.
Maintenance Corridor
I’ve found out about this beautiful strategy on Ic0n Gamings Channel.
His idea is to make a such called “Maintenance Corridor”, to get better access to other sides.
Damage Codewise
When we are talking about dealing damage, there are a lot of factors adding to the equation. The Damage being dealt is Multiplicative not additive. This is the Damage Formular Codewise:
([Base damage x Attribute damage x Damage x Isolation x Opportunism x Momentum x Perks(Total Damage) x Resistance] - Block) x Critical = Dealt Damage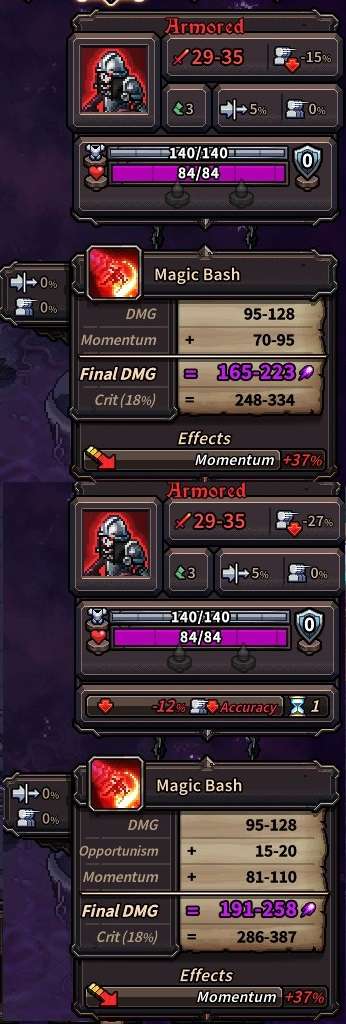
| Name | Description |
| Base Damage | Range Damage of the weapon. Codewise the minimum Damage equals 0 and the maximum damage equals 1. The system “chooses” a number between 0-1 and applies that to the range of damage.² |
| Attribute Damage | Is the Multiplicator of Physical, Ranged or Magical Damage. |
| Damage | Multiplies Damage of any of the damage types and is therefore the most versatile pick. |
| Isolation | Only triggers, if a unit is isolated. |
| Opportunism | Triggers, if any negative alliteration is applied³. |
| Momentum | Only triggers on momentum related Skills. |
| Total Damage | All Total Damages can only be obtained via Perks. |
| Resistance | Applying Resistance to a target, reduces incoming damage. In vice versa, reducing the Resistance of a target below 0% increases its incoming damage. |
| Block | Blocks Maximum Cap is 100. It’s useful in small numbers but looses its effectiveness in massive numbers. |
| Critical | Is guaranteed at 100%. It’s multiplying with the Critical Damage Increase Multiplicator. |
²For example Range of Damage is 100-200, the number chosen by the system is 0,5, the Base Damage will therefor be 150.
³The 4 negative alliterations are: Stun, Poison, Debuff and Contamination.
Theory: Even small numbers can ramp up to insanely high damage outputs, so you should pick at least one of each of the Damage Multiplicators, when they are available to you.
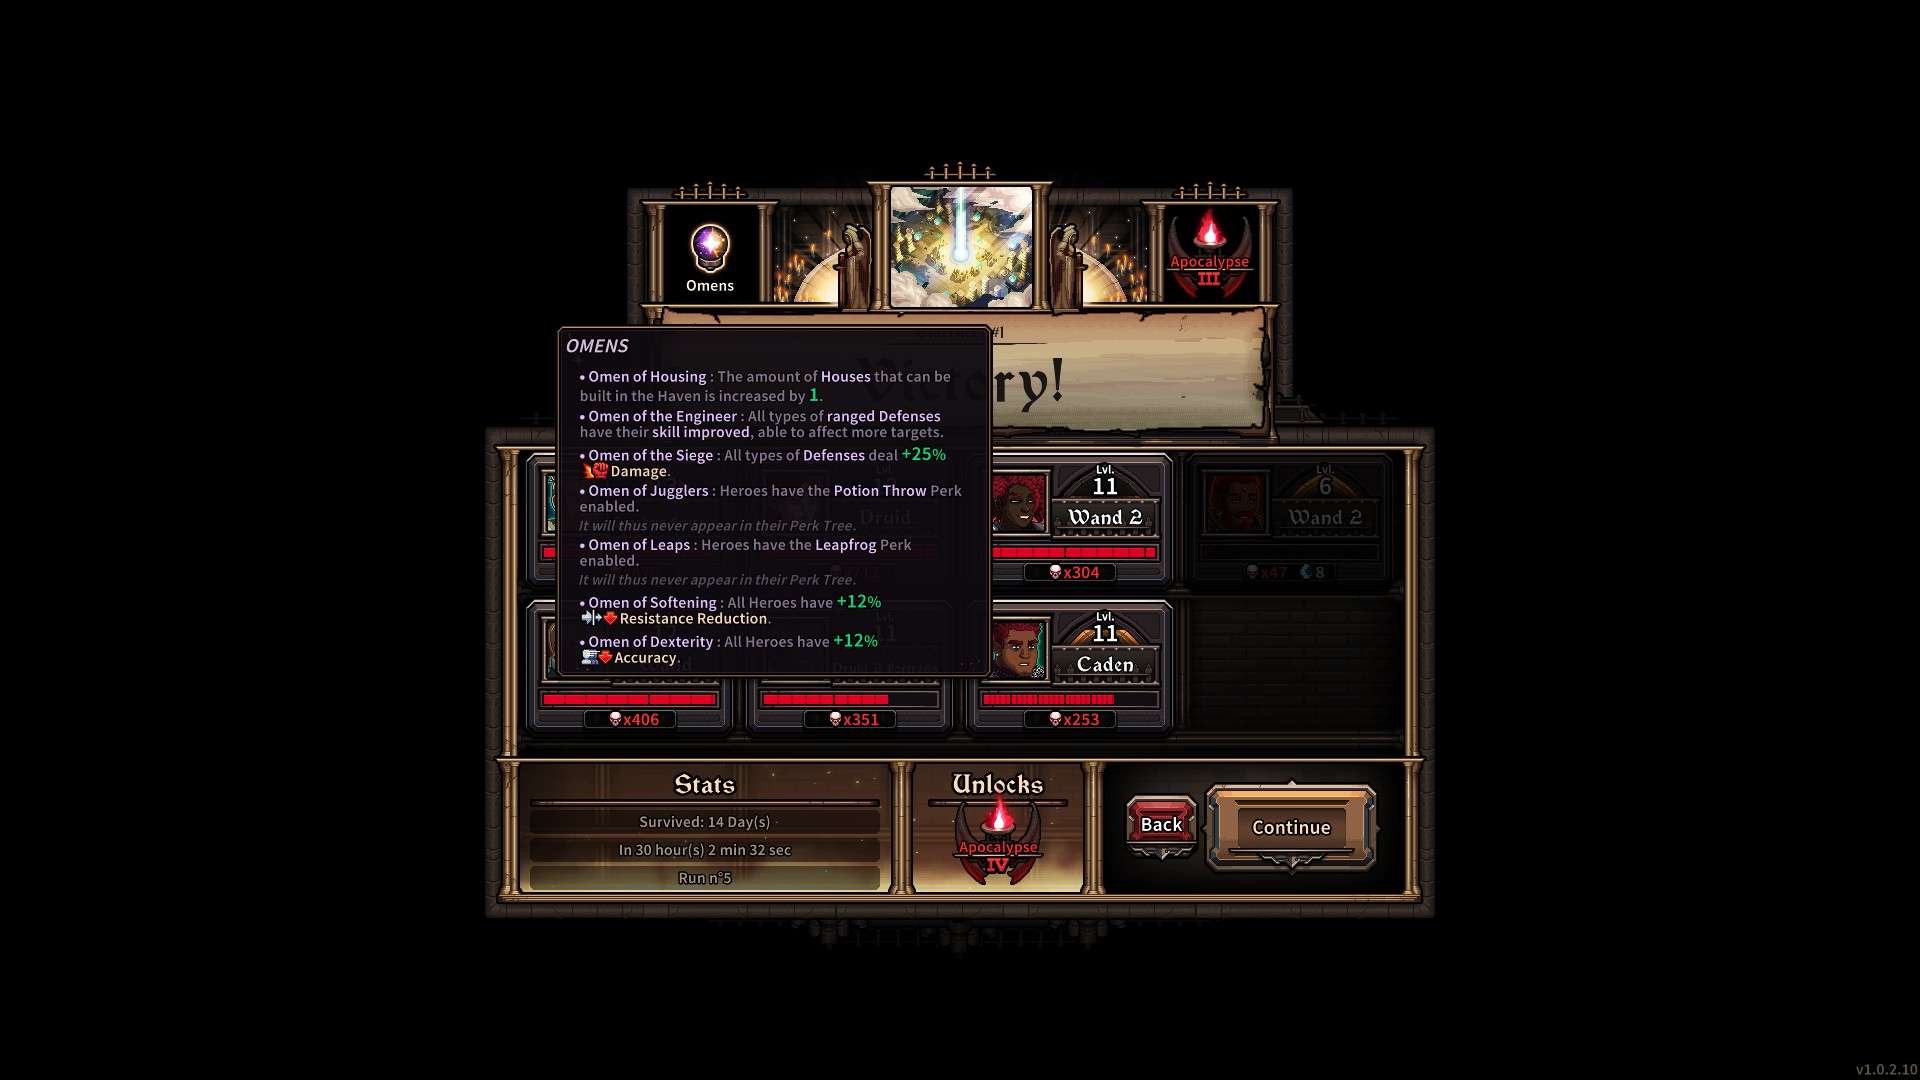
Some people just take all possible Attribute increasing Omens to compensate.
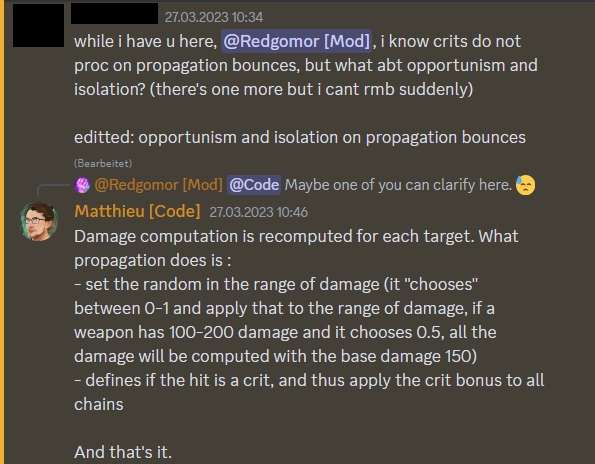
Regarding the question, on how Criticals work on Propagation, we got this statement provided by the Code Team:
Damage
The most consistent Damage Increase is Base Damage, which is located in the Range Damage of a weapon.
- The Range Damage of a Wand Tier 0 is 60-80
- The Range Damage of a Wand Tier 1 is 67-89
Do not fall for the trap of lucrative Damage Multipliers on that specific weapon!
- Wand Tier 0 has +10% Damage as an attribute:
- 60-80 *1,1= 66-88 Damage in total < Wand Tier 1 67-89
Conclusion: The Wand Tier 1 IS superior.
Theory: You want to access High Level Weapons as soon as possible, to get superior weapons as soon as possible.
Economy
Another question that gets asked frequently, is on how to set up the best economy in a run.
People tried different approaches, explaining with global progress and the payback of building a certain type of economy. The problem is, that with Apocalypse 4 the numbers do not add up anymore. (Another reason on why it is so hard to make a proper guide.)
When playing through a run, I’ll go with that personal plan:
- 2 Weapon Sets per Hero
- High Level Weapons (ideally Level 5)
- Equipment (and sometimes lower than Level 5 Weapons) with
- 1 +Multihit, +Propagation, +AP
- 2 +MP, +Crit, +DMG
- 3 +Isolation, +Opportunism, +Momentum
- 4 Rest
- A Teleportation Skill/Perk/Scroll per Hero
Ideally you want to prioritize to get access to Level 5 Gear as fast as possible, but getting there is difficult and should be approached with the concept of “Value per Worker”.
If you get a Mountain of Corpses, that Mountain is worth 40 Gold + 70 Materials or 2 Items that can be converted into gold. Your workers compete against this. If you manage to consistently get Mountain of Corpses (like we discussed it in the Wall section), you will not run into this problem.
Theory: Going with that strategy, you want to have enemies as close to the haven as possible. Building a Seer is unnecessary, so by not building it you have more Gold for your economy.
But if you can’t afford a decent generation of Mountain of Corpses, we have to switch to alternatives.
1. Gold Mines
Gold Mines provide 40 Gold per Worker and are a direct competition to Mountain of Corpses.
2. Shop Keepers Friend
You don’t need to sell Items immediatly. If you wait for the max Level of the Shopkeepers Selling Price (also paired up with the Shopkeeper Omen) you can make your items worth selling.
In the lategame a rare Level 5 Items Selling Price starts with 60 gold.
Another reason to get to Level 5 Items as fast as possible, the value per worker will increase to 60 Gold.
3. Low Panic Level
Yes, playing good is another factor for consistent Gold Income. If it means sacrificing a worker here and there to give your heroes more mana or health, so be it. Every Gold that gets compensated with low panic level is a well invested worker.
A good approach on how to start an economy is to sell all unnecessary Items, get 1-2 Gold Mines up and focus on scavenging Mountain of Corpses.
You want to invest a Worker on 40 Gold per Gold Mine use, to use that gold to get more workers.
You can buy back Items, that you sold for the same price.
So you can ideally invest your items into economy, to get gold out of the economy to rebuy your items.
Having a decent Value per Worker, you straight up invest into Gear Level of any Production Building. I would put Magic Shop on top of the most valueable Production Buildings.
- Followed by Bowyer and Armor Shop.
- Then comes Weapon Smith and Jeweler.
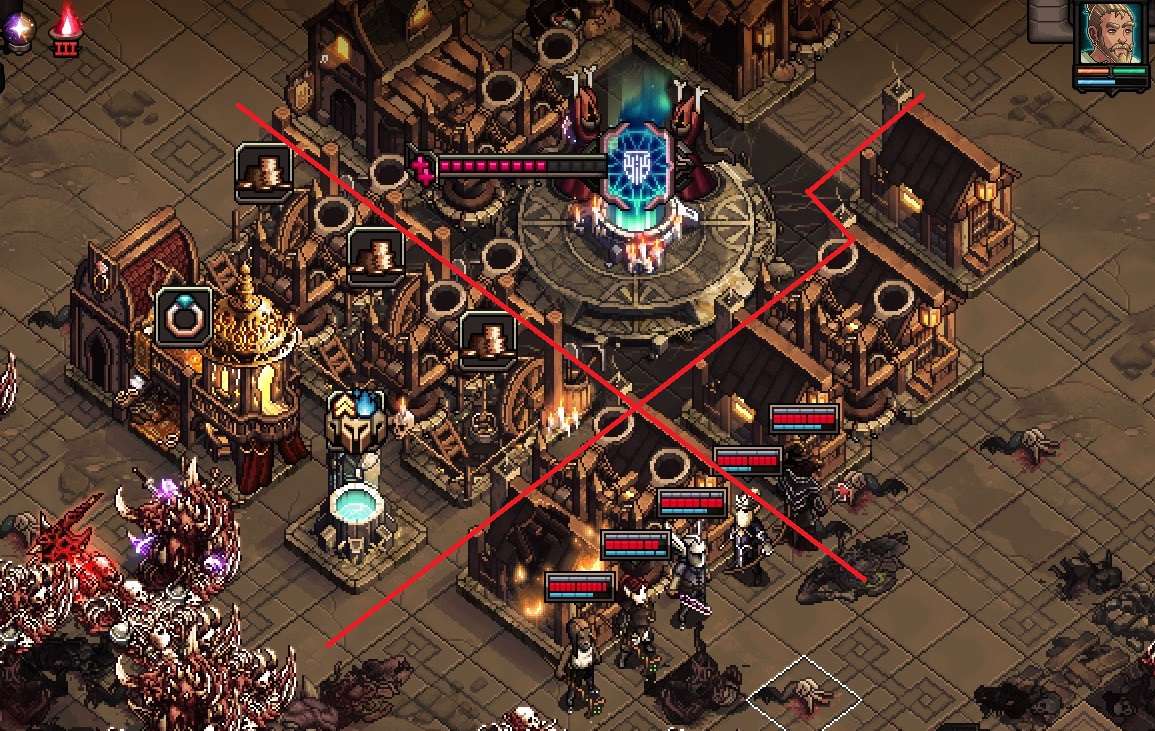
Meta Progression
I figured, that going for the Apoc Hardcore Challenge pretty much lets you obtain 80% of all Meta Progression. The amount of Essences you’ll get is insane.
If you are having trouble with the game, then of course it will take more time, so priorities are the key here.
You will eventually understand, that some playstyles will be better for you than other playstyles, so your priorities will differ from player to player and definitly from difficulty to difficulty.
But here is, what’s really important: The rarer the better.
Once available, you should definitly Focus on “More Uncommon Level Up” and “More Rare Level Up”, and on “More Uncommon Items”, More Rare Items” and “More Epic Items” Meta Progressions.
Rare Level Ups provide you access to increase AP, Propagation Bounce and Multihit Attributes.
Epic Items are the most expensive weapons for you to sell in the Store.
Heroes and Trivia
I do not provide you a guide for a specific hero, because as of right now, the only thing that was consistent in my runs where my Poison Druids, and I don’t need to tell you on how they function.
All other heroes were completely different from the others and also completely situational.
I had a Tome, Wand User with Propagations and Opportunism. (Which was by far the deadliest Wand User, I’ve ever made.)
I had a Power Staff, Scepter User with Momentum and Sadist.
I had a LB, Hammer User with Meteor Ring and Isolation.
I had a Wand, 2H Axe User with High MP as a Supporter with Lone Wolves on each side.
No, you cannot drive the same strategy every game, it is way too situational.
(Except for Poison Druids…)
I want to give you this approach, which still helps me a lot in my runs:
- Get your Heroes Leapfrog and Potion Throw (Best via Omen)
- Get your Heroes at least 10 Accuracy and Resistance Reduction (Best via Omen)
- +10% Damage of a Multiplicator ACTUALLY IS +10% more Damage
- +13% Experience IS NOT +13% more damage (and it hardly will be)
- Have your 3 (or 4) starting heroes reach an efficient high level, so you can buy High Level Heroes
- Even Heroes that seem completely useless can turn into absolute power houses, if you give them a try
- You ultimately want to look for Kills per Action Point
- Don’t underestimate this, but averaging 1Kill per Action Point really is above average
- Never pet a burning dog
- Keep good weapons, especially good weapons
- Build your heroes around your weapons, not the other way around
Also here are some trivial theoretical thoughts, that I might update on a regular basis.
Bosses
- Bosses have high damage and high resistances.
- Propagation bounces, if there are bouncable targets.
- Propagation does not bounce on isolated targets.
- Tomes 2nd Skill reduces Resistances and Damages.
- Having a unit stand next to a boss, does not make him isolated.
- Casting Tomes 2nd Skill on the boss, makes the skill bounce between him and the unit.
- A hero is also a unit, that can be placed next to a boss.
- All Debuffs can be dispelled with immunity or a Healing Potion.
- The Cap on Resistance Reduction is -50%.
- Resistance Reduced below 0% is Damage increasing.
Theory: Following this strategy a Boss will get -50% Resistance and a negative alliteration, therefor guaranteing Opportunism and Isolation Modifications.
- Some Elites and a few Bosses have Magical Mirror.
- Death Denial makes your hero immune for the turn he died.
- A hero can die, while it is his turn.
- Attacking a Magical Mirror can kill the hero.
Theory: Use the Death Denial Perk for Magical Mirror Enemies, to kill them without dying.
- If you go with both theories that has been mentioned prior:
- You can manage to get a hero killed.
- Place that invulnerable hero next to a boss.
- Cast Tomes 2nd Skill on the Boss to let it bounce between him and the invulnerable hero.
- Cast Tomes 4th Skill on the Boss.
Theory: Yes.
Catapults
- Most efficient Physical Damage Heroes require Blood Magic.
- In the early Magical and Ranged Damage is more effective.
- Both Types will have problems against Shielded enemies.
- Catapults deal Physical Damage.
Theory: If you concentrate on Catapults first, you get easy access to Physical Damage, compensating Physical Damage Heroes
Also if this wasn’t obvious to you:
End Nights fast, especially Boss Nights
Alt+F4 Exploits
What are Alt+F4 Exploits?
The game does not save on hardresets, but rather has checkpoints on where the game saves automatically (at the end of a phase).
Or if you manually quit the game to the main menu.
I think that sounds like someone is just lazy in the code team, doesn’t it?
Wrong.

What is so exploitable about Alt+F4?
There are 2 main Exploits: Save Restart and Ability Queue.
The first one obviously, the game saves after a phase or when you quit to menu. So in a way, you can hardreset out of the game, when you’ve done a mistake and restart where you softreseted.
The secod one is a hidden queue. The queue was never fully discovered, but it pretty much set a number of events, that are always quaranteed to repeat, if you would hardreset the game. But there were also corruptions of the savefile happening, so keep that in mind, if you try to test it.
What you want to do is to create a bunch of items, note the order of rarities and attributes down, hardreset the game and produces the items in a different order, to apply queued rarities and attributes to the item of your liking.
You can also alter the level up queue, as they have a similiar queue.
And also you can intertwine different queues. But that goes too deep for people to explore. Maybe you are the one and you are willing to report on how it works, but as far as I observed it, no one has reported it yet.


An excellent guide!
Well done. It sure helps a lot. Thank you very much for taking the time to write it all down.
You should correct just one word in it…
Under Bosses, Theory (2nd occurrence) it says:
“Theory: Use the Death Denial Perk for Magical Mirror Enemies, to kill them without dieing.”
A quick forward from dr. Google:
Dieing is a word, but it’s one you should almost never use, and it never refers to death. Dying refers to death. Dyeing refers to coloring a fabric or other material.
Cheers!
Much appreciated!
I think you are overlooking something very important in your concept of “compensating” the level you pick up the +20% XP on: You are NOT giving up the whole level. In fact, depending on build you give up only the least valuable part of the level up (secondary stat). imo, the extra perk point alone is worth giving up that in almost all cases, and the extra primary stat is just gravy.