
The game does not seem to support anti-aliasing (AA) out of the box. You can, however, force it via your GPU’s driver settings.
Guide to Use Anti-Aliasing via Driver Settings (Nvidia)
Introduction
The new Tomb Raider 1–3 Remastered release feature no graphics options, including AA (Anti-Aliasing) settings. Resolution and Hz/FPS cap is set by you desktop settings. Regarding AA, however, you can force the game to use settings overridden by your driver. Since the game runs on OpenGL, it works fairly easy and out of the box. Beware that this guide is for Nvidia cards only since I do not own a AMD card and hence do not know AMDs software and how you would force AA.
With Nvidia cards there are two options to achieve this:
- Use NVCP (Nvidia Control Panel)
or
- Use a third party software NVIDIA Profile Inspector (which I prefer)
Both options work. However, option b) gives you more control and the best results (difference may vary on your perception and sensitivity to edges and aliasing). If you want the best possible result and want to invest additional five minutes, choose b). Otherwise, go with a).
Comparison with AA vs. no AA
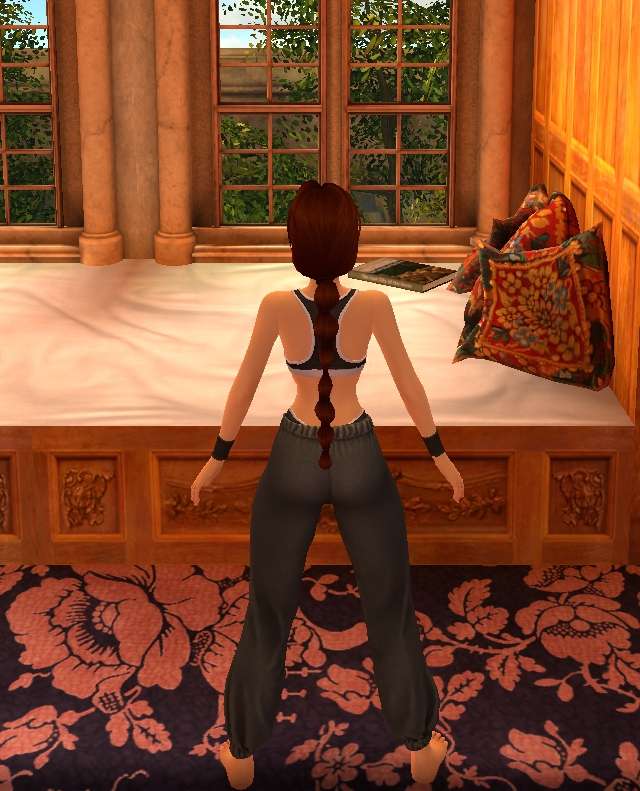
8xMSAA with 8xSGSS (look at the tree leaves, the book in front of the window, and Lara)

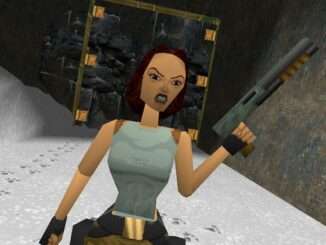
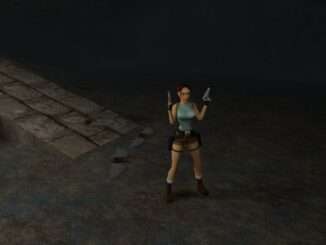
No AA, game’s default option
Using Nvidia Control Panel
Included software with your GPU driver
Open the ‘Nvidia Control Panel’ (NVCP) by either selecting it from your Windows menu (WIN key, type ‘Nvidia Control Panel’) or by clicking on your desktop with the right mouse button and select it from there (click on ‘additional options’ when using Windows 11).
Once it opens, select the ‘program settings’ tab in the central main window, right besides ‘global settings’.
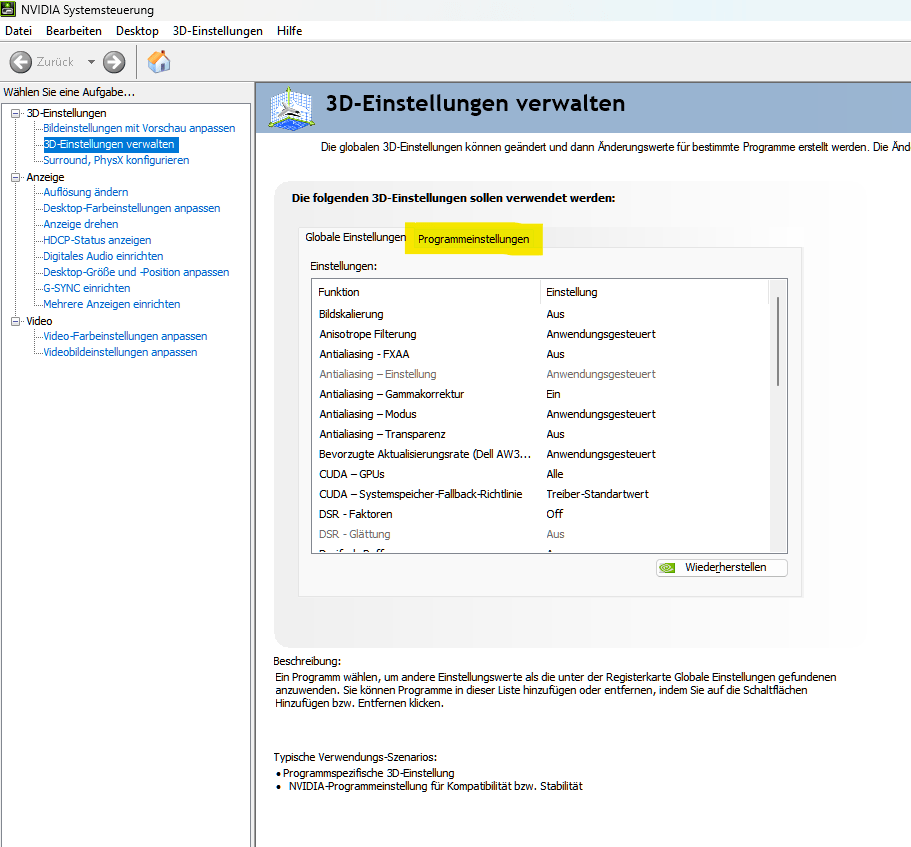
Under ‘1.’ select the drop down menu and scroll down until you find ‘Tomb Raider Remastered (tomb123.exe)’.

If it’s not there, click the ‘add’ button besides the drop down menu. This may take a while. Select ‘tomb123.exe’ in the window. If it is still not there, click the ‘browse’ button in the lower right of the window. Find the path of your ‘tomb123.exe’ in the newly opened file explorer (you can easily find the *.exe by opening your Steam library, click right on the game, click on ‘manage’, then ‘browse local files’.
- Click on the fourth Antialiasing option and select ‘Override any application setting’ (the bottom one)
- Click on the second Antialiasing option and select ‘8x’ in the drop down menu (select lower settings, if your system struggles to maintain your target FPS). If this option is grayed-out, make sure you do the former step and override the application setting.
- Click ‘Apply’ on the bottom right corner of the NVCP
Now you have enabled 8x MSAA (Multisample Antialiasing). This should give you tremendously better results than no AA.
For even better AA quality select the fifth AA option, ‘Antialiasing transparency’ and set it to the same level as you did at the second AA option (in my example, 8x). Now AA also affects transparency textures, like overlapping tree branches, fences, etc. and applies AA there, too. Therefore, it is more taxing to your system.
Using NVIDIA Profile Inspector
- Go to the official GitHub site of the project. Under the latest entry (as of the writing of this guide, 2.4.0.4) click and download ‘nvidia ProfileInspector.zip’.
- Create a folder somewhere on your drive where you want to save the software and it has writing privileges (it is portable and does not need to be installed)
- Launch the software by double clicking on the nvidiaProfileInspector.exe (the first start may take a few minutes)
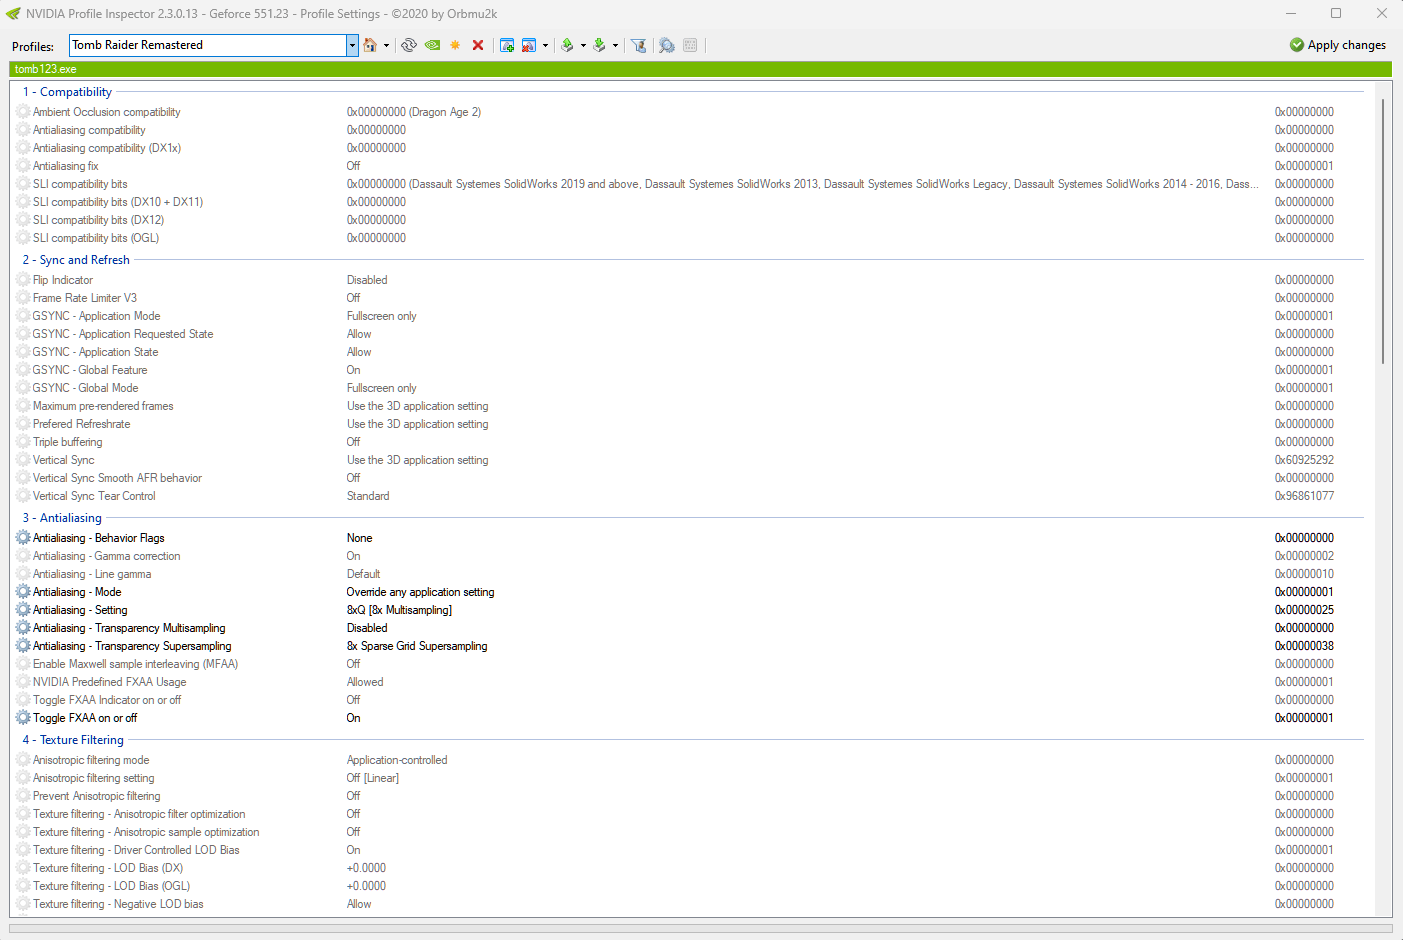
- At the top left under ‘Profiles’ select the Tomb Raider Remastered entry. As of the writing of this guide there is no such entry by default, so you have to create a profile and link an executable to that profile.
- To create a profile: click the little yellow/orange symbol that looks like a sun, besides the red X, in the top bar of the window and enter a name for the profile, e.g. ‘Tomb Raider Remastered’.
- To link an executable: click on that little green + symbol besides the red X, select the ‘tomb123.exe’ from your installation folder of the game. To find the path easy and quick, go to your Steam library, click right on the game, then ‘manage’, then ‘Browse local files’.
- Under ‘3 – Antialiasing’ in the main window, select ‘Antialiasing – Mode’ and click on ‘Override any application setting’
- Under ‘3 – Antialiasing’ in the main window, select ‘Antialiasing – Setting’ and click on ‘8xQ [8x Multisampling]’
- Under ‘3 – Antialiasing’ in the main window, select ‘Antialiasing – Transparency Multisampling’ and click on ‘Enabled’
- Under ‘3 – Antialiasing’ in the main window, select ‘Antialiasing – Transparency Supersampling’ and click on ‘8x Sparse Grid Supersampling’
- Click on ‘Apply changes’ at the top right corner of the software window.
Now you have probably the best possible image quality. If your system struggle to maintain your target FPS, lower the ‘Antialiasing – Setting’, e.g. to 4x or 2x. Always set the Transparency Supersampling to the same value as your setting.
Note that in my screenshot the FXAA option is only enabled for demonstration purpose. Do not use it until you read the last section of this guide.
Conclusion and Caveat
Using this method causes some visual artifacts on Lara and other polygons only when using the original graphics mode. This also happened with the original games and seems to be related to how polygons and textures are rendered. Unfortunately, I have no workaround for this. So if you are planning on playing with the original graphics I would advise to NOT use this method described in this guide and use Nvidia’s generic FXAA (also to enable via the NVCP or ProfileInspector) instead.

Be the first to comment