Guide to Deffkilla Wartrike (Bombrushing)
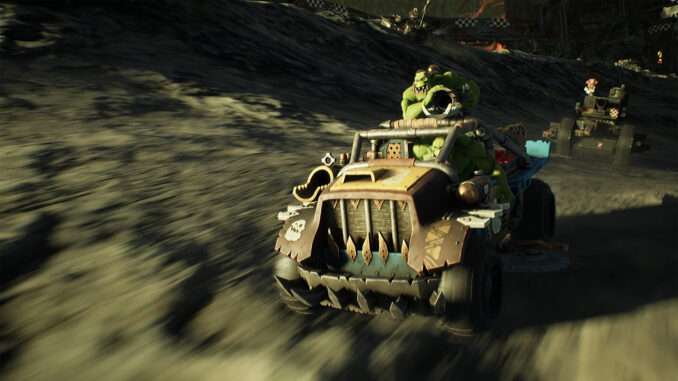
The Deffkilla Wartrike is currently the fastest vehicle, while also having the most paper thin health pool in the game currently. A polarizing vehicle that forces a response by changing vehicles if you are good with the Trike, your job is to acquire the bomb (either from an opponents hands or from it’s spawn location) and deliver the bomb to the enemies Stompa. Your life would be meaningless if not for the Bomb’s tender embrace of heat and shrapnel that takes you when you deliver the bomb.
Let’s first start with your abilities as a Deffkilla Wartrike.
The Abilities
Your Main Gun is a dinky little shotgun. It has a forward facing firing arc with not a lot of room to aim left and right. It doesn’t do a lot of damage, but it’s almost a necessity that you hit with this gun to reach certain damage thresholds for your next ability.
THE KLAW is your main damage ability. For the smaller/less healthy vehicles, this will be a 2 shot kill (provided you are also shooting them enough with the shotgun), but for bigger targets, it can take upwards of 4 or 5 attacks with this, especially if they use their healing abilities. Suffice it to say, use this ability to pick off weakened targets or to do major damage when chasing a bomb holder. Useful in tandem with your next ability.
The Grappling Hook is your source of EXTREME SPEED. When you hover over a target within range, a circle will appear indicating you can grapple hook onto them. It slows down the person it hits and gives that speed to you, it deals 1 point of damage on impact, it will hit regardless of what is in the way as long as the white circle is visible upon impact. It will break if you are too far from the target, if it goes through a solid object, or if you or them die. Use this to catch up to bomb holders, or to gain momentum and swing past defenders like Grot Mega Tanks or Looted Wagons that may be in your way.
The Dash button is your friend! Use this when you get stuck and lose your momentum, use this when you handbrake to do a quick spin around to get moving fast again, use this right before jumping off a ramp for extra distance, use this when you’re just driving straight for even more momentum. During the cooldown time of this ability, spend some of your boost to maintain the speed you’ve gained until the cooldown is back up to do it all again! Also useful to do quick turns when needed.
As mentioned earlier, you are a bomb chaser. If you see an enemy with the bomb, you are rushing to that bombholder and trying to kill them. If you see a bomb uncontested after a respawn, you are using every inch of speed in you to make it there first and getting out alive with the bomb. Getting kills is useful of course, but your vehicle is not best suited for doing damage and kills in comparison to the others. Often times when you first acquire the bomb, I recommend you disengage as best you can to fill up your boost bar and health again from any loss you suffered in your attempt to acquire the bomb. Once you have acquired the bomb, you have one job: an express delivery straight to the enemies Stompa.
Delivering the bomb to a Stompa is no easy feat, however. You must be sneaky, you must be dodgy, you must be speedy, and most importantly, you gotta be freeky. Use downward slopes and boost to gain speed and momentum fast. Use ramps to recover your boost (as airtime does little to slow you down). Do everything in your power to not get stopped by explosions or vehicles blocking your path, even if it means you have to divert your course and try a different run to the Stompa. It is better to live another day with the package than to just lose it on an attempt that never would have made it in the first place.
With enough speed and cunning, you will find it a simple matter to breakthrough and slam a bomb into the Stompa’s face, even should it attempt to lift you. It will become a badge of honor to you every time you die the moment after a bomb detonates. You will laugh maniacally as you respawn and do it all again. Your life is meaningless if not for the bomb. I’d be remiss to not mention two vehicles that do extremely well versus you however…
The Kustom Boosta Blasta has the maneuverability to generally keep up with you (but not forever) and the damage to make sure you don’t make it to the bomb. Even worse, his stikkybomb that he throws can knock you off course or make you jump before you meant to, leading you to falling helplessly into the arms of death prematurely. Dangerous and mobile, but not unkillable and inescapable.
The Grot Mega Tank in particular is a nasty counter to the Wartrike. By virtue of high dps and burst, a sizeable health pool, and being a wide boy, this behemoth is your worst nightmare. He has three abilities that can knock you off course, flip you around, or even stop you dead in your tracks if they hit you and the damage that comes with those attacks will surely put you back to respawn. Simply put, avoid these guys at all costs. I would hesitate to even attack them for fear that you invoke their ire, though it can be smart to finish them off when you get the chance if you find a Klaw attack will get the last of their health off them.
Now get out there, you grot-brained git. Amazork’s got some deliveries with your name on it!
The Grapple’s defensive capabilities
Sometimes you may find yourself behind the enemy bomb carrier, they are too high health for you to krump so you gotta get your team to help, if you fire your grapling hook and have a little luck with the tether system (pray to gork and mork it doesent snap) and slam the brakes after it hits, you can cut your opponents speed to a snails pace for a few moments before the line breaks! Usefull to slow down bomb carriers and also troll unsuspecting victims.
The wartrikes grappel can be broken if the wartrike is hit with an explosion, the stikk bomb works. So if you have an explosive weapon and a wartrike has grappeled you or a teammate, try hitting the wartrike with the explosion.


Be the first to comment