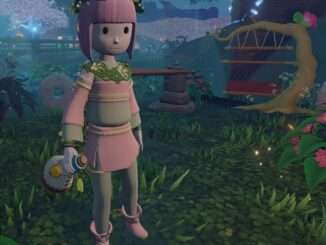
Whether you are a new player or one who’s gotten frustrated with having to replumb your base for the Nth time and has decided to do rebuild correctly, the time stops during the opening tutorial represent the only time the clock isn’t running, meaning that you can build freely without having to worry about managing your thirst and hunger.
Here are the ins and outs of (ab)using the tutorial to set up an expandable ‘heart’ to your irrigation system in the area around your starting tree. During the tutorial is the best time to complete your early game layout, so that as you expand to generate more water (both through home tree upgrades and additional wellsprings) you can irrigate like the Incans of old!
Your Goal: A Maximum Reward, Zero Soft-Lock Tutorial
The Wildmender tutorial currently (as of build 195j) stops time. Once you lower the warding around the Oasis and set out into the desert time will flow, hunger and thirst will accumulate, and it will be that much more difficult to manipulate terrain as the harsh sun saps your thirst and you have to choose between planting and eating. Why not use those three time stops to set up the heart of your base and get as many plants in the ground as early as possible to maximize your gains from the Tutorial?
The answer? Soft-locks.
If you don’t have the water to water a cactus, or a dunegrass seed to craft your mirror, time won’t pass and you will be gated out of opening the barrier and leaving the tutorial.
Here, learn how to:
- Utilize topography to avoid planting over and locking in early mistakes.
- Lay out your oasis as a hub, for water going in and out.
- Make the most out of the three timestops.
- Not soft-lock your save while doing so.
- (Optionally) Recognize features in random worlds that lend themselves to easier starts.
Topography, Random Worlds, And You
In the every world, the staring layout of the barrier zone is very important for the long term development of your oasis. I will discuss a few of the variables which impact play, and how to assess future development of your oasis.
Elevation
One of the major features in the default world is the large shallow basin located to the right when you spawn. This guide is predicated on using terrace farming using switchback rivers originating from elevated wellstones and funneling the excess water through the central oasis into a valley like the one here:

You want hills around at least some of the edges of the barrier zone. These areas can be used for wellstone placement to generate water above the static spring at the center of your oasis. This gives you the ability to layout long winding rivers which run laterally along a slope, wetting the hillside around. This will allow you to expand wet areas to cover even more of your oasis.
These two factors combine to allow you to shunt excess water along, across, and out of an oasis-wide irrigation network. Dumping water into an adjacent basin scales more easily than manually correcting rising water tables within isolated networks when you expand each spring/wellstone. Floods kill your plants and losing mature trees (which cannot be moved without a late game trinket) is a royal pain.
Slope
Extreme slopes are also harder to shovel into shape, because there is a maximum angle to slopes, and if the shovel attempts to increase/decrease slope past the maximum with flatten/Q, the attempt to flatten will fail to change the terrain.
So while you want elevation, extreme slopes are something to avoid.
Cliff Faces
The cliffs surrounding the oasis may significantly infringe on the potentially arable space you have to work with. If this happens to be one side of a valley you can use to dump water, or hides a Blocked Spring on top of the cliffs, it might be acceptable.
Usually it is not.
Blocked Springs
On the default map, there are three blocked springs, two of which are located on hills around the barrier, which can be led downslope to irrigate the central oasis:

Since the height of springs cannot be adjusted and wind-powered pumps are not an early-game option, the number and relative elevation of the springs you can see on your minimap is important to consider. You want at least one or two blocked springs which are higher in elevation than your central spring.
Dirty Springs
On random worlds, dirty springs have a small chance to spawn inside the barrier. It’s always preferable for this to happen, since they often have mature thorntails which you can lift and move to your central oasis and/or extra cacti growing around them. The cloud of vapor above such a spring will be clearly visible against the barrier around the oasis. Since I’ve only seen this in about three of the two dozen worlds I’ve genned, I don’t recommend holding out for this feature.
Awakening At High Noon (12:00 Time Stop)
Overview
Running out of water at this timestamp soft locks your save!!
The opening quests to gather materials and gather tools cannot be skipped.
Gather the five sticks and three sandstone to craft your workbench and sickle. Then break every dead plant and deadfall you can to clear your workspace. Once you’ve done this, craft your spade.
Use your spade on every glowing spot inside the barrier. These are the materials you have to work with until the next time stop. You are finished when you have shaped the ground and planted every last one of the seeds you’ve gathered.
For this reason, you want to water every starter plant first, refill your water, and plant every seed inside the water in the starting basin to ensure it starts with a full water bar. After that, move them to wherever you need them, even if it’s a dry location.
Because time is paused, this will not negatively impact your loose water supply or cause these plants to drown. This is also the only point at the game where you can use live plants to ‘anchor’ the terrain at the bottom of irrigation. We will be taking full advantage of this.
Setting The Water Table
Stand in the shallow basin full of water in front of your spring and press tilde (~) to view your game’s statistics. Aside from FPS and memory, the character’s voxel coordinates within the world will be displayed. Because water tends to flow to the lowest point available, the character’s Y-coordinate is the most important information we’ll be using. You want to measure the lowest point in that basin in front of your spring and use it as the basis for setting up channels and reservoirs.
In general, our plan is to use long, flat feeder channels to let water travel laterally. Along these channels we will place basins .2 or .3 voxels deeper, which will retain water and wet extra soil. Because a certain amount of water is soaked into the soil, we eventually run out of water in the tutorial. After the tutorial, as you gain the ability to enhance your main spring, plant wellstones, and unblock new springs, you will have more and more water to work with.
For the initial layout, I recommend bringing the outer ‘lip’ of the basin lower by .2 to .3 voxels as well. You want the same basic height differential that the initial layout has between the bottom of the reservoir basins and the working area on the edges of the water when you’re done.
Spread your fingers and look at the back of your hand. Imagine the starter basin runs under your knuckles. My recommendation is that you dig five basins, spread radially like fingers, using the mature dunegrass as anchors between them. You’ll want to smooth a long channel at a Y-value between .1 and .2 higher than the oasis’ water table at the end of the reservoirs facing your drainage basin.
Get ready to hold ‘W’ and ‘Q’ simultaneously to inch forwards while smoothing. Tilt the camera almost flat to the ground to judge when the channel’s leading lip is gone and the way to the basin is completely clear. At that point, you have a proper drainage channel.
You’ll want to extend a similar channel from your reservoirs (or a branch of them) at a Y-level higher than your oasis basin’s towards any features that you want water to flow from. These include nearby blocked springs and uphill wherever you’d eventually like to set up wellstones to feed terraces. You don’t need to extend these past your plants, but you want to keep them in mind so that you don’t plant over your future water channels.
At this point, you have to decide how to handle rocks. You can simply accept them as ‘dead space’ or you can raise the soil all around them and then flatten it to cover them. I tend to accept the hard slopes and plant trees on top. I move a watered sunburst (the largest plant in the tutorial) on top of these sites to keep the soil from being moved by flattening in the area around them.
Your reservoir structure will vary based on the layout of rocks, but I recommend extending your reservoirs enough to plant 2 or 3 dunegrass seeds along each side without crowding. Once you’ve done this, reposition your rootbeards by your mature dunegrasses and move in as many of your thorntales and sunbursts around the mature dunegrass as you can. They will benefit them when time starts back up due to the poor soil the dunegrass will spread.
Once you have flattened enough reservoir-side space and planted your seeds, you can water the rainbloom cactus to advance time.
Don’t Starve: Wildmender Tutorial Edition (15:00 Time Stop)
If you plant all your dunegrass seeds before crafting your copper mirror at this timestamp you will softlock your save!!
Therefore, gather the seeds and complete the tutorial quest line up to the point where you are obliged to fire a test shot from your copper mirror. A buried dunegrass seed will have spawned to ensure you can complete your quest (thanks devs!) Ideally there will also be an initial harvest from your mature dunegrasses as well.
Resist the urge to plant! Craft your mirror and and avoid the softlock! Plant the last of your seeds in celebration, you’ve avoided the last softlock! \o/
Mirror in hand, you are now free to use your water to get all the rainbloom cacti fruits within the barrier. Then water all the plants which lost water due to not being in wet soil. Focus on the plants which have visibly depleted waterbars first. You’ll probably run out of water here, but that can no longer softlock you, so it’s okay.
Build your lean-to and catch some ZZZs!
I Am The Night! (18:00 Time Stop)
At this point, you should have some spare water in your basin, but not much. Eat some rainbloom fruits rather than drinking the water you need to give to your plants.
Until you expand your spring, some manual watering will be needed. Make sure you’ve got your rainbloom fruits on your quick action key (select them and use ‘V’ in your inventory screen.) You’ll be using these exclusively for food as you head out to find ghosts while your plants grow.
The main feature of the 18:00 time stop is that you get your first memories, so use this opportunity to lay out some baskets and wooden paths using the supply of plant fiber and wood you got when you broke every dead plant inside the barrier.
A path from the sigil gate to where you set up your storage baskets & worktable is best.
Your Goals Once You Drop The Barrier
If you’ve followed this guide, you will want to explore heavily once you drop the barrier, to the point of not even returning with the fragment from the first enemy you face. On my recommendation, the majority of your water is dispersing into the sand and it’s still not enough for your plants.
Finding your first two blue ghosts to get your first 4 points of Spiritual Memory is top priority. This will let you unlock ‘Water Seeker’ and get more water flow to start taking advantage of the work you’ve done in the tutorial. You are likely so water-starved that even completing one of the two offerings in the Garden Temples (with what could have been seed crops) is attractive, should you find them before the two site-bound blue ghosts.
Focus on the water side of the Spiritual tree early to make the most of your situation!
Good luck!


Be the first to comment