
Contents
Intro
Сrеdit gоеs to Dicerson1!
Helldivers 2 has a wide array of weapons available, in multiple slots and with multiple ways to mix and match what you take. Primaries, Secondaries, Support Weapons, grenades, etc. The following guide will walk through them all, outlining statistics, handling characteristics, and general conclusions
Name – The name of the weapon, along with an image of it and which Warbond it’s from
Damage, Fire Rate, and DPS – The amount of damage the weapon does in a “single shot”; the shots per second of the weapon, and the total DPS. For Stratagems/Callins, the cooldown will be included instead or in addition as appropriate
Capacity (Per Mag/Total Mags) – The capacity of the weapon, both the number of shots per magazine as well as the number of magazines it has, as well as a “Total Potential” damage for the weapon, both per magazine and for the entire reserve.
Accuracy – The Accuracy of the weapon, in terms of how much “spread” it has. As I am somewhat bad at angular math, and such math often does not really help to understand just how accurate a gun is, I will instead list here the range – in meters- at which any innate spread can result in whiffing a bot head (or scavengers for shotguns/spread weapons). If a gun has significant bullet drop this is also mentioned and to what degree. As a note currently, all “scopes” are bugged and misaligned, often causing the “true” center to be slightly to the left and up of the actual reticle. This is shared by nearly all scoped weapons, and is not mentioned as I presume Arrowhead will eventually fix it. To clarify, the “Accuracy” of a weapon and its recoil are different; in this case, Accuracy cares about how far off from the reticle a shot will veer, regardless of how far or wildly the reticle itself travels during fire as a result of recoil. In theory, regardless of how bad recoil is, a “perfect” accuracy weapon will always send the bullet to where the reticle is pointing- and thus a controlled shooter can account for recoil and nail every shot back to back.
Handling – The “Handling” characteristics of the weapon, including how badly it sways both passively and actively when taking fire, how much it drags behind the cursor when moving the camera if at all, as well as its recoil characteristics and reload characteristics. Initially I was going to include swaptime here as well, but after further testing I realized that all primary weapons have similar or identical swaptimes within .1 seconds of each other, if they differ at all; and likewise for secondaries (and in all likelihood, supports as well though that remains to be tested).
Special Characteristics – Unique or special characteristics, such as fire modes, accessories, or attributes. Some characteristics are common between several weapons
Conclusion – The thing or things the weapon “Does best”. For some weapons, their use cases can be better performed by another weapon- typically this is either because that other weapon has some significant drawback, or because this weapon has multiple use cases and thus is a “flex” option. I will do my best to ensure each Use Case entry is a thorough description of what a weapon should be used for.
Common Special Characteristics
- Scope – A scoped weapon has a dedicated “enclosed” sight with multiple magnification levels, or an innately very high magnification. When specified, the variable ranges will be listed. Currently, all Scopes are slightly misaligned- the bullets go significantly up (to about the end of the central vertical line for the AMR/CS scopes at 200m) and slightly to the left (about the left edge of the square for the AMR/CS scope at 200m)- sometimes these scopes might render with “lowres” textures, which are themselves also misaligned. It is best to feel it out for every individual weapon, as it will also vary depending on the zoom level (closer zooms experience less relative misalignment)
- Laser Sight – Weapons with a laser sight visibly show in the 3-d environment where their bullets will strike, making it far easier to land shots from the third person. Be aware that laser sights are usually misaligned at very very close ranges due to being mounted under the weapon.
- Fire Modes – Weapons will almost always have a fire mode, sometimes multiple, which will be specified as a special characteristic
- Explosive – Explosive weapons have an Area of Effect in which extra damage beyond what is listed in-game is dealt, which falls off towards the edge of the radius. Explosive is also a type of damage, which is doubled when it strikes weak points and does even more against “Hardened Flesh” which currently exists only as the butts of Spewers, Chargers, and Bile Titans (also a very small sac in the central abdomen of the titan, though it’s hard to hit and doesn’t contribute much to its HP)
- Stagger – Many weapons have some amount of Stagger, which is not currently quantifiable. Currently, there are two “levels” of stagger that I am aware of; possibly 3 for weapons like the Arc Thrower. I will specify this as Light Stagger, Stagger, or Massive Stagger, respectively.
- One-Handed – A one handed weapon can be used even while carrying other objects, such as the Ballistic Shield or specific objective items. They also tend to suffer harsh movement sway.
- Rounds Reload – A Rounds Reload weapon reloads its ammo one shot at a time, and as a result never “wastes” ammunition.
- Incendiary – An incendiary weapon lights enemies on fire, dealing a fixed 60 damage (Pen 4) per tick innately (then modified by things like the new ship module). Currently, this tick does not occur unless it is applied by the network host, and the tickrate is unknown but lasts for approximately 3 seconds.
- Support Weapon – This weapon occupies the “Support Weapon” slot
- Backpack – This weapon occupies the “Backpack” slot
- Penetrating – Most weapons have some amount of armor penetration, defined as a flat number. Currently, it is believed that this number is used in two places. Once to determine whether or not a shot does Full, Half, or No damage. Then again against a specified “durability” value of some kind that every individual enemy part has to determine a “flat” reduction to the damage, meaning that weapons with higher raw damage values will have a significantly small portion of their damage reduced per-shot and thus have “better penetration” despite having the same pen value as other weapons. The most extreme examples being the Railgun, which always deals 600 damage but scales its penetration according to the charge level, and the Break Spray n Pray which has the same Pen 2 as all other light penning guns but deals a measly 12 damage per pellet; and thus does next to zilch to even lightly armored enemies such as small bots or the lightly armored heads of devastators and brood commanders.
Penetration values ranges from 0 to 10, and will be named as such:
- 0 – No penetration
- 1 – Super Light Penetration
- 2 – Light Penetration
- 3 – Medium Penetration
- 4 – Heavy Penetration
- 5 – Vehicle Penetration
- 6 – Structure Penetration
- 7 – Heavy Structure Penetration
- 8 – Hardened Structure Penetration
- 9 – Bunker Busting
- 10 – Ignores Armor
*On “Stealth” characteristics, stealth characteristics appear to be by weapon category rather than by individual weapon.
*Weak Point multipliers: It is also suspected, though not technically confirmed, that weapons with higher armor penetration also sport a higher “weak point multiplier”. Meaning that guns such as the Dominator, Slugger, Revolver, and both Diligence rifles do extra bonus damage when hitting heads or other weak points on top of whatever they do normally. However, this is extraordinarily difficult/impossible to actually confirm due to the large number of possible and entirely unknown variables. We don’t know the “part health” of every enemy, we don’t know if weapons even have weakpoint multipliers- nor what they are. We don’t know if armor penetration is some kind of modifier value or if it’s just a checkbox value that enables/disables damage outright or flat damage reduction.
We don’t know how enemy armor reduction actually works. There are simply far too many unknowns, currently, to be certain about any of this. As a general trend, however, the “slow” weapons that deal larger chunks of damage less often also seem to do much more damage when hitting weak points, which applies even more dramatically to weapons with higher penetration values (such as the Dominator, Revolver, and AMR). Furthermore, “weaker” weapons with smaller “raw” damage values seem to do dramatically less damage even to lightly armored points; such as the breaker spray & pray which can fail to kill even a small bot in a single shot at point-blank range, despite dealing more than enough “raw” damage with its entire spread and also having light armor penetration- which almost certainly seems to be a direct consequence of the fact that every individual pellet is doing the smallest amount of damage in the entire game.
Primary Weapons
Assault Rifles
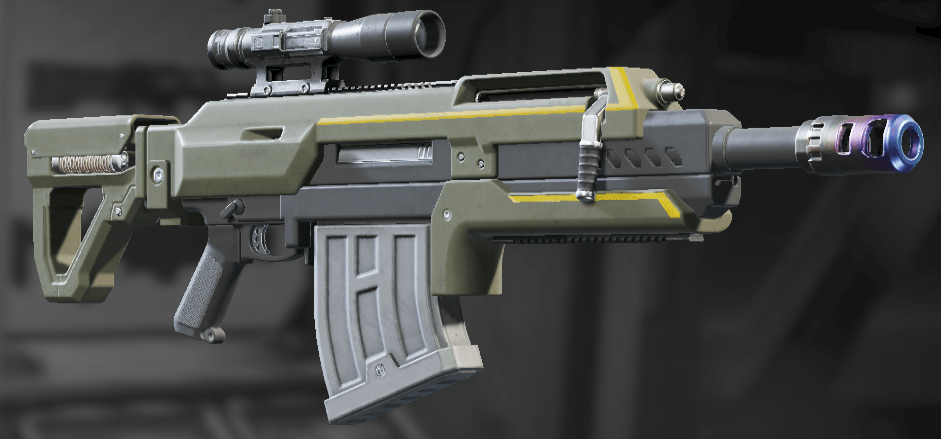
The AR-23 Liberator “Ol’ Reliable” – Starter Gun
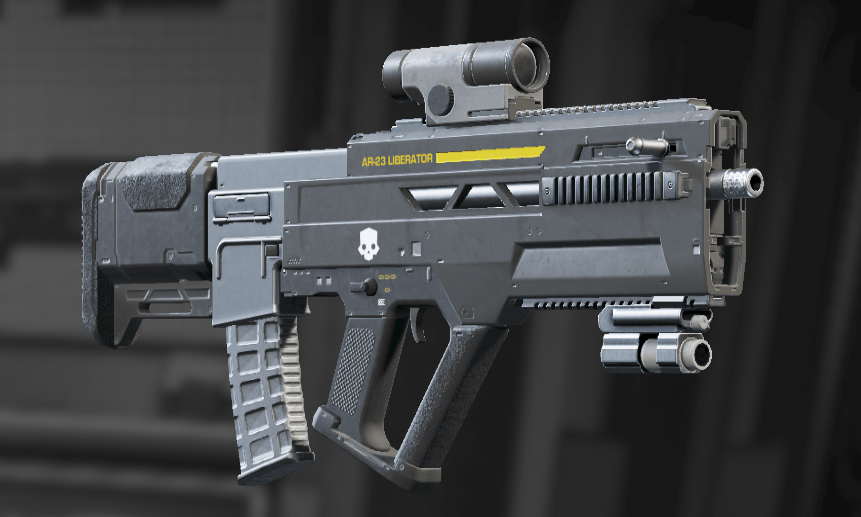
Damage, Fire Rate, and DPS – 55 Damage per shot, firing 10.66 shots per second, for a total of 586.66 damage per second
Capacity – 45 Shots per Magazine, with 7 Magazines in reserve (8 Total). A total Potential damage of 19,800
Accuracy – Very nearly pinpoint, I quite literally could not find a sightline at which this gun’s spread had any noticeable deviation; even firing straight up into the air. Suffice to say it’s easily over 100m, the maximum range of Scope it can switch to. It does have a small amount of bullet drop at that distance, but it does not extend further down than the square area that is the center of the scope’s reticle.
Handling – Recoil is very light and easy to adjust for and functionally negate, Tactical Reload is 1.8 seconds, Full reload is 2.8 seconds. Sway is almost non-existent, even under fire (except when getting hit directly, of course), and the weapon is extremely snappy with less than a quarter second catchup when moving the reticle (possibly .1 seconds, by my eyeball).
Special Characteristics – Light Armor Penetrating (Pen 2), Scope (25/50/100), Laser Sight, Full Auto/Burst/Semi
Conclusion – The AR-23 Liberator is a very potent general use weapon, as Democracy intended. It has “light” armor penetration, which lets it deal decent damage to most small enemies. Its single-target damage output is on the lower end, though its decent ammo and close to non-existent recoil makes it a decent weapon for mowing down hordes of small unarmored targets- such as all of the small bugs or humanoid bots (including Devastators, thanks to its incredible accuracy). It doesn’t really have any weaknesses besides its lack of armor penetration.
AR-23P Liberator Penetrator – Helldivers Mobilize!
Damage, Fire Rate, & DPS – 45 Damage per shot, firing 10.66 shots per second, for a total of 480 damage per second.
Capacity – 30 Shots per Magazine, with 9 Magazines in reserve (10 total). A total potential damage of 13,500
Accuracy – Much like its cousin, the Penetrator has virtually pinpoint accuracy with minimal bullet drop except at very long ranges.
Handling – Also like its cousin, the Penetrator has marginal recoil that is easy to account for; though it is slightly higher and kicks to the sides enough to warrant adjustment. Tactical reload is 1.8 seconds, Full reload is 2.8 seconds. Sway is about the same. Just a liberator with some extra kick.
Special Characteristics – Medium Armor Penetration (Pen 3), Scope (testing), Laser Sight, Full Auto/Burst/Semi
Conclusion – Similar to its cousin, the Liberator Penetrator is the “generic” option amongst anti-armor weapons. However, due to its shockingly low damage output (one of the lowest of all primaries, followed only by the Concussive, Slugger, Punisher Plasma, and Scythe) and the typically higher health pools of medium armored targets, it struggles to kill most such targets with less than an entire magazine- and since its actual damage output is lower, it is actually slower at killing even those targets when shooting their weak points.
The only thing it is particularly good at is killing Striders, Hive Guards, and Brood Commanders from the front; and even then it can take awhile compared to other options and being worse at killing the unarmored chaff can easily lead to being overwhelmed if other options are not available. Currently, there is little to no reason to use this weapon over its contemporaries, the Dominator or Counter-Sniper, as even its higher technical ammo capacity is outclassed by the sheer overall damage output and potential of those weapons (both of which are also pinpoint accurate, if with harsher recoil)
AR-23C Liberator Concussive – Steeled Veterans
Damage, Fire Rate, & DPS – 55 Damage per shot, firing 5.33 shots per second, for a total of 293.33 damage per second.
Capacity – 30 Shots per Magazine, 9 Magazines in Reserve (10 Total). A total potential damage of 16,500
Accuracy – Just like it’s cousins, the Concussive is more or less pinpoint accurate with a marginal amount of drop; at least most of the time. For reasons I cannot discern, it occasionally fires a wild stray bullet that goes very far to one side- I tried seeing if it was tied to consecutive firing by waiting seconds between shots, but it truly does seem almost random. Happening once out of every 5 bullets or so. With this wild bullet, the distance at which it can whiff an automaton head is about 35m
Handling – This gun kicks much harder than its cousins, but its reduced fire rate makes that recoil very easy to account for even when firing continuously. Tactical reload is 1.8 seconds, Full reload is 2.8 seconds. It actually has even snappier movement than its two cousins, though it’s well past the point of diminishing returns.
Special Characteristics – Light Armor Penetrating (Pen 2), Scope (testing), Massive Stagger, Full Auto/Burst/Semi
Conclusion – The Concussive is the red-headed step child of the primary weapons. Sporting the second lowest damage output of all weapons, period, in the entire game, it is easily the least lethal weapon ever devised. Its only saving grace is that it has one of the strongest staggers in the entire game, paired with a decent fire rate, allowing it to functionally perma-stun multiple enemies at once with proper trigger discipline. However, perma-stunning enemies is only useful if that leads to them dying before they can get to you.
This gun’s damage is so incredibly low that it often leads to the user just stalling their inevitable death. It is fun to watch a Brood Commander get pushed back to next week, but if it takes more than a magazine to kill, well… it’s not exactly good. If only this weapon’s stagger was paired with something that could let it kill effectively, then perhaps it would be useful. If you truly love things like mutually supporting fire, you could attempt to bring this and stick close to an ally with a cumbersome weapon and focus simply on crowd control while your team nabs the kills- you can also try using it in conjunction with stratagems such as turrets or orbital strikes, preventing most enemies from getting out of the line of fire.
But such strategies are difficult to employ, and likely not superior to simply killing the targets faster; Death, afterall, is the best form of crowd control. It could be much better, if it were considered an Explosive weapon- but it isn’t, so alas it struggles to do much of anything.
Marksman Rifles
R-63 Diligence – Helldivers Mobilize!
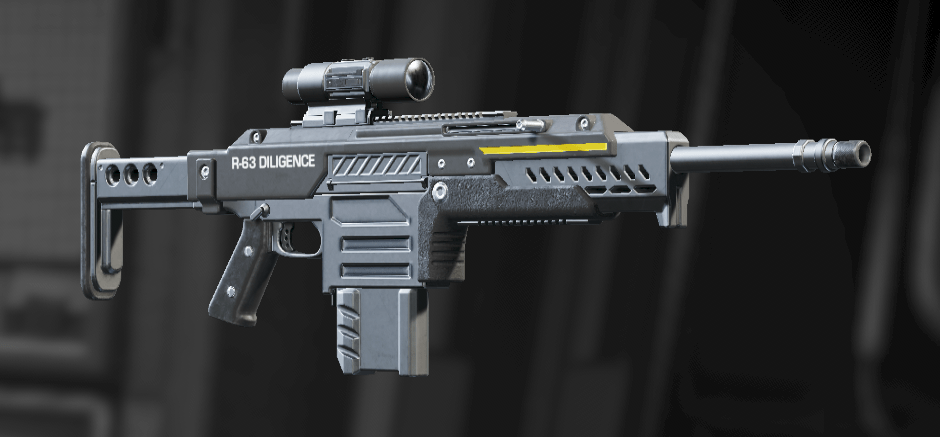
Damage, Fire Rate, & DPS – 112 Damage per shot, firing 5.83 shots per second, for a total of 653.33 damage per second
Capacity – 20 shots per Magazine, 7 Magazines in reserve (8 total). A Total potential damage of 17,920
Accuracy – Even more accurate than the Liberators, the Diligence is about as close to pinpoint as it gets without being a literal laser. It technically has bullet drop, but only at ranges beyond the render distance of any enemy you would reasonably be shooting at.
Handling – Recoil is very significant, making maximum fire rate very difficult to achieve without losing significant accuracy- primarily kicks to the sides but self corrects very quickly, making it easy to overcorrect when trying to fire as quickly as possible. Not much upwards kick. Tactical reload is 1.8 seconds, Full reload is 2.8 seconds. Drag time is the same as the liberators (sub-quarter second), but the passive sway while standing/moving is much higher, requiring standing still or stabilizing- especially when under fire.
Special Characteristics – Light Armor Penetrating (pen 2), Scope (25/testing/150), Semi Auto
Conclusion – I cannot avoid admitting Bias for this weapon, as I have always been a fan of the “DMR” style of weapon. But I cannot likewise avoid admitting its weaknesses. In theory, this weapon excels against any target with a light armor weak point; being a precision weapon.
In Practice, Helldivers is a very fast paced game and stopping to aim can be deadly- especially against the Bots, whose suppression effect can make aiming the weapon difficult or even impossible in some scenarios. In the right hands and under the right conditions, however, this weapon’s damage per shot makes it incredibly efficient at wiping out groups of small enemies (including devastators and even Hive Guard’s and Striders often difficult to hit frontal weak points). If you want the highest number of “kills per resupply”, look no further; in fact, you may find you never resupply at all, if you have the skill.
R-63CS Diligence Counter-Sniper – Helldivers Mobilize!
Damage, Fire Rate, & DPS – 128 Damage per shot, firing 5.83 Shots per second, for a total of 746.66 damage per second
Capacity – 15 Shots per Magazine, 5 Magazines in reserve (6 Total). A Total potential damage of 11,520
Accuracy – Much like its cousin, the Counter-Sniper is more or less pinpoint accurate. Like its cousin, its bullet drop is small enough to be ignored- though it is noticeably faster when shooting into the air. Likely this is because the scope goes out further, and thus the builtin hop up for the bullets is stronger.
Handling – This gun kicks like a mule, and is almost impossible to fire at full speed even at close ranges; unless you plan to knife fight with the barrel. Tactical reload is 1.8 seconds, Full reload is 2.8 seconds. Unlike its cousin, this gun handles like a brick. It takes roughly 2/3rds of a second for the gun to catch up from a full speed drag, even longer when scoped in (up to a second for the reticle to finally center), and its passive sway even when standing still is very distinct and tough to aim with. Stabilization is a must when using this weapon, and shooting it while under fire is extremely difficult.
Special Characteristics – Medium Armor Penetrating (Pen 3), Sniper Scope (50/100/200), Semi Auto
Conclusion – The Medium Armor penning variant of the standard diligence, the Counter Sniper takes what the diligence does and turns the dials towards the extremes. It hits harder, kicks harder, has a stronger scope, and pens better. But it also has more weight, meaning it drags worse, and the higher zoom on the scope actually makes it harder to deal with the current universal scope misalignment.
It also suffers from suppression, movement, etc. more severely, and is in general a very difficult weapon to use at close ranges. It also has fewer magazines and less ammunition per magazine, giving it significantly lower total potential damage and making it not a particularly ammo efficient weapon except in the most skilled of hands. Unlike the much harder hitting dominator, the Counter-Sniper isn’t particularly good at dealing with medium armor targets despite its pen. It is only “barely” medium penning, meaning that although it can kill devastators/striders/hive guards from the front, it takes many shots to do so and is often a waste of ammunition to try.
However, because of its higher damage and better pen, it is significantly better than the standard diligence at wiping out the more moderately light armored enemies such as nearly all the non-heavy terminids and all small bots (one tapping them to the chest, waist, and legs as well as the head). Additionally, unlike the dominator, its projectiles travel very quickly since they are bullets and not gyrojet rounds- making it much better at shooting moving targets and at extreme ranges, allowing it to far more easily strike the vital weak points on enemies like devastators or the very shifty hunters and stalkers. These things combined make the counter sniper an ideal weapon for engaging at extreme ranges, and in the hands of an extremely skilled player can become an absolute monster- especially into the bots, who have much less overall HP and can be efficiently plinked to death despite the CS’ lower potential damage.
Against terminids, their sheer numbers and raw HP will see this gun run out of ammunition very quickly- especially since terminids fight exclusively at the close ranges where this weapon’s poor handling becomes an extreme hindrance. I also have a very strong suspicion that when the Illuminate arrive, this weapon will be an absolute powerhouse against them- as they strike me as a very “long range” type of faction; though I could be wrong. Historically, the Illuminate are also mostly unarmored- meaning it is likely that this gun will be effective against nearly all of their forces, including the “heavier” ones.
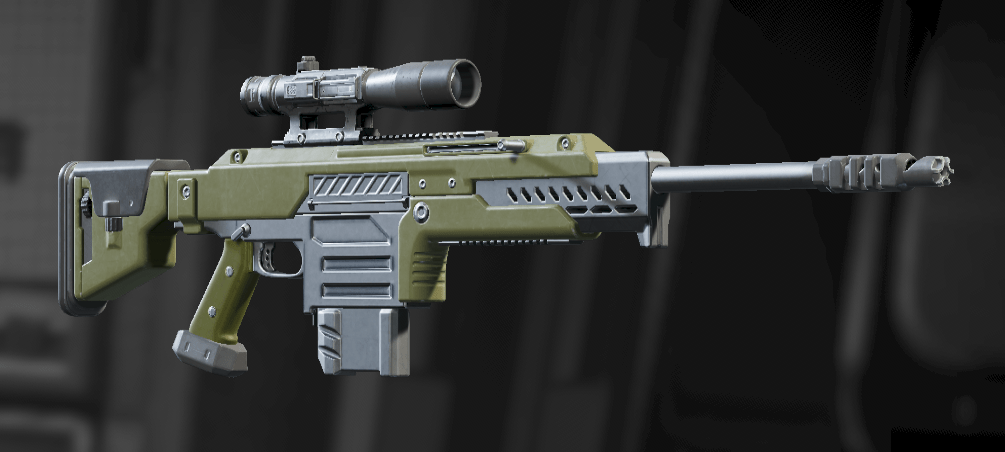
BR-14 Adjudicator

Damage, Fire Rate, & DPS – 80 Damage per shot, firing 9.16 shots per second, for a total of 733.33 damage per second
Capacity – 25 Shots per Magazine, 6 Magazines in reserve (7 total). A Total potential damage of 14,000
Accuracy – Mostly pinpoint at lower fire rates. Minor veer during Full Auto, but barely noticeable over the recoil.
Handling – Fairly lightweight weapon, ~.25 second drag recovery. Significant sway when standing, Severe sway when moving. Recoil is extremely harsh in any stance regardless of stabilization with dramatic amounts of horizontal pull to either side. If bursting your shots it will almost always alternate to which side it pulls between bursts, but when holding it will tend to stick to one side for about half the magazine (the last couple shots tend to end up more or less at the center). Tactical reload of 1.6 seconds, Full reload of 2.3 seconds.
Special Characteristics – Medium Armor Penetration (Pen 3), Scope (25/50/100), Full Auto/Semi.
Sub-Machine Guns
SMG-37 Defender – Helldivers Mobilize!
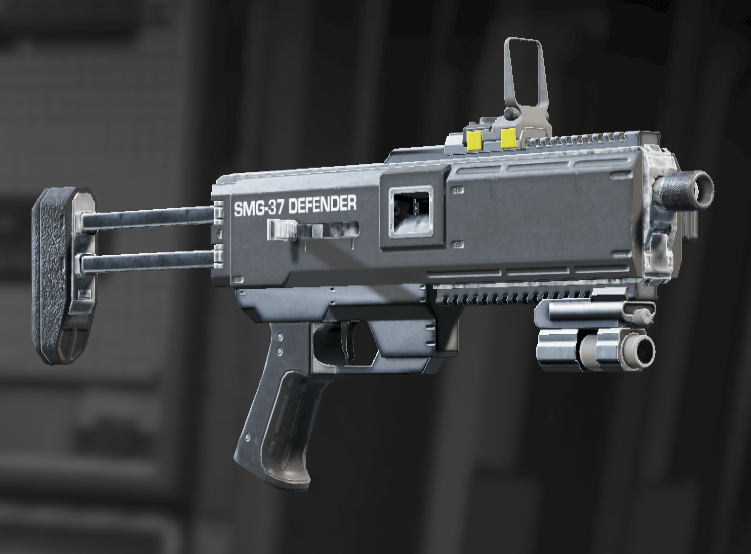
Damage, Fire Rate, & DPS – 70 Damage per shot, firing 8.66 shots per second, for a total of 606.66 damage per second.
Capacity – 45 rounds per Magazine, 7 Magazines in reserve (8 Total). A Total potential damage of 25,200
Accuracy – This weapon’s maximum effective range is about 30-35m. Beyond this, hitting small targets becomes very inconsistent, bullet drop exists but is fundamentally irrelevant for this gun.
Handling – Recoil is functionally non-existent and never needs to be accounted for. Tactical reload is 2 seconds, Full reload is 2.9 seconds. Handles like a tin can, basically weightless with close to 0 seconds of dragtime regardless of aiming status or movement. Has oddly significant amounts of sway, however, when standing or moving and when firing/being suppressed. A gust of wind could throw this thing 90 degrees to your left.
Special Characteristics – Light Armor Penetrating (Pen 2), One-Handed, Laser Sight, Full Auto/Semi
Conclusion – This weapon, despite its inaccuracy, sports one of the highest damage potentials in the game. Meaning that if the user plays fast and loose, and most importantly at close range, it can very easily mow down an extraordinarily large number of enemies before reloading or resupplying. Its reload is also very quick, minimizing downtime.
Furthermore, because it’s one handed, it can be fired while “running” (albeit very inaccurately) and while holding Objectives or the Ballistic Shield. Suffice to say that if you want to be the runner man who zooms around the place, or if you want to make use of the Ballistic shield or have to do a carry objective, this is the gun for you. I suggest making use of the Semi or Burst fire modes for efficient ammo control during most calm situations, switching to auto only if you have a truly large horde to mow through.
MP-98 Knight – Super Citizen Package (Pay Only)
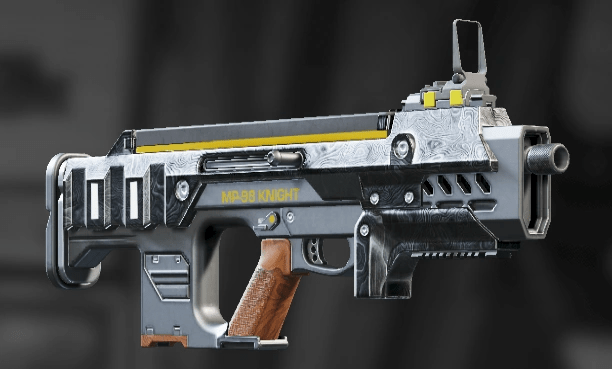
Damage, Fire Rate, & DPS – 50 Damage per shot, firing a staggering 23 shots per second, for a whopping total of 1150 damage per second
Capacity – 50 Shots per Magazine, 7 Magazines in reserve (8 Total). A Total potential damage of 20,000
Accuracy – Unfortunately I do not possess the Super Citizen package, and cannot test this gun’s accuracy. However, I cannot imagine it ever being more accurate than its heavier, slower firing (and already inaccurate) counterpart. Suffice to say that this weapon is almost certainly the definition of a bullet hose, do not use it past nearly point-blank range.
Handling – For similar reasons, I cannot collect any information regarding the Handling of this weapon. By word of user, its Tactical Reload is 1.5 seconds, Full reload 2.5 seconds. Very snappy and quick, just like the SMG-37
Special Characteristics – Light Armor Penetrating (Pen 2), One-Handed, Full Auto/Burst/Semi
Conclusion – Sporting the fourth highest damage per second in the game (or Second, if you consider that the Breaker and its Incendiary spread their damage out across multiple targets/the ground), this gun is tailor made to burn through health pools and spray into crowds. Thankfully it does have access to Semi and Burst fire modes, enabling its users to be at least somewhat judicious when necessary- although it has less damage per shot than the Liberator and probably poor accuracy, meaning it will likely never be a particularly flexible weapon.
Almost certainly ideal, however, for mowing down hordes of scavengers, warriors, pouncers, and hunters, as well as most humanoid bots (although Devastators will require spraying in the general vicinity of the face and praying for some lucky hits). It has a staggeringly high fire rate relative to its Magazine, meaning you will be reloading and running out of ammo quite often unless you make use of its Semi/Burst modes. Not an “efficient” weapon, probably. According to feedback from those who use it, it makes an excellent “PDW”/”oh shit” option, especially for builds reliant on support weapons, as a result of a very short reload and excellent ergonomics.
Shotguns
SG-8 Punisher – Helldivers Mobilize!
Damage, Fire Rate, & DPS – 405 Damage per Shot (Spread across 7 Pellets), firing 1.33 shots per second for a total of 540 damage per second.
Capacity – 16 Rounds in Magazine, 60 Rounds in Reserve (76 Rounds in Total). A Total damage potential of 30,780
Accuracy – 15m is roundabouts where the punisher’s pellet spread can whiff scavengers (although not guaranteed, of course). If you are concerned with bullet drop with this gun you are probably wasting your ammunition.
Handling – Its slow fire rate means that recoil self corrects before you can fire again, making it functionally recoilless. It takes about .5 seconds to reload per shell, with roughly a .25 second “startup” when tactical reloading and a full 1 second startup when reloading from empty. Its sway is very minor, almost non-existent; also not much of an issue due to the fire rate.
Special Characteristics – Light Armor Penetrating (Pen 2), Rounds Reload, Light Stagger, Pump Action
Conclusion – The Punisher has one of the highest damage potentials in the entire game, second only to the Breaker variants and infinite ammo Laser weapons. Furthermore, since it reloads rounds one at a time, it never wastes ammo meaning you are very likely to actually see that much damage come out of the gun. Although it is slow-firing and inaccurate, its ability to spread its high damage across a crowd and apply significant stagger makes it excellent for sweeping groups of smaller targets; especially small bots. In any case, it’s a decent if not particularly flexible weapon capable of dishing out surprisingly high amounts of damage.
Best paired with a precision weapon such as a machine gun or a laser to “finish off” weakened enemies without wasting an entire shell. Its primary drawback is that due to pellet spread and slow fire rate, its overall damage output is fairly low; especially against health sponge enemies like Bile Spewers and Brood Commanders, or into the backs of Hulks. It also has only Light armor pen, so many types of enemies are virtually immune to the weapon unless you can flank them (as you cannot rely on pellet spread to reliably slap weak points).
SG-8S Slugger – Helldivers Mobilize!
Damage, Fire Rate, & DPS – 250 Damage per shot (as a Slug), firing 1.33 shots per second, for a total of 332.5 damage per second.
Capacity – 16 Rounds in Magazine, 60 Rounds in reserve (76 Rounds total). A Total potential damage of 19,000
Accuracy – Close to Pinpoint, at ranges where horizontal deviation is significant the drop is enough to make the shot almost impossible anyways. The drop of this weapon is very significant, even at relatively close ranges (Becomes noticeable at ~40 meters). It has no scope, so long ranged shots are particularly difficult.
Handling – Recoil and Sway are, like its counterpart, irrelevant due to the slow fire rate making between shot adjustments easy. Reload speed is a staggeringly fast .4 seconds per shell, with a .2 second startup when tactical reloading, and a .6 second startup when Full reloading. Has a very minor amount of drag, but not really enough to be significant within its effective ranges.
Special Characteristics – Medium Armor Penetration (Pen 3), Rounds Reload, Stagger, Pump Action
Conclusion – This weapon used to have the strongest stagger in the game, though it is now outclassed by the Concussive due to recent nerfs. Nevertheless its stagger is still very significant and, when paired with its Medium armor pen, makes it a very effective choice against medium sized targets. Unfortunately, with the buff to the Dominator’s damage, it is here too outclassed. In essence, it is a weaker Dominator with bullet drop, doing just barely over a quarter the overall damage per second in trade for only a somewhat strong stagger.
Much like the Concussive, its only true use is in crowd control but unlike the Concussive its fire rate is so slow it can only reasonably stun one or two targets at a time. Not entirely unusable, but not particularly effective compared to other options. Its single advantage over the Dominator is that due to reloading rounds one at a time, it never wastes ammunition and thus has near perfect ammo efficiency; something that the Dominator does struggle with due to its thin reserves.
However, the Dominator’s total potential damage is nearly double that of the Slugger, so even with wasted shots it tends to win out- not to mention that the Dominator’s Explosive typing also doubles its output when hitting weak points, something the Slugger does not benefit from. In my opinion, the Slugger nerfs were unjustified- as it is more or less outclassed by the Dominator in every respect; even its .3 second reload is per shell, which makes its overall time spent reloading much longer than the Dominator per shot fired. Only its stagger is on-par, and much like the Concussive, that is not enough to justify its use in most cases. Just kill the target.
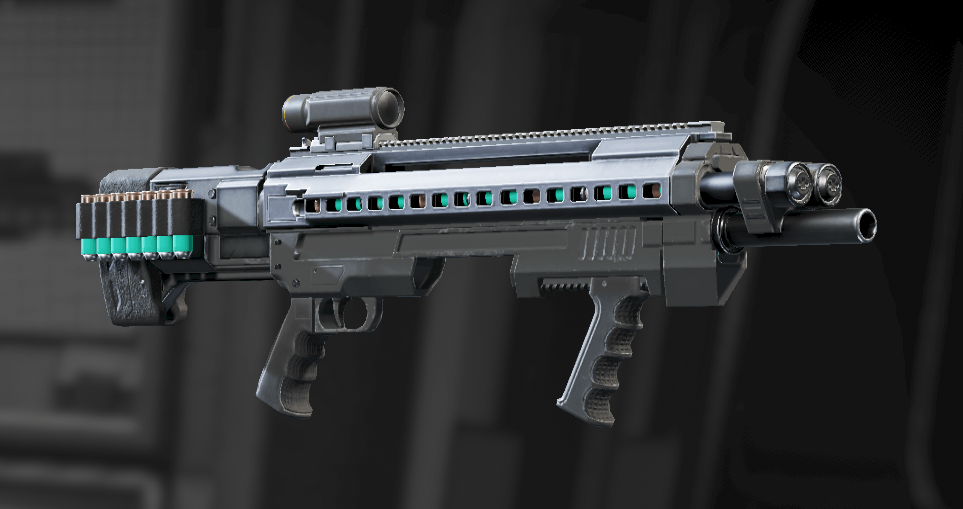
SG-225 Breaker – Helldivers Mobilize!
Damage, Fire Rate, & DPS – 330 Damage (Spread across 8 pellets), firing 5 shots per second, for a massive total of 1650 damage per second
Capacity – 13 Shots per Magazine, 6 Magazines in reserve (7 Total). A Total potential damage of 30,030
Accuracy – Although the accuracy is slightly lower than the Punisher, it has 1 extra Pellet, meaning it can reliably hit scavengers at least once at up to 15ish meters just like the Punisher; although it certainly won’t kill them without some luck.
Handling – Recoil is somewhat significant, but not too difficult to adjust for during continuous fire. Lateral drift exists, but it’s a shotgun so who cares. Has similar sway to the other shotguns, but the near non-existent drag of the SMGs. Tactical reload is 1.8 seconds, Full reload is 2.6 seconds
Special Characteristics – Light Armor Penetrating (Pen 2), Full Auto/Semi
Conclusion – Sporting the absolute highest raw Damage per Second of all Primary weapons in the game, the use case for the SG-225 Breaker is as clear as crystal. Mow down hordes of enemies, or absolutely blast an exposed weak point at pointblank range, and kill something or multiple somethings as quickly as democratically possible.
However this power is not without a price. Its magazine capacity is small, and magazines few- and since it doesn’t pen armor, it struggles to deal with armored surfaces like Hive Guards, Brood Commanders, Bile Spewers, and of course Devastators/Striders. It will chew through ammo faster than a wood chipper can mulch a 2×4, but I’ll be damned if it doesn’t get results. If you can sustain the ammo drain, and keep your targets within the weapon’s effective range, then it will serve you well in most scenarios. Just make sure to bring something a bit heavier for the larger targets.
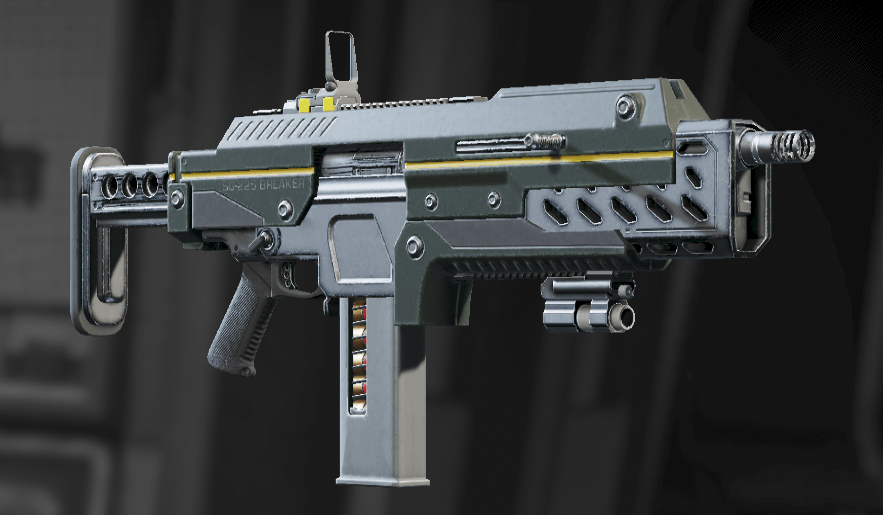
SG-225SP Breaker SPRAY & PRAY – Helldivers Mobilize!
Damage, Fire Rate, & DPS – 192 damage per shot (Spread across 16 pellets), firing 5.5 shots per second, for a total of 1056 damage per second
Capacity – 26 Shots per Magazine, 8 Magazines in reserve (9 Total). A Total potential damage of 44,928
Accuracy – The Spray & Pray will start whiffing scavengers at around 25 meters despite having worse spread than the normal breaker thanks to the heightened pellet count. That said, given the sheer bulk of pellets it can throw in a short period, missing a scavenger once out of several shots isn’t going to make much of a difference. Accuracy by Volume at its finest.
Handling – Recoil is very high, but due to the fire rate and spread also almost entirely irrelevant. Very heavy sway and half second drag, similar to the Counter-Sniper, but it’s also a drum mag auto shotty so it doesn’t really suffer for it. Tactical reload is 2.2 seconds, Full reload is 3.1 seconds.
Special Characteristics – Light Armor Penetration (Pen 2), Full Auto/Semi
Conclusion – The S&Ps use case is fairly limited. Being an exaggerated version of the standard breaker, it forsakes raw potential DPS for, funnily enough, reliability in the form of damage by volume and additional ammo. It has the highest “raw” potential damage of all Primary weapons (rivaled only by the Incendiary due to the burn effect and of course infinite ammo weapons), but due to its accuracy you will almost never see it. It excels at knife-fighting range, making it an excellent choice for sweeping hordes of bugs, but near suicidal for dealing with bots.
Oddly, it can kill berserkers fairly fast and is a good choice as a backup if a pack of them is bearing down on you; I believe this is because the berserker’s “spine” (visible through its chest at the waist area) is almost totally unarmored. And since they travel in dense packs, the gun’s low accuracy is mitigated in that situation. For similar reasons it’s very good against Warriors and also Shriekers thanks, ironically, to its wide pellet spread. It’s very proficient at killing bugs, and though in the long term the incendiary is better at this role, the S&P is very good at rapidly bursting down large groups of small bugs; very helpful in preventing breaches.
Historically, the Illuminate are extraordinarily light armored, replacing it with a shield that must be “popped” before they can be killed- if this holds true in Helldivers 2, then when the Illuminate arrive the Spray and Pray will be a merciless squid mulcher.
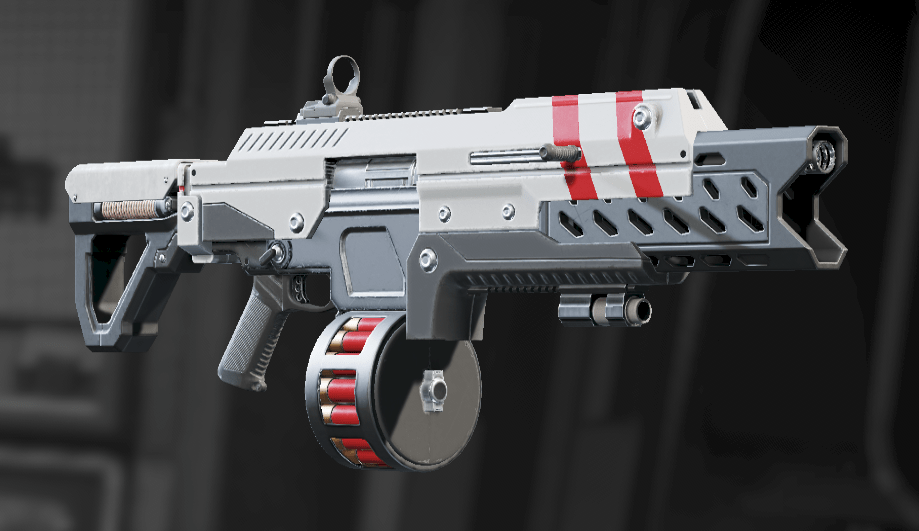
SG-225IE Breaker Incendiary – Steeled Veterans
Damage, Fire Rate, & DPS – 240 Damage per shot (spread across 12 Pellets), firing 5 shots per second, for a total of 1200 Damage per second
Capacity – 25 Shots per Magazine, 6 Magazines in reserve (7 Total). A Total potential damage of 42,000, plus its Incendiary effect likely doubling or tripling that value if you fire judiciously.
Accuracy – Despite the wide spread of its pellets, the Incendiary can accurately hit Scavengers at up to 30 meters likely due to the number of Pellets and the literal size of its Projectiles being larger. It also sports remarkably pronounced pellet drop due to the extremely low projectile velocity, noticeable even as close as 15 meters. But much like the S&P, it achieves accuracy by volume thanks to its incredible magazine capacity.
Handling – Recoil is close to non-existent, with only a small amount of upwards kick that can be drug down during firing if needed. Sway is nearly non-existent as well as drag, similar to the original breaker. Tactical reload is 1.9 seconds, Full reload is 2.6 seconds
Special Characteristics – Light Armor Penetrating (Pen 2), Incendiary, Burst/Semi
Conclusion – Did you know? Bug Repellant is highly flammable, a fact that the good boys down in R&D have made prolific use of in this particular gun. The Breaker Incendiary was not designed, but rather born to kill bugs. It has wide spread, large projectiles, incredible magazine capacity and very decent damage per pellet. Add onto that the fire DoT to every target struck, and it can do shockingly high damage to even the largest bugs (although Titans, Chargers, and Spewers will take quite a while to burn to death- do so only if you have little recourse).
Thanks to the pellets being on fire, it is very easy to predict the trajectory and spread of its shots and keep a horde of bugs trailing behind you on fire and dying for a very long period. In other words, it’s good at Kiting too. When it comes to bug stomping, the Incendiary does it all! Against the bots it’s sort of alright. Being “on fire” doubles as a “stun” for small bots and devastators, which makes it a potent source of control. But they don’t take a ton of damage from fire, and only 20 damage per pellet with light pen means it won’t kill particularly quickly. Even so, it’s not a half bad choice.
Explosive
Note for Explosive weapons; before a recent update, we only saw in-game the direct hit damage for weapons with explosive radii. Now we see the sum of both the direct hit and explosion, however this happened before the release of Democratic Detonation, which means we may never know the actual direct hit damage of any of those weapons- just the sum of their direct and explosion damage.
JAR-5 Dominator – Steeled Veterans

Damage, Fire Rate, & DPS – 300 Damage per shot, firing 4.16 shots per second, for an incredible total of 1250 damage per second.
Capacity – 15 Shots per Magazine, 6 Magazines in reserve (7 Total). A Total potential damage of 31,500
Accuracy – Pinpoint accuracy, but noticeable drop past 40m. Account for the drop, and its range is very good.
Handling – Kicks like a mule, with a very distinct drag to the left during continuous firing. Fairly light drag delay of roughly .4 seconds when scoped, even less out of scope, and remarkably little passive and active sway; the weapon’s extreme weight makes it very natively stable except during firing. Tactical reload is 2.5 seconds, Full reload is 3.5 seconds. As a special note, this weapon’s rounds are particularly slow due to being jet-propelled; meaning that even at short ranges you need to “lead” your target slightly, and at long ranges you need to lead a lot. Its sight is a low magnification red dot, so close ranges are clearly the intended bracket.
Special Characteristics – Medium Armor Penetrating (Pen 3), Stagger, Semi Auto
Conclusion – The highest single-target damage output of all Primary weapons, and Medium Penning to boot, and it’s clear to see that the Dominator’s use case is big targets. It kills just about everything as long as your shots are placed well, and even has a distinctly high damage potential. Its only weakness is how badly it is affected by Bot suppression and movement sway, and the relatively slow travel time of its projectiles making moving targets challenging to shoot. It does deal 300 damage with each shot, and only has a grand total of 105 shots, so it tends to “overkill” small enemies fairly often.
That said, I have noticed it killing multiple scavengers/pouncers/hunters in one shot- though I cannot discern exactly why. My current theory is that it either still has a small explosive AoE despite the tag being removed, or it has some kind of “overpen” effect letting it hit multiple targets. In any case, it is a bit of a waste of ammo to try and kill hordes with it- save it for the high health armored targets like Spewers and Guards, and Devastators and Striders.
Thanks to its Explosive damage type and Medium armor penetration, it has incredible damage when hitting weak points- and thus is very proficient at murdering large enemies. It already has the highest single-target DPS base of all primaries, multiplied by 2 on weak points due to being explosive, and probably more than that thanks to its penetration. In other words, this thing murders large terminids with ease.
R-36 Eruptor
Damage, Fire Rate, & DPS – 230 Damage per shot, followed by a 150 damage Explosion in a 7 meters falloff, firing .416 shots per second, for a total of 158.33 damage per second (or more via AoE)
Capacity – 5 Shots per Magazine, 12 Magazines in reserve (13 total). A Total potential damage of 24,700 (likely more due to aoe).
Accuracy – Pinpoint accurate with somewhat significant bullet drop (reaches the bottom of the central reticle at roughly 150m when on 200m zoom).
Handling – Very heavy weapon with a full second of drag recovery. Due to weight, standing and moving sway is very minor and adds almost no difficulty to shooting. Recoil is harsh, but due to bolt-action nature is largely irrelevant. Range is hardcapped at 150m as the projectile travels for only 1 second before detonating and travels approx 150 meters per second.
Special Characteristics – Explosive, Medium Armor Penetration (Pen 3), Massive Stagger, Sniper Scope (50/100/200), Bolt-Action
Energy Weapons
ARC-12 Blitzer – Cutting Edge
Damage, Fire Rate, & DPS – 250 Damage per Bolt (Fires 3 “Bolts”), firing once every 2 seconds, for a total of 125 damage per second on a single target, or 375 on up to 3.
Capacity – Infinite, 2 second recharge
Accuracy – The single most inconsistent weapon in the entire game. The maximum range is short, the targeting is wildly unpredictable. Aiming tightens the “arc” it uses to target (and the effect is more pronounced in first person than in third), but in any case it is very difficult to get this gun to behave. Furthermore, although it fires 3 Bolts, sometimes the bolts can hit more than 1 target, or all go to a nearby rock instead.
Handling – The handling of this weapon is largely irrelevant due to its nature as an auto-targeting gun, just note it’s about 2 seconds between shots and it takes just shy of a second to swap between weapons so the time gap for firing “in between” shots of the blitzer is very very narrow.
Special Characteristics – Arc, Recharge, Medium Armor Penetrating (Pen 3)
Conclusion – It is very tough to think of this weapon’s use cases. In theory it is a short range gun that spreads damage over a wide area and applies a decent amount of stun. But the inconsistency in its targeting often neuters it such that it hardly even accomplishes that. It can hit weak points, but only if you have a height advantage relative to the target and thus place its “head” in between you and its centermass. If this weapon were consistent, it would be a very decent weapon for crowd clearing- as it would basically just be a Slugger that hits multiple targets at the cost of having a dramatically slower fire rate and severely limited range.
But as it stands, this gun is often considered the worst gun in the entire game due to its absolute unpredictability. Its greatest strength is that you do not have to hold it while it recharges and aiming isn’t necessary, meaning it’s actually a good kiting tool. Shoot, swap to something else, swap back and shoot again, repeat. Ducking in and out of cover loses you no damage, making it good into bots, though it struggles with range; and of course the entire strategy with bugs is to kite.
SG-8P Punisher Plasma – Cutting Edge
Damage, Fire Rate, & DPS – 100 Damage per shot, followed by a 150 damage explosion in a 2 meter falloff. Fires 1.33 shots per second, for a single target damage per second of 332.5, or less if groundfiring
Capacity – 8 Shots per magazine, 12 Magazines in reserve (13 Total). Total potential damage of 26,000 (or more, when hitting multiple targets)
Accuracy – Although it suffers no sway and basically no recoil due to its fire rate, its projectiles “lob” like grenades and are very difficult to aim even at relatively close ranges due to having to tilt the camera up so high and having no reticle or assistance whatsoever. It is an extraordinarily difficult gun to aim with. Something its 2-meter radius is supposed to make up for. However, do not be fooled by the visual effect, although it visually increases in size the further the lob travels, in reality the AoE is always a 2 meter radius and not a hair larger. In other words, hitting with this gun comes with a very significant skill curve.
Handling – Recoil is harsh, and does need to be accounted for somewhat if you want to land consecutive shots in the same spot. Sway doesn’t really affect it, nor does it have much drag, but it is extremely susceptible to suppression, aimpunch, etc. and seems to have a weird bug/glitch/phenomenon where it will sometimes “lock” onto objects and fire your shot at strange angles that don’t match up to where you are aiming (especially bad for the big, clunky, and usually client-sided corpses of Titans and Dropships). Tactical reload is 2.5 seconds, as is the Full reload.
Special Characteristics – Light Armor Penetrating (Pen 2, same as most other light pen weapons despite in-game not listing it), Explosive, Massive Stagger, Pump Action
Conclusion – The Plasma Punisher is a very powerful Anti-Big Bug tool. While the Breaker Incendiary is very good at lighting entire hordes of bugs on fire, and can accomplish dazzling killrates in most scenarios, it does oftentimes take awhile to burn through the larger bugs such as Brood Commanders and Spewers. The Plasma Punisher, although not quite as good as the breaker at killing small bugs due to their small size and mobility causing them to often be too spread out to make use of the AoE, is very proficient at rapidly baleeting Spewers and Brood Commanders, and even Chargers (currently the only primary capable of doing so efficiently- IE in less than 30 or so seconds, though sometimes it can take more than 1 clip if your aim is off).
This is due to multiple factors which compensate for this weapon’s otherwise piss-poor damage output and fire rate. First, being an explosive weapon, its damage against both weak points and “hardened flesh” (the “squishy” part of bugs like the spewer/charger) is dramatically boosted. Secondly, the really large bugs like spewers and chargers and brood commanders tend to walk “over” smaller bugs, and about as shoulder to shoulder as it gets with the larger bugs. As a result it is very easy, especially on higher difficulties where 3-10 of these large bugs can spawn at a time, to hit 2, 3, or sometimes 4 of these bugs at once. It takes only 3 direct shots to a Spewer’s butt to kill it, and about 5-6 when groundfiring only or hitting its armored head/top.
Brood Commander heads pop in about 3-4 hits, but if you directly hit the legs they’ll die at around the same count. All the while any smaller bugs clipping through or around these larger ones will typically die from the AoE. For Chargers, you want to aim more or less directly for their underside between their legs. It’s a tough shot, too high and the shot goes too far behind the charger to AoE the butt (or hits it with the cruddy falloff radius), too close and it will only hit the light armor underside and not the hardened flesh butt, doing not as much damage. Testing on bugged chargers standing still on pebbles or enjoying a local shrubbery shows that with perfectly placed shots it takes only four to kill.
That is staggering for a primary weapon, and nailing the shot also applies a stagger equivalent in strength to the Arc Thrower and Concussive, meaning it will dramatically slow a charger’s roll (i’ve even seen it glitch and cause chargers to almost freeze in place). Though it only gets 105 shots, this specific use for the gun is surprisingly efficient; though trying to use it to clear out smaller bugs is a chore and certainly nothing compared to other much quicker weapons- it gets the job done. If you want to destroy hordes of Spewers or stunlock Commanders to death in 3-4 seconds, this is the gun to do it with. Against bots, however, this gun is markedly worse.
It cannot kill hulks from the front except by the Grace of God, as their back is slightly too high to get scratched with an “under” shot, and nailing the literal pixel thin line at the top of the hulk is impractical to an extreme. Devastators and Berserkers get stunlocked by the weapon, but it can take upwards of an entire clip to kill some of them due to the falloff radius, and getting shot at or hit while firing can throw off your aim and “break” the stunlock, followed immediately by death from devastator return fire- this is a precision weapon, and it does not deal well with being shot at. If you can find cover to abuse, it becomes much safer, but lobbing shots over cover is much more difficult.
It does, however, one-tap striders on a direct hit (unlike the scorcher which needs a hit on the side plate for one-tap, and is two-tap otherwise); it also fires much slower than the scorcher, and accuracy can make efficiently clearing groups of bots very difficult. The scorcher will burn through ammo more quickly, but it will typically get the job done much faster even when heavily abusing the PP’s AoE on very dense bot drops.
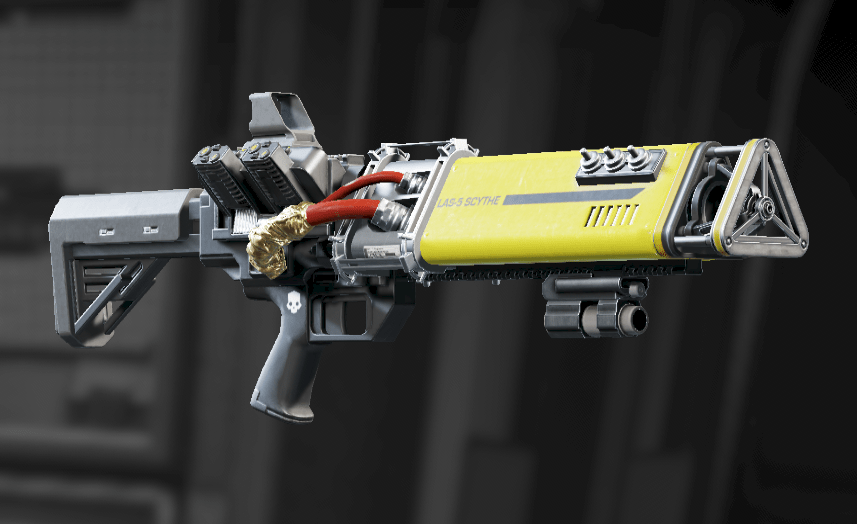
LAS-5 Scythe – Helldivers Mobilize!
Damage, Fire Rate, & DPS – This weapon deals a flat 300 damage per second, spread evenly over time (Closest guess I can make is roughly 30 every .1 seconds)
Capacity – Maximum firing time of 8 seconds (before environmental adjustments), and cools at about 8.33% per second. Carries 6 spare heatsinks. Infinite potential damage
Accuracy – It’s a laser beam. It’s as accurate as it gets. No drop, infinite range.
Handling – No recoil with a ~.3 second spool-up. Very light sway during firing, none when stabilized. Due to damage being reliant on a continuous beam, any amount of suppression or aimpunch from getting hit can cost significant amounts of your already lackluster damage output. Similar “weight” of drag to the Liberator. Reloading the heatsink takes only a single second.
Special Characteristics – Light Armor Penetrating (Pen 2), Beam, Heat
Conclusion – The Scythe is a strange weapon. On paper it has the second lowest damage per second of every single primary weapon. Yet despite this, it actually kills enemies decently quickly. Not as fast as most other weapons, but certainly not so poorly as a mere 300 damage per second would lead one to believe. That said, enemies with very high health pools will laugh as this laser pointer tickles them, so don’t bother pointing it at anything that isn’t a headshot on bots or a small bug/warrior. Although it has “infinite” ammo, do keep in mind that they give you a bunch of heatsinks for a reason.
Burn out if you need that extra bit of Damage to keep the horde at bay, or to “instantly” cool down the weapon for another 8 seconds of beaming- the reload time is close to instant, so downtime is minimal. Its greatest strength is the perfect accuracy, so if what you want to kill has a weakpoint make sure you’re hitting it. As a note, do not “feather fire” the gun as we did in the First game- it has a brief “spool up” period during which it does still generate heat; so it’s a waste of time. You can “burst” your shots, but make sure there’s enough time between bursts to cool some heat off.
LAS-16 Sickle – Cutting Edge
Damage, Fire Rate, & DPS – 55 damage per shot, firing 12.5 shots per second, for a total of 687.5 damage per second
Capacity – Maximum firing time of 9 seconds before environmental modifiers, and cools at about [[still testing]]% per second. Carries [[still testing]] spare heatsinks. Infinite potential damage
Accuracy – Despite being a laser weapon, the Sickle has the most inconsistent accuracy of all the non-shotgun weapons. It appears to adhere to a pseudo-random spray pattern which alternates between pinpoint shots with close to perfect accuracy and wildly inaccurate shots that veer in random directions. It is far more noticeable when firing continuously, but only firing in short bursts does not seem to “reset” this pattern or the recoil- the first shots are just as likely to be pinpoint as they are to go wildly in different directions.
The “Wild” shots will whiff bot heads as close as 25 meters; whereas the pinpoint ones can go as far as 75 before even they start to veer. It feels like it has a cone that it randomly picks points on to determine where the shots go, favoring the inner portions slightly more. The net effect is that it is very difficult to get this gun to actually hit its targets, something it does thankfully make up for with its second-highest fire rate of all primaries (likely the reason why it “feels” so accurate despite objectively not being so)
Handling – Due to being a laser, the Sickle has virtually no recoil; its inaccuracy stems solely from the above spray pattern. Much like its Scythe counterpart, it has a .3 second spool-up and very light amounts of sway when standing/moving, but since it is not a continuous weapon and also sprays wildly anyways, it isn’t particularly susceptible to Suppression and also shares the relatively light drag. Reloading the heatsink takes only a single second.
Special Characteristics – Light Armor Penetrating (Pen 2), Heat, Full Auto
Conclusion – This gun is very much in the same category of weapon as the standard Liberator. Its damage per second is higher due to its fire rate, and it technically never runs out of ammo as long as you let it cooldown, but in exchange it loses an extremely significant amount of accuracy making it not very effective into targets which require precision (such as Devastators, Striders, and Hive Guards). Furthermore, if you want to fire continuously over a long period (such as during a very large/long winded breach or bot drop) you have to overheat the gun and then reload the Heat Sink, which it only has a limited number of.
Although its “total” continuous firing time is longer than the Liberator’s, at 56 seconds compared to the Liberator’s 34, meaning it theoretically has far more staying power than the liberator on top of its damage. Frankly it is slightly overtuned, as its only real drawback compared to the Liberator is the general lack of accuracy- which only matters into a very small number of enemies and which its theoretically infinite ammo and high fire rate easily mitigates via accuracy by volume. You will only struggle with it when fighting extremely protracted engagements against very large numbers of enemies, where a Liberator with a very accurate and judicious shooter could make their ammo go much further than a Sickle firing wildly. Or when fighting very long range engagements- for some reason.
Plas-1 Scorcher – Helldivers Mobilize!
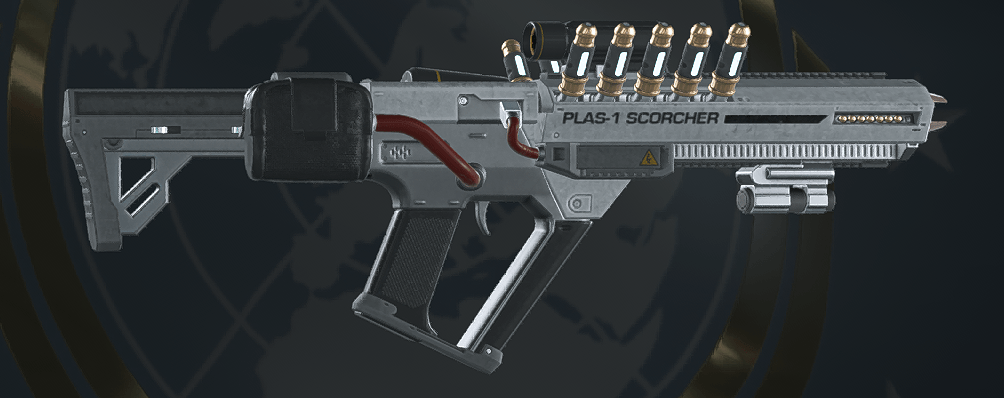
Damage, Fire Rate, & DPS – 100 Damage per shot, followed by 100 damage explosion in 1 meter falloff. Fires 4.16 shots per second, for single target damage per second of 833.33 or less if groundfiring.
Capacity – 15 Shots per Magazine, 6 Magazines in reserve (7 total). A Total potential damage of 21,000, possibly more if hitting multiple targets or less if groundfiring.
Accuracy – Pinpoint at all ranges, zero noticeable dropoff.
Handling – Due to me not yet owning this gun, I have only what information I can gather from watching gameplay of it- which means it is very difficult for me to “feel out” its handling characteristics. From videos, it appears to be somewhat similar to the Dominator in terms of its almost non-existent sway, but also sports the non-existent recoil of the SMG-37. Tactical reload is 2.6 seconds, as is the Full reload.
Special Characteristics – Light Armor Penetrating (Pen 2 on AoE, direct unknown), Explosive, Semi Auto
Conclusion – Considered widely to be the single most powerful anti-bot weapon in the game, and for good reason. Unlike the Punisher Plasma, which suffers from accuracy issues and a slow fire rate on top of a lack of armor pen, the Scorcher is pinpoint accurate with a fast projectile and a decent fire rate. Sure its explosive radius is so small that it won’t really hit multiple targets except in strenuous circumstances, but thanks to the pinpoint accuracy you can always guarantee that a weak spot is within the radius- allowing its light armor penning damage to enjoy a dramatic boost and thus often one-tapping most targets.
This same property also allows it to kill Striders from the front with one shot as long as you slap it in the side plate or the bottom of the waist- and it’s a two shot otherwise, still incredibly fast thanks to its fire rate. The Scorcher’s only true drawback is its relatively low ammo reserves resulting in many wasted shots when tactical reloading. Like the Punisher Plasma, it only has 105 shots- but unlike the punisher you can more or less guarantee that nearly every single shot is a kill on small targets, or every 2-3 a kill on the less numerous medium sized ones (though devastators can take much more if you are relying solely on the AoE).
As a result, it is one of the most efficient weapons in the game for killing bots; accept no substitute. For bugs, it is (apparently) somewhat decent thanks to its Explosive trait lending it a massive damage boost against both weak points and the squishy butts of Spewers and Chargers (and probably Titans). This, all in all, makes it a premier anti-armor weapon, though only because it easily circumvents armor on enemies with weak points.
Secondary Weapons
*Note on Handling; Similar to primary weapons, all secondaries have roughly the same swap speed, clocking at about .3 seconds
*Note, at time of Testing the Automatons had been defeated. Therefore Automaton based information is currently unavailable
Pistols
P-2 Peacemaker – Starter Gun
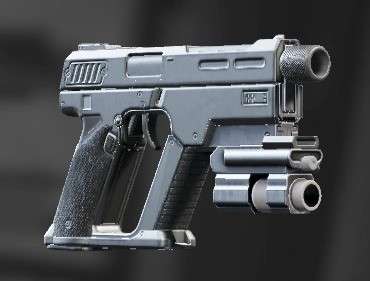
Damage, Fire Rate, & DPS – 60 Damage per shot, fire up to 15 shots per second (Semi-Auto only), for a total maximum damage per second of 900
Capacity – 15 Rounds per Magazine, 5 Magazines in reserve (6 total). Total potential damage of 5400
Accuracy – Pinpoint with zero noticeable divergence. Drop difficult to determine due to bad ADS
Handling – Stated recoil of 21 is incorrect. True recoil is almost non-existent, at least when ADS (minimal climb, almost no spread divergence). Passive and active sway exists but is minimal except when running. Drag is as close to 0 as it gets. Tactical reload is 1.3 seconds, Full reload is 1.8 seconds
Special Characteristics – Light Armor Penetrating (Pen 2), One Handed, Laser Sight, Semi Auto
Conclusion – The use cases for the Peacemaker are close to non-existent. The single only advantage it has over its contemporary, the redeemer, is that when firing quickly in semi-auto it does not suffer a ramp-up in its spread, making it generally more accurate in general use. However, it has nearly half the total ammo capacity, cannot ever make full use of its DPS unless you use an auto-clicker, and for some reason has worse penetration than the Redeemer on most targets (it onetaps scavengers unless you deflect on them, where the redeemer needs to headshot their tiny heads for onetap; but all other targets, especially those with harsher light armor like Brood Commander heads, the redeemer takes significantly fewer shots).
The better accuracy on the peacemaker does not even come close to making up for the sheer damage potential on the redeemer, especially given that the redeemer has nearly double the total ammunition (including when picking up ammo, gaining two of its 31 size magazines where the peacemaker only gets 2 of its 15 size magazines). Unfortunately, the P-2 Peacemaker is more or less obsolete.
P-19 Redeemer – Helldivers Mobilize!
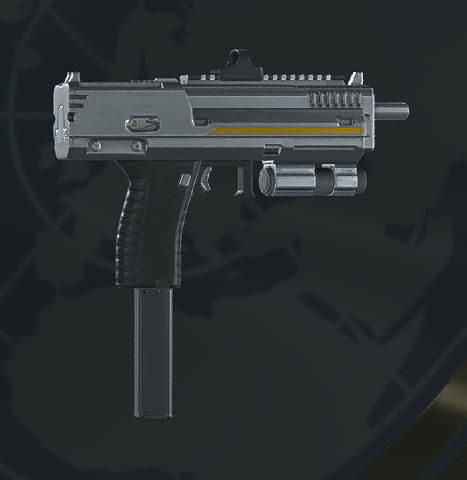
Damage, Fire Rate, & DPS – 60 Damage per shot, firing 18.33 shots per second, for a total of 1100 damage per second
Capacity – 31 Rounds per Magazine, 4 Magazines in reserve (5 Total). A Total potential damage of 9,300
Accuracy – Pinpoint on first shot, subsequent shots will increasingly worsen until the 4th, where the distance at which it can start whiffing scavengers is 40m.
Handling – Sway is very bad when moving and firing, especially if not “aiming”. Recoil doesn’t kick in semi, but kicks hard straight up in Full-auto. Drop is noticeable only around 60+ meters. Tactical reload is 1.3 seconds, Full reload is 2.1 seconds. Drag is similar to Peacemaker.
Special Characteristics – Light Armor Penetrating (Pen 2), One Handed, Full Auto/Burst/Semi
Conclusion – An extremely powerful and potent secondary weapon. Sporting an extraordinary fire rate with very high damage and seemingly upper-level light armor penetration, the Redeemer is an excellent “Oh Shit” option for dealing with encroaching berserkers or other walls of HP (such as hordes of broodguards, warriors, or even very dense formations of scavengers/hunters). It can even decently melt Stalkers, if you can land your headshots with a significant portion of the clip.
Its only downsides are the incredibly powerful recoil, which affects the fundamental spread of the shots in addition to harshly kicking upwards, and the double-edged sword of its extraordinary fire rate and relatively small magazine & reserves. It does have a semi-auto option, however, when accuracy is needed; though unless you afford about a second between shots, it will still suffer the spread penalty on subsequent firings. All-around powerful secondary weapon option.
P-4 Senator – Steeled Veterans
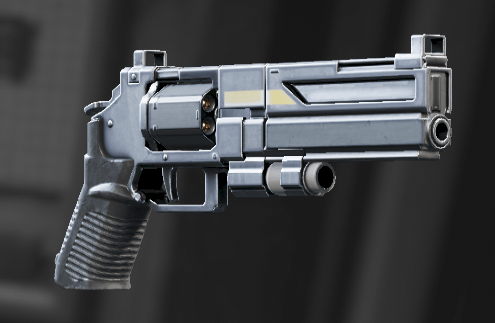
Damage, Fire Rate, & DPS – 150 damage per round, firing 3.33 rounds per second (Semi-Auto only, good luck reaching that), for a total of 500 damage per second.
Capacity – 6 Rounds in cylinder, 40 Rounds in reserve (46 Rounds total). Total potential damage of 6,900
Accuracy – Mostly pinpoint, continuous fire can result in one or two stray shots but minimal time is needed to “Reset” spread. Drop becomes noticeable around 150 meters.
Handling – Recoil is somewhat harsh, but the total amount of kickup in ADS is minimal, much more significant when in third person. Sway is very bad when moving, especially during firing. Accurate gun, but requires finagling with the crosshair. Drag is minimal, thankfully, so the gun is snappy. Reload has a roughly 1.2 second startup, and then takes .8 seconds per round to reload (so 2 seconds at 1 round, and 6 for a full reload).
Special Characteristics – Medium Armor Penetration (Pen 3), One Handed, Rounds Reload, Semi Auto
Conclusion – The Senator is a high performance weapon with a single crippling drawback. It deals incredible amounts of damage for a secondary, one-tapping most targets and dealing with even medium-armored targets in typically 2-3 shots (into Bots, a headshot is more or less always a kill; except on Berserkers due to their insane HP pool).
However, its reload is atrociously slow. 2 seconds even when reloading 1 round, and 6 when reloading the full cylinder. The unfortunate truth is that you will spend more time reloading this weapon than using it by a very wide margin, and as a result is a very very poor choice of “Oh shit” weapon. You take this gun as a niche pick into specifically high health medium armor targets such as Brood Commanders/Spewers and Devs/Berserkers, to round out a build lacking in raw firepower.
The cost is that you essentially do not have a secondary gun, so if a hunter jumps you and your main weapon needs to reload, you may well be screwed or may end up in a death spiral of panic reloading this gun just to survive- don’t do that. If this gun runs out of shots, don’t reload it until you have the time to sit and wait out the full 6 seconds; spending 2 seconds for one bullet is never worth it- swap to your primary and spend the 2 or 2.5 seconds reloading its entire clip instead.
That said, if the cumbersome reload is something you can manage, the reward is a very convenient and powerful answer to every medium-armor target in the game- and berserkers. Just try not to waste your shots firing from the hip, this may be the cowboy gun but continuous fire accuracy is not its forte- take your take to aim and it will reward you. Not in ADS, though, its “sight” is atrociously bad, stick to third person.
LAS-7 Dagger – Cutting Edge
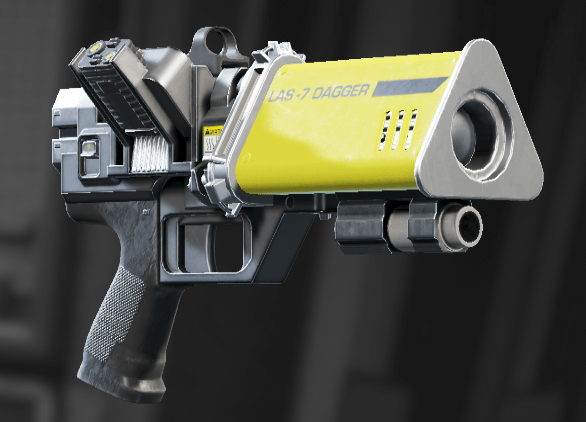
Damage, Fire Rate, & DPS – Deals a flat 150 damage per second, seemingly in .1 second intervals.
Capacity – Can fire for 5 seconds before overheating, and cools at about 11% per second. Carries 3 spare heatsinks (total firing time of 20 seconds before environmental modifiers)
Accuracy – It’s a laser.
Handling – Near zero drag like the other secondaries, fairly harsh sway when moving and firing. If standing still, sway is almost unnoticeable but recoil causes the gun to kick up and to one side, then back. When ADSing this recoil is easy to account for and negate. Heat sink reload is 2 seconds
Special Characteristics – Light Armor Penetration (Pen 2), Beam, Heat
Conclusion – Sporting the lowest damage output of all guns, the Las-7 Dagger is yet surprisingly decent. If you are precise with it, as you should be when using any laser weapon, it can deal decent enough damage to take care of most small targets in about a second or so of firing. That said, it overheats very quickly so as an “Oh Shit” option its use is limited to only a handful of targets unless you start eating into the spare heat sinks. But if you use it sparingly, to take care of stray targets or individuals, it can save you a surprisingly large amount of ammunition you would otherwise spend.
Its primary use is just that; an ammo saver. For builds with guns that have a very limited amount of precious ammunition, the Dagger is a great way to deal with stray scavengers, hunters, warriors, or other small targets without wasting an entire shot of a Dominator, Sorcher, or a second or two of Flamethrower. The king of ammo efficiency. That said, when firing while moving in any form it suffers bad sway and will typically overheat before it kills anything- meaning it is terrible in a pinch, which is usually what the secondary slot is for. Make sure you have a better backup option for those scenarios when taking this pistol.
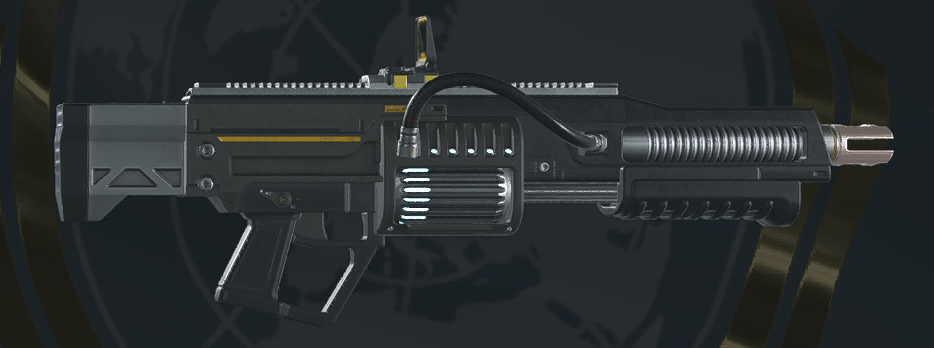
GP-31 Grenade Pistol
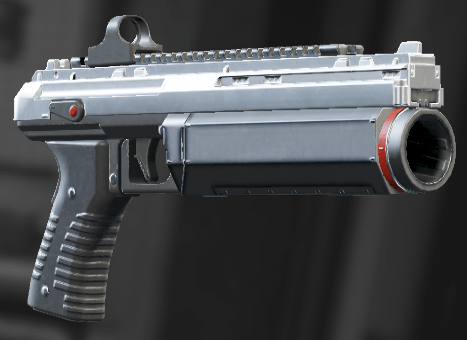
Damage, Fire Rate, & DPS – Each grenade deals 250 damage on direct hit, followed by a 350 damage explosion in a 6 meters falloff. Fires 1 shot, then reloads.
Capacity – 1 Shot per reload, carries 8 spare rounds (9 total). A Total potential damage of 5,400 minimum, but very likely more due to AoE.
Accuracy – Shots fire straight, but have a very heavy dropoff, reaching the bottom of the frame of the first person sight at roughly 25 meters.
Handling – Very light sway when standing, moderate sway when moving. Recoil irrelevant due to one-shot nature.
Special Characteristics – Explosive, Medium Armor Penetration (Pen 3), One-Handed, Single Shot, Extremely Limited Munitions
Conclusion – Initial impression is that it’s a way to have damage grenades when taking stun grenades, or just an extra set of grenades for clearing out large bases or for emergency group clears. Has heavily restricted ammunition, restoring 1 grenade from ammo boxes and 2 from supply boxes.
Grenades
Note: All Grenades come in bundles of 4, or 6 with a specialized armor attribute. Default amount when spawning is 3, regardless of whether you have 4 or 6 max capacity. Additionally, all grenades have the same “weight” and throwing arc from what I can tell, again extended via a specialized type of armor. As a result of these, the Capacity and Accuracy sections are unlisted for Grenades.
Standard
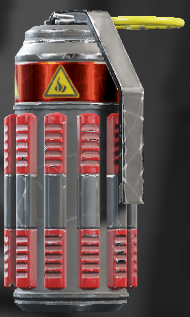
G-12 High Explosive
Damage, Fire Rate, & DPS – Each explosion deals 400 damage in a 7 meters falloff.
Handling – Grenade has a fuse time of 3.5 seconds after pulling the pin, and is somewhat bouncy when deflecting off of angled surfaces. The grenade is heavy, and won’t bounce directly backwards very far unless striking a target moving towards you, like a charging Charger or Brood Commander.
Special Characteristics – Explosive, Heavy Armor Penetrating (Pen 4).
Conclusion – A decent generic grenade option. Deals significant damage to most targets in a decent radius, and is generally a very all-round problem solver if with little utility besides.
G-6 Frag

Damage, Fire Rate, & DPS – Each explosion deals 250 damage in an 8 meters falloff
Handling – Grenade has a short 2.4 second fuse time, still testing for bounciness
Special Characteristics – Explosive, Medium Armor Penetrating (Pen 3)
Conclusion – A somewhat lackluster explosives option. Deals significantly less damage than the standard high explosive with a tier weaker armor penetration, meaning that even against its intended targets it tends to do so little damage that it can fail to kill in the outer portions of its radius. And though its falloff is 1 meter further on all sides, that extra radius does not in any way make up for the stark drop in damage at all portions of the radius. At the moment, the G-6 Frag is more or less outmatched by the High Explosive counterpart in every way.
G-10 Incendiary
Damage, Fire Rate, & DPS – Each explosion deals 150 damage in a 7 meters falloff, igniting all targets struck, and then ignites ground in that same radius for [[still testing]] seconds
Handling – Grenade has a fuse time of 2.9 seconds, still testing for bounciness
Special Characteristics – Explosive, Medium Armor Penetrating (Pen 3), Incendiary
Conclusion – Although the main component of the grenade’s damage is even weaker than the G-6 Frag, the power of the Incendiary mechanic is not to be underestimated (at least when it’s not bugged out). Against the terminids, who are particularly weak to fire, this grenade can easily cut off an entire area and kill over a dozen terminids popping up out of a breach. Generally the better option into Terminids in general, if relying on a slower damage mechanic, but extremely poor into the bots. Be mindful of the ignited ground, as it will kill you just as easily as anything else (try not to use this to open up containers).
Special
G-16 Impact
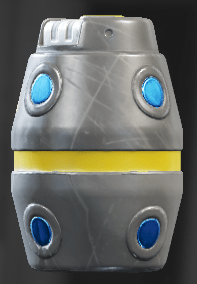
Damage, Fire Rate, & DPS – Each Impact deals 400 damage in a 7 meters falloff.
Handling – Grenade detonates immediately on impact with any target or surface. Does not bounce.
Special Characteristics – Explosive, Heavy Armor Penetrating (Pen 4)
Conclusion – One of the more commonly used grenades since, compared to the G-12, it has almost no risk of self-killing unless you very stupidly throw it at your feet or a nearby target. Also due to its nature as an Impact, when thrown directly at targets it will almost always deal the full 400 damage directly to whatever point was hit- making it very easy to precisely land large amounts of damage immediately. It’s an excellent “I want that thing dead NOW” type of grenade. The downside of being impact is that you cannot bounce it around obstacles, or throw it at close ranges then dive or back off during a Fuse to kill closer targets. It’s also significantly more difficult to close Bug holes or Fabricators, as you have to land the grenade at a very precise point to get the explosion on the internals of those structures. However, the immediate nature of the damage and its ability to easily slap targets for full damage makes it an extremely popular choice.
G-123 Thermite
Damage, Fire Rate, & DPS – Grenade deals 150 damage per tick over its full duration, and ends with a 100 damage explosion in a 2 meters radius.
Handling – Grenade sometimes bounces off of hardened surfaces such as rocks or a bile titan’s carapace; but typically sticks to most other targets. Burntime begins 2.9 seconds after throwing, and explodes [[still testing]] seconds after throwing.
Special Characteristics – Explosive, Heavy Structure Penetration (Pen 7)
Conclusion – Due to the Thermite’s nature as a DoT tool, it is currently broken and more or less does not function. However, through playtesting while in solo, it’s been discerned as a generally fairly weak anti-tank option. Primarily because it is very slow, and often requires 2 or more grenades to kill any relevant target. Landing the stick on weak points is an absolute must, and even then the only heavy unit that will die in one is the Hulk- if you can land it directly on their visor. Otherwise it will take 2 or 3. Chargers take 3 or 4 when landing it on their head, but I suspect it would take less if you land it on their butt or the slightly weaker armor of a rear leg. The damage dealt by this grenade can be used supplementally to other anti-tank options to save time or ammunition; for example throwing one grenade at a Bile Titans head and following it up with a Recoilless or Quasar shot to near-guarantee the kill (two grenades is more consistent). Overall, it simply takes far too many of these grenades to deal with heavy targets when you only ever get 3 per respawn (or more with Hellpod Opt and/or a specialized grenade carrying armor).
Stratagems
Launchers
EAT-17 (Eat It!)

Damage, Fire Rate, & DPS – Deals 650 damage, with a 150 damage explosive component within 3 meters falloff. 70 second base cooldown.
Capacity – Fires 1 shot and is then disposed of. Every callin drops 2 Eat Its
Accuracy – Pinpoint accuracy with fairly heavy projectile drop at extreme ranges, becomes noticeable at 60 meters
Handling – Extremely heavy drag (Between 1 and 1.5 seconds to realign from max turnrate), and severe standing sway. Stabilizing via crouching or prone is recommended when making difficult shots.
Special Characteristics – Hellpod, Explosive, Structure Armor Penetrating (Pen 6. Explosion is Pen 3), Support Weapon, Disposable
Conclusion – The Eat It is a very useful callin, in fact more often used for its being a very low cooldown hellpod rather than the actual Eat Its themselves. Hellpods do immense damage to an extremely precise point, and also always drop on the marker even when it moves due to being attached. As a result, if you attach an Eat It callin (or any hellpod dropping callin) to a Charger or other large enemy, it will always hit them unless they’re moving very very quickly (such as a charger in mid-charge) and typically kill or severely injure.
The Eat Its themselves have identical characteristics to the Recoilless Rifle, one-shotting most non-tank enemies, and one shotting heavy enemies when striking their weakpoint (a Direct shot to a charger’s forehead or a hulk’s visor). They two-shot super-heavy weakpoints (Tank vents or Bile Titan heads when not receiving superarmor from their bile spew). The Factory Strider’s leg vents are also one shot by the Eat Its, which can be combined with the pod damage to easily take one down assuming you can manage to get in under its hail of gunfire. Spore towers also go down immediately, and one Eat It callin is enough to take down a single shrieker nest. Not efficient, since those spawn in groups, but certainly usable. Its best use is for killing chargers with the hellpod, and then more chargers with the actual launchers.
GR-8 Recoilless Rifle
Damage, Fire Rate, & DPS – Deals 650 damage, with a 150 damage explosive component within 3 meters falloff. 480 second base cooldown
Capacity – Fires 1 shot before reloading. Comes with a backpack carrying 5 shots, for a total of 6 shots. Total potential damage of 4800.
Accuracy – Identical to the Eat It
Handling – Identical to the Eat It, but it has a low magnification enclosed holo sight for improved accuracy. 6 seconds solo reload, 1 second team reload.
Special Characteristics – Hellpod, Explosive, Structure Armor Penetrating (Pen 6. Explosion is Pen 3), High Magnification Scope (~25m), Support Weapon, Backpack, Static/Team Reload
Conclusion – The Recoilless Rifle is an Anti-Tank staple weapon. An Eat It, except it is reusable and comes with significantly more ammunition per callin; but at the cost of a very long reload when not making use of the “team weapon” mechanic. As a result, it is a weapon specialized for rapidly eliminating large numbers of heavily armored targets. Although if the shooter is not precise, you will waste most of your limited ammunition supply, and requiring 2 people to make use of the weapon’s niche characteristic (it’s very high refire rate) is a bit of a tall order; especially considering that the volumes of heavy armor enemies necessary to require it are rare to find.
Especially since the introduction of the Quasar Cannon, the Recoilless Rifle finds difficult use in the hands of uncoordinated strangers. But for teams who work together, its ability to quickly mop up walls of chargers or hulks, quickly eliminate Bile Titans or Tank turrets, or rapidly baleet a group of shrieker nests from half the map away, is invaluable.
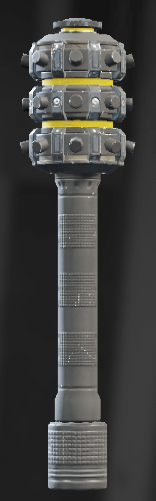
FAF-14 Spear
Damage, Fire Rate, & DPS – Deals 1000 damage (+1000 more to structures), with a 200 damage explosive component within a very difficult to test falloff. 480 second base cooldown.
Capacity – Fires 1 shot before reloading. Comes with a backpack carrying 3 missiles, for a total of 4 missiles. A Total damage potential of 4800, or more when hitting structures or groups.
Accuracy – A lockon weapon, with a 1.5 second lockon time and buggy lockon criteria. Note that very tall targets, such as Bile Titans and Shrieker Nests/Spore Spewers, have disjointed lock boxes requiring you to aim at their “feet” (roughly the centerpoint on the ground underneath their top-heavy model). Try aiming at the air underneath a titan’s butt, and you’ll find your lock easier! Partial locks are possible when a target lock is broken before complete, resulting in the lock decaying slowly as long as it remains within the circle (and vanishing if it leaves the circle or you swap weapons).
Handling – Irrelevant, as the weapon is lock-on based and does not require a stable platform. 4 second solo reload, 1 second team reload.
Special Characteristics – Hellpod, Explosive, Variable Armor Penetrating (8, 7, or 6 depending on the angle the missile strikes- the more “dead on”, the better. Explosion is Pen 5), Support Weapon, Backpack, Static/Team reload.
Conclusion – The FAF-14 Spear is a tumultuous weapon. When it works, it works very well. But only when it works. Between the disjointed lockboxes of tall targets, and the extreme amount of “clutter” caused by a hectic battle near the ground, it is very difficult to get this weapon to behave. Furthermore, the Missiles trajectory heavily impacts how much penetration it has, and thus whether or not it will kill its target. Due to the lockon time and very low backpack capacity, the refire rate granted by team reloading is almost meaningless, though if it did function more reliably it might be worth doing from time to time. The target it is best at killing are Bile Titans and automaton tanks.
For Tanks, you just need a clear line of fire and enough distance so the missile reaches a very tall arc to strike from almost directly above; ensuring the Pen 8 hit and an instant kill (the only anti-tank that can instakill tanks from any relative angle), it is likewise effective against automaton “tank towers”. For Bile Titans, it is more difficult. You must aim for a particular point to get the lockon to work at all, and you have to aim to the side of the titan to get the missile to “curve” into its face. Otherwise it will almost never acquire the correct striking angle and so will never one-shot the titan (in fact often requiring the entire backpack for multiple failed shots). Once you get the hang of it, however, it’s not particularly difficult to do and makes this a premier anti-titan weapon.
LAS-99 Quasar Cannon
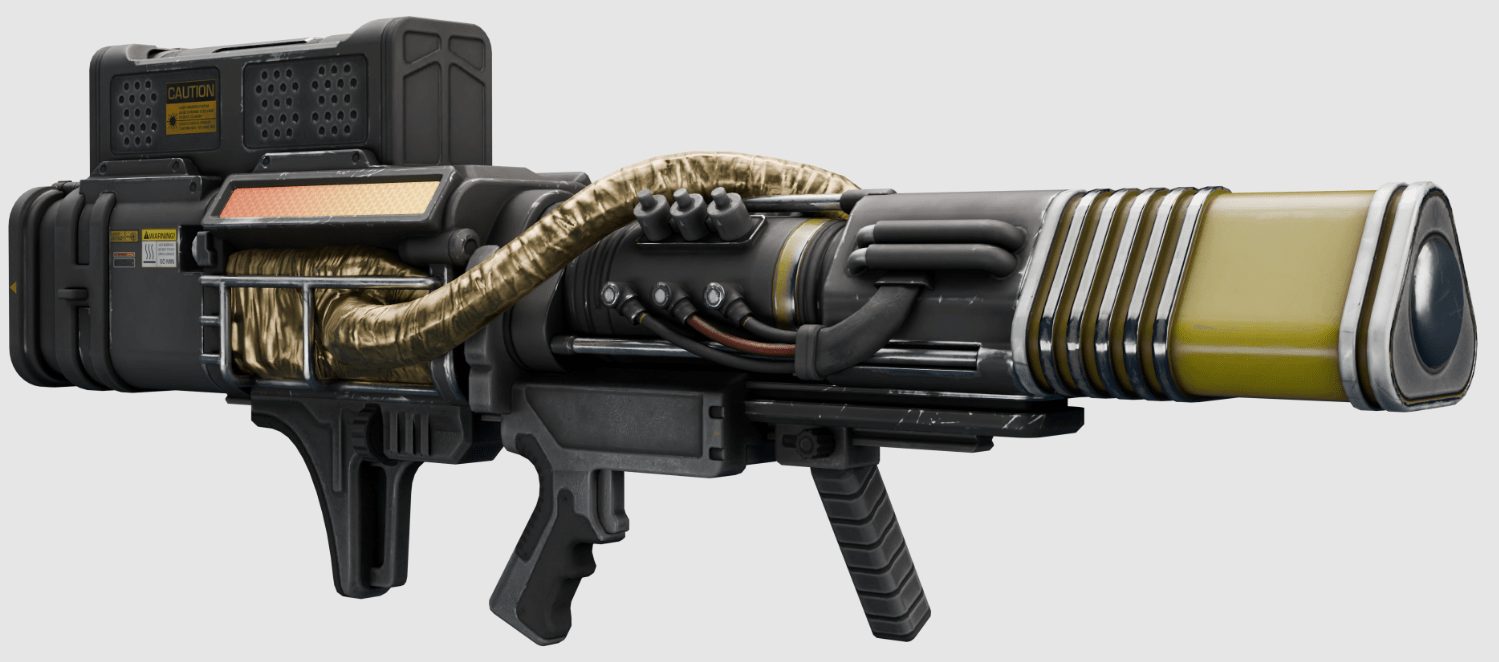
Damage, Fire Rate, & DPS – Deals 650 Damage, with a 150 damage explosive component within 3 meters falloff. 480 second base cooldown
Capacity – Fire 1 shot before recharging. Infinite ammo
Accuracy – It’s a laser.
Handling – Significantly less drag than the Recoilless or Eat It (about half a second recovery from max turnrate). Standing sway about the same, but moving sway is slightly better, possibly placebo due to the better sight. Requires a 3 second spoolup period, then a 10 second recharge.
Special Characteristics – Hellpod, Explosive, Structure Armor Penetrating (Pen 6. Explosion is Pen 3), Recharge
Conclusion – A premier anti-tank option for solo players or uncoordinated teams. With infinite ammo, and a recharge period that can be spent moving, shooting other weapons, or generally doing other things, the Quasar has become a staple for players who don’t want to rely on their teammates. However, due to its total lack of team reload functionality, it is poor at dealing with groups of armored enemies, and is extremely punishing to those with bad aim or bad timing.
However, it more than makes up for this by having no limitations on its ammo, and being generally highly efficient. Furthermore, if you manage to get a second one called in, you can cycle between them with perfect timing; effectively firing them back to back to back forever as long as you can keep picking one up after firing the other. Just try not to play chicken with a Charger.
Support Weapons
GL-21 Grenade Launcher

Damage, Fire Rate, & DPS – Deals 20 damage with the shell, with a 350 damage explosion within a 7.5 meters falloff, fires 2.57 shots per second for a total of 899.5 damage per second. 480 second base cooldown
Capacity – 10 shots per Belt, 2 Belts in reserve (3 total). Total potential damage of 10500, but likely more due to AoE.
Accuracy – Pinpoint accuracy but extremely heavy drop in an Arc. Hits on cursor at ~15m, bottom of the first person sight at 100m
Handling – ~.5 seconds drag recovery at full turnrate. Sway exists, but is very minor and typically irrelevant due to AoE nature- recoil likewise extant but irrelevant due to low fire rate. 3 Second reload regardless of remaining rounds.
Special Characteristics – Hellpod, Explosive, Medium Armor Penetrating (Pen 3, 0 for the shell), Support Weapon
Conclusion – The Grenade Launcher is an effective, but ammo hungry, crowd clearing tool. Thanks to its explosive radius, it is also decent at dealing with most armored targets provided they have a medium armor or less weakpoint (so everything short of bile titans), though for some targets it takes a significant number of shots (and thus a large amount of your overall ammo).
Thanks to being an “explosion” (not explosive) it can also take out bug holes and bot fabricators and is very useful when your main objective is to close up as many of those as possible (Read- Blitz missions). Its main drawback holding it back from being a general use support weapon is its very low ammo count and the minimum fuse time of the grenades making it all too easy to misfire and kill yourself, a teammate, or nothing at all.
RS-422 Railgun

Damage, Fire Rate, & DPS – Deals 600 damage, piercing through specific targets (strider front plates, scavengers and other small enemies). Charge weapon, no specific DPS. 480 second base cooldown
Capacity – 1 Shot per reload, 20 shots in Reserve. Total potential damage of 12600
Accuracy – Pinpoint, zero drop
Handling – Relatively light drag (~.5 seconds recovery from max turnrate), and very light standing and moving sway when in ADS and dramatic moving sway in third person. 1.4 second reload. Takes half a second to achieve minimum charge, followed by half seconds for each level of charge afterwards- immediate death when reaching the top of the 8th charge level at the 3rd second. The bottom of the 8th level is denoted by a thicker than normal black line, anything past that is free hold time.
Special Characteristics – Hellpod, Variable Armor Penetrating (Based on charge level, denoted by the 8 pips; cannot be fired below the line of the 5th pip), Support Weapon
Conclusion – The Railgun is a decent anti-tank and anti-armor option, though not quite as effective as its much heavier contemporaries. Requiring very careful use of its charging mechanic to achieve its highest penetration values, an expert user can fire off extremely high penetrating shots into vital points capable of one tapping everything except tanks and bile titans. Since it is not explosive, however, it cannot eliminate structures or other hardened targets.
Due to the dangerous charging mechanic (resulting in both death and the destruction of the weapon if overcharged) and the relatively long reload, it is a somewhat cumbersome tool. However, it is still much lighter weight than other anti-tank options and never a bad choice for bots. However, even with Pen 8 it still cannot destroy Charger heads, due to esoteric penetration mechanics; and it takes far too many shots to take out Bile Titan heads.
M-105 Stalwart
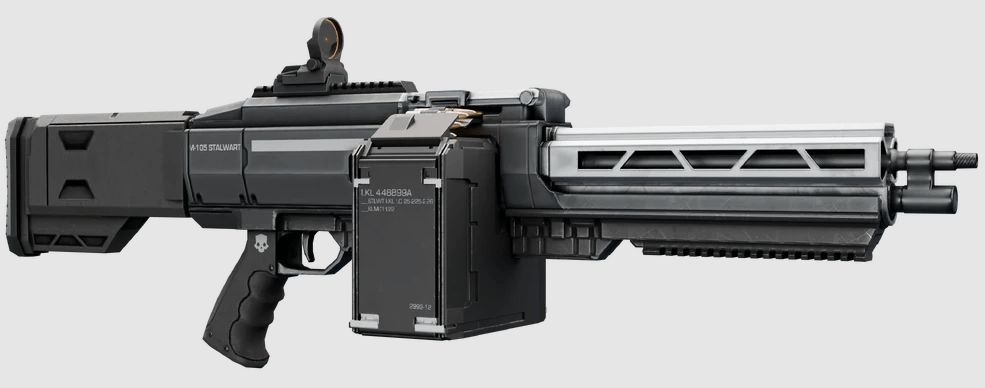
Damage, Fire Rate, & DPS – Deals 55 damage per shot, firing up to 19316 shots per second, for a maximum of 1054 damage per second. 480 second base cooldown
Capacity – 250 shots per Magazine. 3 Magazines in reserve (4 total). Total potential damage of 55000
Accuracy – Extremely close to pinpoint, sight is vertically misaligned- all shots land just beneath the dot and above the laser sight. No increase in spread when firing even at maximum fire rate.
Handling – Light drag, about .6 second recovery from max turn rate. Recoil is extremely light, and easy to control. Minor vertical climb, significant amounts of horizontal deviation during firing. Standing, moving, and firing sway are all extant but almost irrelevant except at far ranges. All characteristics worsen with higher fire rates, but never to unmanageable levels even while moving. 4.5 second Tactical reload, 6 second Full reload.
Special Characteristics – Hellpod, Light Armor Penetration (Pen 2), Variable Fire Rate (700, 850, 1150), Laser Sight, Support Weapon
Conclusion – The Stalwart is a lighter weight and less ammo hungry counterpart to the MG-43 with the highest maximum potential damage of all support weapons except the infinite ammo energy weapons. However, since it is functionally firing liberator rounds, its ability to deal with a variety of targets is heavily limited.
Its raw output is decent at max fire rate, and it can very quickly and efficiently mop up crowds of the small enemy varieties, but once the bigger, chunkier enemies come out to play the Stalwart very harshly falls off and becomes far too slow at killing. Best paired with dedicated anti-armor primaries such as the Dominator or the Eruptor, to use as a general clearing weapon for targets not worth the ammo of those two primaries.
MG-43 Machine Gun
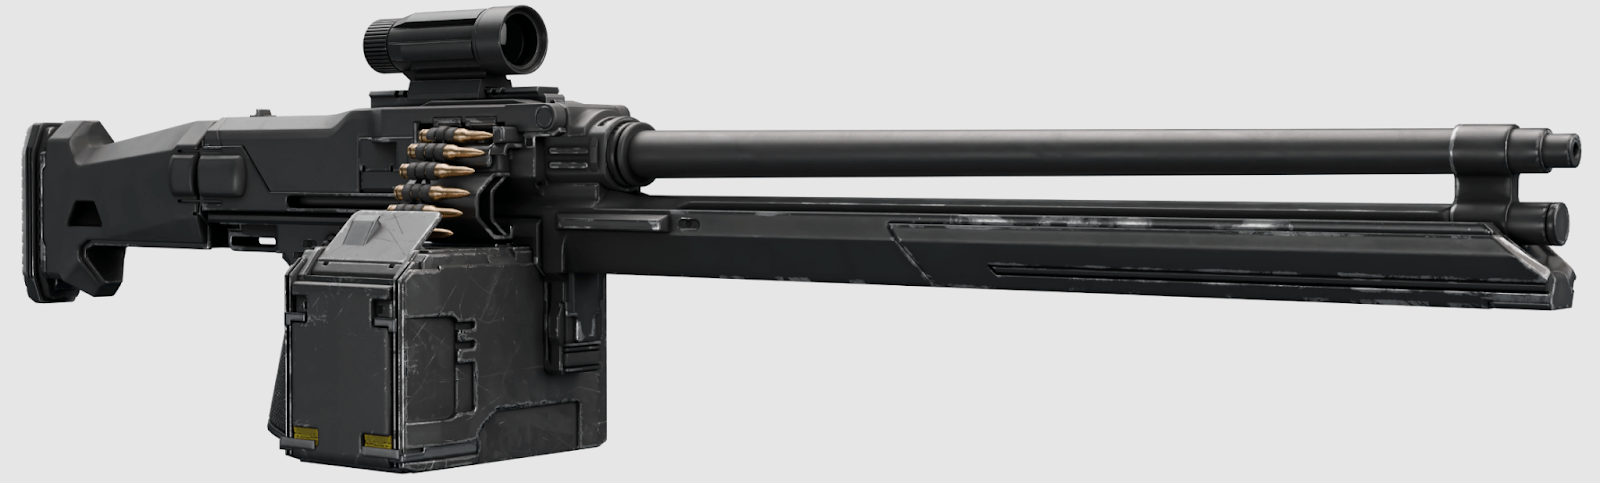
Damage, Fire Rate, & DPS – Deals 80 damage per shot, firing up to 15 shots per second, for a maximum of 1200 damage per second. 480 second base cooldown
Capacity – 150 shots per Magazine. 2 Magazines in reserve (3 total). Total potential damage of 36000
Accuracy – Identical to Stalwart, pinpoint except for minor vertical sight misalignment, but with no laser sight to ease correction. Aim with the bottom of the red dot.
Handling – Moderate drag, ~.7 second recovery. Recoil is somewhat harsh, kicking up and to the left before holding there and then re-kicking to the right after a couple seconds of firing. Minor sway with standing and moving, worsens dramatically during firing. Higher fire rates significantly worsen characteristics, stabilization needed at max fire rate or when firing at range with mid-level fire rate. 4 second Tactical reload, 5 second full reload.
Special Characteristics – Hellpod, Medium Armor Penetrating (Pen 3), Variable Fire Rate (630, 760, 900), Support Weapon, Static Reload
Conclusion – The MG-43 is a staple general use heavy weapon. With incredible DPS, good accuracy, a high amount of ammunition, and medium penetration, it is capable of clearing the field of most targets in very quick order and taking the pressure off of the entire team.
Although it cannot deal with heavy targets, and can take quite a few shots into the more heavily armored small targets (Devastator bodies, spewers, and hive guard heads in particular), there is almost no situation in which this weapon will not shine. Its most significant drawbacks are, of course, its very long static reload and the harsh recoil which demands either a judicious trigger or frequent stabilization (and thus reduced kiting).
It’s all too easy to bog yourself down in the bullet storm, and forget to back off from the encroaching hordes. Be mindful of your positioning, and remember to make use of ammo boxes on the ground or a supply pack if you want to be liberal with its application.
MG-206 Heavy Machine Gun

Placeholder image until a proper model view is found (if you have one, please let me know!)
Damage, Fire Rate, & DPS – Deals 100 damage per shot, firing up to 15.83 shots per second, for a maximum of 1583 damage per second. 480 second base cooldown
Capacity – 75 shots per Magazine, 2 Magazines in reserve (3 total). Total potential damage of 22500
Accuracy – Similar to the other Machine Guns, pinpoint. The HMG in particular has an extremely severe vertical misalignment on its red dot sight, necessitating aiming at an invisible point below the actual dot at the rough center of the round frame.
Handling – One of the heaviest weapons in the game, only slightly lighter than the various Anti-Tank weapons and the Autocannon, and heavier than the AMR, Counter-Sniper, and Dominator. Requiring a full 1.25 seconds to recover from drag at max turnrate, and with very little sway even while moving except during firing. Recoil is the harshest in the game due to the fire rate, necessitating both fortified armor, judicious and restricted trigger discipline, and platform stabilization in nearly all scenarios. 5 seconds tactical reload, 7 for a full reload.
Special Characteristics – Hellpod, Heavy Armor Penetrating (Pen 4), Variable Fire Rate (450, 600, 950), Support Weapon, Static Reload
Conclusion – The Heavy Machine Gun is another weapon towards which I am somewhat biased. I will not deny that it is by far the single most difficult weapon in the entire game to use correctly, but having used it heavily myself, I can say with confidence that it absolutely rewards mastery and precision aiming. Aside from the lack of a high magnification scope, this gun is essentially a fully automatic Counter Sniper with even higher penetration and 225 rounds.
It is capable of one-tapping most small targets, and easily dispatching all others with barely a handful of shots thanks to its extremely high penetration; and you can switch to the middle firemode and crouch with fortified armor to erase a pack of literally anything* in a matter of seconds (berserkers are the most satisfying). It can even obliterate Hulk visors (with carefully placed shots- stun nades and 450rpm while prone are advised) and the backs of Chargers- though for Chargers you’ll need to switch to the 950 mode and stick the barrel as close to their ass as possible to mitigate the ludicrous recoil- the raw damage output, however, will almost certainly delete it before it can even turn around. If you aren’t quick enough on the trigger, though, it will curbstomp you.
Aside from kicking harsher than a rodeo bull, this weapon’s primary drawback is its extremely limited ammo supply. It carries only 225 rounds total and if not for the very long reload, could fire all of them in barely 15 seconds- the single highest raw damage output of nearly any weapon in the entire game. Only chargers and tank turret vents can really justify ever using the maximum firerate, however. For all other targets, stick to the 450 mode (or 600 if you’re well practiced and have alot of targets to burn through), and treat it like a DMR with a 1x red dot that can sometimes hold down the trigger for slightly fatter targets.
I heavily advise carrying a supply pack, if you don’t you can and will run out of ammo and eat all of the team’s resupplies. Thankfully, each resupply restores both of its reserve magazines (and not just 1, like with the MG-43; at least until they fix the new ship module)
*Except tanks, unless you have their vents. Bile Titans still immune to everything except anti-tank
APW-1 Anti-Material Rifle
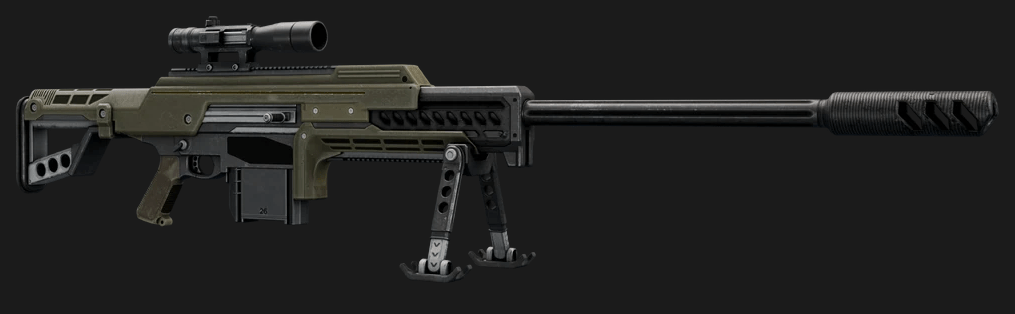
Damage, Fire Rate, & DPS – Deals 450 damage per shot, firing up to 6 shots per second for a maximum of 2700 damage per second. 480 second base cooldown
Capacity – 7 Shots per Magazine, 6 Magazines in reserve (7 total). Total potential damage of 22050
Accuracy – Pinpoint with close to 0 drop at all ranges below its maximum scope magnification, and only minor drop past that (enemies stop rendering at around 250m, so functionally no drop ever).
Handling – Very heavy drag, about 1 second recovery from max turn rate, with significant sway when standing and moving. Stabilization (typically just crouching, though prone is ideal) is advised. Recoil is very harsh, making consecutive firing difficult, but also extremely predictable and easy to account for when higher damage output is needed. 2 tactical reload, 2.5 full reload
Special Characteristics – Hellpod, Heavy Armor Penetrating (Pen 4), Sniper Scope (50, 100, 200), Support Weapon
Conclusion – The Anti-material Rifle is a very useful general use weapon, capable of taking out most lightly armored targets in one shot and most medium targets in 2-3 (or 1 when hitting weakpoints). With its heavy penetration, it can kill Hulk visors with just 2 shots and destroy Striders in 3. However, due to its extremely limited ammo capacity it is not recommended to waste shots on Striders or the numerous small targets.
The AMR is best reserved for the harder targets its high damage can be effectively applied to, such as Devastators, Berserkers, Hulks, Hive Guards, Brood Commanders, and Spewers. If you pair it with a Jetpack and find a high perch, it can easily provide its damage at extreme ranges and relative safety, allowing you to pick off high priority targets with extreme efficiency. It can also take out the vents of the Automaton’s larger units, such as tanks, turrets, and even the factory strider (though you would need to be uncomfortably close to the factory strider) with 4 shots or so.
Be mindful that even resupplies only give it 3 magazines (at least until they fix the new tier 4 bridge module), and so ammo reserves run exceptionally thin; pair it with a decent primary for maximum efficiency. Be aware that although technically the AMR has the single highest damage output of all weapons in the entire game, its harsh recoil makes it nearly impossible to effectively plant the absolute maximum output on any target- and it can only apply it for a single second until it runs out of ammo.
AC-8 Autocannon
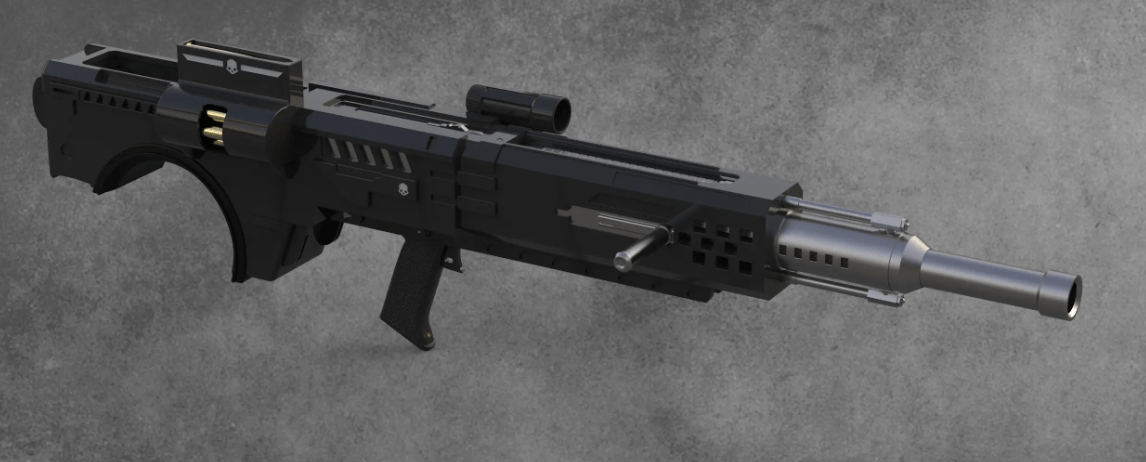
Damage, Fire Rate, & DPS – Deals 260 damage on direct hit, followed by a 150 damage explosion within a 4 meters falloff. Fires 3 shots per second for a total of 1230 damage per second. 480 second base cooldown.
Capacity – 5 Shots per Clip, stores up to 2 Clips. Comes with a backpack carrying 10 Clips. Total potential damage of 24600, or more when hitting with the AoE
Accuracy – Pinpoint, with some dropoff beginning around 150 meters
Handling – Heaviest class of weapon, with nearly 2 full seconds of drag recovery from max turn rate (1.5 seconds for “reasonable” firing delay), and extreme amounts of sway when moving. When standing still the sway is not too harsh, but stabilization is still always ideal. Recoil is the harshest of any weapon in the game (at least amongst those capable of rapid consecutive firings), and decently unpredictable in direction. Reloads 1 Clip at a time, taking 1.8 seconds to reload each clip, with an additional 1.8 seconds if both clips are loaded back to back. Team reload happens inter-clip, functionally giving 0 reload time and true nonstop firing.
Special Characteristics – Hellpod, Explosive, Heavy Armor Penetrating (Pen 4, Explosion is Pen 3), High Magnification Scope (~25m), Support Weapon, Backpack, Static Reload, Team Reload
Conclusion – The Autocannon is the heaviest of the “small arms” weapons (and really stretches the definition), with incredible damage output and high penetration enabling it to easily wipe most hard targets. Thanks to its explosive radius, it can easily mop up groups of clumped enemies and consistently strike weak points on the few targets it doesn’t instantly kill. However, it is extremely cumbersome and a difficult weapon to use as a result, similar to the HMG (which fills a similar role). It is ideal for breaking through dense lines of high health enemies, especially the Terminids or recently dropped packs of Devastators and Berserkers.
Though it has very low ammo, and requiring a static clip reload every 5 shots is a pain. If you don’t manage to reload the clips individually and accidentally force a “full” reload, the overall reload time becomes significantly higher and often very inconvenient- it is important to manage your ammunition when using this weapon. The team reload is not recommended, as there are almost no situations in which you need to fire off more than 10 shots consecutively- and if there are, chances are that teammate is better off using a second autocannon or other weapons.
LAS-98 Laser Cannon
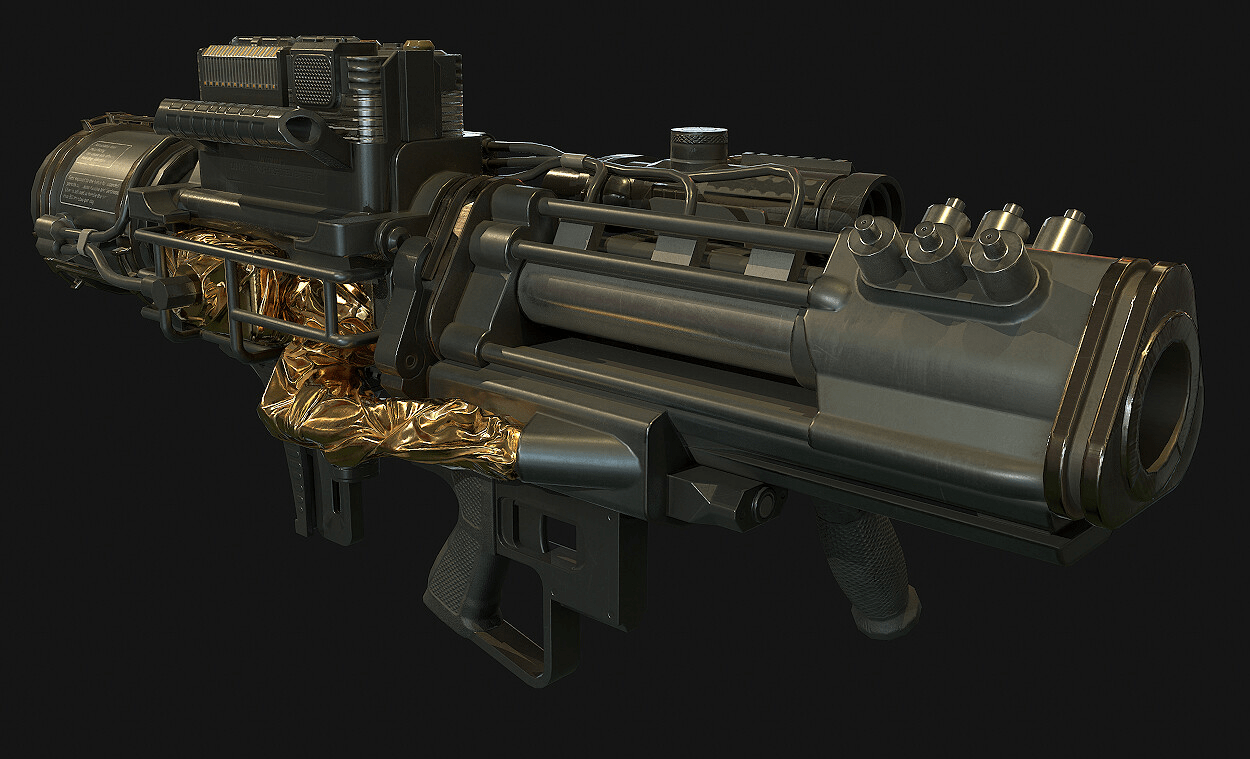
Damage, Fire Rate, & DPS – Deals a flat 300 damage per second (same as the Scythe!!). 480 second base cooldown
Capacity – Can fire for 10 seconds before overheating before environmental modifiers, and cools at about 6% per second. Carries 1 spare heatsink.
Accuracy – It’s a laser.
Handling – Somewhat significant standing and moving sway, significant sway during firing (especially when moving). Drag is very light, requiring about .25 seconds for recovery. Has a .5 spoolup period. Replacing the heatsink takes 3.5 seconds.
Special Characteristics – Hellpod, Heavy Armor Penetrating (Pen 4), Beam, Heat, Support Weapon, High Magnification Scope (~25m)
Conclusion – The Laser Cannon is a bit of a case study for armor penetration. Despite having the same exact damage output as its smaller primary cousin, the Scythe, due to its significantly higher penetration it sees faster kill times on nearly all targets- even the smaller ones. It is an exceptional anti-armor weapon, and is highly specialized to sniping out armored weakpoints.
This support weapon is made for bot killing, and will hold up decently against some of the heavier terminids (although it will almost always overheat before coming anywhere close to wiping out a pack of termis on higher difficulties). Thanks to being a laser and very heavy, it is possible to get decent distance and go prone to use this weapon like a sniper and knock out most targets with relative ease. It especially excels at killing Hulks and Devastators via their armored weakpoints.
ARC-3 Arc Thrower
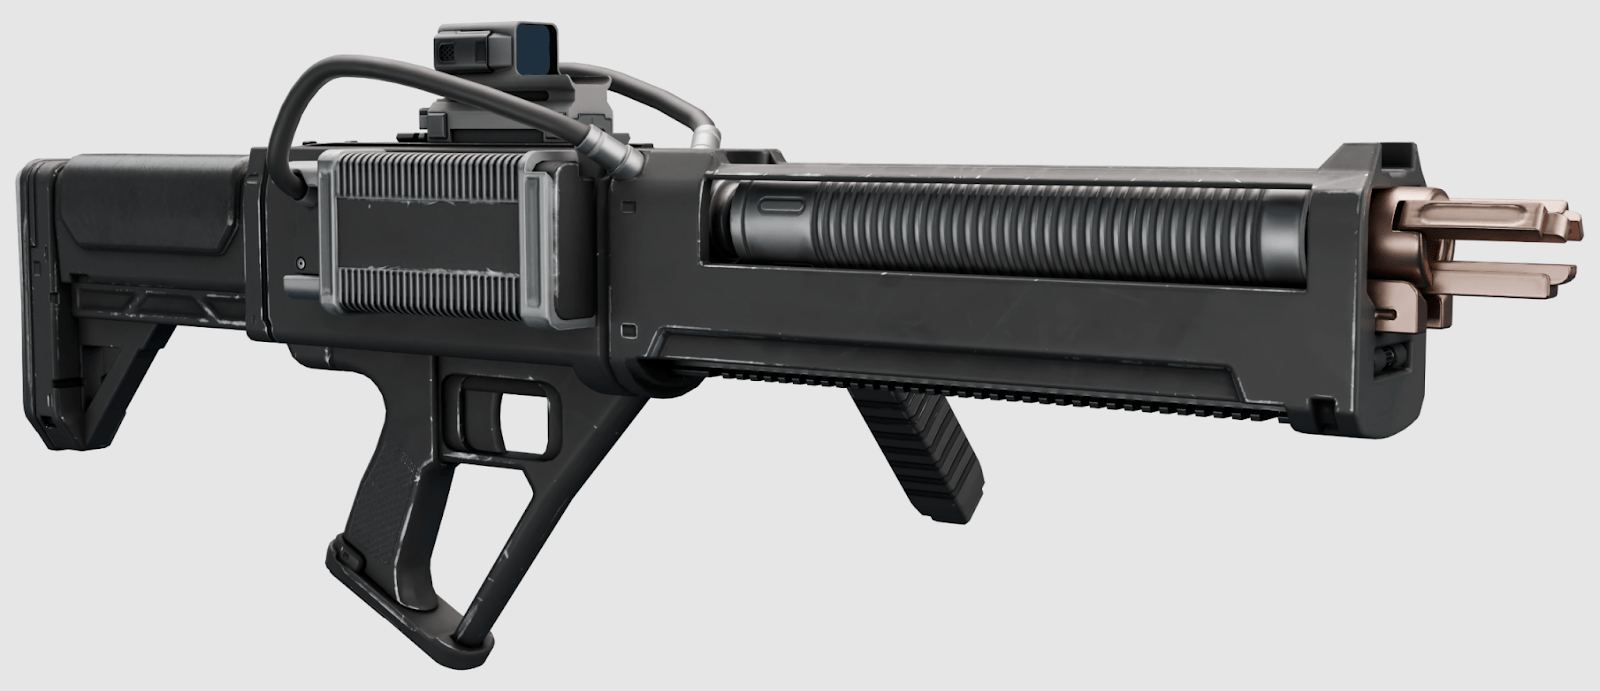
Damage, Fire Rate, & DPS – Deals 250 damage to each target, bouncing to up to 2 more behind the first (or 3, with a tier 4 ship module), fires 1 shot per second, for 250 single-target DPS, and up to 750(1000) overall damage per second.
Capacity – Infinite ammo
Accuracy – Auto-Targeting arc weapon, picking the closest target to the center of the reticle within a narrow cone and bouncing to nearest targets within a radius as long as they are further from the shooter than the previous target.
Handling – Largely irrelevant due to the nature of the weapon’s targeting.
Special Characteristics – Hellpod, Heavy Structure Penetrating (Pen 7), Arc, Massive Stagger, Support Weapon
Conclusion – The Arc Thrower is an extremely versatile support weapon, capable of killing any target it can lock to. However, its raw damage output is relatively low, and as a result larger targets can take a very long time to take out. Although it always locks onto the “center” of a target, the arc does travel in a bit of a curve (or arc, if you will) and can hit heads for extra weak spot damage, dramatically increasing killrates on larger foes.
However, due to the finicky nature of arc targeting and a number of bugs that can cause arc weapons to misfire in general, it is a difficult weapon to get all the juice out of. It is best used against terminids, since they can’t fire back while you repeatedly charge the Arc thrower over and over, and will also step over the bodies of their allies allowing them to be targeted with the initial shot (Arrowhead thankfully fixed a bug that prevented corpses from being valid targets, meaning you can actually use them to bounce shots into a horde- though it is less efficient than hitting a target directly).
The weapon’s extremely powerful stagger can permastun Hulks and slow chargers to a crawl, making dancing around them extremely easy. These two uses alone are enough to make the Arc Thrower a potent tool, but it has very strong killing power as well, making it a premier general use weapon against both factions; though you must be wary of bots returning fire.
FLAM-40 Flamethrower
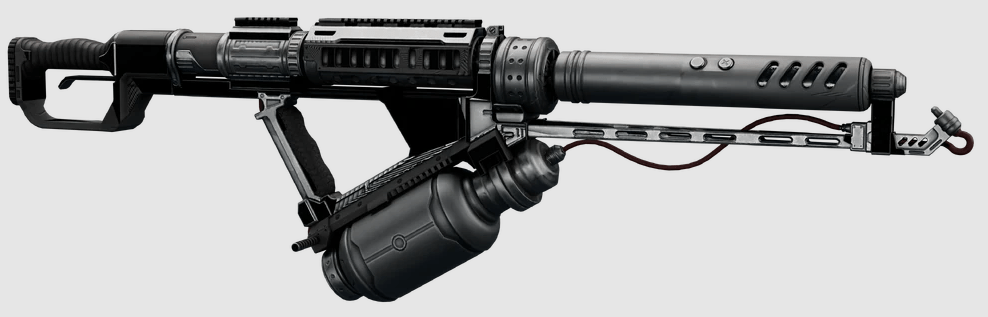
Damage, Fire Rate, & DPS – Deals 3 damage per tick, at an unknown tickrate (given the difference in speed between targets burning to death and being direct fired by the flamethrower, the tick rate must be extraordinarily fast), for an unknown but very high damage per second on top of the standard fire DoT.
Capacity – 12.5 seconds of fire time per canister, with 4 canisters in reserve (5 total). A total firing time of 62.5 seconds.
Accuracy – Sprays flame across a roughly 15 meters long cone that is 3 meters wide at its base, igniting any ground it touches for 10 seconds (with about 5 seconds of lingering particle effect that does no damage).
Handling – The first time firing after swapping to the weapon has a brief “ignition” puff delaying firing by about a half second, with no delays afterwards as long as the weapon is held. Very heavy with 1.5 seconds of drag recovery at max turnrate. No “recoil”. Replacing a canister is always 4 seconds.
Special Characteristics – Hellpod, Medium Armor Penetration (Pen 3), Incendiary, Support Weapon
Conclusion – The flamethrower is a weapon tailor-made for the Terminids. Against bots its extremely low per-tick damage sees its direct fire damage reduced dramatically or even negated against most targets, and the fire dot doesn’t seem to affect the bots as badly as the nids (though it does appear to stun them). Against the terminids, however, the direct fire damage and the dot combined can melt through any bug in extremely short order- against Chargers, half a canister fired directly across all the legs on one side will typically kill (despite being only Medium penetration, which is somewhat perplexing; this game’s damage mechanics are labyrinthine). Combined with its wide area of effect and lingering ground-fire, it is an extraordinarily potent bug-killing tool just like the Breaker Incendiary.
Backpacks
AX/AR-23 Guard Dog
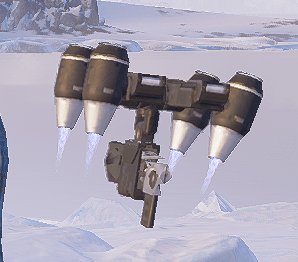
Damage, Fire Rate, & DPS – See AR-23 Liberator
Capacity – See AR-23 Liberator
Accuracy – Perfect, the drone always aims center mass at the closest target to it within 30 meters.
Handling – The flesh is weak, The Machine has no recoil.
Special Characteristics – Hellpod, Drone, See AR-23 Liberator
Conclusion – The standard Guard Dog is a decent backpack companion, but due to the nature of its armament as a precision weapon on a drone that doesn’t know how to aim anywhere but center mass, it is a very weak option against the bots with heightened head hitboxes. Terminid heads are center mass, but the drone does not know to not shoot medium armored targets, and will blast all of its very limited ammunition away on a charger or hive guard if given the opportunity- making the elimination of these targets the highest priority when wearing one.
Due to its limited ammunition supply, it requires very frequent resupplying from resupply pods. When it works, the standard guard dog benefits greatly over its laser counterpart thanks to the quick reload time of the liberator versus the long cooldown of the scythe, and the liberator’s much higher raw damage output; making it a decent defensive tool against large groups of small targets (Anti-Hunterbear circle, deploy!). It is also significantly less prone to friendly fire than its laser counterpart (though it is far from perfectly safe)
AX/LAS-5 Guard Dog Rover
Damage, Fire Rate, & DPS – See LAS-5 Scythe
Capacity – See LAS-5 Scythe
Accuracy – Perfect, the drone always aims center mass at the closest target to it within 20 meters
Handling – The flesh is weak, the Machine has no recoil
Special Characteristics – Hellpod, Drone, See LAS-5 Scythe
Conclusion – The more popular of the Guard Dogs, the Rover’s primary benefit that sees its higher use is the fact that its armament never runs out of ammo; meaning that even if it wastes its time shooting at a target it cannot penetrate, you won’t suffer the punishment of needing to resupply wasted ammunition. The downsides, however, are that its raw damage output is significantly lower and the long cooldown period after it overheats.
This makes its more suitable as a general anti-straggler defensive option for dealing with those pesky hunters or other miscellaneous foes hiding around rocks or corners or circling around you while you deal with the larger threats. It won’t be of much help against a truly massive tide of targets, especially the more armored automatons.
Vehicles
EXO-45 Patriot Exosuit
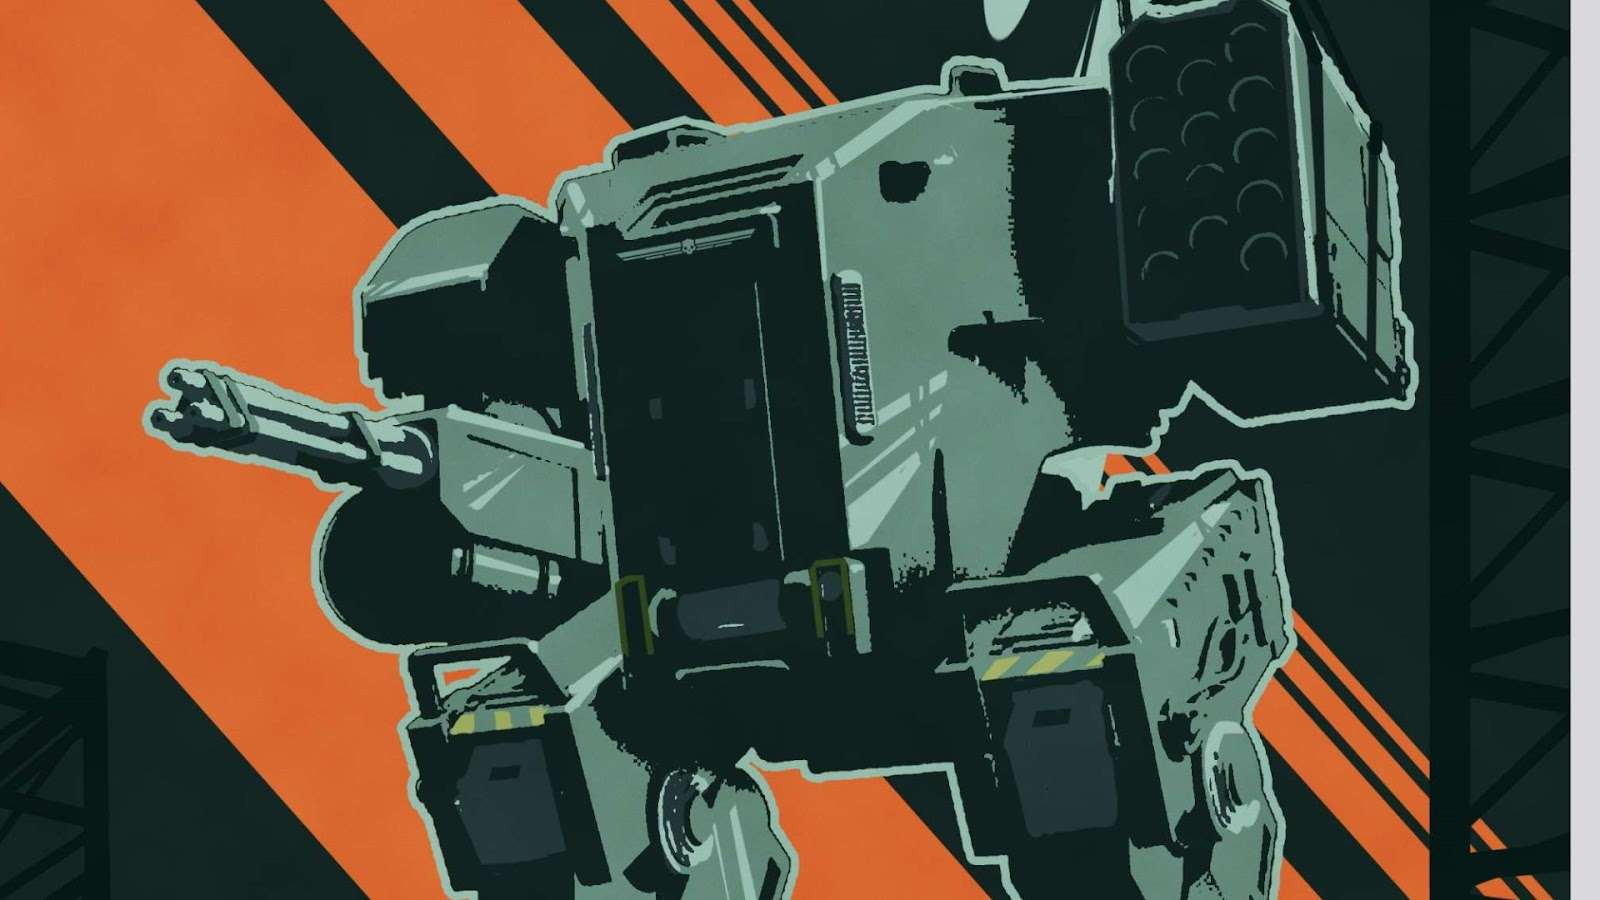
Damage, Fire Rate, & DPS – Right Arm: See the MG-43 Machine Gun. Left Arm: Deals 400 Damage on hit, followed by another 400 damage explosion in a 5 meters falloff, firing 1.5 shots per second for a total of 1200 damage per second. 600 second base cooldown
Capacity – Right Arm: 1000 rounds in a single drum. Left Arm: 14 missiles in a single pod launcher.
Accuracy – Right Arm: Extremely Inaccurate, spread reaches bot-head width at 15m. Left Arm: Pinpoint with a straight trajectory, angled from the left side of the mech towards the reticle
Handling – Omni-directional movement matching helldiver sprint speed at all times. Machine gun has significant but consistent recoil which never changes. Mech turn rate is relatively slow, taking 1.5 seconds to turn 90 degrees. Armaments are frontally locked, requiring turning to acquire targets.
Special Characteristics – Vehicle (1), Limited Use (2), Variable Armor Penetration (Left Arm – See MG-43 Machine Gun; Right Arm – Pen 4, 5, or 6, depending on impact angle. Explosion is pen 3), Explosive
Conclusion – The EXO-45 Patriot is a decent vehicle, versatile and capable of dealing with any target. However, due to the rough nature of its missile armament, it tends to struggle to deal with vehicle targets efficiently (especially bile titans, since achieving a “perfect” impact angle is impossible due to the elevation of their head). Its munitions are also fairly significantly limited, and with only 2 uses means it will almost never last an entire mission- or even the 10 minutes cooldown. It is very useful for conquering Bug hives, due to the missiles’ explosive nature and medium penetration of the MG armament combined with its extreme stability as a platform.
However it is a stratagem which requires support from teammates to be truly effective; being able to save the missiles for truly difficult targets or to quickly delete bug holes is a premier luxury. Against the bots, however, this stratagem suffers immensely. It is an extremely fragile vehicle, and will explode (along with its pilot) at even small amounts of damage; let alone the massive rocket volleys, tank shells, and walls of bullets the automatons tend to throw. A shield backpack can help mitigate this, but is ultimately only a temporary solution- unless you plan to coordinate with your team to protect the Exosuit, it is not a good tool for the bots.
Emplacements
MD-6 Anti-Personnel Minefield

Damage, Fire Rate, & DPS – Each mine triggers on direct contact and deals 150 damage in a 1 meter falloff. 180 second base cooldown
Capacity – The Minefield deploys 48 mines per use
Accuracy – The Mines are deployed across a 15 radius
Handling – Mines will deploy on any surface, from a contact arc originating from the originally deployed pillar. This means they can be stuck to walls, or travel much further than normal when placed on an elevated position or much denser when placed on concave surfaces such as craters or tight chokepoints. The minefield takes 5 seconds to call down, and a further 5 seconds to deploy.
Special Characteristics – Hellpod, Explosive, Vehicle Armor Penetrating (Pen 5)
Conclusion – The Anti-personnel minefield is a powerful double-edged sword. On the one hand, it is capable of cutting off an entire angle of attack for a long period, serving as a powerful threat eliminator against our unintelligent foes; combined with a relatively short 180 second cooldown and a very low deploy time, making it extremely useful to deploy in a pinch. On the other hand, likewise unintelligent teammates (or simply unaware ones) will fall prey to the minefield just as easily; making communication and precise and intelligent placement critically important to avoid becoming a filthy traitor. When used properly, this minefield is one of the most powerful defensive tools in the entire game- a critical part of any static defense strategy.
MD-I4 Incendiary Mines
Damage, Fire Rate, & DPS – Each mine detonates on direct contact and deals a currently unknown amount of damage in a 1 meter falloff, igniting the ground in the same radius for 10 seconds. 180 second base cooldown
Capacity – See MD-6 Anti-Personnel Minefield
Accuracy – See MD-6 Anti-Personnel Minefield
Handling – See MD-6 Anti-Personnel Minefield
Special Characteristics – Hellpod, Explosive, Incendiary, Unknown penetration
Conclusion – The Incendiary variant of the anti-personnel mines, all that is known about its more direct damage components is that they are markedly weaker than its anti-personnel counterpart; being more focused on the incendiary aspect and thus specialized specifically against the terminids (who are altogether more vulnerable to mines than the bots in any case). It suffers all the same pitfalls as its counterpart, and all the same rewards for proper use; although it is incapable of killing any form of armored target, unlike the anti-personnel minefield which can kill chargers or even hulks (though tanks and titans remain immune).
A/MG-43 Machine Gun Sentry
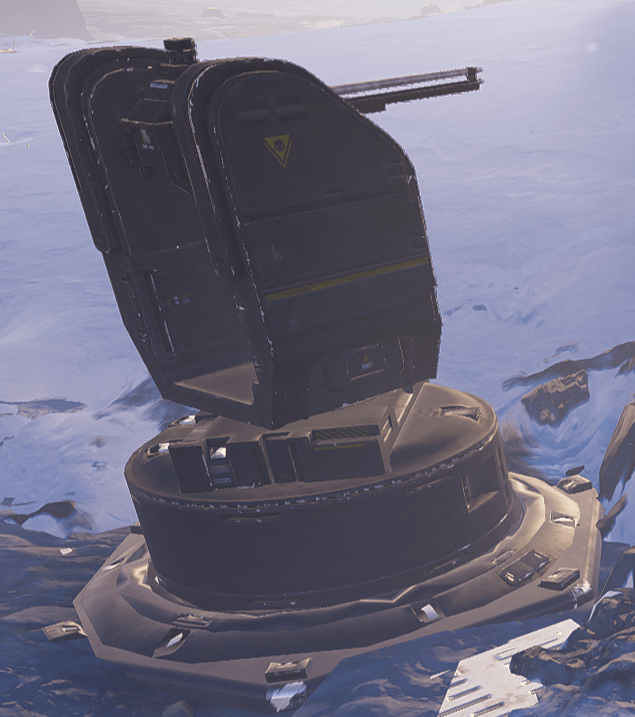
Damage, Fire Rate, & DPS – See the MG-43 Machine Gun
Capacity – Unknown, and extraordinarily difficult to test
Accuracy – Pinpoint, firing centermass at the most convenient* targets within 75 meters.
Handling – Fast turn rate and lower rate of fire than its gatling counterpart makes this turret much more ammo efficient, and thus far longer lasting, though it does not have a significant amount of HP and won’t last long under fire. Takes 5 seconds to call down, and 1 second to deploy.
Special Characteristics – Hellpod, Medium Armor Penetrating (Pen 3), Sentry
Conclusion – The AMG-43 is a decent defensive tool, being an automated MG-43 which is itself a very decent weapon. However, the relatively unintelligent sentry AI makes it very prone to teamkilling helldivers in a chaotic brawl, and so usage of this- or any sentry- demands careful placement and active communication with the team to ensure that the sentry’s line of fire is clear. Most often, this means placing it at as high an elevation as you can manage while still keeping it in general range of the targets- so that the high firing angle can prevent its non-stop bullet hose from passing over unfortunate allies, so that it is removed from the dangers of encroaching foes, and so the odds of its suddenly sweeping backwards to shoot a foe that has appeared behind it are dramatically lessened. Combine it with mines to create a true killbox on defensive missions or tight chokepoints, denying the enemy an entire angle of attack.
*A “convenient” target is whichever target is relatively close to the target the sentry last shot at, starting with the closest. Its logic is a bit tough to predict, and can sometimes result in sweeping arcs across a horde.
A/G-16 Gatling Sentry
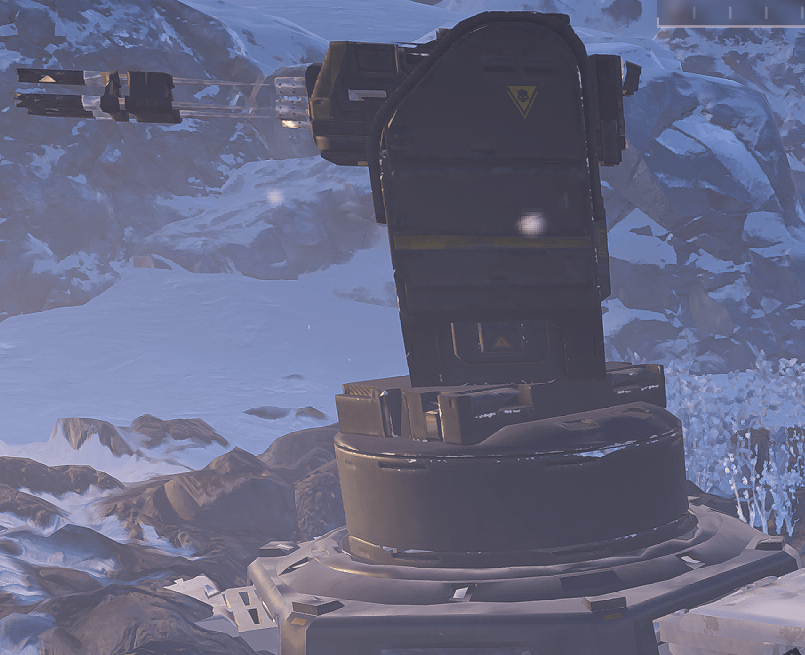
Damage, Fire Rate, & DPS – Deals 80 damage per shot, at an unknown (but very high) fire rate, for an unknown (but very high) total damage per second.
Capacity – Unknown, and extraordinarily difficult to test
Accuracy – Significant spread, though irrelevant in the context of a recoilless, aimbotting sentry turret. Fires centermass at the most convenient targets within 75 meters
Handling – Turn rate is a bit lower than the MG-43 counterpart, and the higher fire rate means it wastes more ammunition between targets and doesn’t fire for nearly as long (It feels like about half as long, usually). Its bullet hose of death also affords dramatically less room for error than the MG-43, though there wasn’t exactly very much to begin with. Same amount of HP as the MG-43 variant
Special Characteristics – Hellpod, Medium Armor Penetrating (Pen 3), Sentry
Conclusion – The A/G-16 Gatling sentry is a more “bursty” variant of the MG-43, dealing its damage far more quickly and for not nearly as long. It is better at stemming a massive tide, but it won’t hold it for very long and in most other situations it acts as a worse MG-43. The two are ideally taken together, functionally allowing the Helldiver to have 2 machine gun turrets to use in alternating fashion for more long-term coverage, or both at once for truly desperate situations. Both placed together at a decent vantage point can singlehandedly wipe every medium armor or weaker enemy from any bot drop or breach- though the Helldiver will be required to take out heavy armor enemies such as Heavy devastators/Striders and Chargers/Hulks/Tanks/Titans.
A/AC-8 Autocannon Sentry
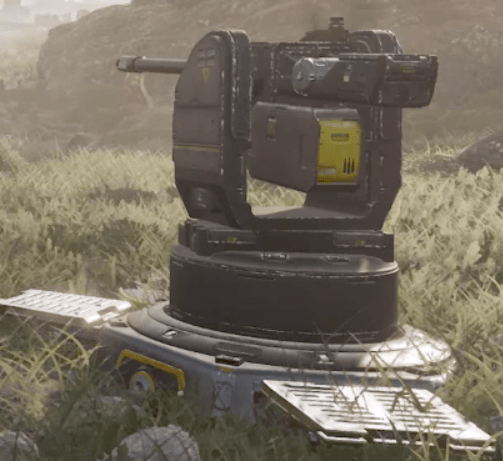
Damage, Fire Rate, & DPS – Deals 300 damage on direct hit, followed by a 150 damage explosion in a 3 meters falloff. Fires 3-round bursts every 1.5 seconds for a total of 900 damage per second (or more with AoE)
Capacity – Unknown, very likely identical to the AC-8 with backpack, but possibly not.
Accuracy – Very minor spread, occasionally misses even medium sized targets at medium ranges. Fires centermass at targets within 75 meters.
Handling – Very slow turnspeed, but never fires when not on-target. Extremely poor performance at close ranges due to turnrate and explosive radius.
Special Characteristics – Hellpod, Explosive, Vehicle Armor Penetration (Pen 5; Explosion is Pen 3), Stagger, Sentry
Conclusion – A decent defensive option, dealing very heavy anti-armor damage capable of killing even tanks and chargers from any angle (albeit with some effort). The slow turn rate does mean it needs to be placed decently far from its targets, or it will end up spending more time turning than firing and likely be destroyed. The explosive radius does make it possible to get teamkilled by the sentry, and it will still fire if you are between it and its target, so caution is still needed.
Due to its relatively slow fire rate, it will also tend to spend a good deal of time firing at targets that aren’t ideal for its damage pattern- and could end up destroyed by heavier targets when smaller ones are there to distract it. As a result, it is best paired with other emplacements or a supporting helldiver to clear out the chaff so it can focus on the bigger threats. Chargers, in particular, tend not to die to a single burst and so need to be dealt with unless they are far enough away to get slammed by a second or third burst before running over the turret (or unless the turret is placed somewhere the charger cannot reach).
A/M-12 Mortar Sentry
Damage, Fire Rate, & DPS – Deals 400 damage per shell within a [[still testing]] meters falloff. Fires shells in 3-round volleys every [[still testing]] seconds, for a total of [[still testing]] damage per second.
Capacity – Unknown, and extraordinarily difficult to test
Accuracy – Inaccurate, shots landing anywhere within [[still testing]] meters of a target. Fires at targets as far as [[still testing]] meters away, but no closer than 15 meters.
Handling – “instant” turn rate, but with a very long travel time on the mortar shells of [[still testing]] seconds. Extremely prone to friendly fire due to large AoE. Low HP pool
Special Characteristics – Hellpod, Explosive, Medium Armor Penetrating (Pen 3), Sentry
Conclusion – The AM12 is a prolific teamkilling device. Well known for being more effective against Helldivers than either of our hated foes. That said, if your entire team carefully coordinates their movements (read – drops the sentry really far away, pulls aggro, then runs all the way back to the mortar sentry and stays within 15 meters or so of it), it can serve as a decent killing machine against both factions.
The high damage, medium penning explosive munitions can decently kill clusters of small enemies; but will tend to struggle even against medium armor enemies due to the harsh damage falloff. Only very fat enemies, or ones weak to explosives in particular, will be particularly vulnerable to the mortar sentry. Best used in large numbers as part of “mortar pit” strategies.
A/ARC-3 Tesla Tower
Damage, Fire Rate, & DPS – 600 Damage per bounce, firing every 2.5 seconds and bouncing to up to 3 targets (4 with the Tier 4 Circuit Expansion module) for a total of 240-960 damage per second.
Capacity – Lasts for 180 seconds
Accuracy – Autotargets nearest valid target within 20 meters, with each subsequent bounce seeking targets within about 10 meters or so of the previous target (bit inconsistent as I cannot predict the bounce targeting, making it very tough to tell what the limit is; at least not when I am by myself)
Handling – Has no moving parts, with a fairly low amount of health. Bugs will take it out in a few swipes, and bots after a few seconds of gunfire. Does not hold aggro very much, so if the Helldiver is nearby and within line of sight will typically be ignored (most noticeable with bots- though targets that are further away and out of LoS will still tend to shoot at the tower)
Special Characteristics – Hellpod, Heavy Armor Penetration (Pen 4), Arc, Sentry
Conclusion – The Tesla Tower is a very dangerous, but also extremely high output, sentry emplacement. Due to its propensity for teamkilling, it is advised that one be extraordinarily careful in its placement. Complicating this is the fact that it needs very close range to hit, and has very low HP and so will die very quickly. Pairs very well with a carefully placed shield bubble to protect it from long range fire; but it will target the generator so it needs to be outside the tesla radius.
Against bugs, they will struggle to get close until a fatter and more heavily armored bug walks up on it. Due to its very low pen (compared to the handheld arc weapons) its damage output against armored enemies is abysmal and will typically result in it being destroyed by them. But against hordes of small to medium sized enemies it can often hold its own if placed well for its full duration. The Arc-resistant armor is a good idea if you wish to make heavy use of this emplacement.
E/MG-101 HMG Emplacement
Damage, Fire Rate, & DPS – 200 damage per shot, firing 10 shots per second for a total of 2000 damage per second
Capacity – 300 rounds per calldown, 1 magazine with no reloading. A Total potential damage of 60,000
Accuracy – Decently accurate, but not pinpoint. Whiffs bot heads starting at around 25m
Handling – Has somewhat significant recoil, but with a bit of focus can be negated as its predictably upwards and not particularly erratic. Fast but narrow sway when not firing, but almost entirely overwritten by recoil during firing. Turns at roughly 30* per second.
Special Characteristics – Hellpod, Heavy Armor Penetration (Pen 4), Full Auto, Turret
Conclusion – The HMG Emplacement is a very potent, but also very short-lived, turret emplacement with a massive amount of potential damage. Extremely effective against a variety of targets thanks to the combination of its high damage per shot, relatively high armor pen, and high fire rate. It can melt anything smaller than a heavy unit in very short order, and comes with enough ammo to obliterate dozens of units. With precision, it can even take out Hulk heads with a decent few shots. However, due to being a static turret, it makes the user extremely vulnerable and the turret itself is liable to be destroyed by bot rockets, tank shells, spewer bile, or chargers and bile titans.
It is best paired with the Shield Generator emplacement, to defend the turret and its firer for a short while- but ultimately its static nature in a fast paced and mobile game severely limits its uses. The defensive missions are where it is best, especially Evacuate High-Value Assets which is a 100% static defense objective. It is also extraordinarily effective against Shriekers and Gunships, making it a premier anti-air option.
Eagles
All Eagles have an 8 second cooldown between callins, and after running out of uses must be Re-Armed for 2 minutes. All eagles must re-arm simultaneously, meaning that the cooldown does not start and uses are not restored until either all Eagle callins are used up or the Helldiver manually starts the Re-arm- which disables all eagles for the cooldown. The game also says there is a “0 sec” callin. This is a lie.
Strafing Run

Damage, Fire Rate, & DPS – Deals 150 damage in a 2 meters falloff per hit, fires a fuckload* of hits, for a shitload* of damage.
*Fuckload and Shitload are scientific measurements, trust me
Capacity – 4 Uses per Rearm
Accuracy – Impacts within a 5 meters wide straight line traveling 50 meters from the beacon away from the Helldiver at time of throwing.
Handling – First shot hits 2.5 seconds after calldown, last shot hits 3.5 seconds after. Rough safe distance is 5 meters (in first person, so about 8 or so in third)
Special Characteristics – Eagle, Explosive (doesn’t say it, but given that it kills things not even in the impact crater, it is definitely explosive), Medium Armor Penetration (Pen 3), Stagger
Conclusion – Not entirely sure what to think of this airstrike. It deals a small amount of damage in a narrow area, with low penetration. It has fewer uses than the clusterbomb, but hits a longer line in a different direction. It feels less reliable, but at the same time it also strikes much sooner and is less prone to friendly fire- making it much better when panic throwing stratagems.
Though its low damage makes it unlikely to reliably kill the higher health enemies such as spewers or berserkers (not that it can’t- as with most of the eagles strikes the patterns are very inconsistent, sometimes it’ll land 4 or 5 shots in the same spot, sometimes it’ll be widely spread; its a general trend of all eagles, even the 500kg has a tendency to throw the bomb in very weird spots).
Airstrike

Damage, Fire Rate, & DPS – Each bomb deals 500 damage on a Direct Hit, followed by an 800 damage explosion in a 5 meters falloff. Fires 5 bombs by default
Capacity – 3 Uses per Rearm
Accuracy – All bombs drop in a line that is 15 meters wide and 30 meters long, centered on the beacon and perpendicular to the Helldiver at time of throwing
Handling – First bomb hits 4 seconds after calldown, last bomb hits 5 seconds after calldown. Rough safe distance is 20m (in FP, so 23 or so in third person)
Special Characteristics – Eagle, Explosive, Vehicle Armor Penetration (Pen 5, for both DH and Explosion)
Conclusion – Easily the “best” of the airstrikes for the combination of its versatility, sheer power, and number of uses. With 3 total strikes (after the tier 3 upgrade), each Airstrike has enough damage and penetration to take out nearly any target- including most objectives. They close bug holes, they blow up fabricators, terminate illegal broadcasts (and nearly every enemy in the game, excepting only Bile Titans and air units). They hit a wide area, and have a massive radius on each individual bomb. There is almost no problem in the game that an Airstrike cannot solve.
Though it pains me to say it, the only other stratagems in the entire game that come anywhere close to this one’s power level are the 500kg (because it can kill even bile titans, at the cost of requiring more precision than the airstrike) and the Cluster Bomb (because it hits an even wider area and kills most of the chaff, leaving only the heavy units that other stratagems can easily deal with; and has 2 more uses). The Napalm strike is slower, the smoke strike doesn’t do damage, the Strafing run is too small in effect, and the rocketpods do too little damage to reliably take out most large targets.
The only reason you don’t see an airstrike in the loadout of every helldiver in every lobby is because Eagle re-arm times are shared, and most people like taking either the cluster bomb to clear chaff so they can focus on large targets or the 500 to kill large targets so they can focus the chaff- and they don’t want to deal with having those cooldowns restricted by the use of a second stratagem, no matter how good it may be. It is, however, the only stratagem in the game capable of instantly killing a Factory Strider- though it requires angling the calldown such that the entire line lines up with the length of the strider, ensuring that the bombs explosions strike the exposed undersides of the strider’s leg vents.
Cluster Bomb

Damage, Fire Rate, & DPS – Each small bomb deals 350 damage in a 5 meter falloff. Fires a fuckload of bombs (the upgrade, unfortunately, only adds an additional tiny bomb and not an entire extra canister- it is in fact also bugged, sometimes causing the extra bomb to drop directly on top of a nearby helldiver, instantly killing them despite being nowhere near the main drop area)
Capacity – 5 Uses per Rearm
Accuracy – All bombs drop in a line that is 20 meters wide and 45 meters long, centered on the beacon and perpendicular to the Helldiver at time of throwing
Handling – First bomb hits 4 seconds after calldown, last bomb hits 5.5 seconds after calldown. Rough safe distance is 25m (from FP, so 28 or so third person)
Special Characteristics – Eagle, Explosive, Medium Armor Penetration (Pen 3), Stagger
Conclusion – One of the more commonly used Eagles, the Clusterbomb trades the standard airstrikes general versatility for a wider and more consistent spread of weaker bombs and 2 additional uses; making it far more reliable at killing the larger and larger groups of chaff spawned in higher difficulty missions.
Although it cannot destroy harder targets, Helldiver loadouts almost always come with some manner of anti-armor anyways and so typically this isn’t an issue. Its sheer reliability and wide area makes it a phenomenal chaff shredder, which is extremely useful when dealing with the conga line patrols of small units to prevent breaches and bot drops. Or to get bombs into every nook and cranny of rocky terrain or dense structure layouts. Just be mindful of the area of effect.
Napalm Airstrike

Damage, Fire Rate, & DPS – Each bomb deals 250 damage in a 4 meters falloff, and leaves the ground underneath on fire. Any targets struck by an explosion are covered in heavy DoT (because Napalm) dealing a further 400 damage per tick on top of the standard 60 from being on fire. Fires 5 bombs by default.
Capacity – 3 Uses per Rearm
Accuracy – All bombs drop in a line that is 10 meters wide and 25 meters long, centered on the beacon and perpendicular to the helldiver at time of throwing
Handling – First bomb hits 4.3 seconds after calldown, last bomb hits 5 seconds after calldown. Burning ground lasts about 15 seconds after impact, longer than flamethrower and incendiary nade (looks shorter than it is). Rough safe distance is 15 meters (from FP, so 18 or so in third person).
Special Characteristics – Eagle, Explosive, Variable Armor Penetration (Pen 3 on main Explosion, Pen 2 on heavy dot), Incendiary
Conclusion – A version of the airstrike tailor made to kill terminids, unfortunately falling short primarily due to the low pen on the “heavy dot” resulting in failure to kill most of the larger bugs unless previously weakened. The burning ground does not last particularly long, and thus typically doesn’t deny an area for too long either. Overall an underwhelming airstrike, saved only by the fact that the burning ground can at least reliably kill scavengers and warriors for the 10 or so seconds it lasts.
The showcase clip in-game shows it killing a bile spewer, but this is only due to it being directly hit by one of the explosions- meaning that it achieves over a short period something the standard airstrike with the same number of uses achieves instantly. It’s one saving grace is that if a bomb hits a Bile Titan, it does a decent amount of damage- though even a full rung of Napalms probably won’t kill a titan, it might save a bit of ammunition on an AT weapon.
500kg Bomb

Damage, Fire Rate, & DPS – A single Bomb which deals 1400 damage if it directly strikes the target (very rare), followed by a 1200 damage explosion in a very sharp 15 meters falloff that extends very high into the air.
Capacity – 2 Uses per Rearm
Accuracy – Technically pinpoint accurate, but due to the innately inaccurate nature of eagles and the extremely sheer angle of the bomb’s drop (always coming in from behind and to the right of the Helldiver at time of throwing), it can often end up hitting very close to the initial throw position- especially if throwing from a very elevated position relative to the call-in’s impact (seems to be an intentional anti-cheese mechanism for players that like fighting from unreachable positions).
Handling – Bomb lands 4.5 seconds after calldown, then detonates after a further 1 second. Rough safe distance is 16 meters in first person (~19 in third), might knock you over but won’t deal damage at that distance.
Special Characteristics – Eagle, Explosive, Variable Armor Penetration (Pen 7 on direct hit, Pen 6 on explosion)
Conclusion – The most commonly used stratagem in the game, primarily for its ability to easily kill Bile Titans and just about every other enemy type in the game. Although very cumbersome in its use, requiring precise timing to ensure that narrow hitboxs lands on-target, the reward is a near-guaranteed kill on just about anything that could possibly exist. In my opinion slightly overrated, due to the ease of access of many other anti-tank options, but all the same a simple and effective solution to an otherwise complicated and difficult problem.
With the short re-arm time and 2 uses per (averaging out at 1 500kg per minute), it can save a tremendous amount of ammo on whatever anti-tank option you are primarily using, or in a team of helldivers equipped with other anti-tank options serve as your only such tool; thus opening room for other stratagems or weapons.
Not my favorite, personally, but it’s popular for good reason. Do note that its very narrow hitbox precludes it from being clearing most types of objectives, and although the direct hit is very high penetration, it has no explosive property and thus cannot actually deal damage to most structures- and the pen 6 explosion tends to whiff anything that isn’t almost directly on top of the bomb.
110m Rocket Pods

Damage, Fire Rate, & DPS – Fires four rockets that each deal 600 damage on a direct hit, followed by a 200 damage explosion in a 7 meters falloff.
Capacity – 3 Uses per Rearm
Accuracy – Auto-targets the largest enemy or structure within 20 meters of the calldown. Almost perfectly accurate, only very occasionally failing to strike most large targets.
Handling – Rockets impact 3.2 seconds after calldown. Angle tends to be from the front and left of the Helldiver at time of throwing, but I have seen other angles and am not sure what the conditions are. Rockets do occasionally deflect, and land in a forward-traveling pattern starting at the calldown beacon and traveling away from it ~5 meters past that point along the eagle’s path.
Special Characteristics – Eagle, Explosion, Vehicle Armor Penetration (Pen 5, both on hit and explosion), Auto-Targeting
Conclusion – The Eagle “version” of the Railcannon strike, but significantly weaker in effect due to the high number of uses and short rearm time of the eagles in general; in effect making it a “mini” railcannon that is less punishing when it fails to kill or otherwise misses due to a bad throw.
However, the search radius is significantly lower than the railcannon, and on top of dealing less damage per callin can often hit targets from the wrong angle and thus do even less damage. It can fail to kill chargers, and only very rarely will the rockets hit a Bile Titan in the head (otherwise dealing very very little damage on the rest of its carapace, and often failing to kill even with all 3 callins). It is primarily intended as an anti-heavy callin, for Chargers and Hulks, and not Tanks and Bile Titans.
Orbitals
Precision Strike

Damage, Fire Rate, & DPS – Fires a single round which deals 150 damage on direct hit, and 750 damage in a 13 meters falloff.
Capacity – 100 seconds base cooldown.
Accuracy – As the name implies, it always strikes the exact point of callin, excepting only sheer angles near the edge of the map and tall intervening obstacles.
Handling – The strike impacts 5.5 seconds after calldown. Rough safe distance is 14 meters in first person (17 in third)
Special Characteristics – Orbital, Explosive, Variable Armor Penetration (Pen 3 on direct hit, Pen 5 on explosion)
Conclusion – A highly versatile stratagem, capable of dealing with most targets assuming you can precisely aim it. Its radius is very narrow, but it strikes somewhat quickly and has a very very low cooldown, exceeded only by the Gatling barrage and the Gas/EMS strikes. Its best uses are to deal with the slow Automaton tanks, or tightly packed groups of enemies (ideally being stunned or controlled by an EMS field of some kind, or simply placed with decent lead or with timing on a breach/drop)- its low cooldown also lends its use towards destroying certain objectives, though its radius does not make it an ideal solution for clearing out any but the smallest of enemy bases.
With a good hand, however, it can make very short work of the more annoying objectives such as Shrieker nests and Detector towers. Once Arrowhead fixes the bug preventing most stratagems from “following” targets stuck by the callin grenade, it will also be a very potent tool for killing Chargers, Bile Titans, and Hulks (though Bile Titans may survive it, depending on the exact point of impact).
Gas Strike

Damage, Fire Rate, & DPS – Direct hit with the round deals 300 damage, followed by a lingering cloud of gas damage dealing 50 damage per tick (tickrate unknown). Cloud is 15 meters in radius and lasts for 15 seconds. The Corrosive dot lingers for several seconds (Helldiver dies long before it runs out)
Capacity – 75 seconds base cooldown
Accuracy – Similar to the precision strike, it lands directly on the point of calldown.
Handling – Strike impacts 3.5 seconds after calldown. Safe distance is anywhere outside the cloud.
Special Characteristics – Orbital, Explosive, Variable Armor Penetration (Pen 4 on DH, Pen 6 for the DoT)
Conclusion – In Theory, this strike is a long-lasting area denial tool similar to the eagle Napalm strike but a bit more precise. In practice, the damage dot is oddly weak (a whole 10 points weaker than the fire dot, which already struggles to kill things stronger than scavengers entirely by itself).
The higher pen on the DoT should make up for it, but oftentimes the strike will almost entirely fail to kill anything larger than a small bot moving through it unless it stands in it for a protracted period of time. While this does make it effective at clearing small bots and striders, Devastators and Berserkers will tend to be almost entirely unaffected besides being scratched by this strike. However, I am still testing its uses- this seeming weakness could be a result of the DoT bug.
Gatling Barrage

Damage, Fire Rate, & DPS – Fires a concentrated barrage of rounds, each of which deals 300 damage on direct hit followed by a 250 damage explosion in a 3 meters falloff.
Capacity – 80 seconds base cooldown.
Accuracy – Rounds impact within a 10 meters radius
Handling – Barrage begins 2 seconds after calldown and ends 12 seconds after calldown. Barrage length of 10 seconds. Rough safe distance is 15 meters in first person (18 in third)
Special Characteristics – Orbital, Explosive, Variable Armor Penetration (Direct Hits vary between 2 and 4 depending on impact angle, Explosion is always 3), Massive Stagger, Barrage
Conclusion – A decent anti-chaff option for extended engagements, ideal when you know enemies are going to be streaming into a particular spot (such as ongoing bug breaches, or conga lines of recently aggro’d foes through a narrow chokepoint). It cannot reliably kill heavy targets, however, so make sure to bring anti-tank options for chargers/hulks and tanks/titans.
Each individual shot has a massive stagger and will stunlock any vulnerable type of enemy, functionally locking down the area for the duration of the barrage. Its low cooldown and narrow radius ensures extreme ease of use, making it a handy fire and forget option to use in nearly every single engagement (very nearly once a minute!)
Airburst Strike

Damage, Fire Rate, & DPS – Fires a continuous barrage of shrapnel airburst rounds, each projectile of which deals 350 damage in a 5 meters falloff. Fires 1 shot every 3 seconds.
Capacity – 120 seconds base cooldown
Accuracy – Rounds consist of a 10 meters radius spread centered on a random point within 5 meters of the calldown.
Handling – First shot lands 3 seconds after calldown, last shot lands 9 seconds after calldown. Rough safe distance is 20 meters in first person (23 in third).
Special Characteristics – Orbital, Explosive, Medium Armor Penetration (Pen 3), Stagger, Barrage
Conclusion – The Airburst strike is a short n sweet barrage lasting barely a few seconds, but dealing an incredible amount of damage in a very narrow area. The explosions are identical to the individual bombs of a cluster bomb, but because they are much more densely packed and land in a somewhat continuous barrage in that very narrow area, end up dealing a dramatic amount more damage to anything within their radius.
The precise nature of this strike rewards precision, but also means it will never truly deal with the gargantuan hordes that can spawn on higher difficulties (at least not by itself). The staggered nature of the rounds also lends it to dealing with protracted or streaming groups of foes, especially terminids during a breach or bots filing through a narrow chokepoint. Paired with other stratagems thanks to its low cooldown, and it can round out a chaff-clearing lineup and serve as an easy way to trivialize most encounters.
120MM HE Barrage

Damage, Fire Rate, & DPS – Fires a continuous barrage of High Explosive Artillery Rounds, each of which deals 300 damage on direct hit followed by a 1000 damage explosion in a 10 meters falloff. Fires 6 bursts of 3 rounds spaced .7 seconds apart every 4 seconds for the duration of the barrage.
Capacity – 240 seconds base cooldown
Accuracy – Shots land randomly anywhere within 55 meters of calldown.
Handling – First shot lands 6 seconds after calldown, last shot lands 28 seconds after calldown. Barrage length of 22 seconds.
Special Characteristics – Orbital, Explosive, Variable Armor Penetration (Pen 7 on Direct Hit, Pen 6 on Explosion), Barrage
Conclusion – Both the 120 and 380 Barrages suffer from a bad reputation due to their rather poor states when the game first launched. They have since been buffed significantly in their accuracy and the radius of their explosions, making them far more reliable than before. Generally speaking, if you throw down either of these barrages you can expect everything in their radius to either die or be severely damaged. The main drawback is that the barrages are very slow, and their radius very wide- meaning it is not uncommon for certain enemies to make it out of the radius as they chase you, or for a fellow Helldiver to mistakenly believe a barrage has concluded and end up walking too close.
The primary difference between the 120 and the 380 is that the 120 fires more frequently, and for not as long, and of course does much less damage per individual round making it less likely to kill heavy targets (although it can still one tap even tanks or bile titans with very lucky direct hits to their weak points). The radius of its firing and its explosions are both narrower, as well, making it a bit more focused than the 380 and also less likely to teamkill as a direct result. Otherwise, however, these differences are somewhat superficial. In effect, these stratagems serve the same purpose and role and both perform it more or less equally well.
380MM HE Barrage

Damage, Fire Rate, & DPS – Fires a continuous barrage of High Explosive Artillery Rounds, each of which deals 450 damage on direct hit, followed by a 1000 damage explosion in a 12 meters falloff. Fires 6 bursts of 3 rounds spaced 1.5 seconds apart every 6 seconds for the duration of the barrage.
Capacity – 240 seconds base cooldown
Accuracy – Shells land anywhere within 75 meters of the calldown
Handling – First shot lands 7 seconds after calldown, last shot lands 40 seconds after calldown. Barrage length of 33 seconds
Special Characteristics – Orbital, Explosive, Variable Armor Penetration (Direct Hit varies between 8 and 6 depending on impact angle, Pen 6 on Explosion), Barrage
Conclusion – See 120MM HE Barrage. The 380 deals significantly more damage on Direct Hit, and has a much larger explosive radius. Its shells come down more slowly, and over a much broader area, and thus apply their damage more sporadically and less consistently. However, whenever it does hit something, it typically dies. Even Tanks and Bile Titans will usually die on a direct hit unless the impact angle is particularly unfavorable.
Walking Barrage

Damage, Fire Rate, & DPS – Fires a concentrated barrage of high explosive Artillery rounds, each of which deals 450 damage on direct hit, followed by a 1000 damage explosion in a [[still testing]] meters falloff. Fires 4 bursts of 3 rounds spaced 1.5 seconds apart every 6 seconds for the duration of the barrage.
Capacity – 240 seconds base cooldown
Accuracy – Shells fire in progressive 20 meter radius circles which start at the calldown and travel ~15 meters per burst.
Handling – First shot lands 4.5 seconds after calldown, last shot lands 25.5 seconds after calldown. Barrage length of 21 seconds.
Special Characteristics – Orbital, Explosive, Variable Armor Penetration (Pen 6-8 on Direct Hit depending on impact angle, Pen 6 on Explosive), Barrage
Conclusion – The Walking barrage is more or less the same as the 380MM Barrage, except it fires in a narrow line traveling outwards from the callin point instead of randomly within a 75 meters radius. This makes it slightly easier to predict where the shots will land, but due to the innate inaccuracy of the 380 it is still very dangerous to follow this barrage.
Also due to the distance each burst travels from the last, it has a tendency to do very little effectual damage to enemy targets unless they are very densely packed and strewn across the roughly 80 meters long killzone. Due to the nature of the drop patterns of Bot Dropships, this particular stratagem can be very effective at dealing with bot drops when placed predictively. Also due to the somewhat predictable nature of the pattern, it can be used to target fabricators or other structure objectives with relative ease compared to the more sporadic 380 barrage.
Orbital Laser

Damage, Fire Rate, & DPS – Fires a continuous, laser beam dealing 30 damage per tick (tickrate unknown but likely extremely fast) to all targets in the beam. Additionally lights the ground and targets on fire.
Capacity – 300 seconds base cooldown. Can only be used 3 times per mission.
Accuracy – Beam rapidly auto-tracks onto the target nearest to it within 50 meters, and is approximately 1 meter wide.
Handling – Beam begins firing 1 second after calldown, and finishes firing 26 seconds after calldown. It does not care about friendly fire, so be extremely careful and try not to be between the beam and any enemies at all whatsoever.
Special Characteristics – Orbital, Structure Armor Penetration (Pen 6), Incendiary, Beam
Conclusion – An extraordinarily powerful stratagem, justifying its limited number of uses and long cooldown. The total amount of damage this beam can put out is incredible, and it can destroy nearly every kind of target. Bile Titans and tanks will end up chewing through alot of its duration, as will Chargers and Hulks (though not as badly). But drop this during a very large engagement, and it will single handedly wipe out half or more of the enemy forces with ease.
Very commonly, it is used as a fire and forget weapon to obliterate Automaton bases of any size (including Commander Bunker bases), as it can easily melt through Fabricators and other structures. Particularly large bases likely won’t be taken out in one calldown, but the laser will clean up the vast majority of the structures and harder targets within- making easy work of an otherwise time consuming target.
Railcannon Strike

Damage, Fire Rate, & DPS – Fire a single, extremely powerful railcannon which deals 2000 damage directly to the target, followed by 800 damage explosion in a 1 meter radius.
Capacity – 210 seconds base cooldown
Accuracy – Absolute Precision, automatically targets the largest target (highest health pool) within 25 meters of the calldown.
Handling – Shot lands 2 seconds after calldown.
Special Characteristics – Orbital, Explosive, Variable Armor Penetration (Between 8-10 depending on impact angle on direct hit, and between 6-8 depending on distance from the Explosion)Conclusion – The Railcannon Strike is a powerful, but niche, answer to the heaviest of the targets. Dealing the single highest amount of damage in the game of all equippable items, this Orbital is tailor-made to nuke a single annoying target such as a Bile Titan, a Tank, or just a pesky structure (though ideally make sure there are no targets in the vicinity of the structure, as it tends to prioritize non-structure targets). Its long cooldown precludes it from most other uses however, and on higher difficulties can be very cumbersome to wait for.
Combine this with the deflection mechanic causing it to sometimes fail to kill particularly durable targets such as Bile Titans (and almost never killing Factory Striders), and it rapidly becomes difficult to justify using over the far more frequently available options such as the 500kg or Rocket Pods. However, if your loadout is very heavily generalized and capable of tackling most kinds of targets, the Railcannon can be a nice cherry on top to help take the pressure off every now and then when a bile titan or tank presents itself.


Be the first to comment