
Delivering the Light of Liberty to 400 metres.
Contents
Recoilless Rifle from a Distance
Сrеdit gоеs to SunTzuII!
Introduction
While often overshadowed by newer weapons like the railgun, the venerable recoilless rifle remains a formidable weapon in the arsenal of democracy.
It will faithfully go where it is aimed and not subject to the whims of a lock-on system. It’s ammunition is more readily available than the Spear, and it will punch harder than a railgun or autocannon when it connects. A single shot will silence illegal broadcasts and destroy spore spewers from a safe distance (yes, even from outside the spore cloud); a gunner-loader team can quickly dispatch a tank or cannon tower even from the front. It is also one of few weapons that can bring down an Automaton dropship before it can disgorge it’s undemocratic payload.
However, aiming the recoilless rifle does have one quirk: Gravity will arc its shells down, so during long-ranged shots, you will need to adjust your aim higher to compensate.
I will show you how.
Using the Reticle
First, find a suitable target. A distant and unsuspecting cannon turret may have its vents exposed, or perhaps you saw the unmistakable glow of a spore spewer from afar. Most hardened targets you’ll come across will be big enough and close enough – say, less than 75 democratic units (aka metres) – that will have little need to adjust for range. But for more distant targets…
The next step when you find a distant target for your recoilless rifle is to find the range. Look at the target and call it out (Default: Tap “Q” on PC, tap “RB” on PS5); anything deserving of a recoilless shot is probably deserves the attention of the rest of your squad anyway. A marker will appear showing the range to your target.
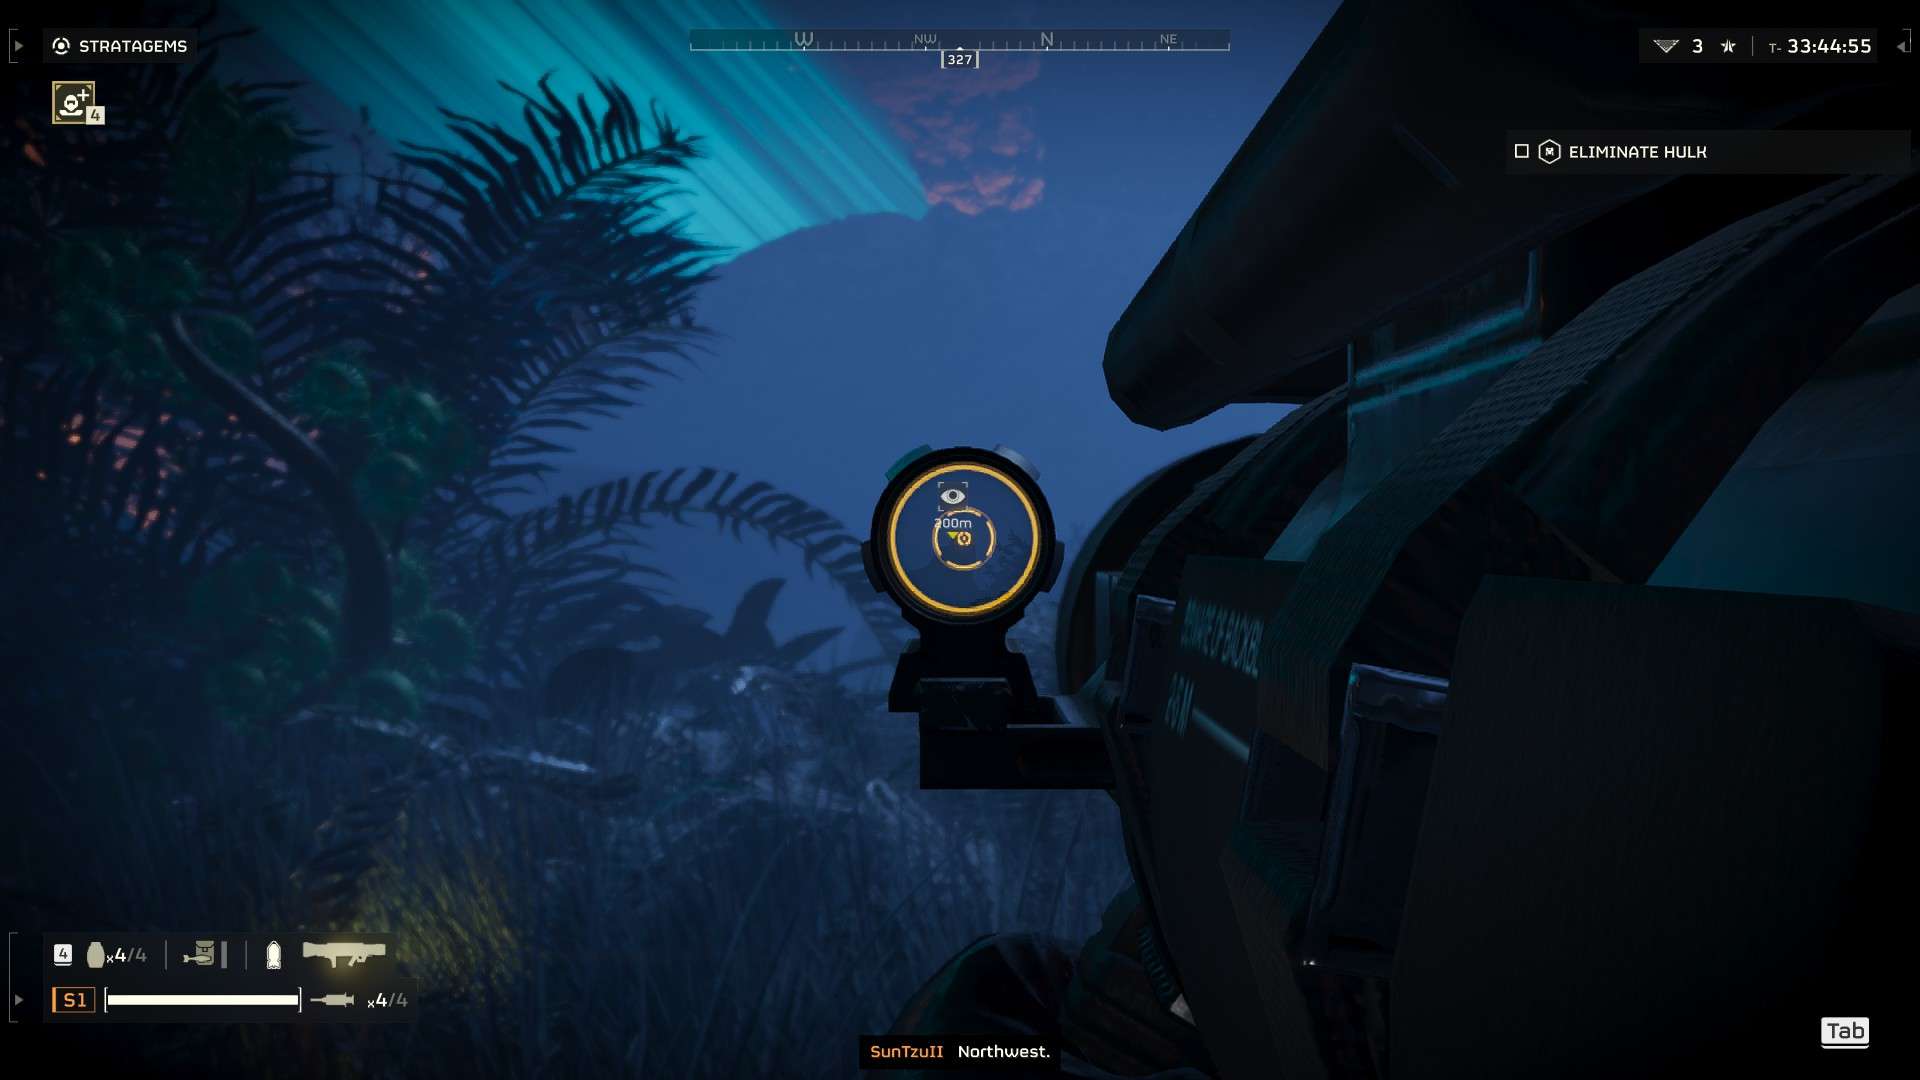
An undemocratic terrain feature sighted and ranged at 300 metres.
You will need to get into first person view to use your recoilless rifle’s gunsight. While aiming, the default key to switch aiming mode is “Middle Mouse Button” for PC and “Tap right-stick” for PS5.
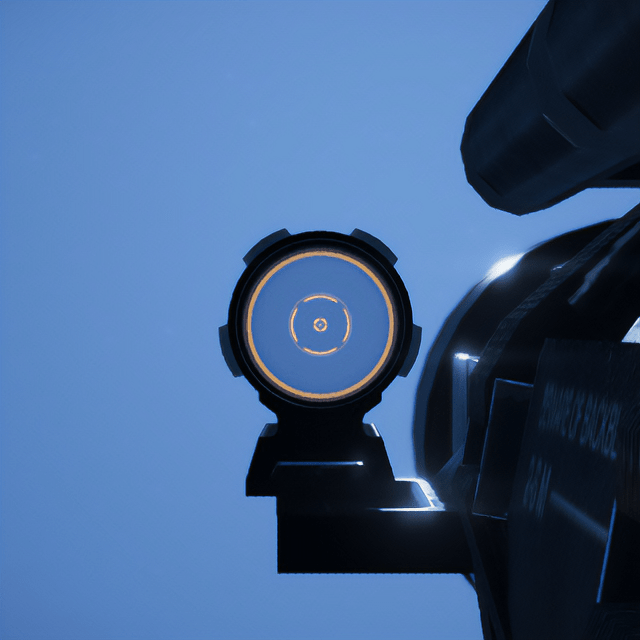
Let’s talk about your gunsight reticle. If you draw an imaginary line from the centre straight down, where the line intersects the middle circle is your 200 metre aimpoint. The outer circle is where your 400 metre aimpoint would be. You can work out the aimpoint for other ranges from there.

Use the appropriate aimpoint for your target’s range. Fire when ready.
To recap:
- Find a suitable target.
- Find out the distance to the target by calling out the target (Default: Tap ‘Q’ on PC, Tap ‘RB’ on PS5). A marker will appear along with the range.
- Get into first person view to bring up the gunsight (Default: While aiming, tap “Middle Mouse Button” for PC; tap “right-stick” for PS5 to switch aim mode).
- Use the rings in the gunsight reticle to work out the appropriate aimpoint for your target’s range. The middle ring is 200 meters, the outer ring is 400 meters.
- When ready, show your enemies the Light of Liberty.
Additional Recoilless Rifle Tips
As a team weapon, reloading your recoilless rifle by yourself is a slow and tedious task. Whenever possible, coordinate with a teammate to make a formidable anti-armour team!
When engaging Automaton tanks from the front, aim for the turret not the hull. Other weak points include the glowing vents behind the turret, and the engine bay at the back of the hull.
When engaging Automaton cannon turrets, aim for the turret itself (ideally the vents at the back). Attacking the tower beneath does little-to-no damage.
Automaton stratagem jammers appear invulnerable even to multiple recoilless rifle shots. You’ll have to destroy it by other means.
The recoilless rifle can be used to strip armour from a Terminid charger’s front legs, leaving it extremely vulnerable to lighter weapons. Other anti-armour weapons like the railgun are also capable of this.
A face shot with a recoilless rifle against an Automaton hulk will kill it instantly. A railgun is also efficient with this tactic and is potentially easier to aim.
Do not stand behind a teammate using a recoilless rifle. The backblast could knock you over, though it’ll do little-to-no damage.
May Liberty carry you to victory.


fun little tip if you have the Plas 1 scorcher it 3 taps spore spewers at any distance and you dont have to waste stratagems or grenades
a new hidden feature for both EAT-17 and RLR is they no longer suffer the 50% damage reduction when hitting enemy with shallow angel
Question. What do you use as an improvised range card since the optic lacks anything i see obviously filling this role.
With the “Mark” function. Please refer to Step 2 above.
I don’t recommend comparing the recoilless’s power to destroying an illegal broadcast.. a single grenade does the trick, too.
I would also like to add, mostly because I haven’t tested whether the disposable AT has any more or less power than the recoilless, it (The disposable) can oneshot the terminid charger if you get a good shot on its butt. Great guide too, thank yous <3
It also oneshots Automaton Carrier Ships with a well aimed shot at the thrusters. TBH this is the only reason i bring this weapon. Railgun is so much more mobility.
Thanks man, definitely an underrated weapon against Bots or Bugs. Takes down an Hulk in One shot and two for bile titans. Just aim for the head on both