
Guide to Germ Killing Room
Food poisoning is a common problem for players. Here is a method to kill germs in water, tested over a long period. This setup is reliable and simple.
This single room can clean 1800 kilograms of germ-filled liquid each cycle. You can increase this amount, but 1.8 tons is usually enough to clean daily waste.
Overview
There are 3 Liquid Shut Offs but only one will be activated at a time and there will be non-activating periods, therefore, the average power usage is less than 10W.
The Mechanical Door on the top is not necessary. It can be build with a fully enclosed tiled room.
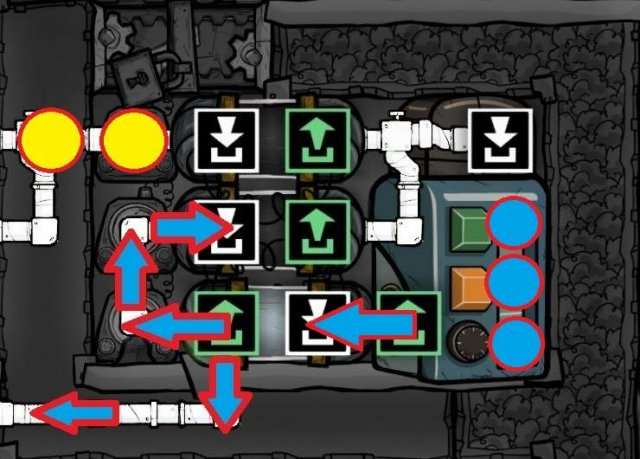
Building Layout
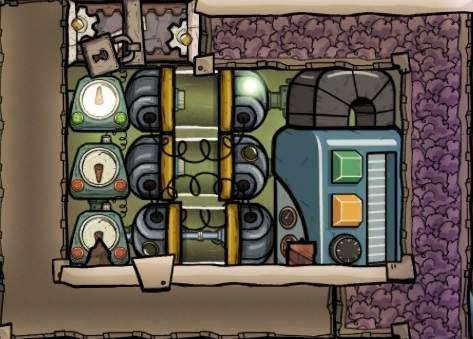
This is taken from live gameplay and some debris are lying over because i am too lazy to take an action.
Also, the room needs to be filled with complete Chlorine gas. Either pump the gas in or release by manual bottles, otherwise it won’t work.
If there are some other gases inside the room, it will increase the time to kill the germs and there will be a good chance that it will give out non-sterilized water prematurely.
There is some priming included in this method. That is because Chlorine will kill the germs ONLY if the liquid is inside the reservoir. In order to put all the Germ Water inside the reservoir, the outlet pipe section of the reservoir needs to be filled up with Clean Germless Water first, a.k.a, Priming process.
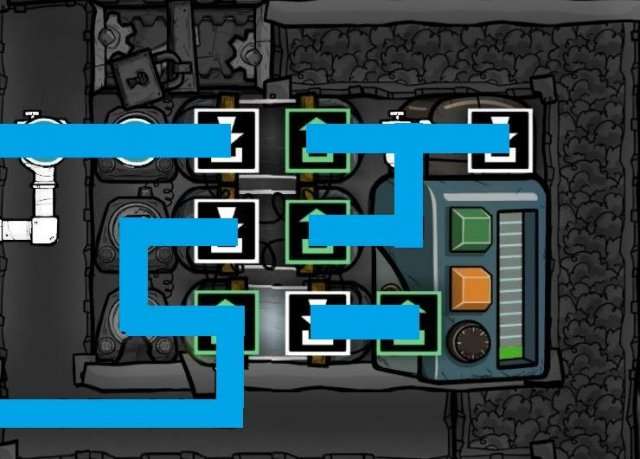
Piping and Automations
Piping Overlay
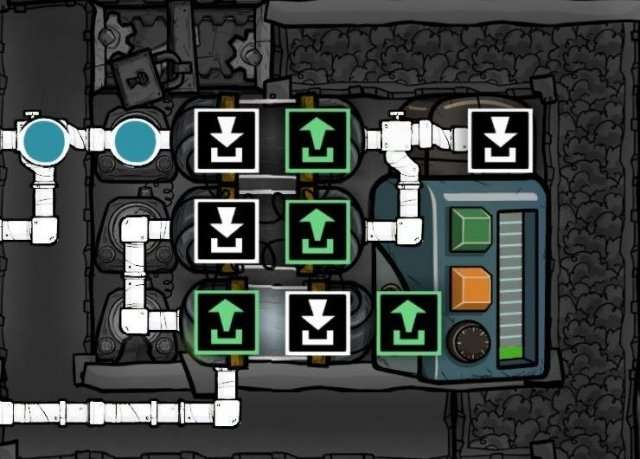
The Germ Water will came from the top pipe line.
Just to avoid any confusions between the Liquid Shut Offs, please reference this.
Only these blue lined pipes are needed to be constructed.
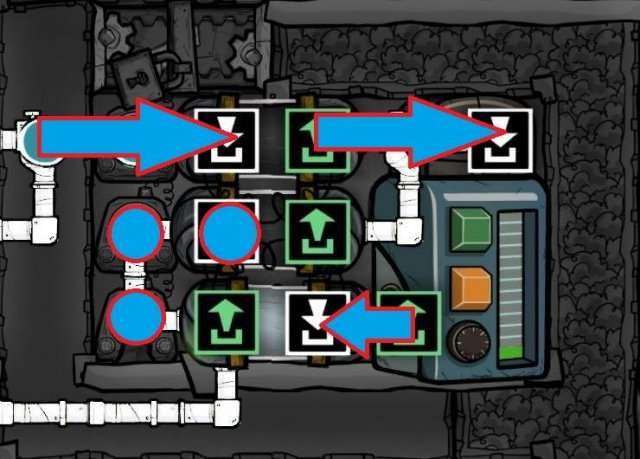
Automation Overlay
This is all the automation it takes to run.
How It Works
The whole process can be divided into 4 sections.
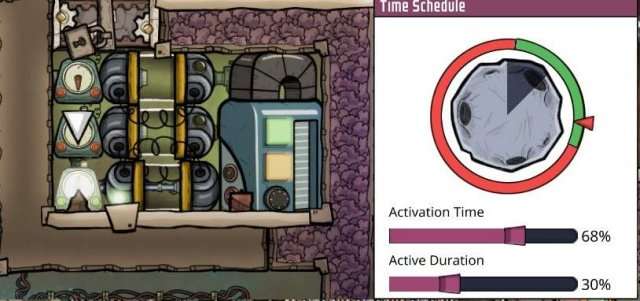
Take a careful look at Cycle Sensor Settings and set values exactly the same (Important)
1. Prime the Water (Middle Cycle Sensor).
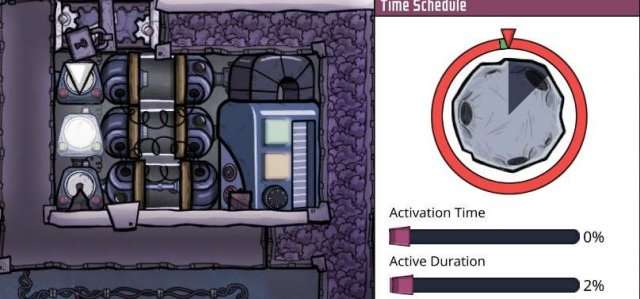
2. Germ Water Intake (Top Cycle Sensor).
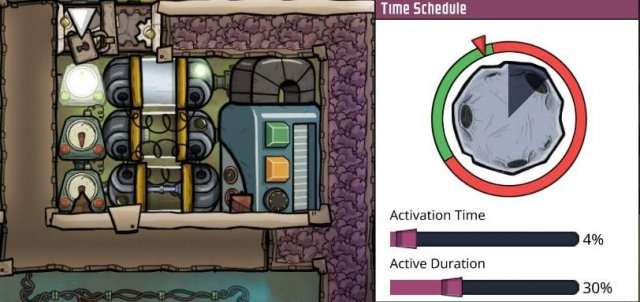
3. Kill the Germs (All Sensors Off).
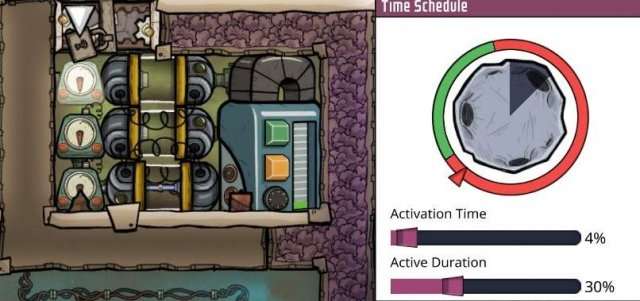
4. Gives Out Clean Water (Bottom Cycle Sensor)
Walkthrough in Detail
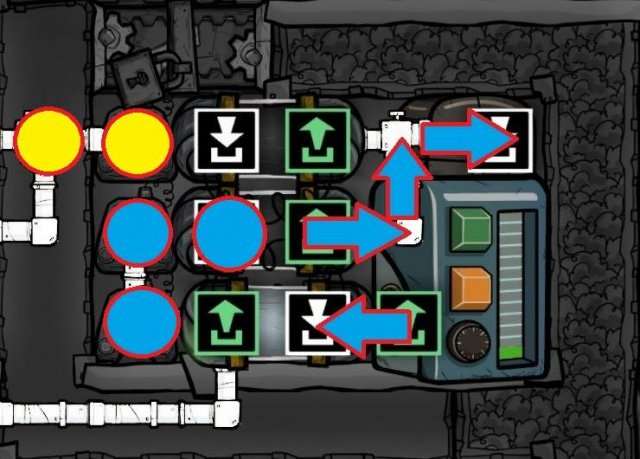
First time priming (Needs only for the first time since all the pipes are empty).
You need to fill those 3 spots with clean germless water beforehand.
The easiest way to fill up is shown by the arrows (The Germ liquid intake pipe).
After priming, the process becomes fully automatic.
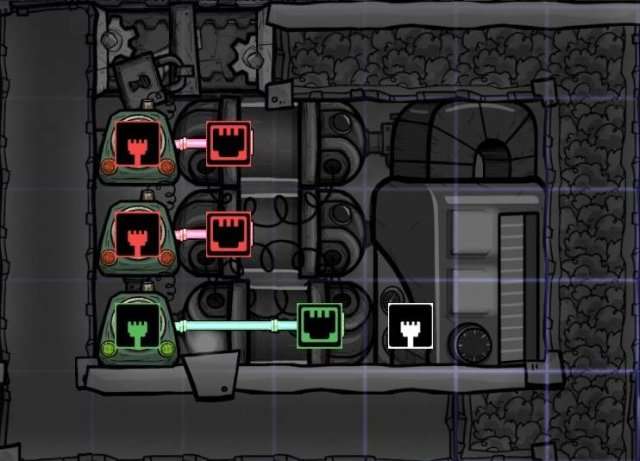
Automated Process (Yellow represents Germ Water, Blue represents Clean Water)
1. Prime the Water.
At the start of each Cycle, Middle Cycle Sensor activates and turns the Liquid Shut Off on.
This only takes a few seconds. After that, Priming is completed.
2. Germ Water Intake.
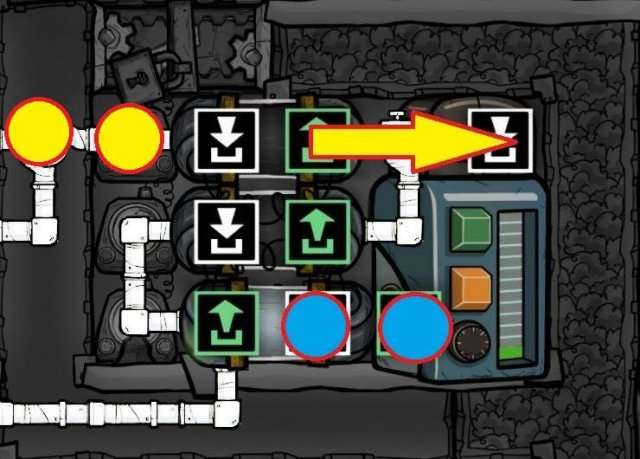
Top Cycle Sensor activates to lets the Germ Water enter the upper liquid line and go inside the reservoir.
It cannot get out from the Reservoir Outlet since it is occupied by the Clean Water.
3. Kill the Germs.
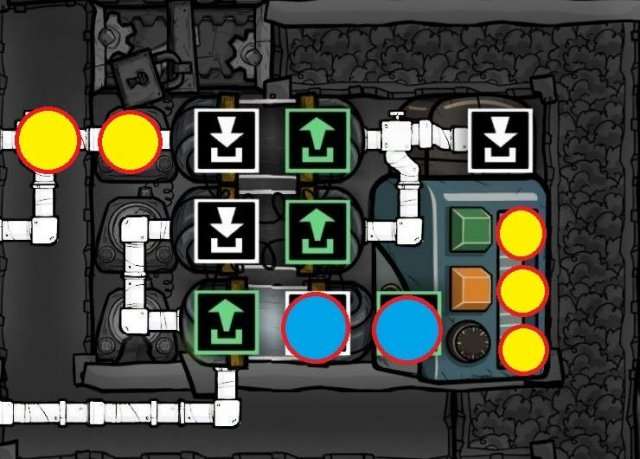
Chlorine will kill off the Germs inside the Reservoir automatically.
As you can see, Germ Water cannot come out since Clean Water is blocking the outlet.
4. Gives Out Clean Water
After all the Germs are dead, the Bottom Cycle Sensor activates to finally lets out the Clean Water.
But it will go both ways to make the priming ready again.
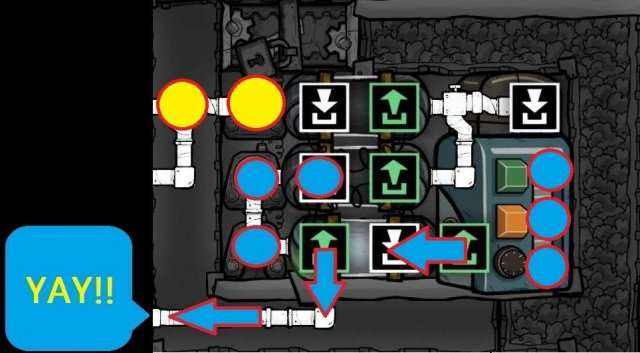
After the Priming Pipe is full, you can enjoy the Fresh, Clean, Germless Water for any use in your Colony.
Conclusion
This is best to pair with bathroom system since dupes will poop everyday. If the system runs dry for a few cycles, The Priming Line will likely become empty. In this case, you will need to re-prime it again just like the first time.


Be the first to comment