
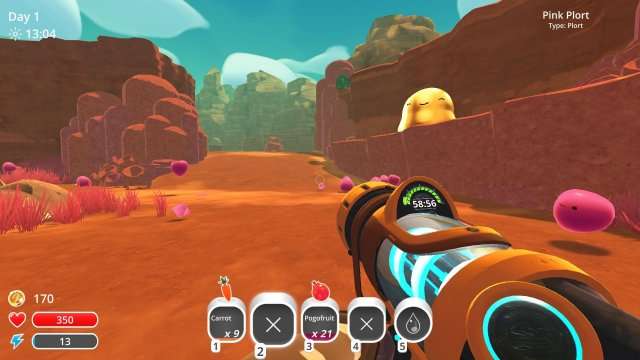
After the 1.2.0 update, the previous 5-Day Rush is no longer available. It has been replaced by Rush Mode. This new mode has more features and can be more difficult compared to the earlier version. If you didn’t get the 5-Day Plortmaster achievement before this change, don’t worry. I have information about the new mode here for you.
More Slime Rancher Guides:
- 100% Achievement Guide (How to Unlock All).
- Map Data Node Visual Location Guide.
- Basic 5-Day Rush Guide.
Basic Rush Mode Mechanics
Rush Mode has some very distinctly unique characteristics that make it different from both the normal game, and its predecessor, 5-Day Rush. Make sure you are familiar with ALL the following information, because I am not going to repeat it.
Plort Gates and Slime Doors
- The gate to the Ancient Ruins and the Teleporter to the Glass Desert start activated. This completely nullifies the need to search for the plorts to enter and allows early-game access to the Glass Desert slime species.
- However, the Glass Desert is still completely unrestored and the well is NOT activated. You need to bring 3 Rock Slime Plorts to activate it.
- In addition to that, all Slime Doors requiring keys still need keys to be opened.
Gordo Slimes and Golden Gordo Slimes
- All Gordos have reduced feeding requirements. Gordos that normally require 50 now only require 30, and the Pink Gordos only require 20. Gordos that normally have Slime Keys inside them still have those keys. Feeding them their favorite foods still counts as double, but is highly inefficient in this game mode.
- However, any Gordo placed on top of a teleporter only needs ONE piece of food to burst. This includes the Tabby Gordos, the Rock Gordos, and the Tangle Gordo.
- In addition to the normal Gordos, there are now GOLDEN GORDOS scattered around the map. These can ONLY be burst by feeding them three Gilded Gingers, 6 of which are obtained through every Ranch Exchange completed. These burst into Golden Slimes which vanish quickly but can be used to obtain large amounts of Golden Plorts.
Plort Prices and End Game Bonuses
- All plorts have static prices based on tiers. In general, the farther into the game they are, the more they are worth. I’ll have a picture of the chart down below.
- However, selling 25 of a plort type puts a star next to them. This is an end-game bonus to your score. The more plort variety you sell, the higher the bonus. The bonus appears to be calculated based on how many types out of the total plort types you managed to sell 25 of. I got 9 / 16 on my run and ended with a 57%, which makes the math add up. This means that 25 easy to obtain plorts carry just as much value as expensive end-game ones. If you can get 25 of a plort type, GO FOR IT.
Vac Pack Upgrades
- You start the game with EVERY upgrade possible, including elite 7Zee only upgrades. This DOES include Golden Sureshot, guaranteeing three Golden Plorts for every Gold Slime you can hit while popping Gordos. Because of this, don’t waste gilded gingers on normal gold slimes. It is not worth it to waste the only item capable of popping Gold Gordos just to get two more plorts out of a single slime.
Slime Science Gadgets
You also start the game with a varied but limited assortment of Slime Science gadgets. There is no possible way to get more, as all the buttons in the Lab are unable to be touched. It gives you:
- 2 Med Stations
- 2 Hydro Turrets
- 3 Teleporters
- 3 Warp Depots
- 1 Market Link
You cannot get more of these specific items. Be aware that if you lose something that cannot be picked up again, you will never be able to recover it if you destroy it. Be very careful about where you place these items. The Warp Depots and Teleporters are unique in this way. Market Links, however, can be picked up. So, if you collect 25 of a certain plort type while exploring, you can place a Market Link and then pick it back up afterward.
Penalties for Dying
- Dying in Rush Mode gives you a -10% penalty on your current Newbucks for every death. In addition to that, it will also shave a minute off your time during the run. Try to avoid dying.
Ranch Exchanges
- In Rush Mode, completing Ranch Exchanges is critical for your success. A completed Ranch Exchange will give you 6 Gilded Gingers, in addition to 12 more minutes on your timer. If you complete all four possible Ranch Exchanges, your run will end exactly at noon on the 5th day. For every Exchange you somehow miss, that goes down half a day for an absolute minimum of noon on the 3rd day. It is absolutely critical you complete all the exchanges as fast as possible.
- Keep in mind that 24 minutes pass between the start of the current exchange and the start of the next. This happens at 12:00 every day in-game. If you have let the time go down far enough, it is possible to not have enough time to finish the next exchange, ending your run prematurely. Put the Ranch Exchange at the absolute top of your priority list.
- Ranch Exchange RNG is not kind. It is completely possible to get a request for items that are found in an area you haven’t unlocked yet, or super rare slimes like Hunter / Crystal Slimes. You really just have to hope for the best or be very good at Slime Door skips.
Additional Content
- Neither Ogden’s Wilds nor Mochi’s Megabucks content can be accessed during Rush Mode. This includes all their upgrades, plorts, slime types, and other content.
Plort Prices

Click on the image to expand it. The blur isn’t my fault, its because the screens in-game act like CRT TVs and are hard to take crisp photos of. For those of you who will still be annoyed anyways, here’s the prices in text form.
Tier 1 Plorts (Worth 10 Newbucks)
- Pink Plort
Tier 2 Plorts (Worth 22 Newbucks)
- Phosphor Plort
- Rock Plort
- Tabby Plort
Tier 3 Plorts (Worth 45 Newbucks)
- Boom Plort
- Rad Plort
- Water Plort
- Honey Plort
- Fire Plort (Even though its from the Glass Desert lol)
Tier 4 Plorts (Worth 60 Newbucks)
- Hunter Plort
- Quantum Plort
- Crystal Plort
Tier 5 Plorts (Worth 75 Newbucks)
- Dervish Plort
- Tangle Plort
- Mosaic Plort
Ultra Hyper Mega Master SSS EX+ Tier Plorts (Worth 300 Newbucks)
- Golden Plort
General Advice and Expectations
1) I expect you, the reader, to be INTIMATELY familiar with the maps. I will only be giving basic directions, not full on details. You need to be able to to know where you are going and where to find things on your own, or else you won’t be able to fulfill the random Ranch Exchange requests (Which I cannot cover because they are 100% random). This is tough love, and unfortunately you are going to need it.
2) Be sprinting at all times. Time is of the essence in this mode, and you need to be going as fast as you absolutely possibly can. It will save you whole minutes by the end of the game.
3) Open any Pods you can find. They don’t give resources in this mode, instead giving money equivalent to their Pod color.
- Green: $100
- Blue: $200
- Purple: $350
4) Use your Golden Plorts to fund your building. Golden Plorts are BY FAR the best moneymaker in this game thanks to the availability of Gilded Gingers and Golden Gordos + Golden Sureshot. Prices don’t ever go up or down, so feel free to sell all your Golden Plorts as soon as you get them.
5) Be prepared for the most unfair Ranch Exchanges possible. This means keep some Hunter Slimes in reserve, try and grab a few Odd Onions if you can, that kind of stuff. Viktor and Ogden especially are guilty of demanding the rarest possible slimes / foods.
Golden Gordo Locations
Obviously you need to know where every Golden Gordo is to get the maximum value out of your Gilded Gingers. However, there are actually more Golden Gordos than there are possible Gilded Gingers to feed them.
So I’m going to show the easiest ones to get, because all the rest are much too far into the game to be efficient to pop. The ones I will show you are the most grouped together and the easiest to reach. However, for the sake of knowledge, I will tell you where the final three are:
- The one in the Ruins is located in the middle of the gigantic crevice in the Ruins, easily visible on a platform in the middle. (This one is a good alternative for the Moss Blanket Golden Gordo.)
- At the very end of the Glass Desert, just before the final room. Can’t miss it.
- The final Golden Gordo is located where Hobson’s final message is found, in the final room of the Glass Desert.
I’m not going to be showing maps, because lets all be honest, the map doesn’t help THAT much.
Remember! The game gives you EXACTLY enough Gilded Gingers to feed 8 Golden Gordos to bursting. If you waste a single Gilded Ginger on a normal, non-Gordo slime, you will be unable to pop the final Golden Gordo.
Gordo #1: The Dry Reef
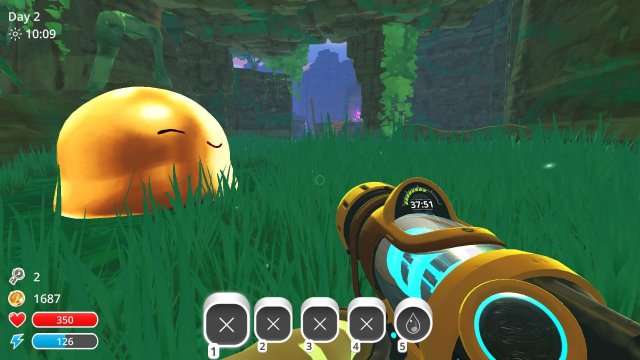
This Gordo is directly outside the Ranch in the first section of the Dry Reef. It probably exists to show new Rush Mode players that there are Golden Gordos in this mode, because it is practically impossible to miss.
Gordo #2: Ring Island Gordo 1/3
I apologize for this absolutely trash level photo, but I wanted to make it easier to recognize where it was. The Gordo is on the small island in the pond off to the left. This is on Ring Island, accessible only by popping the Tabby Gordo on the Dry Reef beach next to the Overgrowth.
(Warning! While it is possible to barely stand on the ledge directly next to the Gordo while feeding the it the Gingers, its final “size” as it pops will shove you off the ledge and cause ALL the Golden Slimes to despawn from proximity before you can recover to shoot them. Make SURE you are hovering in the air or on the nearby rock bridge before popping it.)
Gordo #3: Ring Island Gordo 2/3
This Gordo can be found on Ring Island as well. By going deeper into the island, you can find this Golden Gordo next to the bride leading to the Ring Island Pink Gordo. It is on top of the Ring Island Vault, if that helps you find it.
Gordo #4: Ring Island Gordo 3/3
Located at the very top of Ring Island. It stands directly on top of the Ring Island Vault. If you hop over to the mountain from the Pink Gordo location, then climb the rocks to the right of the tunnel. The Golden Gordo is up there.
Gordo #5: Moss Blanket
This Gordo is actually pretty hard to find if you don’t know where the Moss Blanket Vault is. So, to spare you a super tedious guide as to where it is, just google “Slime Rancher Moss Blanket Vault Location”. The Golden Gordo is directly on top of it.
Gordo #6: Ash Isle Gordo 1/3
This Gordo is found on Ash Isle, which is unlocked by popping the second Rock Gordo in the Indigo Quarry. This specific Golden Gordo is inside the first cave to your left after teleporting to Ash Isle.
Gordo #7: Ash Isle Gordo 2/3
The second Ash Isle Gordo is located in the very back corner of the OUTSIDE of Ash Isle. It does not involve going into any caves, so if you go through the caves you are going the wrong way.
Gordo #8: Ash Isle Gordo 3/3
This is the final Golden Gordo both in the game and on Ash Isle. It is located at the very top of Ash Isle on top of the 3rd Vault. Head upwards until you reach the Crystal Gordo, and then keep heading upward until you find it. It does not involve any hardcore parkour, so if you are flying around the place you’re doing it wrong.
Starting Your Rush (Finally)
Finally done with all the reference material and basic guidelines. Now we can get into the actual gameplay.
I will be “narrating” what to do in this guide. As I said before, it is impossible to make perfect step-by-step instructions on what to do, so treat this as more of a “To-Do List”.
Do not mindlessly follow this guide to the letter.
I obviously cannot predict what is going to happen in your game. YOU have to react to it. I’m not going to give you instructions to go to each individual Golden Gordo and pop them. If it happens to be in front of us, I will, but you have to do it on your own time. This also goes for Ranch Exchanges. Every day at exactly noon, you should drop everything you are doing and immediately complete the Exchange as fast as possible. That time bonus is critical to getting the achievements.
First and most important step
The instant you spawn, immediately go check what the first Ranch Exchange request is. Complete this as fast as you can for an easy and early 6 Gilded Gingers and +12 minutes on your timer.
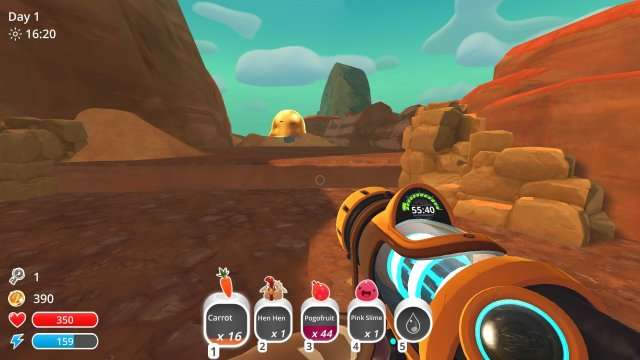
Gather Supplies and Pop the Golden Gordo
Before you head out to the Dry Reef, mosey on over to the Overgrowth and grab ALL the carrots + pogofruit. Grabbing the chickens can also be beneficial, but is not required. Once you do that, head over to the Dry Reef.
Since we are heading out onto the Dry Reef anyways, gather up a few carrots or something and pop the Golden Gordo #1 for a bunch of Golden Slimes and a good amount of plorts. A solid number of plorts to get per Golden Gordo is around 25, but honestly 18 – 21 is perfectly fine too. If you got less than 10 you majorly dropped the ball on a Golden Gordo and you need to practice. Make sure you sell the Gold Plorts as soon as possible so that they don’t take up inventory space. There is no reason to hold on to them since prices don’t fluctuate in Rush Mode.
After popping the Gordo, run through the Dry Reef and pick up as many pogofruit and carrots as possible. Your goal is 30 pogofruit, and 40 of any other food type. Chickens, carrots, more pogofruit, doesn’t matter. But you need 30 pogofruit specifically. These are to pop some Gordos in a minute or two. Make sure you also have 2 chickens to pop the Tabby Gordos.
You can pop the Phosphor Gordo and the first Pink Slime Gordo now if you really want to, but it isn’t actually necessary since we’ll be heading back this way in a bit anyways.
Pop the Tabby Gordo at the end of the Dry Reef near the Moss Blanket entrance for an easy teleporter to the Overgrowth.
Gathering the Slime Keys
Now that you have your Pogofruit and other assorted foods, head from the Tabby Teleporter in the Overgrowth to the other exit leading to the Beach of the Dry Reef. Go pop the Tabby Gordo leading to Ring Island. While you are here, assuming you are still carrying the Golden Gingers, you can pop Golden Gordo #2. If you don’t have the inventory space to do that, don’t worry, you can come back later.
Climb the island until you reach the Pink Gordo. Pop it for the slime key, then jump down back to the teleporter and head back to the Dry Reef. Make sure to go back through the Overgrowth and not further up the beach, because it ends in a Slime Door that way and wasting the key you just got is a horrible idea.
Once you get back to the Dry Reef, use the 30 Pogofruit to pop the Phosphor Gordo for his Slime Key and the first Pink Gordo for his as well.
We should now have three slime keys and around 12,000 Newbucks.
(You should get about 5,000 – 7,000 Newbucks for both Golden Gordos you popped. If you chose not the pop the second one the first trip, haul butt back there and pop it because you need that money.)
Building Your Ranch & Entering the Moss Blanket

Setting up your teleporters
Trust me, this step is pretty important. You want to place down one of each teleporter somewhere on the main ranch. This works best either in the very center of the Ranch with three Slime Gadget spots all in a group, or the three spots surrounding the Plort Market machine. For the love of god, make sure you do not place down more than one of each type. That will PERMANENTLY remove that teleporter from your game because you can never move it from that spot.
Building your Ranch
Since we are currently pretty well funded thanks to our Golden Plorts, we can go completely nuts with building. For the four land plots on the outside ring of the Ranch, turn these all into Gardens. Don’t bother with Scareslimes, but make sure they have sprinkler and fertilizer upgrades.
As for the inner four plots, turn them all into max upgraded Corrals. Don’t waste money on the Solar Shield upgrade though, but feel free to use the music one because we’ll be keeping some rather unruly slime species in these eventually.
Heading over to the Moss Blanket
Once your Ranch is all set up, grab some more pogofruit from the Overgrowth and set out towards the Moss Blanket Slime Gate. Once you crack that open, drop down the log entrance and immediately place down a teleporter exit. This will allow you to get in and out of the Moss Blanket easily as you can both enter / exit from your own teleporter, and exit from the normal blue teleporter past the Honey Slime field.
Grabbing some mint mangoes and popping the Honey Gordo
Rush through the Moss Blanket and try to get a combination of fruit that will satisfy the Honey Gordo. Remember, mint mangoes count as two and you only need 30 to pop Rush Mode slimes. Once you get enough fruit, head over to the Honey Gordo and pop it for a replacement third Slime Key.
Make sure you keep 4 mint mangoes. We will be placing these in the Gardens later.
Abducting multiple Honey Slimes
Honey Slimes are the absolute cornerstone of effeciency in this gamemode. They are the highest selling, but most easily fed slimes in the entire game. Some people may argue that Dervish Slimes are better with their Prickly Pears, but you can’t get any Prickly Pears in the first section of the Glass Desert without restoring it first, which takes too much time.
While running through the Moss Blanket, take AT LEAST 10 Honey Slimes and as many Honey Plorts as you can. The more, the better. Grab as many mint mangoes as you can too because more of those means less early waiting for your Gardens to grow more. Honey Plorts take higher priority than the slimes themselves because we can use those to transform other slimes.
Back to the Ranch
At this point in time, once you think you have enough, head back to the Ranch through either the normal exit teleporter or the one you placed down earlier. Slap a mint mango in each Garden and toss the Honey Slimes, in groups of ten, in each Corral. Don’t put more than ten in each because we’ll be turning these into Largos and you don’t want that many Largos in a single Corral. Feed them if you can, but don’t wait around for the mint mangoes to grow, because we have more work to do.
In addition to that, don’t sell all your Honey Plorts. We need those to convert some Quantum Slimes into Largos shortly.
Entering the Ruins and Glass Desert

Entering the Ruins
Now that we have our mint mangoes all set up, our Honey Slimes all ready to be Largo’d, and everything generally in place back at the Ranch, it’s time to amp up the game. However, we first need to quickly run through the Dry Reef and grab three Rock Plorts. We need these later to activate the Ancient Water fountain. Once you get those, take your teleporter back to the Moss Blanket and bust open the Slime Gate to the Ruins. As you’ll notice, the Plort Door is already open. Head on through into the Ruins.
Literally skipping the entire ruins
Now that we are in the Ruins, we are going to entirely skip it and head to the Glass Desert. On the way there, abduct about 10 – 20 Quantum Slimes to turn into Quantum Honey Largos later. Rush through the Ruins, all the way to the Slime Door housing the Glass Desert teleporter room. There is literally nothing of value we need in the Ruins. Open that door with your second Slime Key and proceed to the Glass Desert.

Setting up your teleporter and abducting some Tangle Slimes
We’ve arrived at the Glass Desert, hopefully sometime during Day 2 (If it’s Day 4 already then you already failed, sorry. There’s just not enough time left for you). However, not enough wild slimes spawn naturally until we start restoring the desert, so let’s do that first.
Run over to the Tangle Gordo, and don’t pop it just yet. Place your own teleporter down nearby so we can head back home because we will be using the Tangle Gordo as our only source of Tangle Slimes. (I don’t recall ever seeing a Tangle Slime spawn naturally in the first half of the Glass Desert, but I could be wrong.)
Before we head back through the teleporter, jog on over to the Ancient Water fountain and activate it with those Rock Plorts. Grab some water (Make sure your sprint bar is full first) and run a circle around the Tangle Gordo, activating as many of those buds as you can. Now that we have naturally spawning Dervish and Mosaic Slimes, head on back through the teleporter.
It’s Largo Time!
Using your Quantum Slimes, crossbreed about 20 Quantum Honey Largos and place them in two of the Corrals. Feed them and sell their plorts. Throw out any Slimes that are extra, since we need the other two Corrals for Mosaic Dervish Largos. Make sure your inventory is empty, since we are going to need all four slots for this next part.
Obtaining Dervish, Mosaic, and Tangle Slimes
Before we head back through the Glass Desert teleporter, run out into the Dry Reef and grab any edible chicken you can find. You only need one, don’t bring more than that. Head back through the teleporter now.
Your objective is ten Dervish Slimes and ten Mosaic slimes. Plorts are useless to us right now, ignore them. We need non-Largo Dervish and Mosaics. Once you have those, use your single chicken to burst the Tangle Gordo. It will pop into exactly 10 Tangle Slimes, so suck those up. BUT, before we can head back to the Ranch, we NEED some prickly pears to feed our Dervish Mosaics. You’ll find some growing on various trees in the restored buds. Kill some time until four spawn and then head back to the Ranch.
More Ranch Setup
More Largos
Head up to the Laboratory expansion and create four new max level gardens. Plant the prickly pears in them and wait for those to grow. In the meantime, make sure to feed your preexisting Quantum Honey Largos. Also, go and build another Corral in either the Overgrowth or the Grotto. We’ll be using this Corral to house our more annoying Largo, the Honey Tangle Largo.
This is to ensure it doesn’t grab other types of plorts from neighboring Corrals and turn into a horde of Tarr. It is helpful, but not necessary to make some more mint mango gardens near this new Corral to help feed them more.
Since we DO have mint mangos lying around, but our prickly pears aren’t quite ready yet, let’s make those Honey Tangle Largos and start getting them fed. You can sell their plorts, we won’t be needing them really.
Killing Time (Optional Depending on Day)
If you already went to Ash Isle for the Golden Gordos, then ignore this section and just do something else, idk.
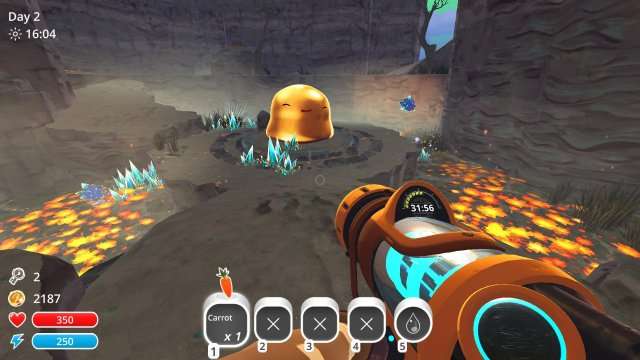
Since we can’t actually make our Dervish Mosaic Largos until we have food for them, because they’ll cause fiery hurricanes of death if they don’t get fed, we need to kill time somehow until those prickly pears grow. Grab your Gilded Gingers, because we are going to pop some Golden Gordos.
Thankfully, there’s an entire area we haven’t yet visited (unless you had to enter early for a Ranch Exchange), the Indigo Quarry. You should have one final slime key from the Honey Gordo, so pop open the entrance and run on it. If you haven’t visited the Quarry earlier by either flying across the Moss Blanket pier or opening it with this key earlier, make sure to burst the Rock Gordo covering the teleporter back to the Ranch.
While we are visiting, feel free to nab some Rad, Boom, Puddle, really any slimes you want since we have already obtained our “cash cow” slimes and are now aiming for completion bonuses.
Make your way over to the second Rock Gordo guarding the teleporter to the Ash Isle. To save time, I’m just gonna say to go burst Golden Gordos 6,7, and 8. If you can, grab some Crystal Slimes for the bonus, and the fact that they are Tier 4 Plorts.
Once you get all your Golden Plorts, head back to the Ranch using the Rock Gordo teleporter. Your prickly pears should have grown by now, so fill those two empty main corrals with your Dervish + Mosaic Slimes to make those Mosaic Dervish Largos. Make sure you split the food evenly or you’ll get mega hurricanes of fiery death. Ye have been warned.
Time to Wing It!
End of Concrete Instructions
Well, here’s the end of where I can guide you. You should at this point have:
- 4+ mint mango gardens
- 4 prickly pear gardens
- 2 Corrals with 10 Quantum Honey Largos
- 2 Corrals with 10 Dervish Mosaic Largos
- 1 Corral with 10 Honey Tangle Largos
- Popped all 8 possible Golden Gordos
- Some other stuff idk my memory is getting bad
There really isn’t much to say past this point. You’ve unlocked every area in the game, you have your cash cow slimes all prepped up and ready, along with 8 Golden Gordo’s worth of Golden Plorts. All that is really left is to gather different plort types to get the bonuses. You can do this either by carrying around a metric f*ckton of fruits and veggies to feed wild slimes, or you can kidnap all of them and keep them in your Ranch. This also gives you something to do between harvest times.
Best of luck to you!
Hint: Hunter Slime are by FAR the hardest to get your hands on. You only need 25 plorts to get the bonus, so I’d focus on that if I was you.
Proof This Stuff Works
Just to make absolutely sure, for your sake, that everything I said actually WORKS, I played through the entire mode again following my own instructions. I wasn’t trying super hard, to see how flexible the guide was, and as such constantly got sidetracked and even missed the final Golden Gordo. However, this was still the result:

So this stuff really does work. I’m sure it can be even further optimized, so try and see what works best for you. But as it it stands, this guide is 100% reliable in obtaining Rush Plortmaster.


Well, if you don’t understand spanish:
Wow! Incredible guide! Thank you!
Increible guia! Gracias!