
Okay, so the “Magenta Street” map is hard. I spent a lot of time and got lucky to finish it without losing any Very High Priority Devices (VHPDs). I’m writing down what I did to help others.
Getting Started
Before you try to get this done, you need good equipment and skills. Here’s what I used. You don’t have to use the same things, but use skills that kill many enemies fast. That’s important for this. Moving quickly to avoid attacks isn’t very helpful because the enemies can hit you more easily.
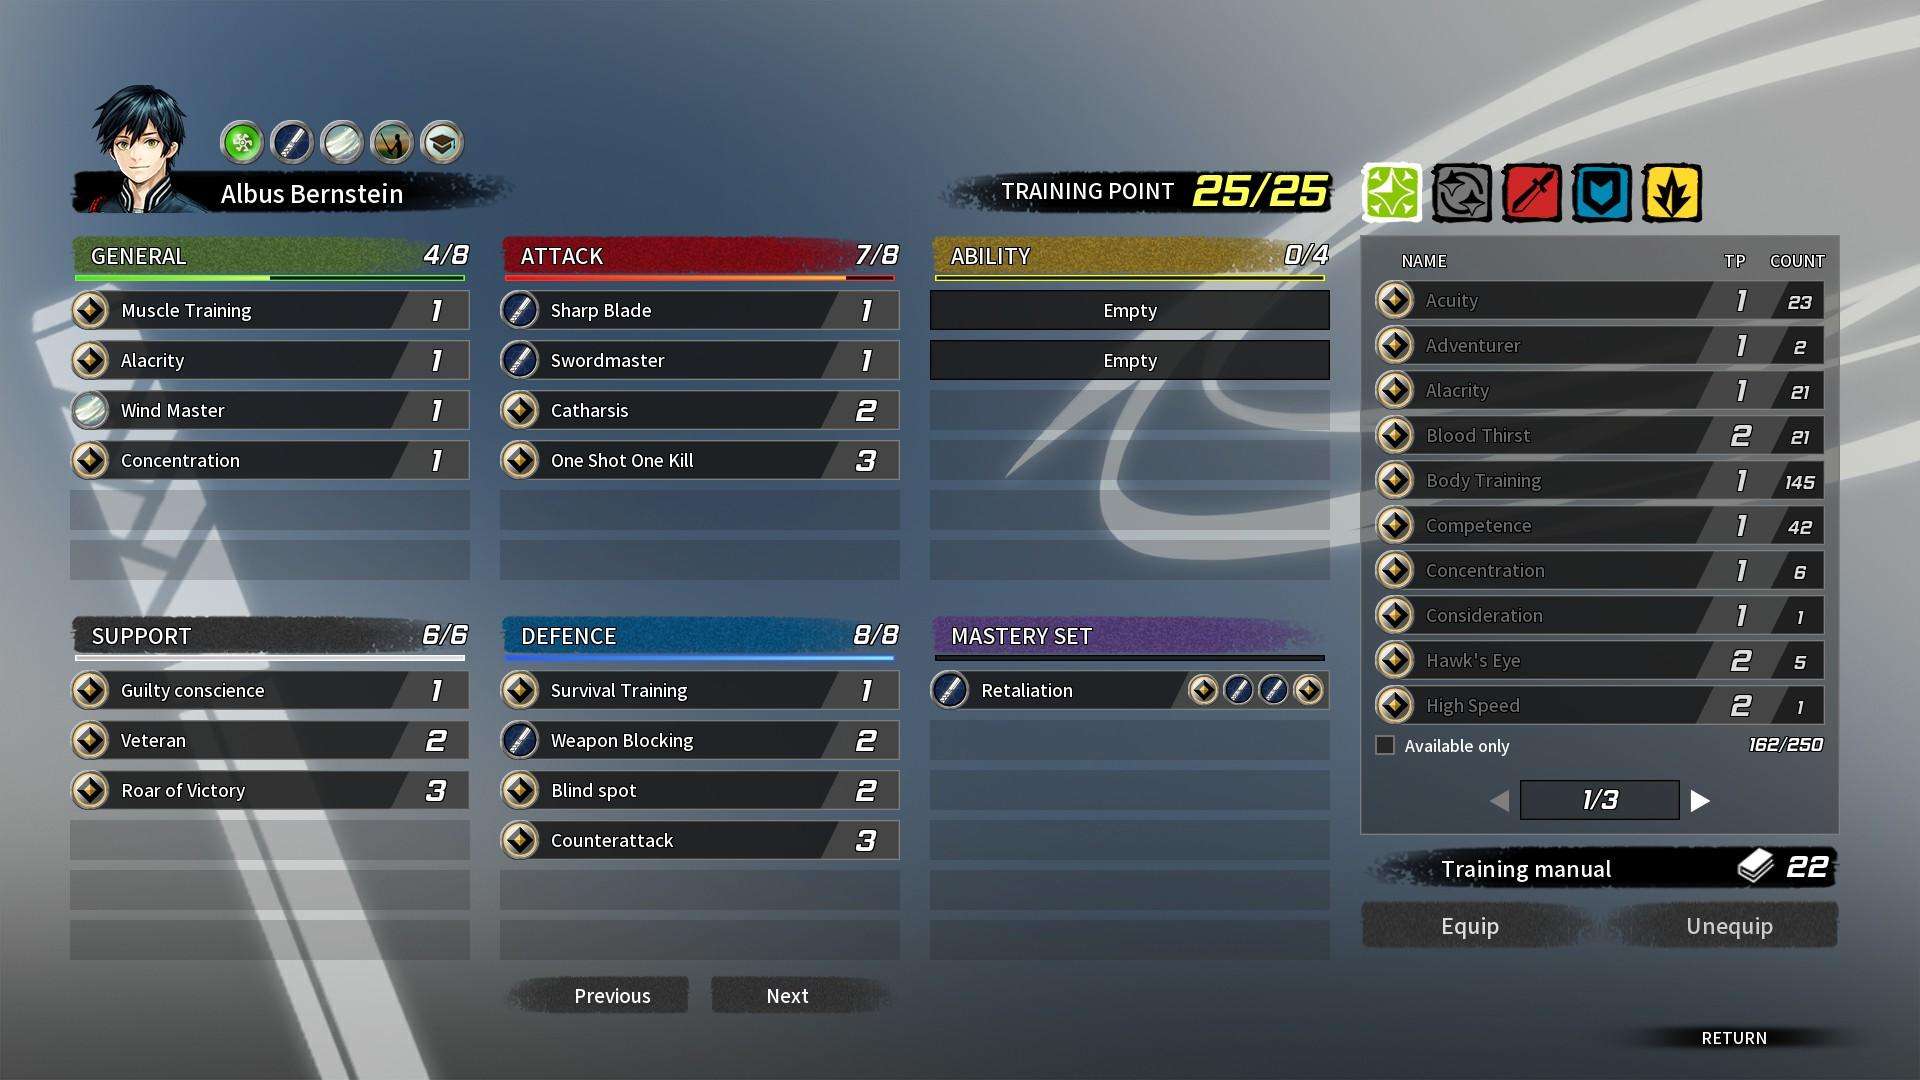
Albus:
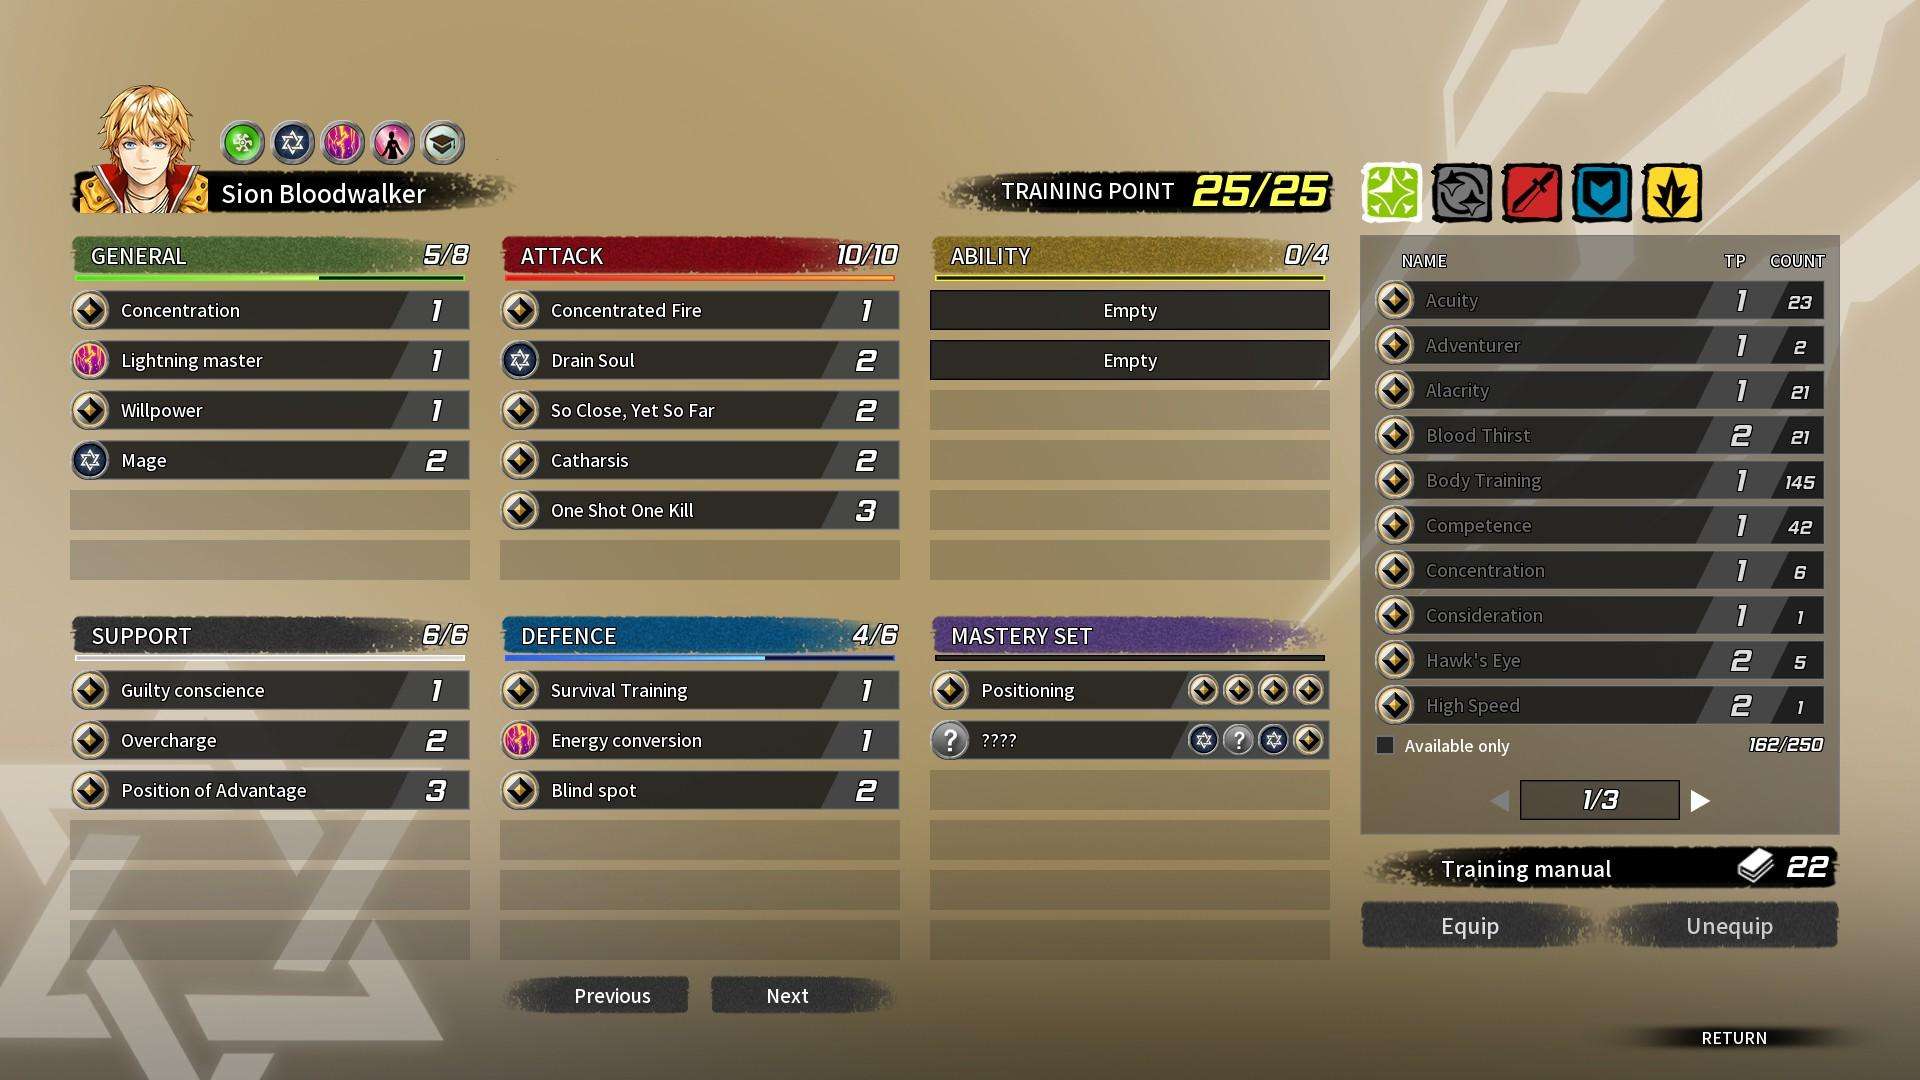
Sion:
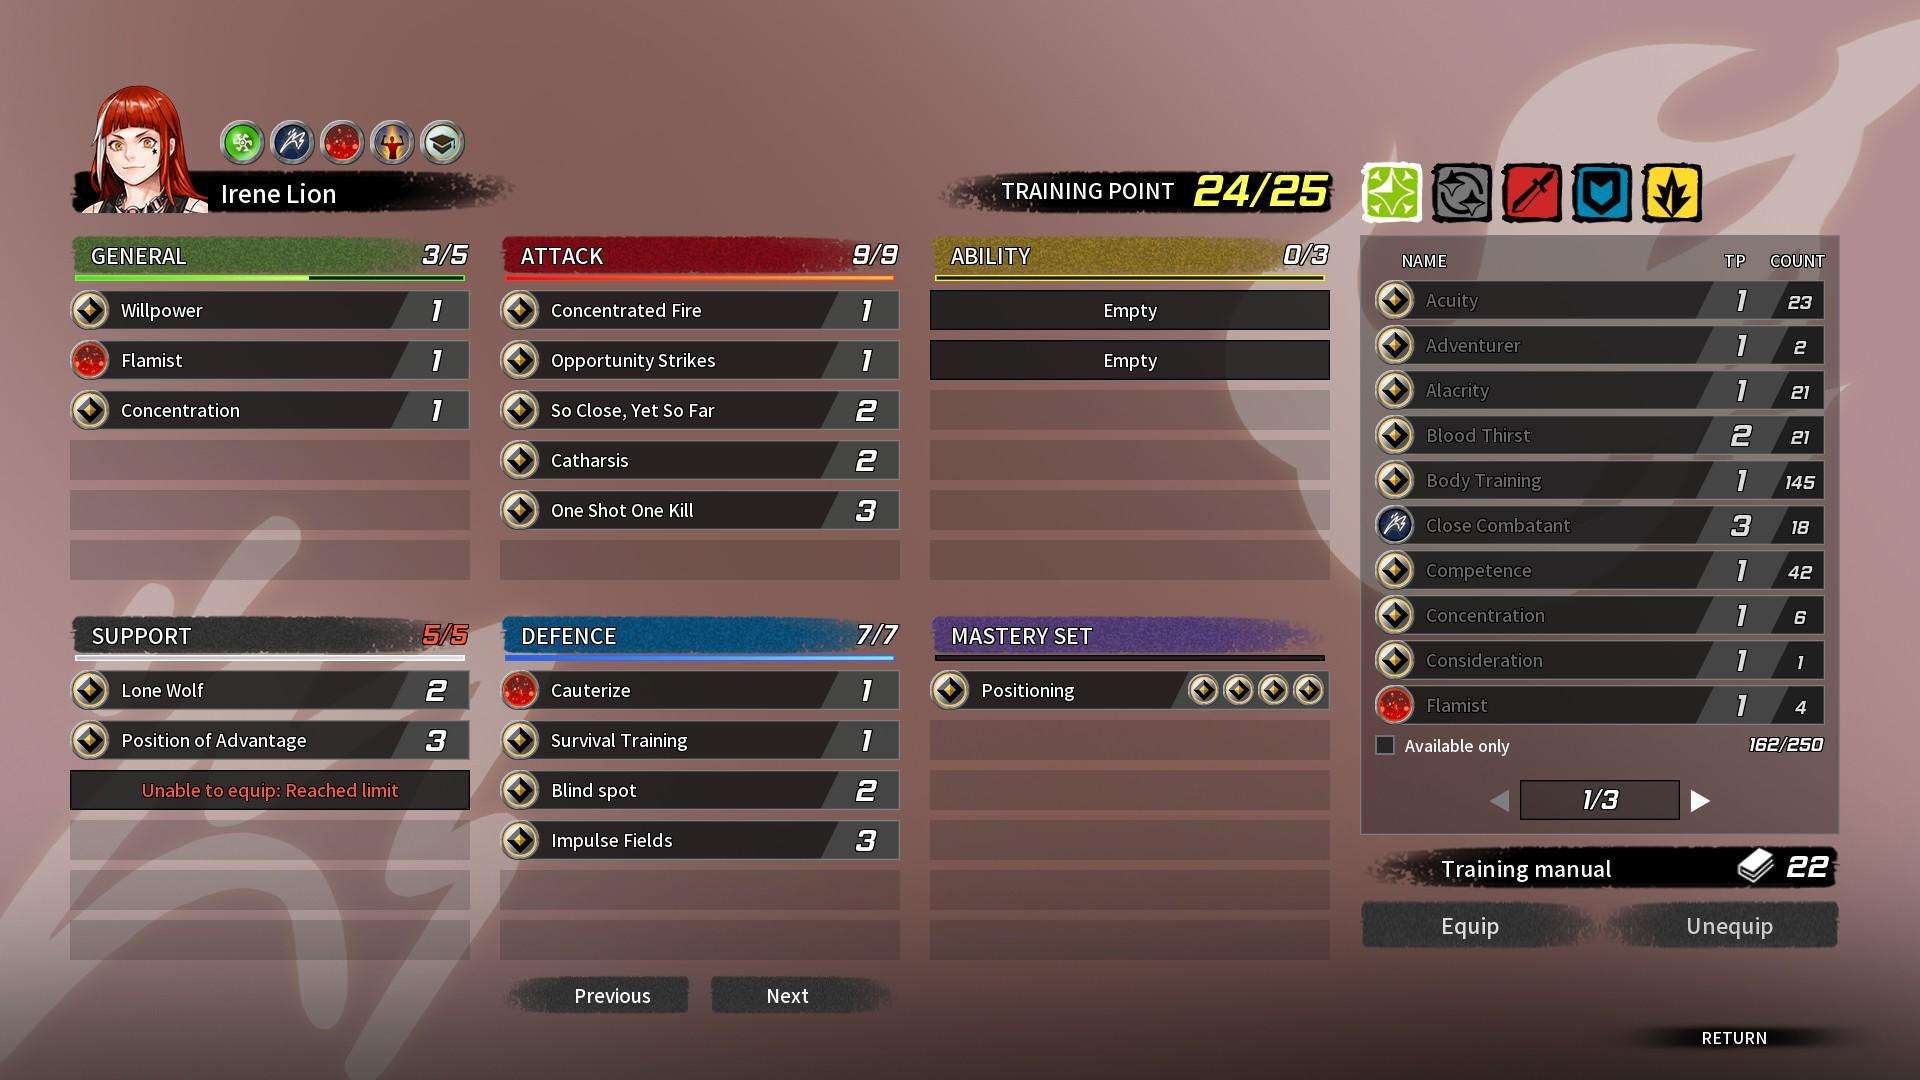
Irene:
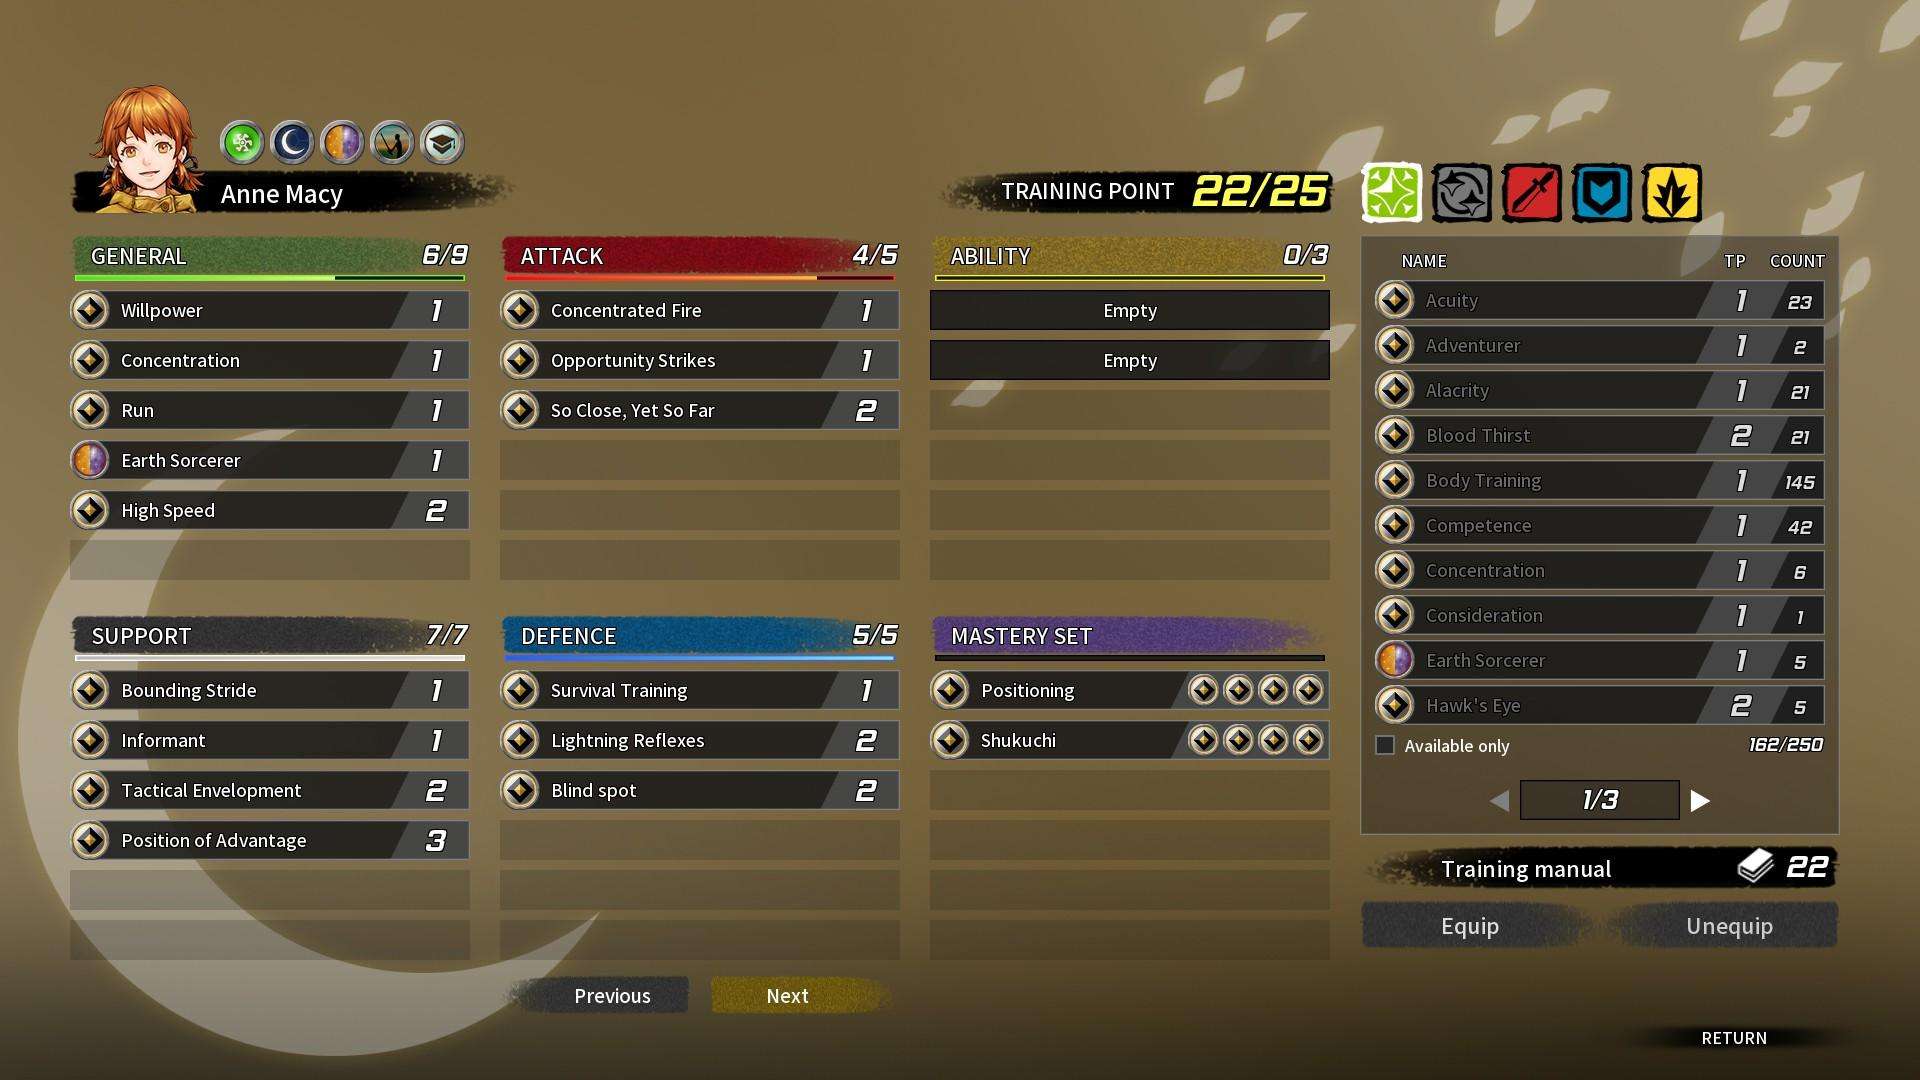
Anne:
Why am I using these masteries?
Albus – I set albus up to use his Gale slash as much as possible and that can be a real lifesaver on this map. The enemies group up and mob you so if albus can get to 100 sp he can clear out a lot of enemies at once.
Sion – really he is best setup to be a glass cannon, 1s1k + catharsis is incredibly powerful making him our best option for consistent AOE attacks. Unfortunately, white tiger butchers have impulse fields preventing you from 1 hitting them. I use positioning as the map is full of elevated areas and combined with 1s1k you can decrease your next turn delay incase things go wrong and you cant finish off a group(or they block you). Roar of victory is also really good on him but I couldnt fit it in with my build.
Irene – You should really either make Irene into a glass cannon or a block tank here. Because of the mastery “tactical reform” stacking dodge isnt really effective on this map. If you use my mastery set just place irene on the building in the middle or the top left side she can clear the ranged guys out really easily. If you go tank I would recommend using gatekeeper and revenge as well as bringing the iron wall mastery ability. That way she can stand in the front and soak damage while decreasing enemy action turn.
Anne – positioning is just great on her, she needs to be quick to get more turns incase things go sour.
The Map
Here is a rough sketch I did of the map and the enemies in it. Its not 100% accurate but in general there is around 40 enemies on the map, 2 of which are bosses. The first boss I believe is 1 random spoonism boss from the initial mission battle.
My map had Ralph on it and he appears with the spoonism group. The other boss is Kevin in the top left corner. The arrow indicates the path of the sole patroling group on this map which we will disucss later.
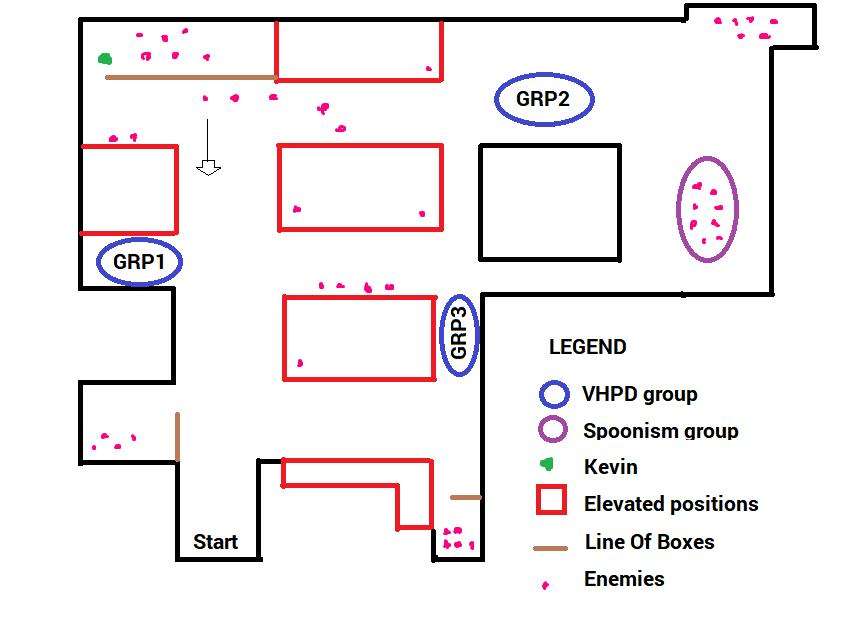
Enemies and What to Look Out For
White Tiger Hoodlum
These are the most common enemy on the map, and also the one most likely to ruin your perfect run. That is because of the mastery “tactical reform” which grants +50% hit chance if an enemy has missed you previously.
This means if a group of these guys gangs up on one unit they will die very quickly. If you use the shield VHPD on the map to cast their Iron wall ability they will for the most part focus the shield VHPD before attacking your units. However, don’t place anyone infront of the shield VHPD to avoid taking an unneccessary risk incase they decide to target you.
White Tiger Enforcer
There aren’t a lot of these on the map but they are much more dangerous than the Hoodlum. They have incredibly high crit chance so if you see one make sure you position behind a VHPD shield unit in order to activate concealment or you will likely take a critical hit.
White Tiger Butcher
These guys are a pain primarily because they have impulse fields which prevent them from taking more than 50% of their hp in 1 hit so no 1 shot 1 kill. They also have a tendency to move around your shield VHPD to attack Anne or Sion if you let them get too close.
Spoonism Units
Once you trigger your 2nd group of VHPD units then a large group of Spoonism units will attack you from the right side of the map. This group consists of about 8 or 9 unique spoonism units(basically the last 8 or 9 units we have encountered). These guys are the least of your troubles but can still quite easily kill a VHPD gunner if given the chance.
Spoonism Boss
Comparatively the spoonism units are fairly weak so you should clear out his minions first and then killing him shouldnt be a problem.
Kevin
Kevin is a souped up Tiger Hoodlum that appears in the top left corner. He has all the same abilities that they do plus a mastery called “threat” that will fear a target if they are crit while under half hp. Honestly, you will likely never encounter “threat” as his crit dmg is high enough if you are under half and get crit that unit is probably dead, but if it happens you will want to cleanse it with Anne and heal that character up with potions or the healing ability. He can be stunned so wind grenade from a shield unit or knock him against a wall to put him out of commision quickly.
The Mission Itself
Alright, now that the basics are out of the way lets look into the mission mechanics for the quest itself.
The start of this mission will have you controlling either Spoonism units or Ryo Ryuzaki. This is followed by a fight between Ryo and Marco Bardo. These fights have no bearing on the achievement itself so we will skip the details, but in general pick the most popular option for these battles and generally you will win most of the time unless you get unlucky.
Now on to the main mission and the achievement. In order to get the achievement you will need to do two things.
- Play the map on hard mode.
- Rescue all the VHPD without any of them dieing.
First, the important thing to remember on this map is that unless you trigger fights by entering an enemies line of sight or by activating 2 or more of the VHPD groups the enemies will stay passive. This includes all the corner groups of White Tiger enemies with the notable exception of a single patrolling group in the alley just north-east from Group 1. If you are quick enough and you land enough killing shots, you can evacuate group 1 before this patrol spots them. If you reach this area and do not deal with the Hoodlum on the elevated building directly to the northeast of them he will also notify the patrol to swarm that position so it is of utmost importance that you kill him first if you try this method.
The next important thing to remember is that if you get unlucky and a VHPD officers gets killed the easiest thing to do is just abandon the mission and then restart it from checkpoint. This will save a lot of time and stamina as you can get pretty unlucky and lose VHPD before you even get a chance to reach them.
Lastly, the mechanics of the mission go like this: There are 10 VHPD among 3 different groups and in order to get the achievement you will need to rescue all 10 of them. Groups 1 and 3 have 3 members while group 2 has 4. I numbered them in the order you should be activating them, although if you are strong enough and plan to kill Kevin, you may have better luck activating #2 first and then plowing right to his corner in the top left as group #2 has 2 shield units.
Now, as you activate the groups, enemies will start to converge on your location. The first group activated is a freebee and you can trigger this without worry. Activating the 2nd group will trigger the spoonism group to try to flee to the entrance and as a consequence try to murder Group 2 if left to their own devices. Finally, activating Group 3 will cause all the enemies on the map to aggro and start looking for your units. Now that we know the basics lets go over what you need to do.
Step by Step Instrucitons
- First thing you want to do when you enter the map is take out the unit on the elevated position infront of you on your right. He is obscurred initially but feel free to walk into his line of sight as he wont alert others as long as you kill him before he gets a turn.
- Next, move forward with your units and immediately kill off the next elevated unit on your right. This unit will call for help if ever given the chance so he is top priority. The enemies in the path to the right will also split up and attack you and GRP 3 so this part unfortunately requires some luck as a member of GRP 3 can easily be killed due to RNG or if you fail to kill the unit on the elevated position before he calls for help. Remember to trigger GRP1 the first chance you get and move the the 2 gunners south before the patrolling units reach them. If you are having trouble with this part make sure to remember that shield VHPD have the skill iron wall, and standing behind them or on their sides gives concealment as well as cover. This +50 block form concealment gives pretty good protection from unlucky crits. You will also need to kill a second unit on the right corner just infront of GRP3, he hangs out halfway up the staircase going up to the elevated area in the middle and can also alert the enemies infront of GRP2 if you are unlucky.
- Aleternative! If you are having trouble killing all the enemies before they pull aggro or you want to kill Kevin, you can also survive this section by turtling in the left area hiding all of your units in the corner where GRP1 was. If you set Irene up as a tank with iron wall you can effectively block off the pathway with albus, irene and shield VHPD forming a wall to guard Sion and Anne. Once you kill off all the melee units inch your way north keeping everyone behnd the iron wall and eventually you can get to Kevin who is hiding in the top left corner. Smoke Grenades are a good choice for this route as there is a lot of ranged attackers. Be warned that Stragglers can sometimes go for GRP2 while this is happening but they usuauly can beat 1 or 2 enemies.
- Congratulations, you are past the most difficult part. Now, you will want to move group 1 south and start clearing out the side rooms. These rooms are located on your left and in the bottom right corner. They will activate anyway when you get all 3 groups but killing them now means its much easier to navigate everyone to safety later without much trouble. Feel free to have the shield VHPD lead the group, just have him use iron wall every turn and he can tank really well.
- Once this is done you will want to clear out the group of spoonisms. There is a path just to the right of GRP 3 that you can move into, just make sure not to activate group 3. The group is quite big but the units arent that strong. Be careful not to let them go too far north or they will alert a group of white tiger butchers and hoodlums. Once they are killed you are safe to activate GRP 2.
- At this point move all of the VHPD units from GRP 1 and 2 to the starter area and ontop the evacuation panels.
- Activate GRP 3 and move them to evacuation panels. They will need protection if you didn’t kill kevin so feel free to fodder some of your party so long as one of them lives and all the VHPD escape you are good to go.


Be the first to comment