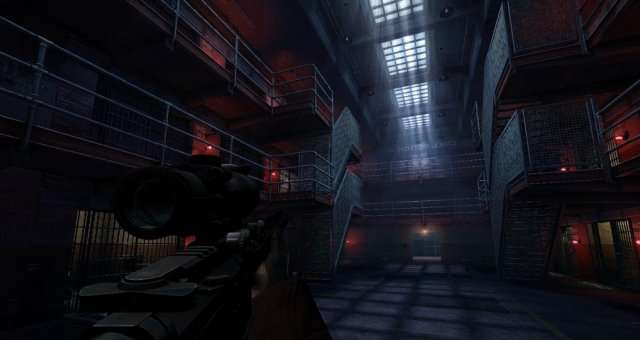
This is a guide for the new heist that’ll hopefully help you.
Loadout
With the current spawn rates and the close quarters combat nature of the map, a weapon that can easily clear up groups of enemies is advised.
Suggestions are:
- Akimbo Grimms.
- Grenade Launchers.
- Sniper Rifle with Graze skill (Requires good aim!)
Swan Song ace and Inspire is also very handy on this heist.
From my experience, ammo bags aren’t really mandatory. Since this map is close quarters and the amount of enemies are high, you’ll be swimming in ammo pickups provided you have a weapon with a good ammo pickup and keep killing enemies.
First Aid Kits with Uppers aced are pretty handy when you need to hold out in a spot when there are lots of enemies.
Doctor Bags are self explanatory. If you get into custody at the roof part, it’s all over, you won’t be coming back.
Concussion Grenades could be useful when you need to rush past an area.
1. Ambush
You’ll spawn in the sewer. Nearby is a ladder. Climb it and you’ll see a lid. When you remove it, and enter the compound, there will be a few Murkies waiting for you. On top of that, an endless police assault will immediately start.
When you climb out of the sewers, there should be thermite nearby in a red toolbox. Look around, and you’ll surely find it. DO NOT forget to grab it, or you’ll have to go back to get it once you reach the bars.
In my opinion, the safest way to survive the ambush is to stick to the left side of the shower room, between the low walls. Sticking together is a must.
Once the door opens and the objective changes, rush through the door to the bars. This is where the thermite comes in. The thermite needs to be placed on top and bottom of the bars for it to work. Once it’s clear, drop in to the adjacent room.
2. The Cell
Once you enter the room, you’ll see a control room. For the doors to open, everyone needs to be near them. Inside the control room, there is 1 Murkie. Kill him, or take him hostage if one of your teammates managed to get into custody.
There should be a computer near the window. Use it, and look for Bain with the cameras. When you find him, he’ll be marked. The cell number is in front of the door. Enter the cell number on the keypad. Now, you’ll have to wait 2 minutes until the cell door opens and Bain can run. After a while, the endless police assault will be over.
Till the cell door opens, camp in the control room no matter what. It’s the safest place to be. Once it opens, rush to the door to the next area. Go down the stairs. Use the asset ammo bag if needed, as you won’t be coming back to it.
3. Canteen/Laundry
Run through the cell block and through the canteen or laundry doors. Once in the canteen/laundry room, find the white door and drill it. While it’s drilling, camp near the door, as it’s the safest there.
Once the drill is done, open the door and look for a keychain on the ground. It should be near a dead Murkie. Exit the room and use the keys on the closed cell door nearby. When you open it, a turret starts firing at you. Just run past it and head towards the Death Row room. There will be yet another cell door. Use the keychain and move on. Once again, keep progressing until you encounter another cell door. Open it with the keychain and go up the stairs.
4. Roof
You should be in the roof access room now. Yet again, go up the stairs and go to the closed cell door. Open it with the keychain. Head into the room. There will be another closed door, which can’t be opened with the keychain. You need to open it with the power switch. For it to activate, all your teammates must be in the room.
When you activate the power switch, head through the door. You’ll see Bain, who will fall unconscious. When Locke picks him up, head to the Lighthouse, killing any Murkies. A point of no return timer will activate, so be quick to complete objectives.
When the bridge needs to be extended, lockpick/blow up the lighthouse doors, kill the murkie inside and activate the switch. Now, wait till Locke needs to rest and stay with him, clearing the area. When Locke is near the helipad, camp at the bottom platform till you need to hack the marked control box. The control box hack takes 1 minute, so keep an eye on the point of no return timer.
When the control box is hacked, the door leading to the stairs up to the helipad will open. Go up the stairs and to the helicopter. Now, just wait for Locke to come. When he gets to the helicopter, the escape will activate and the heist will be completed.
After the heist, Locke will say that Bain is being looked after by professionals, and that Murkywater infected him with some sort of virus.


In higher levels the timer-of-no-return starts with 1 min by starting the hack and the hack itself will take me 55 sec. also NO TIME to get to the helicopter.