This is a text walkthrough on how to achieve S+ rank for Claire A on Hardcore difficulty to unlock the infinite minigun.
More RE2 Guides:
- Maps and Item Locations.
- 100% Achievement Guide and Puzzle Solutions.
- Lockers, Safe Codes / Combinations and Leon’s Desk.
- Circuit Board Puzzle Solutions.
- Laboratory Puzzle Solution.
Unlock Codes and Puzzle Solutions
Click to enlarge…

Requirements
- If you want to try this, it’s best if you’ve already finished the game by yourself at least one time. Using this information before you’ve played it yourself will ruin all the surprises.
- You should only have three save files at most.
- Try to complete the game in under two and a half hours.
- If your character dies, don’t choose the “Continue” option. Instead, go back to the main menu and load your game from a save file.
- If you select “Continue” after dying, the time you spent will still count towards your total time.
- Don’t use weapons that have unlimited ammo or any special, upgraded weapons.
- Some players on the Resident Evil subreddit have said that using the infinite knife is acceptable.
Gas Station
- Run through zombie.
- Grab Key.
- Get grabbed or run past (your health will reset when you exit gas station, ammo won’t).
Police Station Beginning
- Grab heal spray (skip laptop)
- Help officer
- Shoot door zombie legs (Safe), wait on right side of door and run past (risky)
- Run past two zombies (stay right of guy)
- -Cut Scene-
- Open gate with knife
- Grab ammo and bank g herb
- Run through hallway and grab ammo at left of room with window exit
- Go right to west office and unlock pouch safe (9 left, 15 rIght, 7 left)
- Unlock speed loader from leon desk (Left Lock: NED + Right lock: MRG)
- Exit west office and go to photoroom stairs
- Grab herb and board window
- Upstairs, grab ammo from cop
- Shoot leg of zed on stairs
- Grab blue key.
- Option 1 (Safe, slower): Go through library, grab unicorn medalion in library downstairs door near stairs (Fish, Scorpion, Vase) and red book near desk at library exit, then grab lion medalion on lobby second floor (Lion, Branch, Bird)
- Option 2 (Risky, faster): Turn around go back downstairs through west office to Marvin. Then go to library and grab red book.
- Unlock waiting room (make sure to have 2 open inventory slots, bank first if neeDed)
- Art room:
- Grab weapon key card
- Unlock statue arm (jewel for officer badge)
- Go to Fire escape
- Grab board and chain cutter
- Unlock west office
- Board Window
- Grab ammo from cop corpse
- Grab flash if you can
- Grab valve
- Grab electric fuse
- Exit to lobby
- Bank ribbon and valve
- Unlock West office
- Discard key
- Keep bolt cutter on
- Run through knife gate hallway
- Unlock bolt cutter room
- Grab detonator
- Discard bolt cutter
- Go to storage room
- Unlock locker 109
- Grab pistol ammo
- Unlock nade launcher
- Go to film room
- Bank
- Store Nade launcher, grab valve
- Go to locker room, grab portable safe and locker items
- Unlock valve door
- Grab flame rounds on bench
- Run to STARS room
- Grab battery and stacked items if possible
- Go back to locker room, head upstairs to detonate
- Grab pistol ammo on shelf
- After planting detonator, run to library door and hold door open to stop shelf falling
- Grab maiden medallion
- Exit to library
- Fall through floor
- Grab unicorn medalion if you haven’t already
- Unlock underground staircase
- Bank
- Store Nade launcher
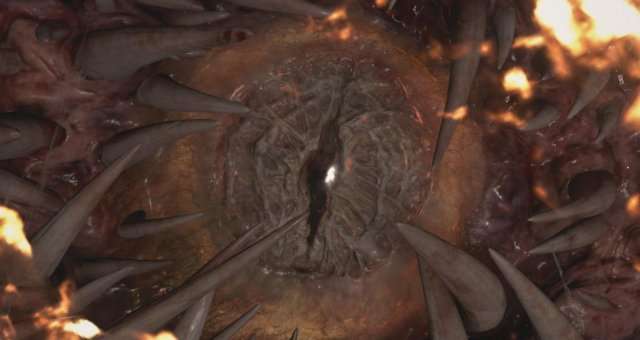
BOSS Birkin Stage #1
- Strat.
- Don’t shoot if eyeball is closed
- Grab all items around room first while damaging his eyeball
- Fighting him.
- When he’s chasing you, run in a circle around the center block.
- If you have a straight line path, stop running for a second and bait his attack anim
- Shoot eye when he attacks
- Climb up ladder, go right room
- Unlock left locker
- Grab herb to left of door
- Bank at garage
- Grab nade launcher and flame rounds for lickers
Police Station Basement
- -Parking Garage Cut Scene-
- Go right and head to mourge
- Dog kennel
- Two lickers, walk only.
- Enter mourge, open zombie with diamond key
- Run past zombie at door
- Entering Kennel, move close to licker and shoot with flame
- Try to run past second licker, shoot with flame to be safe.
- Exiting hallway, flame licker on ceiling
- Exit to garage
- Unlock Chief Iron elevator door
- Grab nade launcher upgrade
- Go up to Chief Iron office
Police Station East Side
- Enter Irons office
- Grab heart key and items in other room
- Go upstairs
- Grab board, flash and ammo
- Grab electronic part (heart key)
- Grab large gear
- Go back to Iron’s office and bank eletronic part and flash
- Go downstairs to board window and grab jewel case behind Heart door
- Licker after picking up, run out
- Back to Irons office
- Bank
- Go to watEr pump
- Stun lady zed
- Grab two G herbs at end
- Stun lady zed again and go upstairs
- Unlock helicopter hallway
- Grab R herb, combine
- Shoot Mr. X face three times when he’s lifing chopper
- Shoot again when he’s walking, stun him
- Run past, go to lobby
Police Station West Side
You may want to save here now as this part can be brutal.
- Bank
- Keep keys, Grab nade launcher for lickers
- Unlock officer badge for smg
- Head to west office, go to records room (watch out for licker at door, flame him)
- Unlock with heart key and grab jack for library
- SAFE option
- Stun Mr. X in this room
- Otherwise, juke X and run straight to west office
- When it’s safe, open west office door and flame licker (kill to be safe)
- Run to film safe room
- Bank
- store nade launcher
- grab diamond key
- watch out for licker still
- Go to STARS office
- Unlock SMG
- Don’t forget to retrieve badge from PC
- Go down hall to diamond room
- Grab portable safe
- Unlock exit to library unicorn room
- Aggro zombies and place jack on shelf
- Aggro zombies to door and Run out back to lobby
- library zeds may follow you and fall from second floor
- Bank at lobby
- Grab large gear, bank extra stuff
- Unlock both portable safes and stack the two keypad keys
- Go through west office again and go to storage room
- Unlock 203 for Hip Pouch
- 103 for knife
- 208 for flame ronds
- Run back to lobby
- When all zombies fall, stun Mr. X in lobby
- Go to library
- Solve library puzzle
- Stun zed corner of pillar
- Solve clock tower
- Grab electronic part
- Head to irons office from 3F
- Grab parking garage key
- Solve electric panel
Sherry – Orphanage
- Grab block from doll behind
- Solve block puzzle
- Exit
- Grab key from wall
- Hide from irons
- Run upstairs
- Hide behind middle drawer
- When Irons hits his foot, hide under table on other side
- As soon as he goes to the middle drawer and looks to the wall, hide behind the drawer nearest the bathroom door
- Wait until he enters bathroom and grab key
- Escape
Claire – Streets
- GraB SMG
- Head to parking garage
- Opening the gate, Mr. X will spawn
- Loop around white car and leave
- Go down street, you will see zeds at a gate
- Get close to have them open it
- Run around the street once then go inside gate
- Kill Zed Doggos
- Grab herb and smg ammo on bench in basketball court
- Kill z doggos behind fence
- Head to bus, grab another herb
- Entering bus, there will be one standing zed; stun him
- Kill z doggo outside bus and enter orphanage
- -Cut Scene-
Sewers
- Enter room ahead
- Grab items and bank
- Bank
- Store SMG
- Grab handgun and knife
- Exit and go down hole
- Follow sewer
- Grab B herb to your left on ledge
- Head to cable car
- Two woke zeds, stun zombie closest to hole.
- Go to storage box
- Grab all HE Grenade, flash grenade and 1 knife
- Cross the bridge, go left and grab T plug and herb
- Go downstairs, clear the two zeds
- I personally throw my explosive grenade
- Climb down ladder
- Go left and up the ledge
- Shoot sewer zed to wake him and run past
- If you can’t do this, equip flash grenade and let him grab you, then run
- Run past second sewer zed, keep right, then keep left at the sewer pipe.
- Get up ledge
- Grab king and queen plug in room
- Grab shock gun
- Head back and run past sewer zeds
- Go up ledge
- When climbing down, trigger charging zed and immediately go up right ledge.
- Wait until he dives in the water; as soon as he does, climb down and run
- Grab sewer key
- Go back to storage and clear up inventory
- Grab police badge
- Go back down stairs and open gate to right.
- Grab high powered gun powder and quicklY run past the sewer zed hanging left.
- Go upstairs to small room and kill zed, dont unlock door yet
- Grab rook plug
- Unlock sewer door down the hall
- Move metal shelf and go up elevator
- Unlock badge case
- Go back down to solve chess puzzle
You may want to Save before birkin stage 2 fight.
- Bring SMG
- Go downstairs grab B and G herb.
- Go into red room and grab R herb, combine.
- Solve power puzzle
- Head to door, birkin triggers
- Stand near barrel closest to large gate for safest spot (you may get hit, RNG)
- After fourth ceiling bash, go left of gate, birkin will bust through
- As soon as he opens the gate, stay on left side and run past.
BOSS Birkin Stage #2
- Strat.
- Press button to move crate
- Grab flash and knife
- Shoot eyeball until he stuns, keep him in middle.
- When you stun him, make sure you are near the button.
- Hit button again to hit him, keep shooting him while it comes.
- Repeat until defeated.
- Grab pistol ammo near button ledge and SMG ammo near ledge you dropped down.
- Go back and get sherry.
- Get sherry to cable car.
- Unlock safe (code on side).
- Pistol heavy ammo upgrade
- Head to lab.
Lab – Entrance
- Put sherry in security room
- Bank extra stuff
- Head to side door near reception
- Go down to cafeteria.
- Keep left enterIng and head up to ladder
- Drop down and grab items, knife.
- Turn right to napping area and grab wristband.
- Watch out for hunk zed (knife him).
- Run back to lobby
- Go down main hall and head to left door
Lab – West Side
- Enter lab and grab flame nade launcher.
- Run past plant zeds
- Shoot yellow orbs on plant zeds to stun them and run past if need be
- Unlock mixing station and hatch to downstairs (refer to unlock codes in “Resources”)
- Grab vial
- Go to mixing station
- Solve vial puzzle (refer to unlock codes in “Resources”)
- Run past plant zeds down to hatch
- Head to break room and turn right
- Beware of lickers, you should kill them because you will come back here.
- Go upstairs, clear zeds as you will be coming back
- Grab modulator
- Go back downstairs same way, turn right to cooling room and cool vial.
- Go back uptairs and insert cool vial.
- Grab second wristband and exit lab.
Lab – East Side
BOSS Birkin Stage #3
- Grab vial
You may want to save before Birkin stage 3 fight, but personally I find him easy.
- Bank, take whatever weapons you need and 1 heal.
- My loaDout is SMG pistol and shock gun
- When you start, shoot out his eyeballs on his leFt knee, his right arm, and his back.
- Grab all items down here while you are fighting him.
- When you shoot out his eyes, he will stun and reveal his stomach eyes.
- Use shock gun.
- After two times, he will transform and only have stomach eyes.
- He will grab the middle pillar and throw it, rUn to eiter side of the room away.
- Keep shooting him untiL defeated
- Escape facility.
Escape – Final Boss Fight
If you still have under 3 saves, this is a good final save. Otherwise, this fight is easy.
- Escape the facility until you reach train car.
- Zed plants will be here, bring flame launcher if you need it.
- Otherwise, just shoot their orbs and run past.
- Grab 1 healing and whatever weapons you want, but keep Two slots open.
- Grab plugs then grab minigun.
BOSS Birkin Stage #3
- Starting, shoot Birkin’s eyeballs out with minigun at top.
- When he drops down, just run around the car sticking to the two noses of the train.
- He has a charge attack and flailing attack, so just keep juking him and shooting.
- He will retreat to climb up, don’t shoot. Then he will jump down to the car and it will repeat.
- The second time he climbs up, he will jump down straight to you. So try to run around and again stick to the nose of the train to avoid his pounce.
- Repeat until dead.


Be the first to comment