
This isn’t a walkthrough per se, just a list of tips and other information that should help those struggling in the game.
Helpful Tips
All credit goes to Heza!
I’ve done a few playthroughs of this game so far, and I’ve learned quite a few things to do and not to do in order to hopefully ensure a successful run.
When Expanding Your Kingdom

- To get extra time for your builders to cut trees or create walls, send them on their task as soon as an attack on the side you want to work on is over.
- Try to keep the merchant and vagrant camps so you can have a steady stream of income and workers to hire. To do so, make sure there is at least one tree left on each side of the camp.
- Sometimes, in order to build around the camps you will have to go farther out away from the last wall(s) you built in order to expand your kindom w/o destroying any camps. If that happens, send out your builders early so they have time to reach the trees and cut them down before night falls. Mark the trees to be cut and move back towards your base until you are able to build a new wall.
- If you are expanding out your kingdom, try to have enough coins on hand to build a fully upgraded wall. This is especially important for later islands where the greed attacks are larger and last longer.
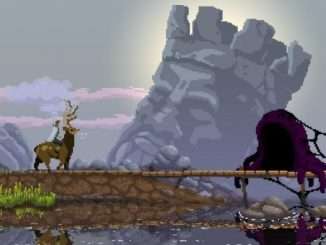
- As soon as you get the stone mine on the 2nd island, start building out toward the dock and destroy the portal there so you can build a lighthouse.
- Lighthouses will ensure your boat won’t be destroyed when returning to an island with one, and they also help to lessen the decay that happens to an island when you’re on another one (the higher the tier of lighthouse, the longer it takes for things to decay).
Having / Keeping Income
- You want at least one farm with 3 to 4 farmers so you have a good source of income.
- Note that farmers won’t work during winter, so make sure to store coins with the banker as often as you can so you have money for the winter.
- While farms are useless in winter, there are still ways to make money. Pikemen/Ninjas will fish which produces coins (one per fish, so you will want a lot of them to get a good amount of money) and archers unassigned to a tower or knight will hunt animals (though they are scarcer in winter). There may also be berry bushes that can be harvested by any farmers you have.
- There are 12 gem chests in total (no chest on 1st island, 3 chests each on islands 2-5). Each chest will have anywhere from 2 to 3 gems inside, meaning you will get anywhere from 24 to 36 gems in a playthrough. Keep this in mind when deciding what to purchase with gems.
- Store gems in the box by the dock were you originally build the boat and save them for the statues and hermits. The storage box is also the only way to keep gems from being lost permanently upon losing your crown.
Gameplay Tips
- Not all of the mounts are useful, so don’t spend gems on every one you come across. Gems are better spent on the statues and hermits, and the few good mounts in the game.
- You don’t have to play this way, but I generally go from island 1 to 2, to 3, then back to island 1. I mainly go back to get the Griffin mount as it is, in my opinion, is one of the better mounts to have. You can also return to destroy the dock portal and create a lighthouse.
- Again, you don’t have to play this way, but I tend to only move on to island 4 after the 3 statues so far are activated and I have at least the baker hermit, along with a full ship (3 knights with their archers and 3 builders), and a full sack of coins. This makes it so you can build decent walls and have good defenses right of the bat, which is important for later islands.
- Also, as soon as you are on the 4th island, try and build the iron mine as soon as possible. Greed waves are larger and can be more dangerous, so being able to build maxed out walls is important. Especially once you start to destroy portals.
- Vagrant camps are often farther away from your base on later islands and therefore it can be hard to hire new workers before night falls. To help with this, have the baker hermit and build a bakery (have the hermit on your mount with you and build on a 3 tiered archer tower) and create a loaf of bread. Vagrants will come running from their camps toward the bakery to grab the bread. And if you hire the vagrants before they eat the bread, you will have a constant beacon of sorts that draws them in and gives you a steady stream of villagers to convert into workers/archers/etc.
- I’ve noticed that destroying a portal often leads to a Blood Moon that night, with the attack coming from the side of the destroyed portal. This can be dangerous on later islands where greed attacks are heavier and stronger. Therefore before you attack and destroy a portal, you should have a maxed out wall on that side, a catapult, knights, and a good amount of archers.
- After the attack on the portal, make sure to replace any lost knights or archers in preparation for the Blood Moon.
- The knight statue on the 5th island can be ignored if you wish due to it always being active. The jump attack it gives to knights often causes them to die more frequently since they use it as soon as they see any greedling, and the attack itself leaves them open to get hit. This makes the statue more of a bane than a boon.
- It is possible to get yourself stuck in an unwinnable campaign. This can happen if you destroy all vagrant camps and leave yourself without any villagers to turn into builders.
- For example, I did this to myself once when getting the achievement for cutting down all trees on an island. I cut down all trees on the 1st island (removing all vagrant camps in the proccess) and lost my crown on the 5th. When you lose your crown, you restart on the 1st island where you have to rebuild the boat to leave and may also need to rebuild and re-recruit villagers. I made the mistake of turning the remaining villagers on the island into archers/knights, therefore leaving myself with no way to build the ship and ultimately trapping myself on the 1st island.
What’s on Each Island
1st Island
- Ballista Hermit – costs 3 diamonds, turns triplet archer towers into ballista towers (manned by a builder, good against groups of greedlings and floaters).
- Archery Statue – costs 4 diamonds and 10 coins to activate (increases accuracy, not damage).
- Griffin mount – costs 2 diamonds and 8 coins (good stamina, fast everywhere, can graze anywhere, able to push back and shortly paralyze greedlings).
- 2 Portals – the dock and cliff.
2nd Island
- Stable Hermit – costs 1 diamond (attaches stable to a farm, stable will have previous ridden/owned mounts at it).
- Farm Statue – costs 1 diamond and 7 coins (increases crop yields).
- Stone Mine – costs 10 coins.
- Dog – drop a coin on to get (coin is returned to player), barks in direction(s) that greed attack will come from.
- Great Stag mount – costs 1 diamond and 3 coins (good stamina, slow on grass, fast in forest, can attract deer that will follow you around).
- 4 Portals – 1 small portal on each side, dock, and cliff.
3rd Island
- Bakery Hermit – costs 4 diamonds (turns triplet towers into bakeries, purchase bread to attract vagrants from camps).
- Builder Statue – costs 3 diamonds and 9 coins (increases hit points of walls).
- Draft Horse mount – costs 1 diamond and 3 coins (good stamina, a bit faster than the starting horse).
- Warhorse mount – costs 2 diamonds and 8 coins (low stamina, a bit slower than starting horse, can put a temporary protective buff on nearby subjects).
- 6 Portals – 2 small portals on each side, dock, and cliff.
4th Island
- Knight Hermit – costs 2 diamonds (turns triplet towers into knight towers, turn a villager into a squire/knight buy purchasing a shield)
- Iron Mine – costs 20 coins.
- Great Bear mount – costs 3 diamonds and 10 coins (low stamina, has an AOE charge attack when running).
- Lizard mount – costs 3 diamonds and 10 coins (low stamina, recharges stamina in sunlight, has an attack that spits fire onto ground in front of it).
- 8 Portals – 3 small portals on each side, dock, and cliff.
5th Island
- Horn Hermit – costs 3 diamonds (turns tall stone walls/iron walls into rally walls, call reinforcements from other parts of the island).
- Knight Statue – costs 2 diamonds and 8 coins (knights fight more aggressively and gain a jump attack) *knights preform the jump attack whenever they see any greed, which often leads to them dting more frequently than before.
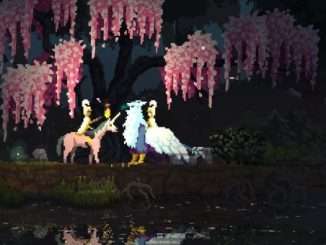
- Unicorn mount – costs 4 diamonds and 12 coins (okay stamina, fast on open land, drops 3 coins when grazing).
- 8 Portals – 3 small portals on each side, dock, and cliff.
Harmful Bugs / Glitches

- I’ve noticed that after I destroy the dock portal on at least one island and create a lighthouse, it can lead to a glitch where a catapult I’ve built for the opposite side of the map will move from its post and start heading toward the dock.
- This is detrimental on other islands where the portals on the dock side have not been cleared, because the catapult will be moved out past the walls where it is then destroyed and the builders are reduced back into vagrants.
- I don’t know this is a bug or not, but after lighting the bomb in a cliff portal my mount would not sprint and only would walk. This meant that I couldn’t escape in time and had to continue the campaign with a new monarch.

Be the first to comment