A quick guide to help you get started!
Cube World Guides:
- Ultimate Guide 2019.
- Beginners Guide 2019.
- Class Specialization Guide.
- Advanced Movement Guide.
- How to Tame Pets.
Quick Thought
All credit goes to Aerosfilis!
As of right now, the game isn’t easy to get around at first, so I will try to give you basic knowledge to get started.
That said, this game seem to mainly focus on exploration so discovering the basics can be a part of the experience. I will try my best to write information in an order I find important to know, so if you want some hints but still discover a lot by yourself, feel free to only read one chapter at a time. I will also not include everything as this is a starting guide and not a full “how to play” guide nor wiki.
Also, see this game more as a Breath of the wild where you don’t get the key items right away and have to search for it than a classic RPG with levels and the such, the progression is more gear based like a Monster Hunter than level based like a Dark Souls or other well known level based RPG.
Character Creation
After starting the Game you get to create your very first character! So click on “start game” and let’s get on with it already!
TIP: you can move the camera by holding left click and dragging the screen around. This can be useful if the camera is stuck 2cm away from the character.
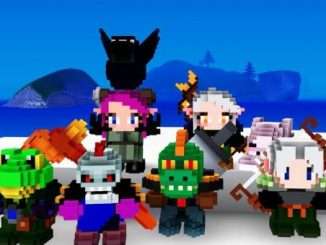
You get to chose the look of your character, including the Race. As far as I’m aware this does not influence the game what so ever, but here is a list for you:
- Human: Your basic human race, as boring as it gets.
- Elf: It’s… Human… With pointy ears and different faces and haircut.
- Dwarf: Our beauty contest winner!
- Orc: About as dumb as it gets, with muscle.
- Goblin: the Dwarf version of the orc?
- Lizard: -10 points, just because it’s not a cat.
- Undead: Do you think it was human or elfish before it was… you know… dead?
- Frogman: Or Frogwoman, up to you.
After choosing your race and gender, you will get to pick your class. As said before, the race doesn’t influence the game so they all have the same classes. Each class has 2 specialization which will change your special ability (default R button) as well as your special stamina ability (middle mouse button) and others. They also each have 3 weapons (counting the shield as one as it allows for a different set of attacks).
- Warrior: your basic heavy armor CQC class. It is the only class with iron based armor which is also the strongest. As well as the only class with a basic blocking ability (assuming the shield is equipped).
- Ranger: Your basic ranged class. It’s armor really isn’t that good as you’d assume for a ranged class.
- Mage: Also a ranged class, it has the worse basic armor in the game but (and someone will have to confirm) back in the alpha it’s water damage could be used as healing, making it the only support class. Might still be there.
- Rogue: Your DPS? I ahven’t tried it much yet, it’s armor is slightly lower than the warrior but still pretty good, even more compared to ranged classes.
I have yet to get deeper in the classes myself so feel free to tell me basic stuff you think is worth adding.
Once you’ve finalized your character and created it, the game will start right away where you created it, so off to the next step!
Basic Controls
This is gonna be a dumb list of the basic controls, feel free to open the settings to check on them if need be.
- F1: Show some basic controls on the bottom left.
- F2 and F3: UI scale down/up.
- Escape: Show menu controls.
- C: Crafting menu.
- B: Inventory.
- M: Map.
- O: Open the game’s menu.
- J: Friends list.
- Left Click: Basic attack.
- Right Click: MP attack.
- Middle Click: While movie: dodge; While still: Specialization stamina ability.
- Left Shift: Specialization ability.
- R: Ultimate specialization ability.
- Tab: Item wheel open/close, then A/D to switch items.
- Q: Use selected item.
- E: Interact/Talk/Pick.
- T: Call pet or ride it if next to you.
- Ctrl: Walk.
- Mouse wheel: Zoom map and minimap in/out.
- Ctrl + Mouse Wheel: Zoom camera in/out.
Aside from Mages, you will need to build up MP by attacking with your basic attack. Mage automatically regain MP over time. Note that each weapon has a variation in attacks and each class has it’s own set of abilities (although they may share some). The specialization can change some of them too.
What Now?
Your goal is to find the region artifact to level up and move on to the next region. To do so you will need better gear.
You start off with 1 star gear, then go up to 5 stars with gold. You can have a quick idea of the gear’s level by looking at its color, in order: white, green, blue, purple, gold.
You will quickly notice that enemies’ name and places on the map also have similar color, this indicates their level. I would highly recommend following this indication as you can quickly get overwhelmed.
TIP: You can find your own level in the top left corner of your screen when your inventory [B] is open.
But before we get more gear, let’s go to town.
You can try finding one by zooming on the map, houses are usually easy to spot, sometimes you have farm lands around as well.
Once there feel free to explore it a bit, if the map is zoomed on it, you can see icons above some houses, this include the Guildmaster (crown) where you can change your specialization, item shop (flask) where I would recommend to buy glass flasks, useful to make potions which you can drink while moving, food doesn’t allow for that, armor and weapon shop and many more that allows access to crafting stations you might need later. Feel free to come back in town to try them out.
TIP: Potions can be drank while moving, useful to heal or buff during a fight. Food on the other hand requires you to sit down and take time to heal. Use them when you have no threat around you and save on your potions for when you’ll really need them.
On your way to the town, try to find any shrine you can, this is where you will respawn if you die as well as allow you to teleport freely to them from anywhere. Just click on one of the blue dot on the map to initiate teleportation. This will also allow you to quickly come back to town whenever need be. Try to also pick up as many items as possible as well, useful for crafting later on.
I would also highly recommend talking to every NPCs, you don’t have to read it nor stand near them so it’s pretty fast to do but do it. They will often give you “quests” to do, as in locations on the map with interesting stuff, usually key items you might need to progress. And try to stay in the region as gear and key items are bound to them, only pets, consumables and crafting items can be carried to other regions but nothing is lost if you decide to come back later.
Gearing Up!
If you found quests, go on experiment with that, see if you can find new stuff without needing more info as further down might ruin the exploration aspect of the game. Again, just remember about the colors!
But anyway!
Now, how do you get more gear? the “easy” and long way is to hunt every monster and hope they give you something. Another option is to craft new ones or go to a town to buy some, but you will quickly notice that they only offer you the basic level one weapons.
The most efficient way I found was to go to landmarks with the color/level of your choosing and kill mobs there. Many usually have a small quest for you to do that will give you plenty of money, new gear of higher level and occasionally key items.
TIP: Remember the colors! no need to hunt every monster, just the ones with a color that interests you.
Sometimes you will get left overs, do NOT sell them. If you go to town, the magnifying glass house will allow you to identify them and give you items of the same color as the left over you scanned. This is also a good way to get new gear. I might be wrong on that as I barely had time to test but it seem to only give you item for your class, as opposed to just random item. Feel free to correct me on that.
There are other options to get items but I will leave that for you to discover. This is mostly to guide you rather than struggle mindlessly in the plains hunting sheeps.
TIP: Some landmarks are easy to spot when slightly zoomed on the map, shrines includes, usually light grey boxes for them. You can place a marker with the middle mouse button when on the map to keep track of places you think might have something interesting.
Key Items
I’m really unsure about giving more info about key items, again, I really find a strong point about exploring in this game as it is now so what’s the point if I tell you everything?
If you talked with NPCs and read their dialogues, you should have an idea of what you might find already, so feel free to skip that spoiler box if you want to discover for yourself.
So I will only say that: some landmarks quests unlocks new crafts for higher level gear as well as better shops, usually with higher level gear. You will also find traveling items but best is always to teleport between shrines so find as many as possible.
There is more for you to find but I’ll keep that a secret on this guide!
TIP: Remember that Key items are bounded to the region, so all crafts and better shops apply to the region you found the key item in.
Final Word
That’s it for now!
Hope you get to enjoy the game and find the artifact!
I haven’t played much more myself for now so again, really more of a starting guide of what I would have liked to know to not spend hours hunting sheeps. I’m not even sure what to do afterward once you get the artifact and I supposed move to a new region?


Be the first to comment