
This guide helps players earn more in-game money without revealing story details. First, basic economic principles are explained. Then, key choices that affect resource gain are discussed.
Economics Guide
We are going to dive right in. Early on, the game mentions that Contentment dictates the number of taxes you receive. However, it never clearly states the ratio of Contentment to Gold and Supplies. Well, here it is:
- 1 Contentment = ~.3 Gold (rounded up).
- 1 Contentment = ~.3 Supplies (rounded up).
So, every 2-3 contentment will yield you an additional Gold or Supply. Why is this important? Almost every week, you will have the option to spend resources to benefit the peasants. The question is whether you should? The answer is Yes.
Assisting the common people benefits the player. Completing one or two favorable tasks grants a consistent weekly bonus of 1-2 resources. This outcome is similar to a permanent upgrade, which is generally considered valuable. Visual aids are available to demonstrate the calculations behind this strategy.

In the first screenshot, you’ll notice that I’ve tanked my Contentment to an abysmal 1, yet I’m still gaining 5 Gold & 1 Supply. These are your base rates, and if you drop below 1 Contentment, you lose all of your tax (though this isn’t a realistic risk).

In the second screenshot, I’m gaining 19 Gold & 15 Supplies, negate the base rates (5G & 1S) and you have 14/50 & 14/50 = .28 & .28. Once you’re up to 23 Gold & 18 Supplies (60 Contentment), your taxes will no longer increase. Though, if you’ve made wise economic decisions (such that this guide will suggest), it won’t matter and you can continue to be a benevolent king lavishly spending on all his peon’s desires.
Early Upgrades
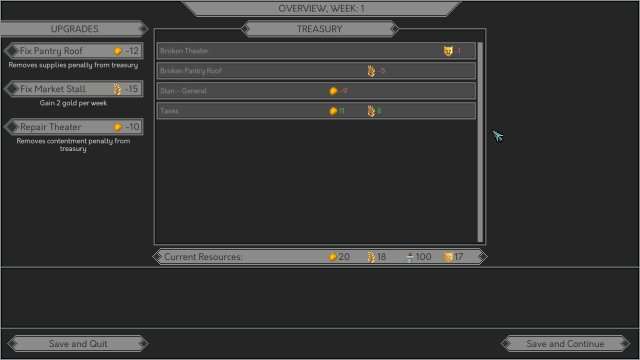
Okay, now that we understand clearly how the economics work, what should we do about upgrades? You definitely want to Fix Pantry Roof first. +5 Supplies is huge. I usually fix the Market Stall right away, but you can wait a turn or two if you want. I always wait a turn or two to repair the Theater.
The reason being that if you fix everything on the first turn (which you can), you won’t have any resources available to respond to any of your peasant requests, which will all be -1 events (same as not repairing the theater), and they’re all cheaper than repairing the theater anyway, so it’s better to fulfill the ad hoc requests and then fix the theater when you can comfortably do so.

Another important note: There’s no reason to buy upgrades for predetermined events ahead-of-time. You know when the wedding is, paying for the flowers / music early means you won’t have those funds available to help your stupid peons. You are always best off waiting until the last minute to purchase these things (though the last two weeks before certain battles play out somewhat strangely, so I’d always at least purchase defenses 2 weeks before the actual battle).
Not All Decisions Were Made Equal
I should note here: I almost always pay resources in lieu of my agents when applicable. There are times when this is not appropriate; use your best judgment in discerning these. However, there are many events that only your agents can handle, so I like to leave them free for these. And if I don’t need them, I send them out on the Map.
With that said, there are some decisions in the game that will give you distinct advantages. If you’d rather not know the outcome of these decisions, feel free to skip this segment. However, there are things that will provide you A LOT of gold throughout the game for relatively little investment, and the right decision is not always 100% intuitive.
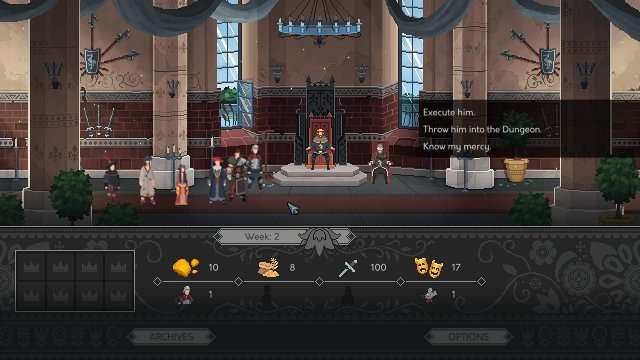
First off, make sure you do not let this savage roam free. Though in none of my playthroughs did I think it appropriate to loose a murderous barbarian upon my weak peasants, a bleeding heart may be willing to give him a second chance. Other lords will not agree with this decision. Imprison or behead this infidel, and you will reap the benefit of doing so later.
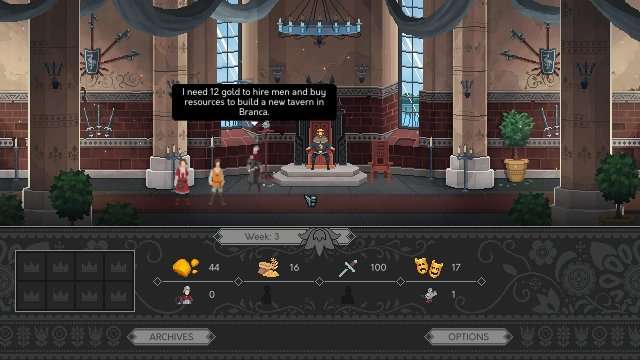
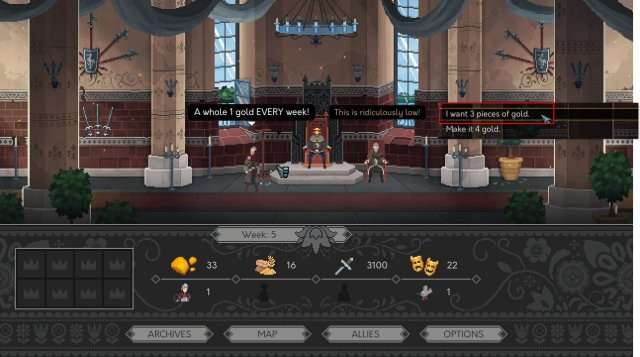
This man will be your best friend. In many ways, he is better than any Lord you come into contact with. You should immediately provide him the 12 gold when he asks for it. However, if you are short on funds, he will graciously come back later. Make sure you’ve set aside the gold for him then. When he comes back later, he will offer you a piddly 1 gold for your investment. Demand your fair share of 3 gold/week!
This will quickly repay its investment. Now, this is very important: He will come back later when pimps have overrun his establishment. Your inclination may be to send Stan to help him out; do not send your general. Instead, front him the 28 Gold he needs to hire his own bodyguards. This will pay huge dividends (4 Gold/Week!) That’s more than most Lords will offer.
If you don’t have the gold when he initially asks, you can ask him to come back later. Make sure you have it then! This event will easily net you 120+ gold by itself, so don’t screw it up. It’s one of those that can make the game significantly easier on its own.
There are some other events, a la paying for your local inn:

That have re-occurring benefits. Following the mantra of always being generous, you’ll reap these benefits naturally. You’ll get burned a little bit along the way, but you’ll have the resources to get burned and still come out way ahead. A good motto for this game is always give as much as you can. You’re the king. You can afford to do so.
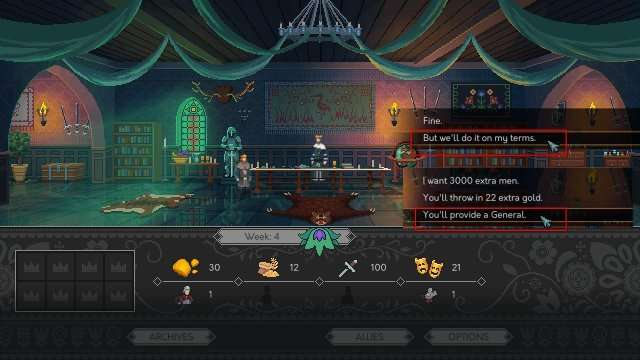
You’ll learn early on that Talys is a ***. But, he’s not as bad a guy as he seems. He’s actually super generous when it comes to resources. After all, he’s willing to offer you a humongous army for a wedding. If you ask him for a general, he will instead offer to pay for yours. This is huge! Stan is a whopping 9/Gold turn (almost twice your base income), and Talys will pay for it outright. This ends up being ~50 gold in the longrun, so don’t pass up on this opportunity!
Picking the Right Friends
So, after a certain event, you will be given the option (or requirement) of befriending some of your neighbor lords to enlist their army in a coming battle. Some of these lords provide greater benefit than others. I’ve listed them all here:
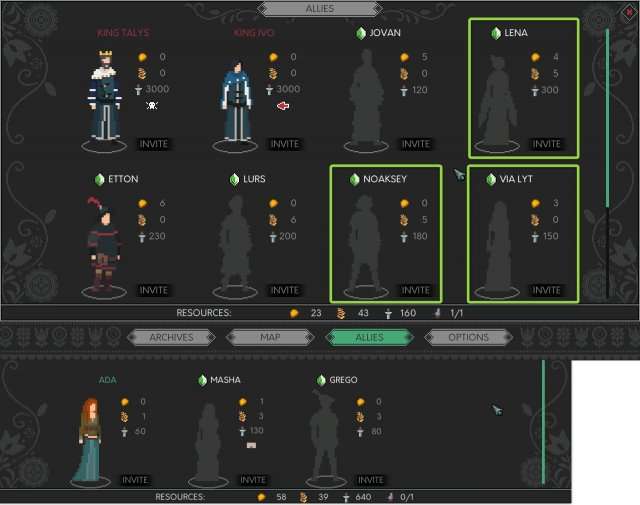
On my first playthrough, I slept on Lena. I assumed anyone that could offer so much must be impossible to work with. It turns out, that’s not true. Lena’s offer is very much within the realm of possibility, and if you’re willing to put up with the stipulations, she offers a hefty benefit from her allegiance. It’s worth noting here that:
- 40 Soldiers / 1 Supply usage
That’s super important because all Lords offer a certain amount of soldier support. These will likely cut into your Supply income if what they provide does not cover their expenditure. For instance, Lena offers 5 supplies but 300 soldiers. This means that she actually costs you 7-8 supplies, while only offering 5 herself for a net income of -2/3 supplies. However, if you’re willing to accept the gold as a trade-off, it’s not a bad deal.
On the other hand, Noaksey is straight profit. He offers 180 troops while providing 5 supplies. He pays for all of his troops and then some. On top of that, you get his benefits on Day One. Noaksey is a straight bro and probably my favorite lord out of the bunch. While he may embellish his stories, he’s not unwilling to admit so himself, and he remains a friend through-and-through.
Via Lyt will cost you ~4 supplies, so contact her when you’re comfortable with that trade. Masha covers most of her expenses will providing you +1 Gold, so feel free to contact her any time. Grego is fantastic value, however, keep in mind… He can be contacted at any time, so you can always wait to befriend him at any point throughout the game. Feel free to keep him in your back pocket.
This brings us to our next point…
Etton vs. Lurs (spoilers ahead)
You’re welcome to go with your gut on this one. However, if you want to know my opinion… Etton all the way! Dust might be the medieval equivalent of meth, but it will make you rich, and the scumbag Lurs forces you to spend your hard-earned supplies every week just to keep him from selling to the Radovians (what a douche!), which makes him more like 3S/week and that SUCKS compared to Etton, who remains a bro (and a great source of gold) throughout the campaign.
Spoilers Continued

Later on, after a certain battle, you’ll be given the opportunity to side with others kings. Essentially, one hates Radovians, one is a hippy and loves everyone, and the other wants to marry your daughter. You can choose any of them. However, if we want to compare the first two: We may notice a synergy: The one who hates Radovians easily aligns with Via Lyt.
If you decide to execute the Radovians you encounter, you’ll retain her income and that king’s support. Honestly, if you’ve played your cards right (or as I’ve suggested), then you won’t need it. But it’s just another way to maximize your income if that’s what you’re interested in.
Wrapping It Up
If you’ve followed my advice up to this point, you should pretty much be rolling in gold & supplies and need nothing else. However, I’ll leave you with this last bit:
Slight spoilers ahead…

If you want to know who you should kill at the trial… it all kind of depends on your previous decisions. However, if you’re friends with Etton & Noaskey, definitely do not kill either of them. They’re awesome sources of income throughout the game. For reasons you will soon discover, Lena will stop paying you dividends. So you can axe her here safely. Or, you can sentence no one. I mean… I wasn’t fully convinced on any of them, so I felt that wasn’t a terrible decision. You can play it as you feel is appropriate.
Overall, this is a great game, and I thoroughly enjoyed my time with it. I hope the advice I offer is not game-breaking in any way, but makes it a little easier for those who are interested in attaining a little economic benefit without spoiling any of the main storyline.
Remember to be generous to those with little, and they will be generous to you.


Be the first to comment