
Contents
Guide to Fix Game After Update
All credit goes to Tux!
Introduction
This is a lengthy, hopefully detailed enough explanation for how to fix your game after the most recent update. I occasionally will provide a screenshot example to hopefully help guide you in the correct path. Note, I’m just an individual human. I’m not apart of the Beam Team, I’m not a complete expert, but this is what I did to fix my game. If you follow these steps your game will more than likely be playable.
I should note, this hopefully is not as complicated as it looks, I just tried to cover all the bases in depth so even those who aren’t that good with computers and navigating your PC files can follow along.
However, it is time consuming (you have to uninstall, reinstall, and then depending on how many mods you have determines how much longer it takes. I had around 100, so it took me about a good 45 min of figuring out the corrupt mods).
Complete Uninstall and Backing Up
First, you’ll need to go into the steam app, right-click Beamng.Drive in your Library, click Properties, Local Files, Uninstall.
Now navigate to where your user folder is located on your PC. for me its under “Documents” labeled “BeamNG.drive”.
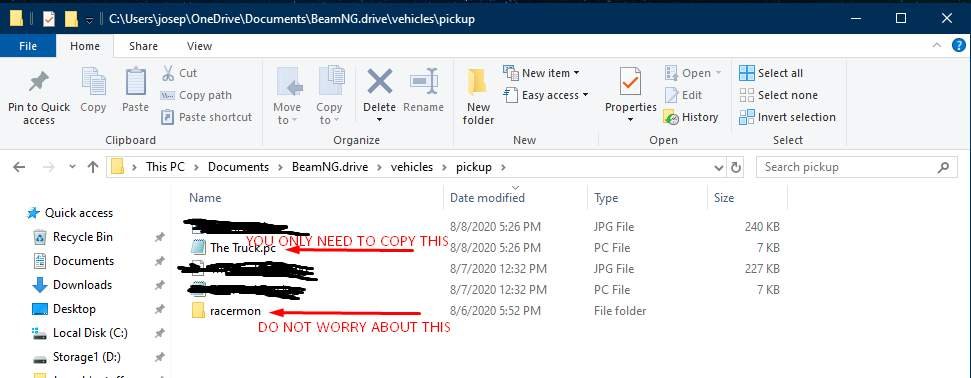
Now you need to backup your mods > repo folder (and certain files in your vehicles folder if you created custom versions of the default vehicles and want to save them, such as a suped up version of the D-series).
Enter the BeamNG.Drive > mods folder, click then drag the REPO folder to your desktop or make a copy somewhere separate of this BeamNG.Drive folder. You do not need to worry about the db.json.
If you have custom versions of the default vehicles, enter the vehicles folder, the specific vehicle folder, and drag only the .pc file to your desktop or make a copy somewhere separate of this BeamNG.Drive folder.
Now delete the entire “BeamNG.Drive” folder under “Documents”.
Reinstall
Once you have both uninstalled BeamNG.Drive and deleted the Documents > BeamNG.Drive User folder.
Reinstall BeamNG.Drive.
Once you are done reinstalling, open the game, and enter any map (I chose Small Grid for less load time). Make sure everything is correct (like the speedometer UI) , and that you can drive.
Note: your controls will be reset due to reinstalling. Arrow Keys are default for driving.
Once you have run the game at least once and made sure everything is working properly, now comes the tedious part of this process (More so if you have a lot of mods like I did).
Finding The Corrupt Mod Folder(s)
After you have opened the game and checked to make sure everything is correct, close the game.
Navigate to your Documents > BeamNG.Drive > mods > repo folder. Open in a separate explorer your old repo folder so you can have both repo folders side by side.
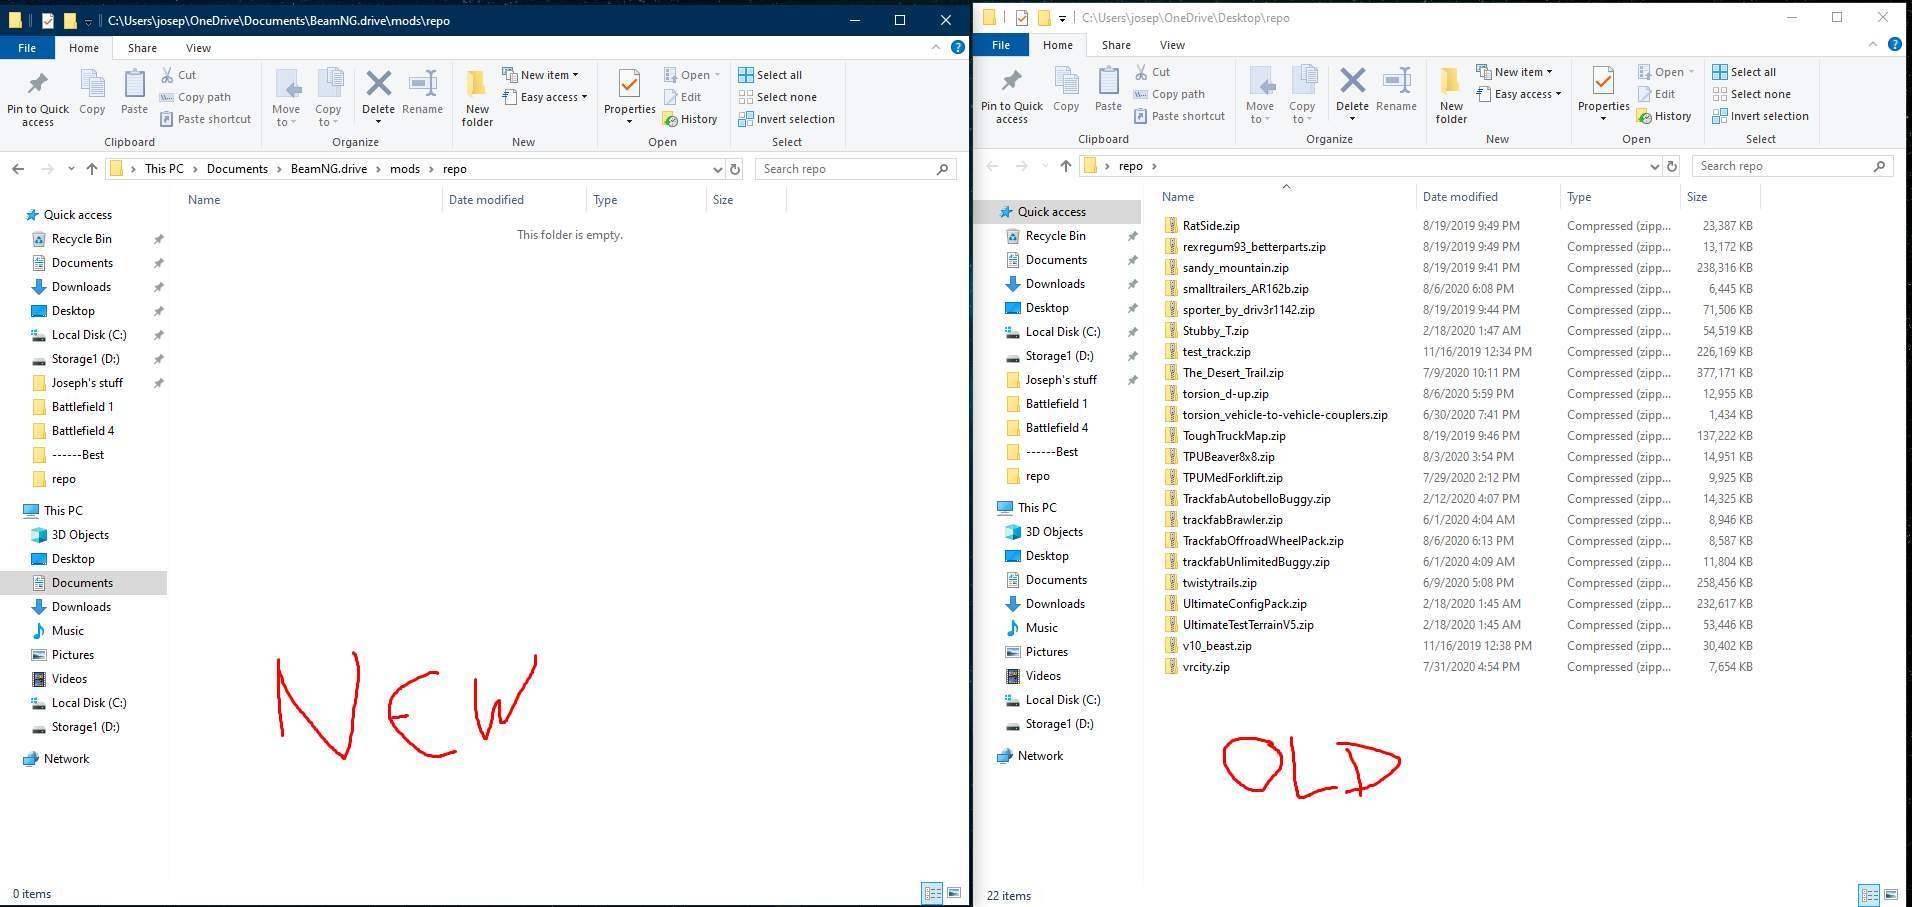
I shortened the amount of mods for easier understanding, I really have around 100.
To speed things up, go ahead and copy over most of the maps, since these mods will not be the problem to your game breaking.
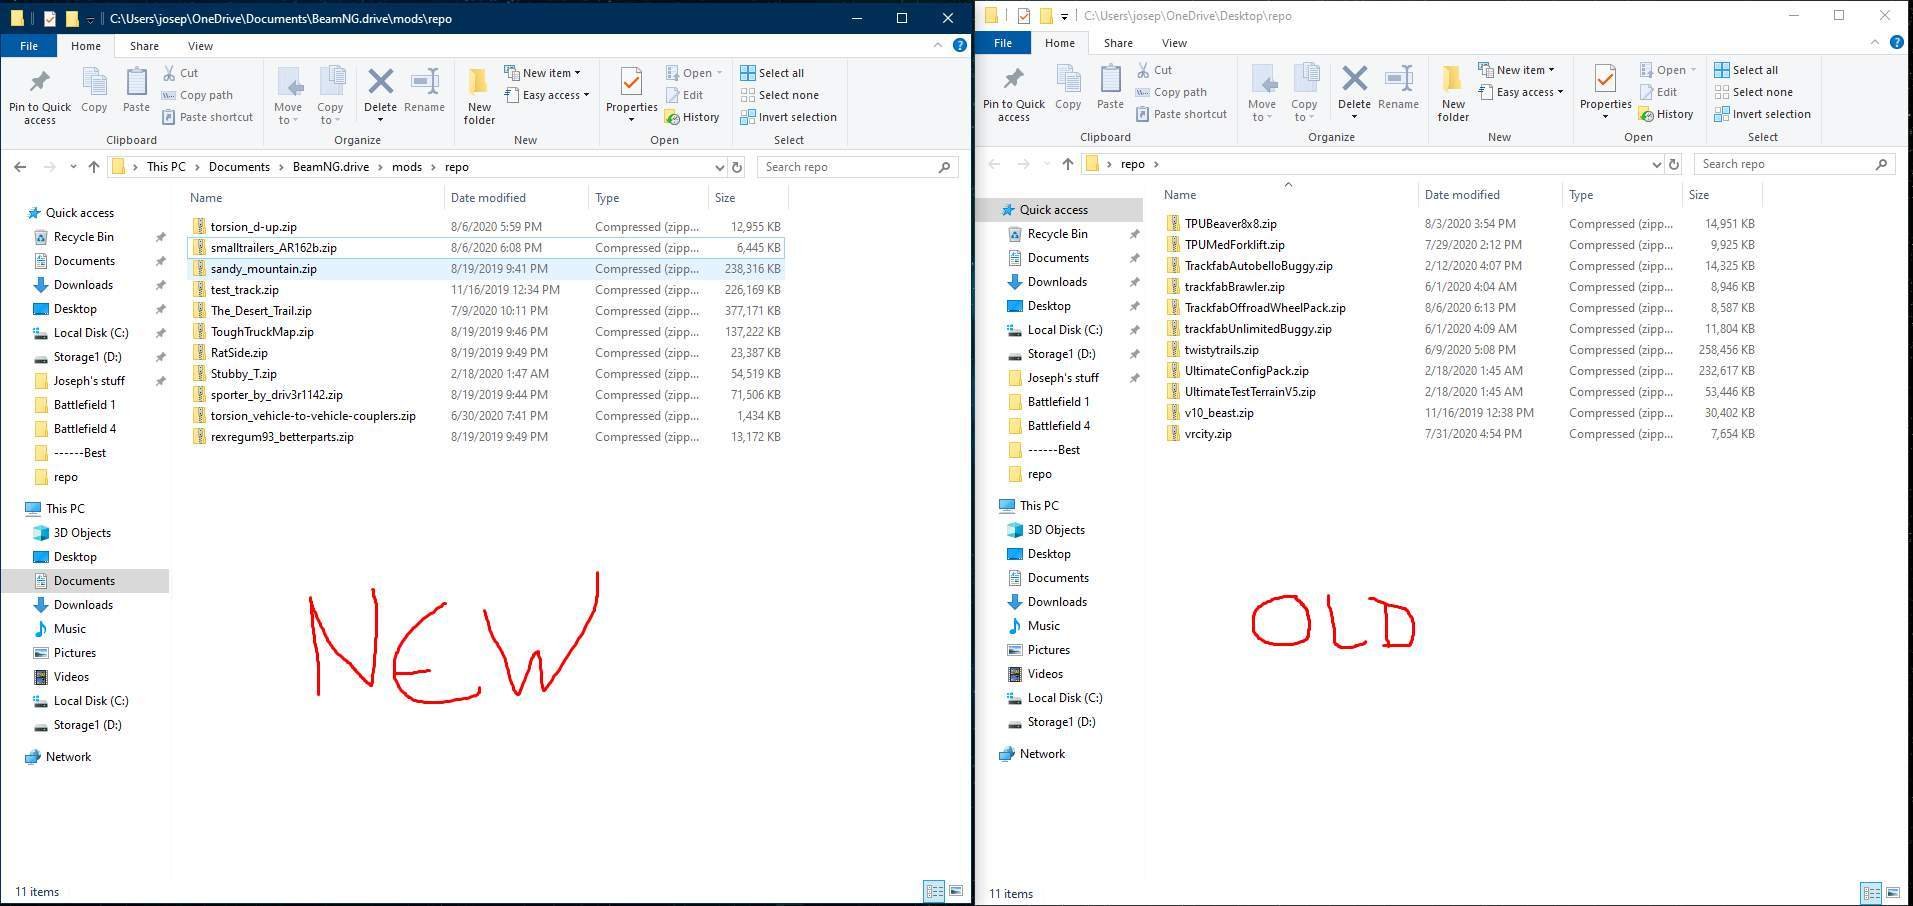
Now, click the first mod, hold shift and click half way down to select roughly half of your mods (or click-drag to select around half). Drag and drop to your new repo.
Now open your game, and load into small grid map (less loading time). make sure your game still works. Some mods will break (like the 67CAM / V8 racing sound, it currently does not work. However, they are not breaking the game (such as missing wheels, bugged speedometer UI, etc) so they are fine to stay for now).
Note: What you are essentially doing is eliminating the mods that break your game.
If you load in and everything still works, nothing is wrong with the game or loading in the default vehicles, then those mods you copied over are fine. Close the game, and repeat the process of halving the old repo folder into the new repo folder until the game breaks.
Example of halving the old repo folder each time into the new repo folder:

If you load in and wheels are missing, the UI is flipped and not working, you can’t load in default vehicles, etc. one or more of the mods you copied over is broken. If this happens, Close the game, click anywhere in the new repo folder and press CTRL+Z (to undo the previous mods you copied over).
After you CTRL+Z, select the other half of the mods from the old repo folder, copy them over to the new repo, open your game and see if that group of mods break your game. If they do, don’t worry, just CTRL+Z to undo that group of mods you copied over.
Keep In Mind Through This Process
Again, the idea is to eliminate the mods that are breaking your game, or rather eliminating the mods that are not breaking it. If both the halves of the old repo folder make your game break, grab half of the first half you tried earlier.
The idea is trying to find the single folder(s) that are causing your game to bug out (you can check by starting the game and making sure everything is correct, then closing the game. Drag just that folder over, start the game up, load in and notice the game is only broken after you added that one mod).
Once you find the corrupt mod(s), remove them from either repo folder (you can drag to your desktop if you want to remember the name and want to wait for the creator to update the mod, or delete it all together… just do not place it back in your new repo folder).
There is not a correct way to find the broken mod folder.
I just suggested chunking the amount you remove from your old to your new by halves to be the quickest and most efficient way to isolate the folder causing your game to break.
Finishing Up
Once you are done, all of your old mods (excluding the ones causing your game to break) should be located under your newly installed BeamNG.Drive > mods > repo folder.
You can now delete your old repo folder from wherever you placed it.
To see your custom vehicles you copied over from your previous BeamNG.Drive install:
navigate to the vehicles folder, find the specific vehicle folder, then drop your .pc file in that folder.
Note: If the custom vehicle save you copied from your old install was dependent on a mod that you removed because it was corrupt, your custom vehicle will either not work or will have missing components (of course).
Your game should now work if you successfully removed the mod files that were causing your game to break.
If your game does not work, you need to remove the last files you just placed in your new repo, or redo the process of adding mods to your new repo folder from your old folder entirely. Make sure the corrupt folders causing your game to break are NOT placed in your new repo folder.
A Separate Note About The Blank Vehicles Cluttering Your Vehicle Menu
When you’re transferring your old mods group by group into your new repo folder in the process above, this is how you can find out which mods are creating those unnecessary unusable vehicles that you have.
They will display as a question mark background with a weird vehicle name such as Satsuma or Peugot.


Be the first to comment