
A guide listing all the requests available in Persona 5 Strikers, where to find them, and what their rewards are for completing the missable achievement: What are Friends For? It also contains tips on how to complete the more complex requests, such as: Prison Mail, Forgotten Desire, and Thief Challenges. Note that some spoilers will be found when looking through the request list.
Contents
Introduction
All credit goes to HayateButler!
Requests in Persona 5 Strikers are your optional side quests which you receive when you talk to people while exploring each city. Completing these requests will earn you various goodies, such as money, items, and bond points; be sure to keep an eye out for them. It’s also important to note that if you proceed to the next city before completing certain location restricted requests, you won’t be able to finish it.
If you are looking for strong shadow requests that unlock persona fusions, Ctrl + F for “Strong Shadow.” And if you are looking for all missable requests, Ctrl + F for “MISSABLE Request”.
August 2
- Request: Take back the Desire
- Location: Shibuya Jail – Shibuya Crossing (Automatic from Futaba)
- Objective: Defeat Shadows
- Reward: Motto Hoodie (Male – 76 Def, Null Brainwash)
August 3
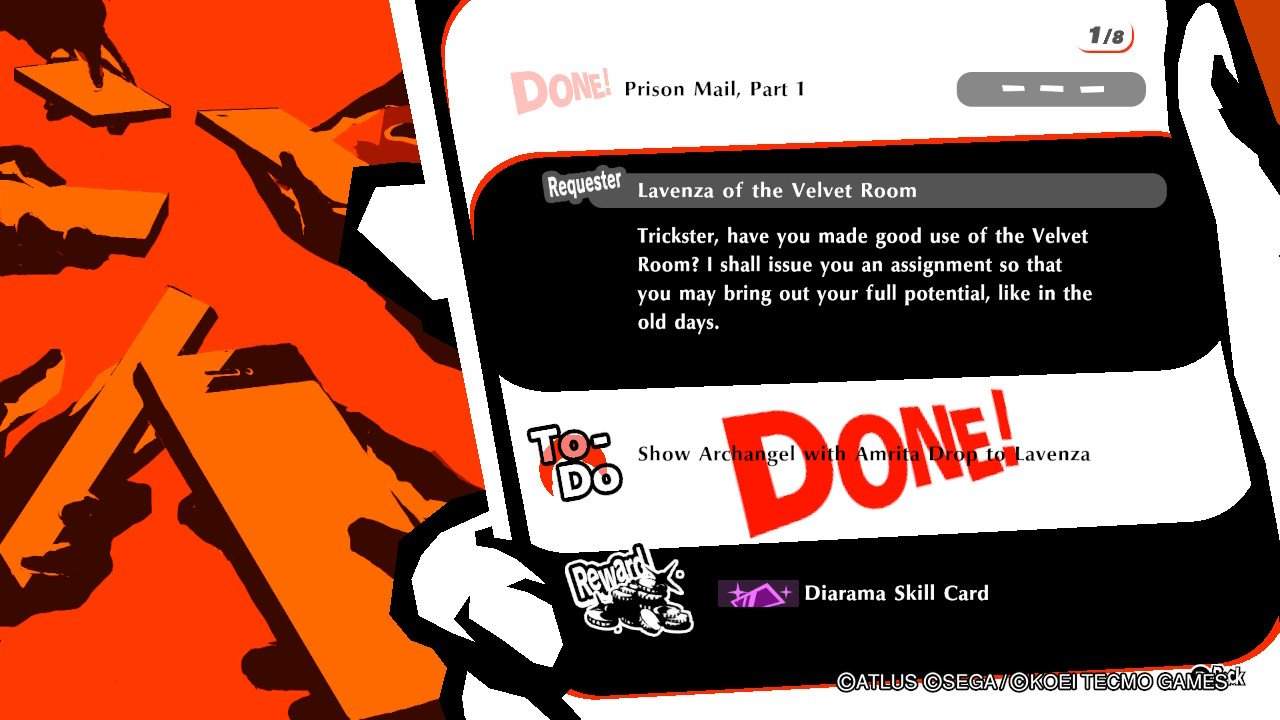
- Request: Prison Mall, Part 1
- Location: Velvet Room
- Objective: Show Lavenza an Arch Angel with Amrita Drop Fuse Lv 14 High Pixie with Lv 14 Hua Po (Orthrus & Berith or Andras & Succubus)
- Reward: Diarama Skill Card
- Request: Cold-Blooded Treatment
- Location: Sendai Jail – Aoba St. 1st Ward and Hirose St
- Objective: Defeat 3 Lamia by Hitting their Weakness (Ice)
- Reward: Muramasa (Fox – 94 Dmg, 2 Ag)
- Repeat Reward: Quickfix Alpha
- Request: Gusts of Punishment
- Location: Shibuya Jail – Side Path of Castle: Front Area
- Objective: Defeat 3 Succubus by Hitting their Weakness (Wind, Bless)
- Reward: Headhunter Ladle S (Mona – 84 Dmg, Crit Up Low)
- Repeat Reward: Rice/Onion
- Request: Painful Past: Alice Hiiragi
- Location: Shibuya Jail – Castle: Front Area
- Objective: Jail Monarch Mad Rabbit Alice Rematch
- Reward: Bond XP
- Repeat Reward: ¥2,500
- MISSABLE Request: Sendai Sweets
- Location: Sendai Station Square (Ann, Respond to her message)
- Objective: Deliver a Zunda Shake, Zunda Daifuku, and Gyutan Ice Cream (Purchase from nearby shops)
- Reward: Bond XP
- MISSABLE Request: Lending a Paw
- Location: Mt. Aoba Park (Morgana, Complete “Sendai Sweets” Request)
- Objective: Deliver a Zunda Supreme. Talk to people in Mt. Aoba Park, one near shrine info booth & one inside shrine, then head south to talk to Fussy Manager. Go to Sendai Station and talk to the man talking to himself near Futaba to learn the password. Return to the Fussy Manager and buy the Zunda Supreme from Blue Cafe.
- Reward: Bond XP
August 8
- Request: Trapped in Wonderland – Forgotten Desire 1
- Location: Shibuya Jail
- Objective: Find the Forgotten Desire for Morgana. Go to the Underground Waterway where you found Sophia and head to the drains you can climb in the northwest part of the map. Climb the southern most drain.
- Reward: Accessories Unlocked in Sophia’s Shop
- Request: Sophia’s Weapon Shop
- Location: Sendai Jail – West Garden and Hirose St.
- Objective: Defeat 20 High Pixie
- Reward: Weapons Unlocked in Sophia’s Shop
- Repeat Reward: ¥1,200
- Request: Sophia’s Armor Shop
- Location: Sendai Jail – Hirose St.
- Objective: Defeat 5 Orthrus
- Reward: Armor Unlocked in Sophia’s Shop
- Repeat Reward: Medicine
- Request: Junk Collection, Part 1
- Location: Shibuya Jail
- Objective: Collect 15 Chipped Microchip
- Reward: Hacker Gear Mk. 2 (Oracle)
- Repeat Reward:¥19,200
- Request: Painful Past: Ango Natsume
- Location: Sendai Jail – Castle: Front Area
- Objective: Jail Monarch Nightmare Dragon Ango Rematch
- Reward: Bond Skill Level Cap Increase
- Repeat Reward: ¥3,000
August 10
- Request: Prison Mail, Part 2
- Location: Velvet Room
- Objective: Show Lavenza an Eligor with Divine Grace. Fuse Lilim with a Lv 29 Ame-no-Uzume (Lamia & Orthrus).
- Reward: Rebel Soul Skill Card
- Request: Trapped in a Nightmare – Forgotten Desire 2
- Location: Sendai Jail
- Objective: Find the Forgotten Desire for Morgana. Go to Hirose St Checkpoint and get onto the rooftops where you walked along the invisible platforms. After you first cross over the street below use the floating platforms to hop to the roof on the right, then jump off the other end of the roof.
- Reward: Accessories Unlocked in Sophia’s Shop
- Request: Enduring a Slimy Hell
- Location: Sendai Jail – Sendai Station and Aoba St. 1st Ward
- Objective: Defeat 50 Slimes as Joker
- Reward: Arsene’s Cane (Joker)
- Repeat Reward: ¥1,800
- Request: Sub-Zero in Sapporo
- Location: Sapporo Jail – Suzushino and Odori Park
- Objective: Defeat 20 Jack Frost by Hitting their Weakness (Fire)
- Reward: Items Unlocked in Sophia’s Shop
- Repeat Reward: Hot and Sour Tea
- Request: Blessing the Wicked
- Location: Sapporo Jail – Suzushino and Odori Park
- Objective: Defeat 3 Lilim by Hitting their Weakness (Wind/Bless)
- Reward: Water Yoyo (Sophie)
- Repeat Reward: Lamb Meat/Pork/Flour
- Request: Psychokinetic Siege
- Location: Sapporo Jail – Sapporo Clocktower and Castle: Front Area
- Objective: Defeat 3 Setanta by Hitting their Weakness (Psy)
- Reward: Death Contract S (Noir – 134 Dmg, Fear Low)
- Repeat Reward: ¥2,200
- Request: Junk Collection, Part 2
- Location: Sendai Jail
- Objective: Collect 12 Strange Circuit
- Reward: Extortionist Bond Skill Level Cap Increase
- Repeat Reward: ¥28,800
August 11
- Request: Prison Mail, Part 3
- Location: Velvet Room
- Objective: Show Lavenza a Kaiwan with Makouga. Fuse Lv 26 Setanta with Lv 27 Principality.
- Reward: Soul Thief Skill Card
- Request: Bug Blaster
- Location: Sapporo Jail – The Arboretum and Sapporo Tower
- Objective: Defeat 8 Mothman by Hitting their Weakness (Gun)
- Reward: Items Unlocked at Sophia’s Shop
- Repeat Reward: Super Jolt
- Request: Cursing Those on High
- Location: Sapporo Jail – Castle: Front Area
- Objective: Defeat 3 Principality by Hitting their Weakness (Curse)
- Reward: Stat-Boosting Bond Skill Level Cap Increase
- Repeat Reward: ¥2,600
- Request: Nuking the Stars
- Location: Sapporo Jail – Sapporo Tower and Castle: Front Area
- Objective: Defeat 3 Kaiwan by Hitting their Weakness (Nuclear)
- Reward: Death’s Claw (Queen – 126 Dmg, 2 Ma)
- Repeat Reward: Donut-Worry
- MISSABLE Request: Love Soupreme
- Location: Suzushino, Sapporo (Ryuji, Talk to him after he messages you on 8/11)
- Objective: Deliver 2 Meal Tickets. Talk to the man in a white shirt in front of the red pharmacy on the west side of Suzushino intersection. You will then receive another request that needs to be completed before you can buy the Meal Tickets from him.
- Reward: Bond XP
- MISSABLE Request: The Apothecary’s Connection
- Location: Sapporo Jail – The Arboretum and Sapporo Tower (Talk to the man outside Akagire in Suzushino for the Love Soupreme request)
- Objective: Defeat 10 Mothmen as Sophie
- Reward: Bond XP
August 17
- Request: Prison Mail, Part 4
- Location: Velvet Room
- Objective: Show Lavenza a Mitra with Regenerate. Fuse Lv 31 Setanta with Lv 27 Principality.
- Reward: Charge Skill Card
- Request: Trapped in a Frozen Hell – Forgotten Desire 3
- Location: Sapporo Jail
- Objective: Find the Forgotten Desire for Morgana. Go to the Arboreum Checkpoint and turn around. After a while you’ll reach an open area with a few quadrupedal shadows, The Forgotten Desire will be the far item pickup.
- Reward: Bondmaker Bond Skill Level Cap Increase
- Request: Junk Collection, Part 3
- Location: Sapporo Jail
- Objective: Collect 12 Integrated Circuits
- Reward: Resilient Scarf S (Mona)
- Repeat Reward:¥54,000
- Request: Painful Past: Mariko Hyodo
- Location: Sapporo Jail – Castle: Front Area
- Objective: Jail Monarch Snow Queen Mariko Rematch
- Reward: Bond XP
- Repeat Reward: Tuna/Beef
- MISSABLE Request: Beachside Blast
- Location: Okinawa Beach (Makoto)
- Objective: Purchase a Watermelon (¥800 at Beach bar) & Defeat 10 Jack Frost (Sapporo Jail – Suzushino and Odori Park) as Queen
- Reward: Bond XP
August 18
- MISSABLE Request: Okinawan Art Appreciation
- Location: Okinawa (Yusuke)
- Objective: Defeat 10 Shiisaa (Okinawa Jail – Research Lab and Document Storage Area) as Fox
- Reward: Shiisaa Ornament
August 23
- Request: Prison Mail, Part 5
- Location: Velvet Room
- Objective: Show Lavenza a Unicorn with Zionga. Fuse Lv 33 Black Ooze with Lv 35 Shiisa
- Reward: Joker’s Wild Bond Skill Level Cap Increased
- Request: Trapped in Ruins – Forgotten Desire 4
- Location: Okinawa Jail
- Objective: Find the Forgotten Desire for Morgana. Go to the Lab: North checkpoint and walk into the room with the shipping containers. Morgana will warn you that there’s a Powerful Enemy on the far side of the room. Use the moving crane to get on top of the shipping container tower right in front of you.
- Reward: Divine Grace Skill Card
- Request: Shocking the Scum
- Location: Okinawa Jail – Experiment Area
- Objective: Defeat 20 Back Ooze by Hitting their Weakness (Electricity)
- Reward: First Clear: Demon Pipe (Skull)
- Repeat Reward: Revival Bead
- Request: Elegant Experiment
- Location: Any Jail
- Objective: Defeat 8 Shadows in a Single Showtime
- Reward: Items Unlocked in Sophia’s Shop
- Repeat Reward: ¥4,800
- Request: Junk Collection, Part 4
- Location: Okinawa Jail
- Objective: Collect 12 Strange Discs
- Reward: Hacker Gear Mk. 4 (Oracle – 204 Def, 50 HP)
August 24
- Request: Prison Mail, Part 6
- Location: Velvet Room
- Objective: Show Lavenza a Queen Mab with Technical Adept. Fuse Lv 37 Kaiwan with Lv 40 Kikuri-Hime.
- Reward: Persona Ability Boosting Bond Skill Level Cap Increased
- Request: Trapped in the Shrine Gates
- Location: Kyoto Jail
- Objective: Head to the bamboo area with the small lantern & Neko Shogun
- Reward: Concentrate Skill Card
- Request: Junk Collection, Part 5
- Location: Kyoto Jail
- Objective: Collect 9 Suspicious Character String Data
- Reward: Masquerade Whip S (Panther – 172 Dmg, Dizzy Low)
- Repeat Reward: ¥72,000
- Request: Junk Collection, Part 6
- Location: Osaka Jail
- Objective: Collect 9 Ambiguous File List
- Reward: Rune Amulet (5 Ma)
- Repeat Reward: ¥84,000
- Request: The Hound of Hades Howls
- Location: Osaka Jail – Juoji Zoo
- Objective: Defeat Strong Shadow: Cerberus
- Reward: Cerberus Fusion Unlocked
- Repeat Reward: ¥15,000
- Request: Sophia’s Weapon Shop Redux
- Location: Kyoto Jail – Beckoning Cat Square
- Objective: Defeat 5 Neko Shogun using a Phantom Dash
- Reward: Weapons Unlocked in Sophia’s Shop
- Repeat Reward: ¥8,000
- Request: Sophia’s Armor Shop Redux
- Location: Kyoto Jail – Fox Couple Statue
- Objective: Defeat 10 Koppa Tengu as Wolf
- Reward: Armors Unlocked in Sophia’s Shop
- Repeat Reward: Niuhuang Dan
- Request: An Ebon God Descends
- Location: Sendai Jail – Side path of Castle: Front Area
- Objective: Defeat Strong Shadow: Seth
- Reward: Seth Fusion Unlocked
- Repeat Reward: ¥13,200
- Request: A Thief’s Challenge: Panther
- Location: Shibuya Jail
- Objective: Reach the Marked Location without Quick Travel or Increasing the Security Level. Start by heading out the Shibuya Station: West Exit, then move to the Underground Waterway. In the large square rooms in the Underground Waterway, hug the sides of the wall, or just rush through the middle to get by. Once you get to the sentry rooms prioritize ambushing Shadows. Note: Ambushing an enemy won’t raise the security level, and even if a Shadow begins to investigating your noise, as long as you aren’t caught, the security level won’t go up. If you fail this quest, you’ll need to leave the jail and re-accept it from the hideout.
- Reward: Accessories Unlocked in Sophia’s Shop
- Repeat Reward: Purifying Ash
- Request: A Thief’s Challenge: Fox
- Location: Sendai Jail
- Objective: Reach the Marked Location without Quick Travel or Increasing the Security Level. Head west from Sendai Station to Aoba St. 1st Ward and continue ahead to get to West Garden. At Aoba St. 1st Ward there is a wall of sentries covering the path, but they should be close enough to the cop car on the left side of the road that you can ambush them. Hug the left wall entering the West Garden, and get to the objective.
- Reward: Knight’s Crest
- Repeat Reward: Bitter Gourd/Tofu/Carrot
- Request: A Thief’s Challenge: Noir
- Location: Sapporo Jail
- Objective: Reach the Marked Location without Quick Travel or Increasing the Security Level. Go through Suzushino to Odori Park, and take the first right to Sapporo Tower. Climb up the hill and snowboard down to the objective.
- Reward: Items Unlocked in Sophia’s Shop
- Repeat Reward:¥10,000
- Request: A Thief’s Challenge: Skull
- Location: Osaka Jail
- Objective: Defeat 5 Valkyrie & 20 Naga
- Reward: Parameter Booster Bond Skill Level Cap Increase
- Repeat Reward: Bead
- Request: A Thief’s Challenge: Wolf Pt.1
- Location: Sendai Jail – West Garden and Hirose St
- Objective: Defeat 10 High Pixie with Phantom Dash
- Reward: Traffic Sign (Wolf)
- Repeat Reward: Life Stone
- MISSABLE Request: Cooking Papa
- Location: Osaka (Zenkichi, Talk to him at Shinsekai after he messages you)
- Objective: Get Haru & Futaba to teach Zenkichi How to Cook. Haru is at Dotonbori: Shopping St, and Futaba is at Shinsenkai: Tower. Talk to Haru first to receive the “Obanzai Ingredients” request. Complete the request, then speak to Futaba for the “Forging the Ultimate Menu” request. This request will also finish after “Forging the Ultimate Menu” is done.
- Reward: Bond XP
- MISSABLE Request: Obanzai Ingredients
- Location: Osaka – Dotonbori: Shopping St. (Haru, After receiving the “Cooking Papa” Request)
- Objective: Deliver Kamo-Nasu Eggplant, Tofu, Beef
- Reward: Obanzai Recipe
- MISSABLE Request: Forging the Ultimate Menu
- Location: Osaka – Shinsekai: Tower (Futaba, After completing “Obanzai Ingredients” Request)
- Objective: Deliver Kyoto Curry, Miso Ramen
- Reward: Bond XP
August 25
- Request: Elegant Experiment Extended
- Location: Any Jail
- Objective: Defeat 12 Shadows with a Single Showtime
- Reward: Items Unlocked in Sophia’s Shop
- Repeat Reward: ¥13,000
- Request: A Thief’s Challenge: Queen
- Location: Okainawa Jail
- Objective: Reach the Marked Location without Quick Travel or Increasing the Security Level
- Reward: HP Incense
- Repeat Reward: ¥12,000
- Request: A Thief’s Challenge: Sophie
- Location: Kyoto Jail
- Objective: Reach the Marked Location without Quick Travel or Increasing the Security Level
- Reward: Safecracker Bond Skill Level Cap Increase
- Request: Make the Way for the Frozen King
- Location: Sapporo Jail – The Arboretum
- Objective: Defeat Strong Shadow: King Frost
- Reward: King Frost Fusion Unlocked
- Repeat Reward: Hiranya
August 28
- Request: Halt the Strutting Little Imp
- Location: Shibuya Jail – Shibuya Crossing
- Objective: Defeat Strong Shadow: Black Frost
- Reward: Black Frost Fusion Unlocked
- Repeat Reward: Cabbage/Kamo-Nasu Eggplant
- Request: Prison Mail, Part 7
- Location: Velvet Room
- Objective: Show Lavenza a Trumpeter with Diarahan
- Fuse Lv 54 Norn with Lv 48 Sarasvati.
- Reward: Regenerate 3 Skill Card
- Request: Trapped in Dystopia – Forgotten Desire 5
- Location: Osaka Jail
- Objective: Find the Forgotten Desire for Morgana. Middle of the map in Shipping Railway Area, where the cargo containers are is a spot you can climb up to find it along with a chest.
- Reward: Power Incense
- Request: Employee Course Correction
- Location: Osaka Jail – Juoji Station
- Objective: Defeat 5 Ganesha & 5 Raja Naga
- Reward: Churrasco Recipe
- Repeat Reward: Mega Purifying Ash
- Request: Junk Collection, Part 7
- Location: Osaka Jail
- Objective: Collect 12 Bizarre Report
- Reward: SP Incense
- Repeat Reward: ¥70,000
- Request: A Thief’s Challenge: Wolf Pt. 2
- Location: Osaka Jail
- Objective: Reach the Marked Location without Quick Travel or Increasing the Security Level
- Reward: Accessories Unlocked in Sophia’s Shop
- Repeat Reward: Snuff Soul
- Request: Painful Past: Akira Konoe
- Location: Osaka Jail
- Objective: Jail Monarch Hero Akira Rematch
- Reward: Bond XP
- Repeat Reward: ¥15,600
August 30
- Request: Dragon Slayer Enters the Fray
- Location: Kyoto Jail – Inari Taisha Main Shrine
- Objective: Defeat Strong Shadow: Siegfried
- Reward: Siegfried Fusion Unlocked
- Repeat Reward: ¥11,000
- Request: The Writhing Nightmare Rising
- Location: Okinawa Jail – Cage of Desolation
- Objective: Defeat Strong Shadow: Mara
- Reward: Mara Fusion Unlocked
- Repeat Reward: Bead Chain
- Request: Prison Mail, Part 8
- Location: Velvet Room
- Objective: Show Lavenza a Cu Chulainn with Concentrate
- Fuse Lv 59 Mot with Lv 55 Nebiros.
- Reward: Mediarahan Skill Card
- Request: Trapped in the Abyss – Forgotten Desire 6
- Location: Jail of the Abyss
- Objective: Find the Forgotten Desire for Morgana
- From the Depths of the Abyss checkpoint, climb up the west ledge.
- Reward: Bond Skill Level Cap Increase
- Request: Junk Collection, Part 8
- Location: Jail of the Abyss
- Objective: Collect Illegible Document
- Reward: Ruyi Jingu Bang S (Skull)
- Repeat Reward: ¥102,000
- Request: A Thief’s Challenge: Mona
- Location: Jail of the Abyss
- Objective: Reach the Marked Location without Quick Travel or Increasing the Security Level
- Reward: Magic Incense
- Repeat Reward: Amrita Soda
- Request: Prison Mail, Part 9
- Location: Velvet Room
- Objective: Show Lavenza a Dominion with Nuclear Amp. Fuse Lv 62 Mot with Lv 60 Forneus
- Reward: Fortify Skill Card
- Request: Trapped in the Great Tree – Forgotten Desire 7
- Location: Tree of Life & Wisdom
- Objective: Find the Forgotten Desire for Morgana. At the bottom left part of the second floor, climb the ledge.
- Reward: Master Coffee Recipe
- Request: Junk Collection, Part 9
- Location: Tree of Life & Wisdom
- Objective: Collect 15 Unnatural Samples
- Reward: Armors Unlocked in Sophia’s Shop
- Repeat Reward: ¥120,000
- Request: A Thief’s Special Challenge
- Location: Tree of Life & Wisdom
- Objective: Reach the Marked Location without Quick Travel or Increasing the Security Level
- Reward: Master Curry Recipe
- Repeat Reward: ¥20,000
- Request: Painful Past: Demiurge
- Location: Tree of Life & Wisdom – Hall of Contracts
- Objective: False God Demiurge Rematch
- Reward: Bond XP
- Repeat Reward: Crab/Egg/Miso
- Request: Painful Past+: Alice Hiiragi
- Location: Shibuya Jail – Castle: Front Area
- Objective: Jail Monarch Mad Rabbit Alice Rematch Again
- Reward: Naraku Whip S (Panther – 290 Dmg, 30 SP)
- Repeat Reward: ¥21,000
- Request: Painful Past+: Ango Natsume
- Location: Sendai Jail – Castle: Front Area
- Objective: Jail Monarch Nightmare Dragon Ango Rematch Again
- Reward: Usumidori S (Fox)
- Repeat Reward: ¥22,000
- Request: Painful Past+: Mariko Hyodo
- Location: Sapporo Jail – Castle: Front Area
- Objective: Jail Monarch Snow Queen Mariko Rematch Again
- Reward: Fleurs Du Mal S (Noir – 308 Dmg, 5 Ma)
- Repeat Reward: ¥23,000
- Request: Angel of Contracts Descends
- Location: Tree of Life & Wisdom – Hall of Contracts
- Objective: Defeat Strong Shadow: Metatron
- Reward: Metatron Fusion Unlocked
- Repeat Reward: ¥24,000
- Request: Painful Past+: Akira Konoe
- Location: Osaka Jail – Castle: Front Area
- Objective: Jail Monarch Hero Akira Rematch Again
- Reward: Mjolnir S (Skull)
- Repeat Reward:¥25,000
- Request: Painful Past+: Demiurge
- Location: Tree of Life & Wisdom – Hall of Contracts
- Objective: False God Demiurge Rematch Again
- Reward: Forbidden Fruit (Sophia)
- Repeat Reward: ¥30,000
- Request: Knocking on Death’s Door
- Location: Okinawa Jail – Cage of Desolation
- Objective: Defeat the Reaper
- Reward: Paradise Lost S (300 Dmg, Reduce Curse Dmg High)
- Repeat Reward: Chewing Soul


Be the first to comment