

Egg Heist: All Chaos / Nightmare Mode Dungeon Layouts
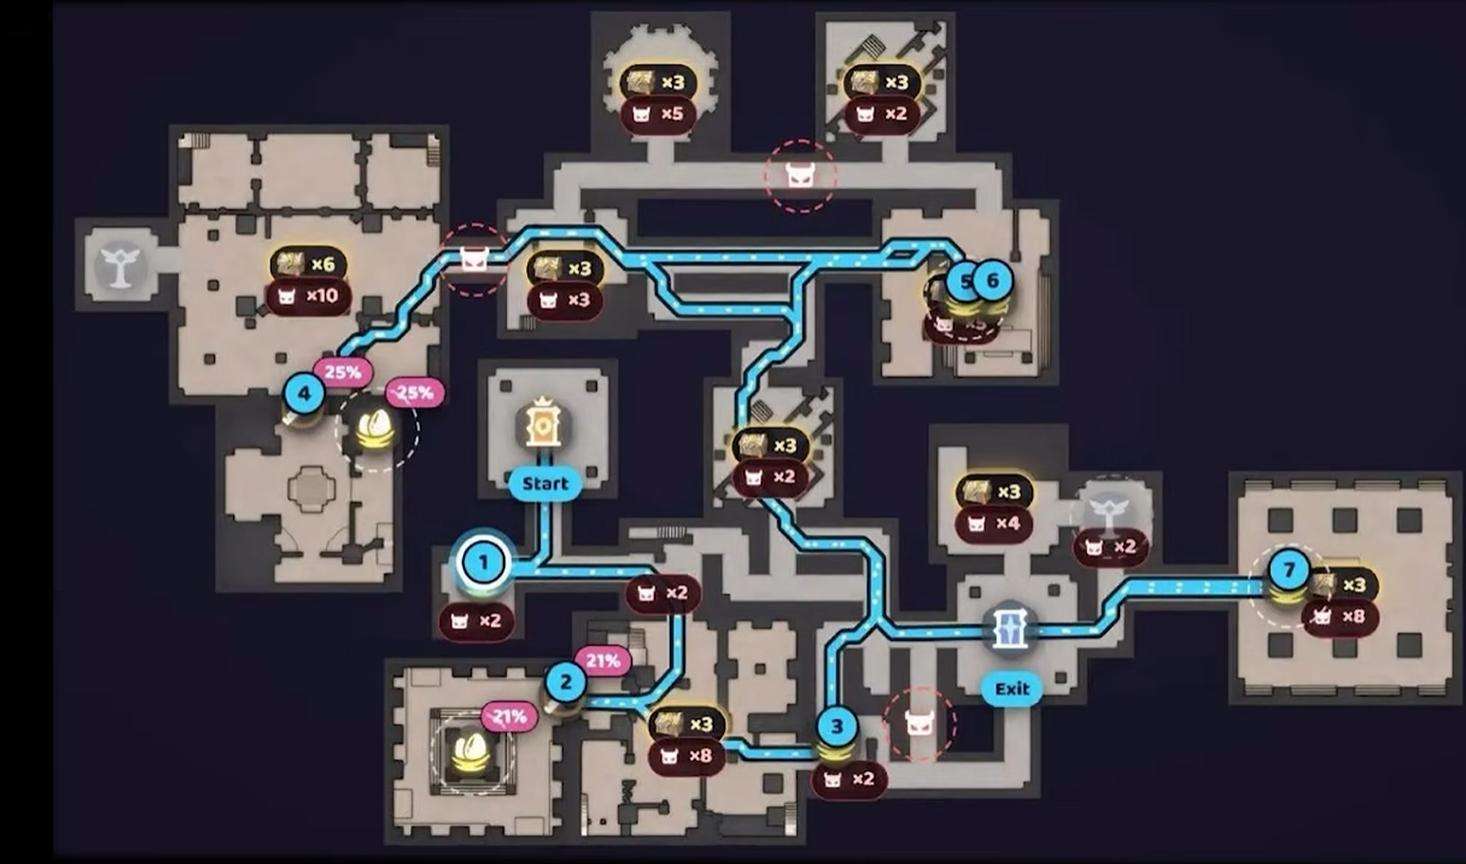
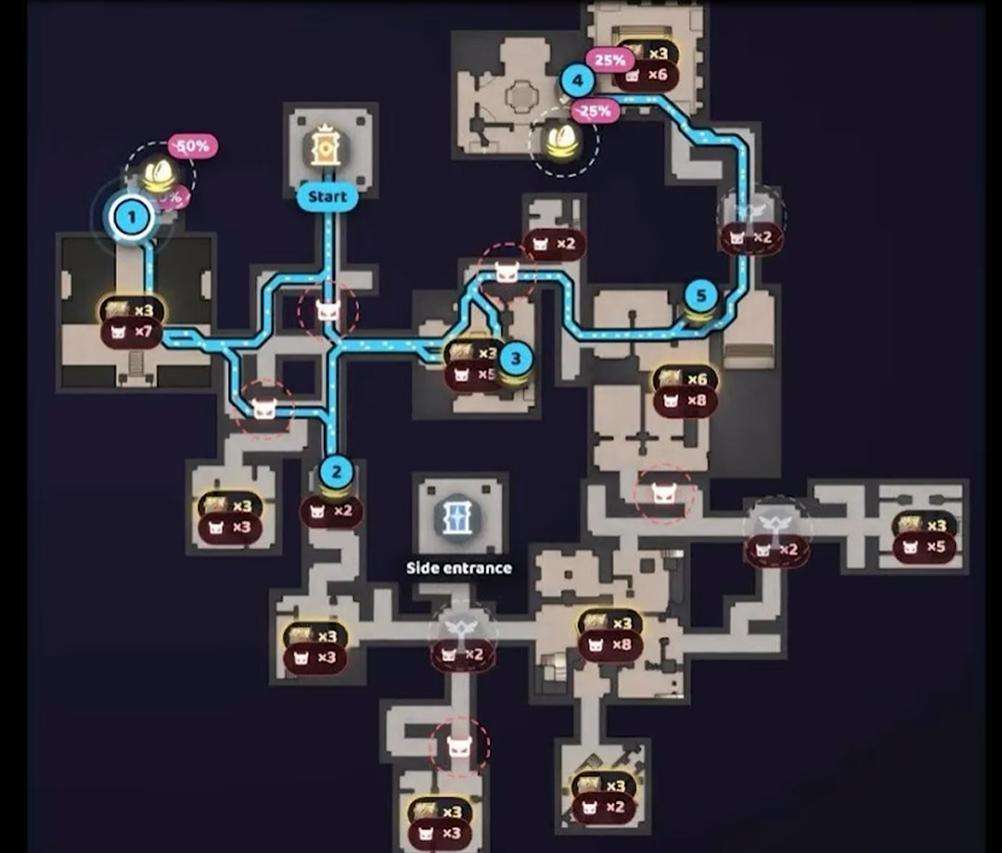
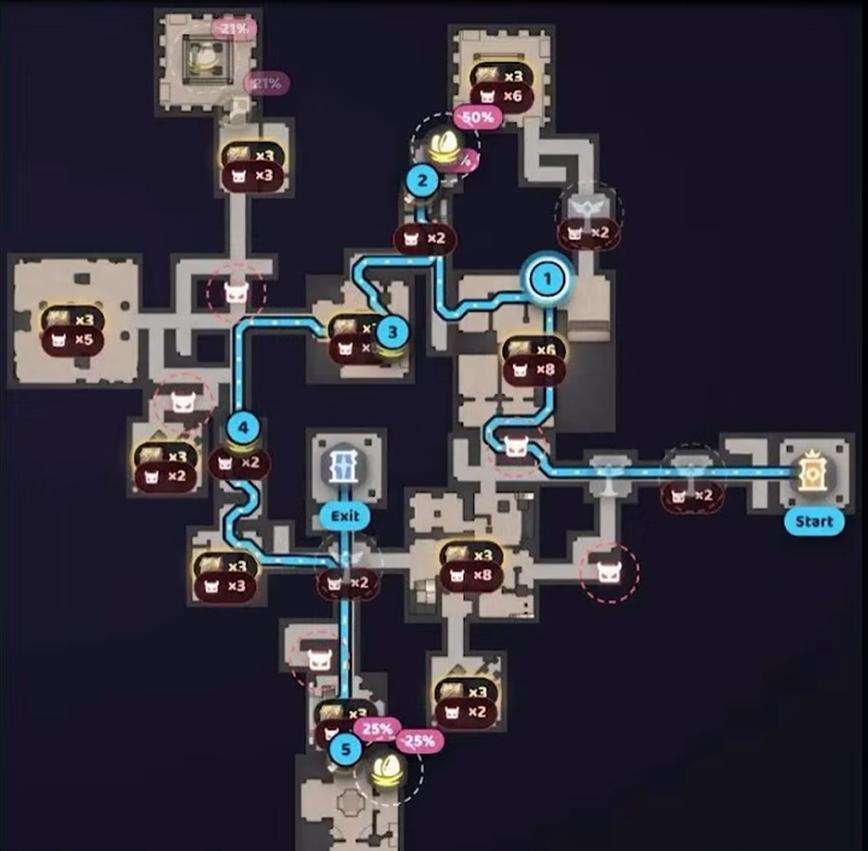
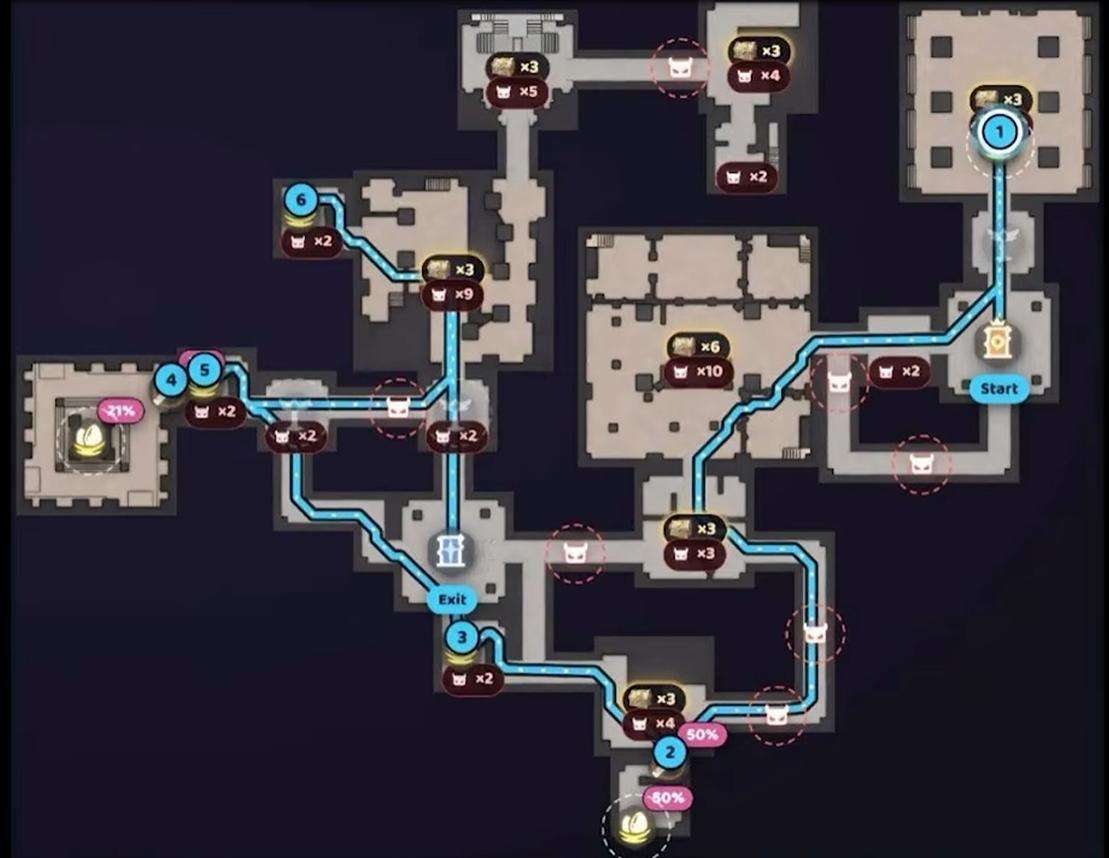
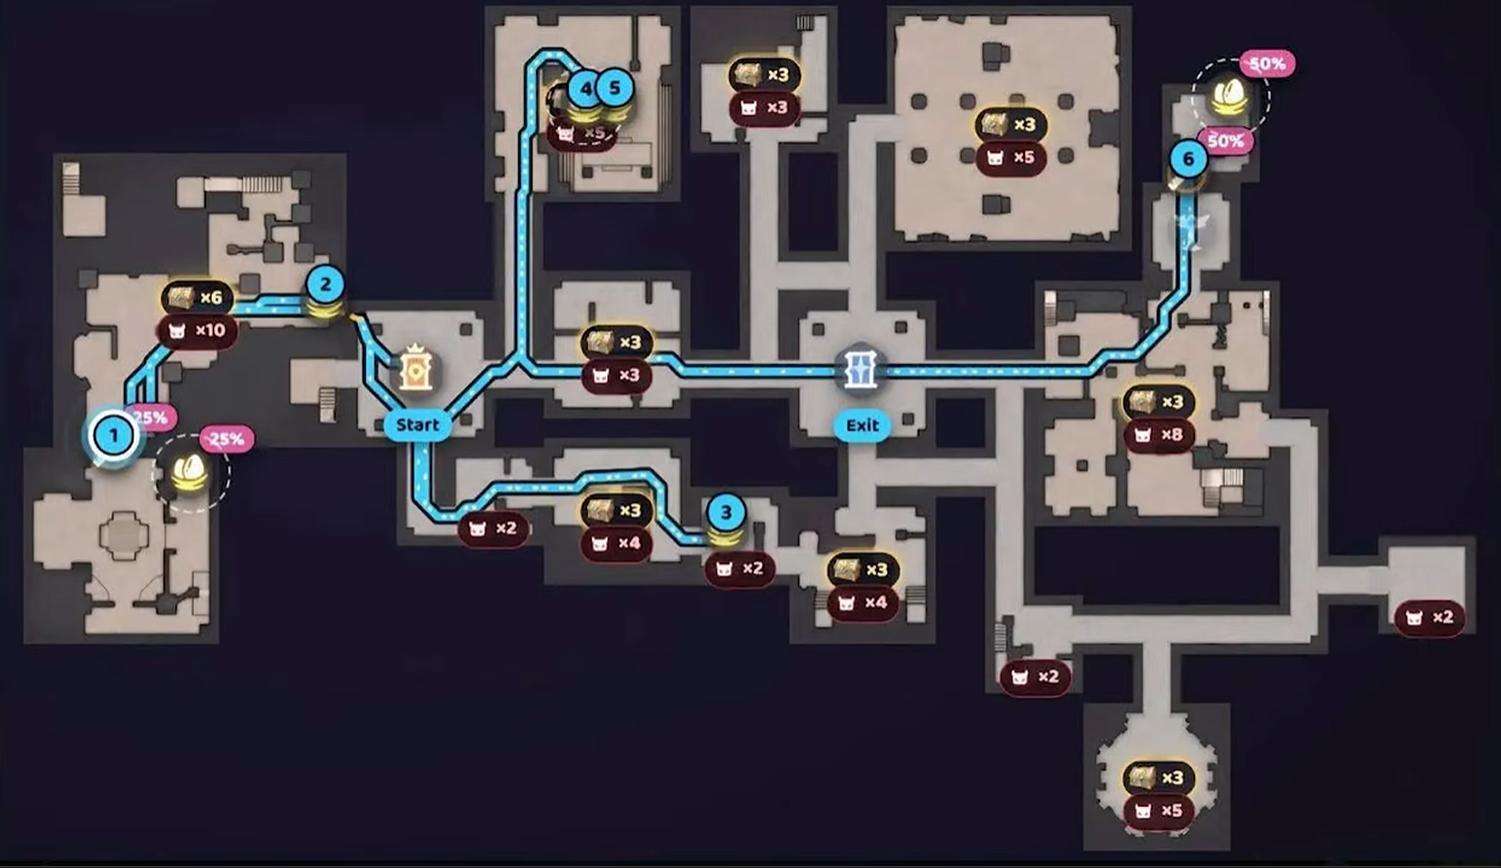
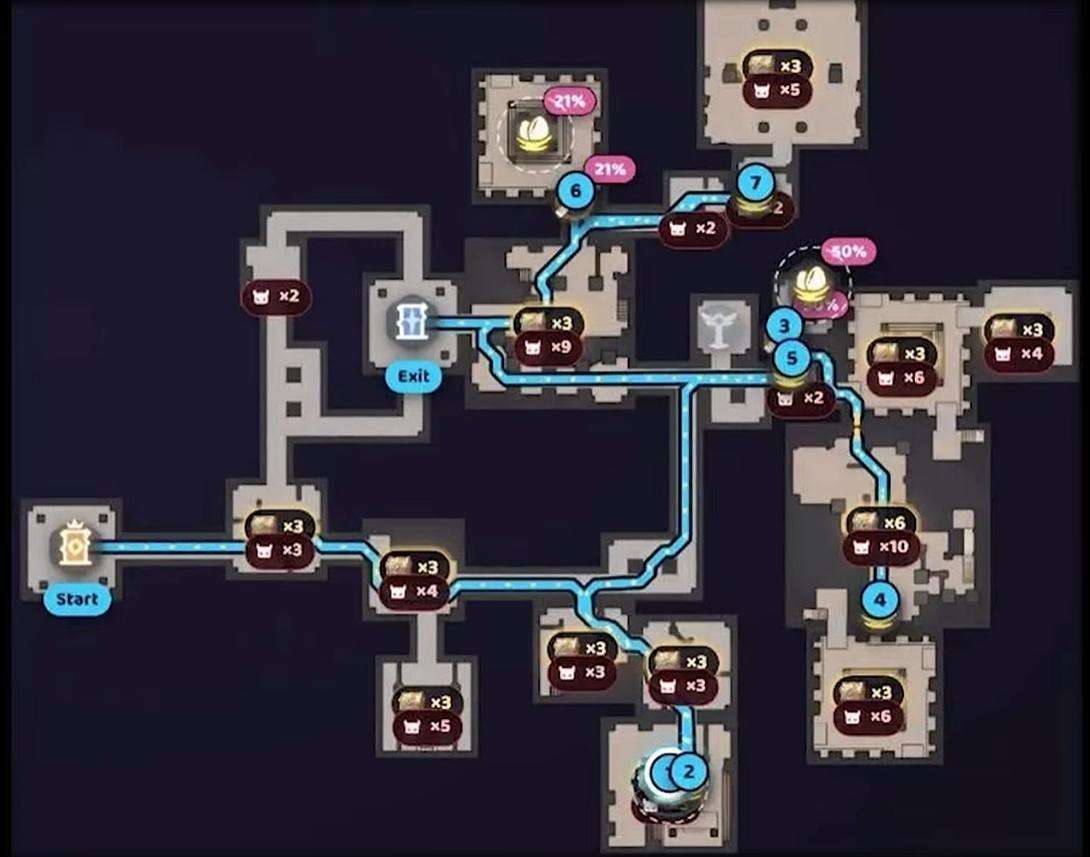
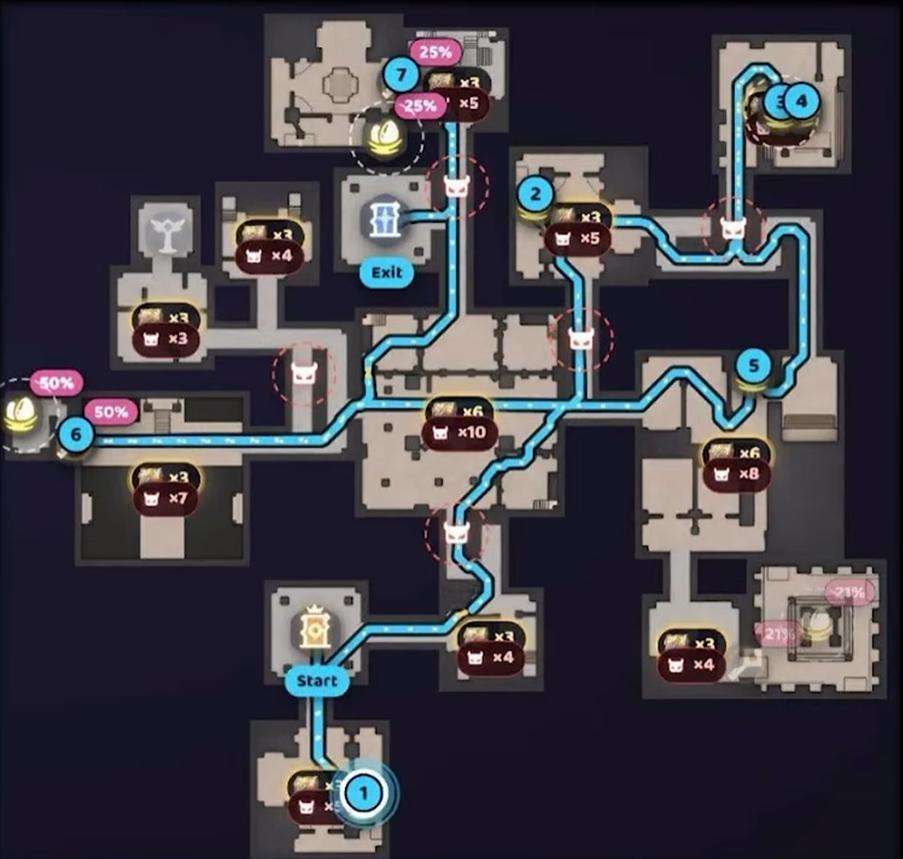
Chaos Mode shares the same dungeon map pool as Nightmare Mode. The dungeon layouts are sorted by the position of the blue door relative to the orange door.
There can be 1 to 5 eggs in a run. If there is enough time, do not leave after finding only one egg.
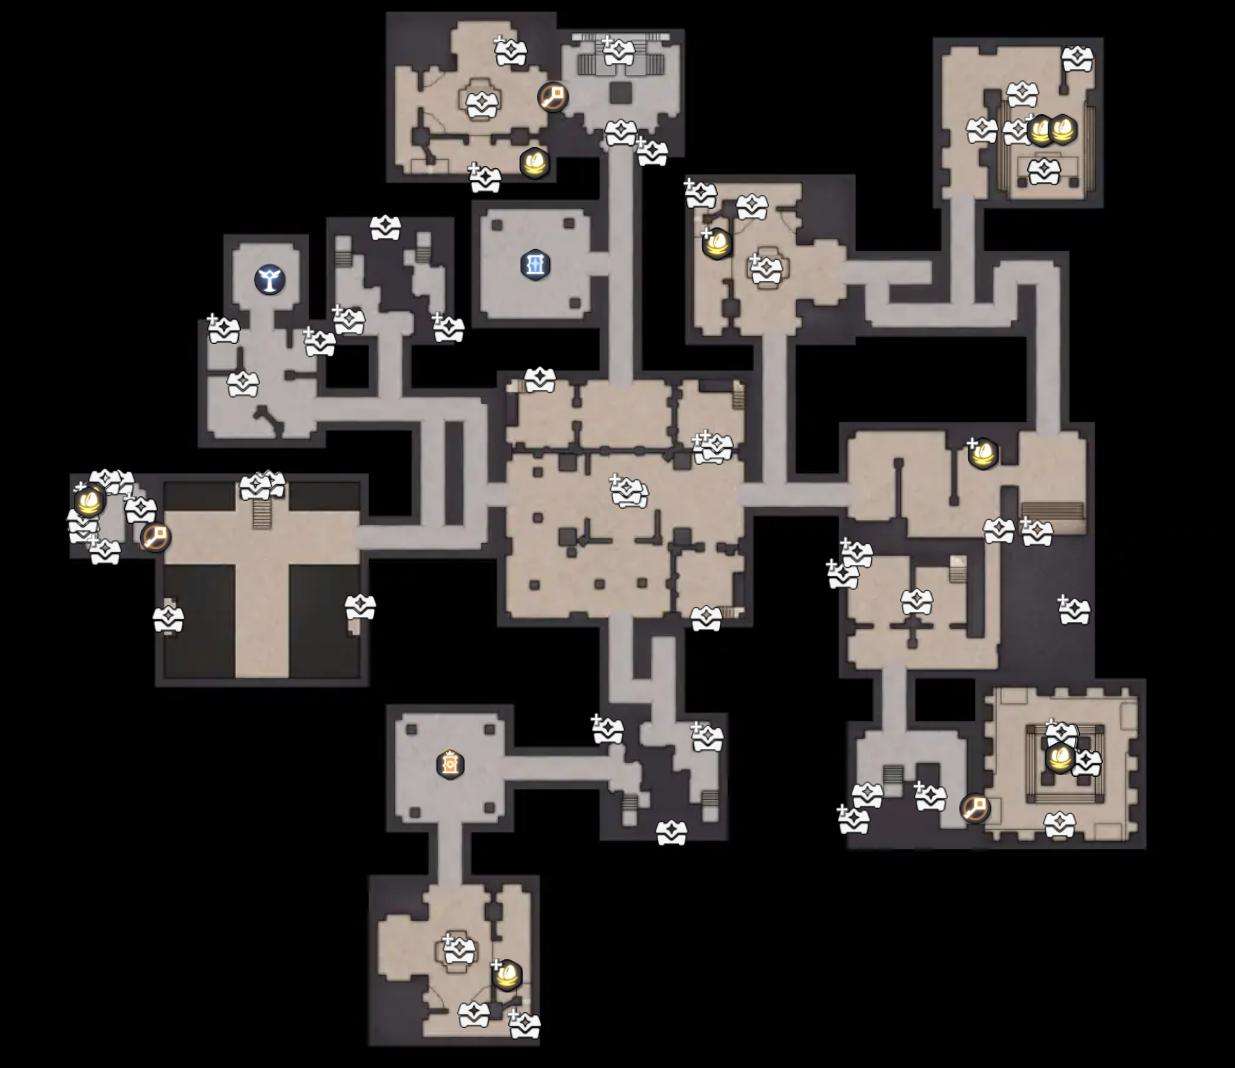
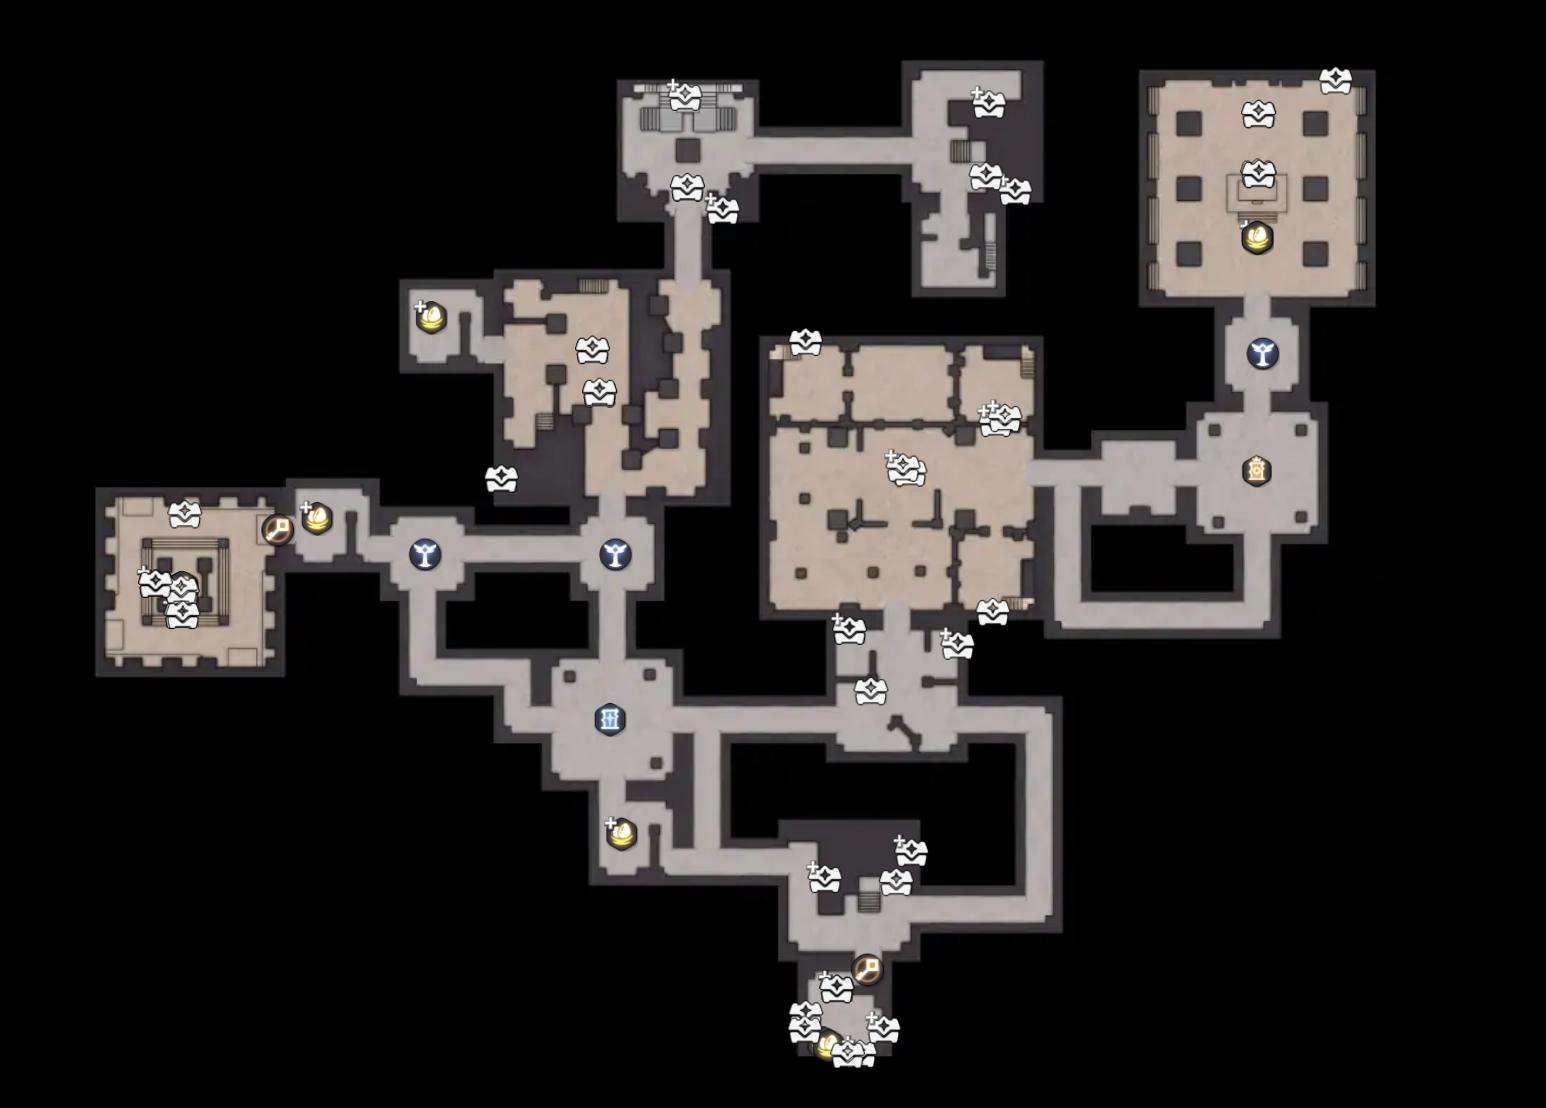
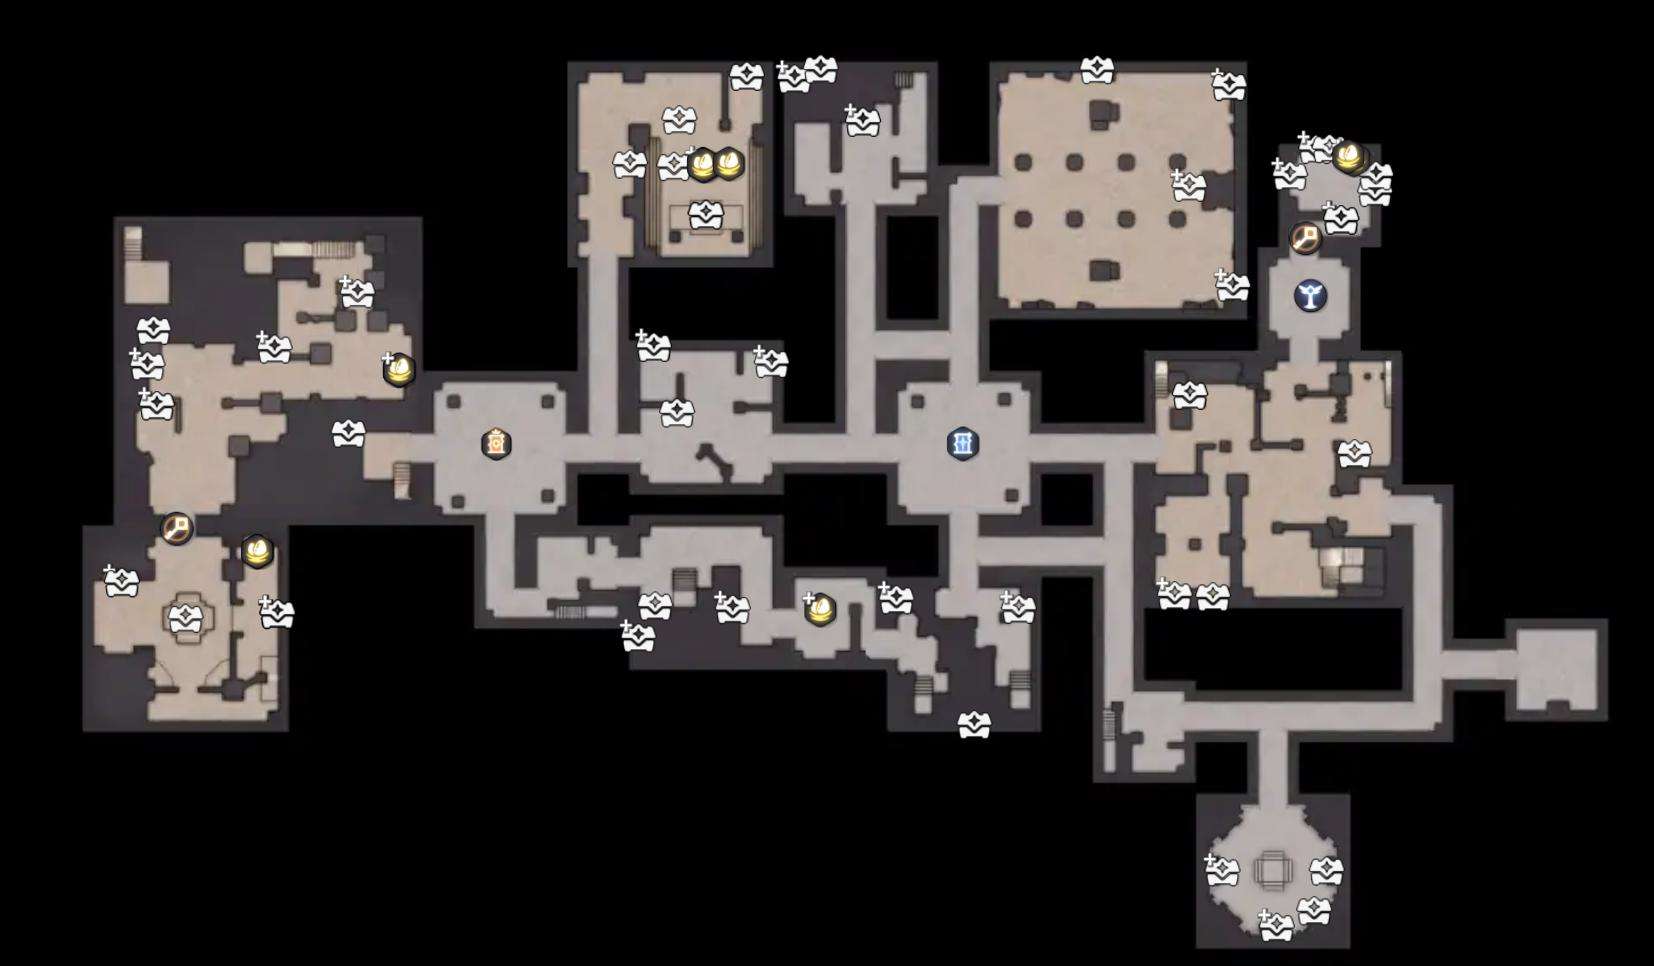
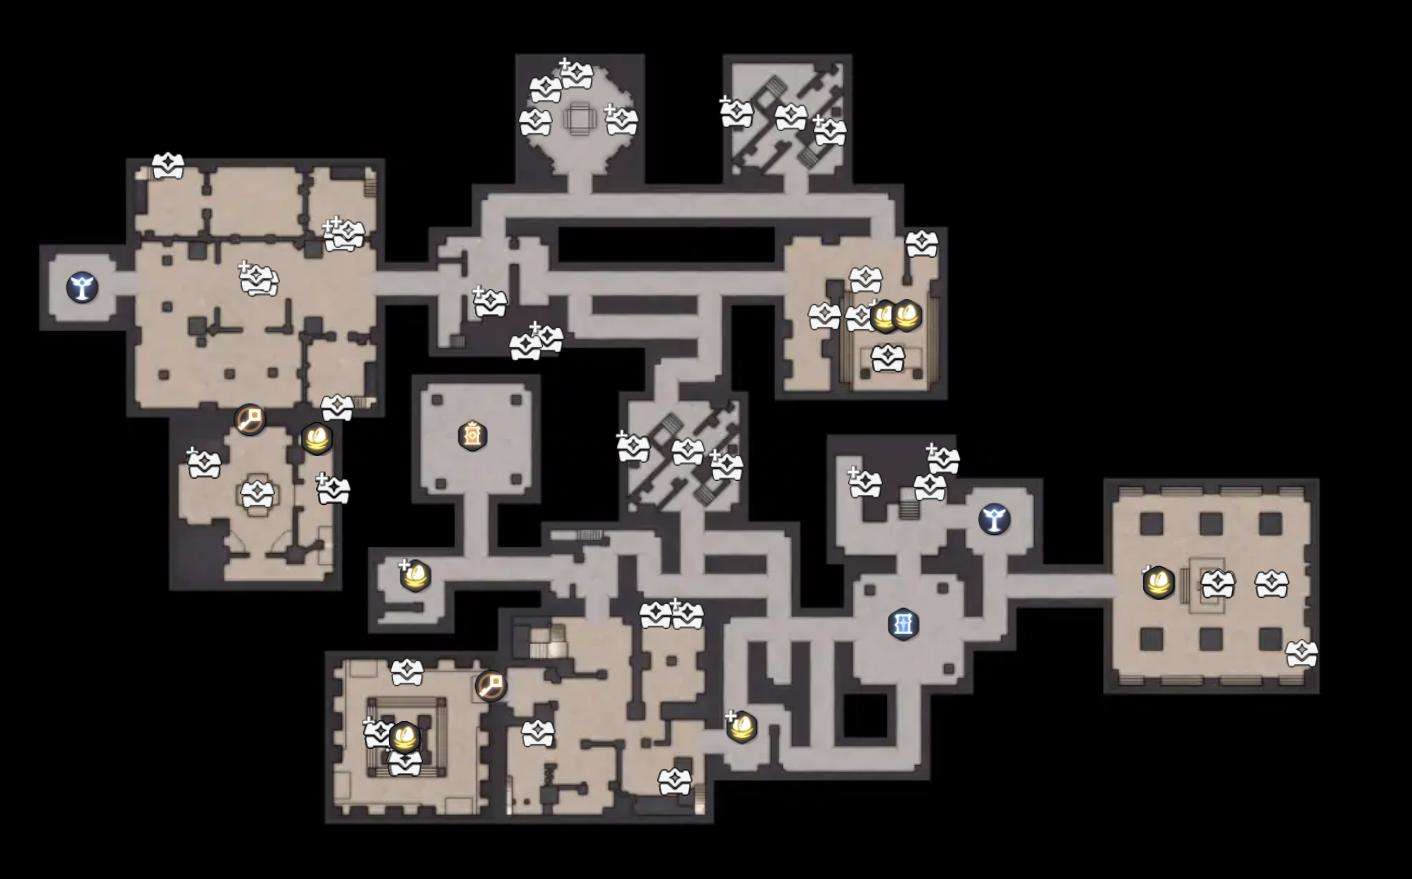
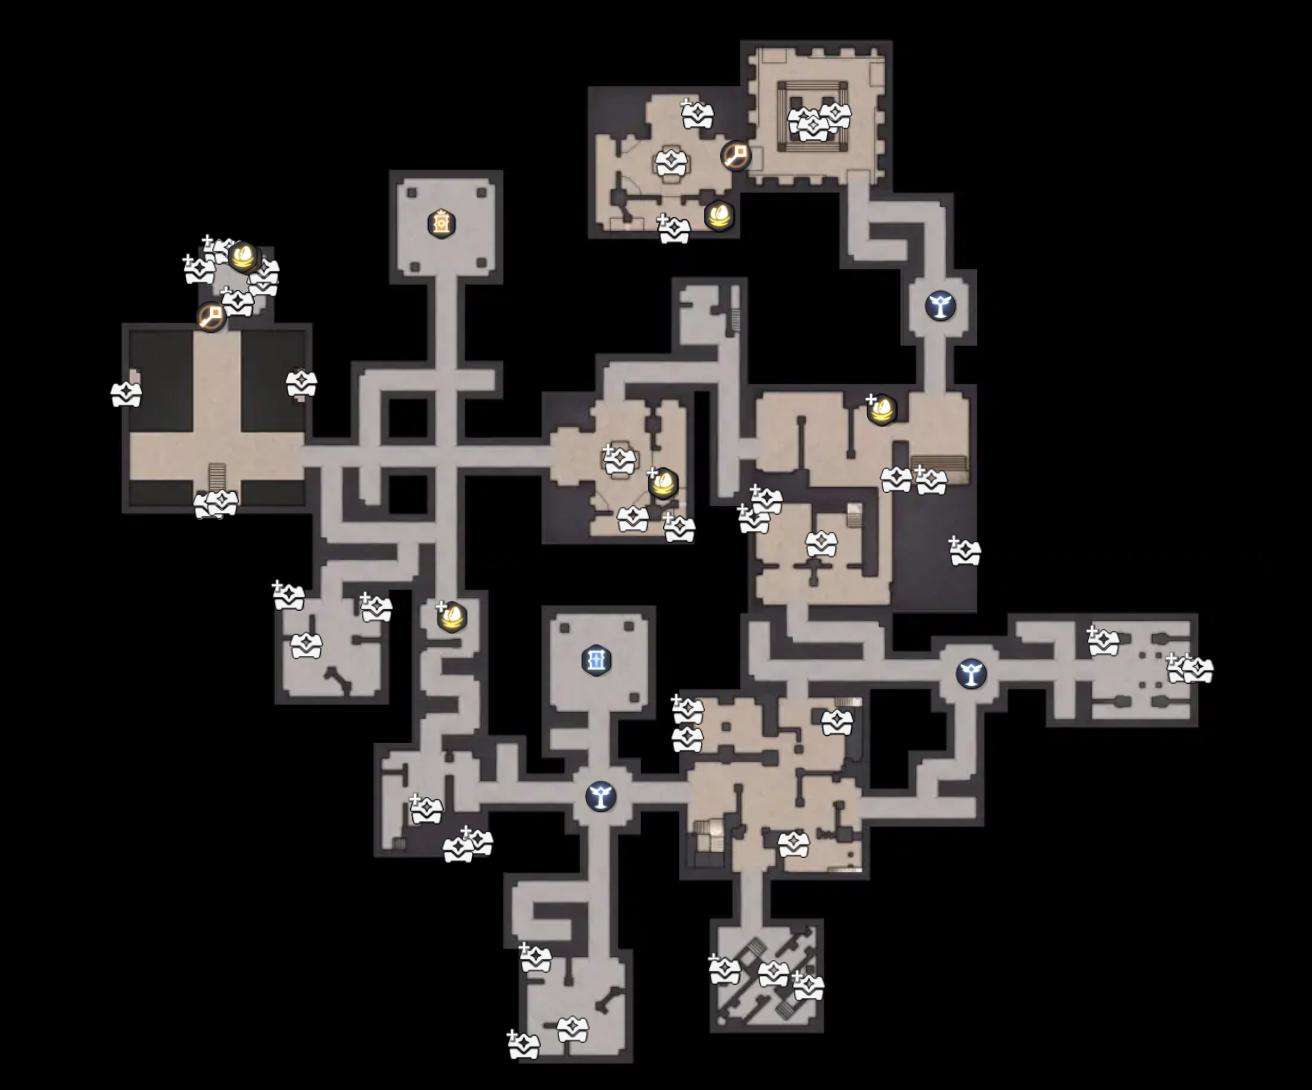
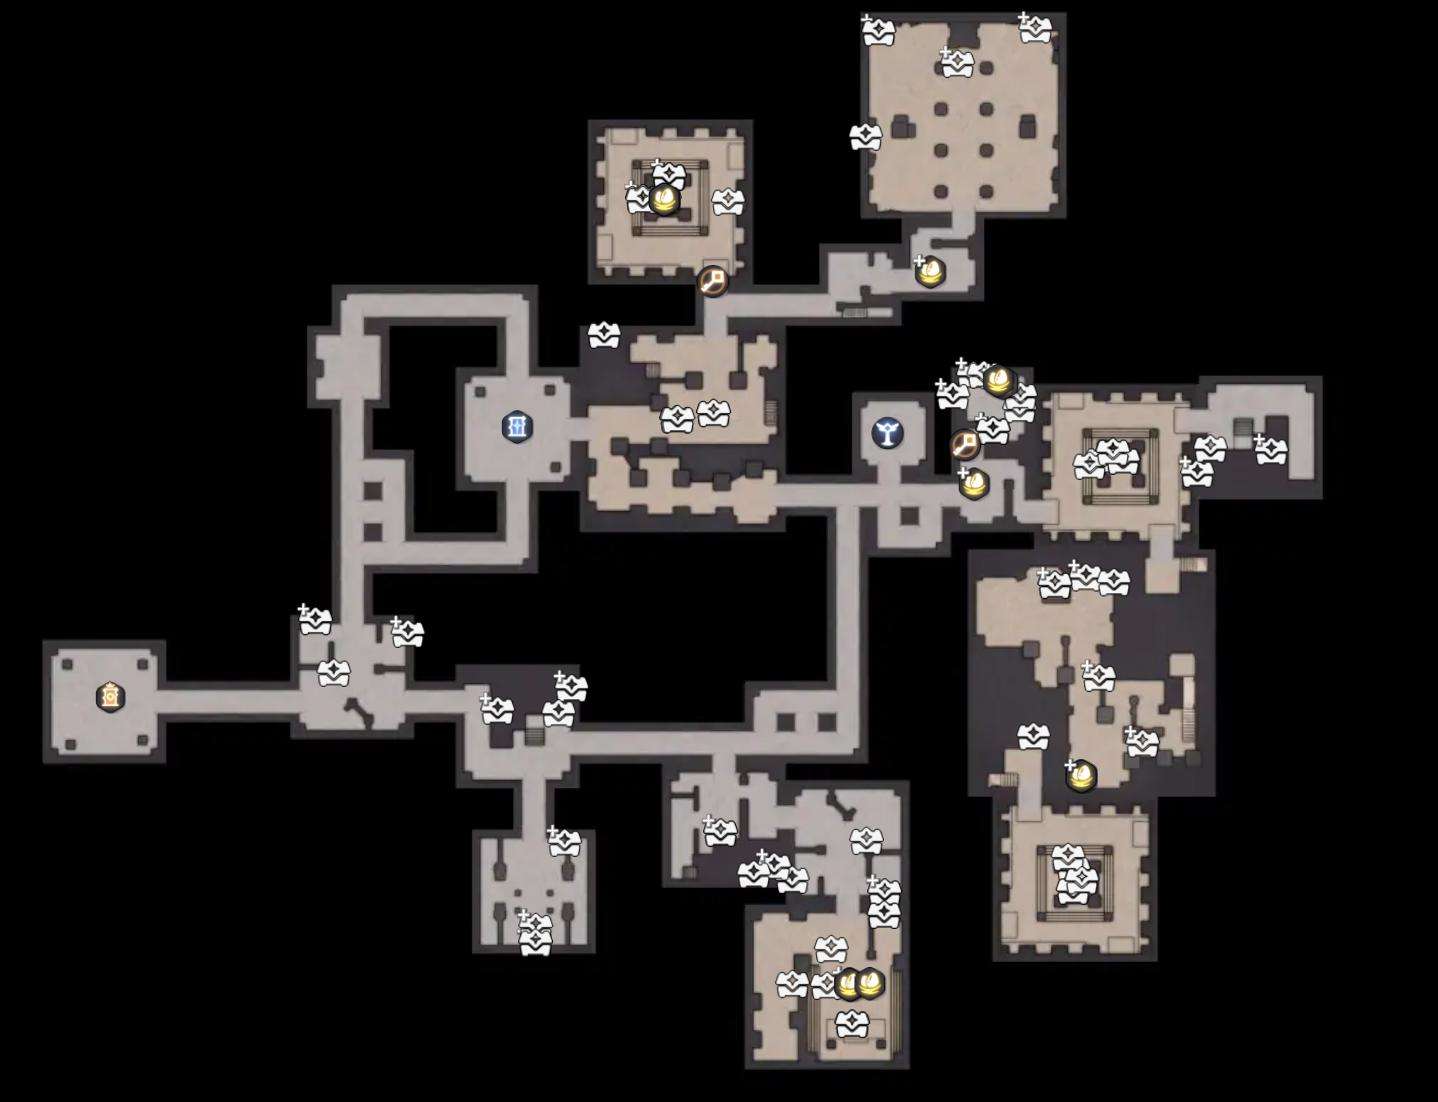
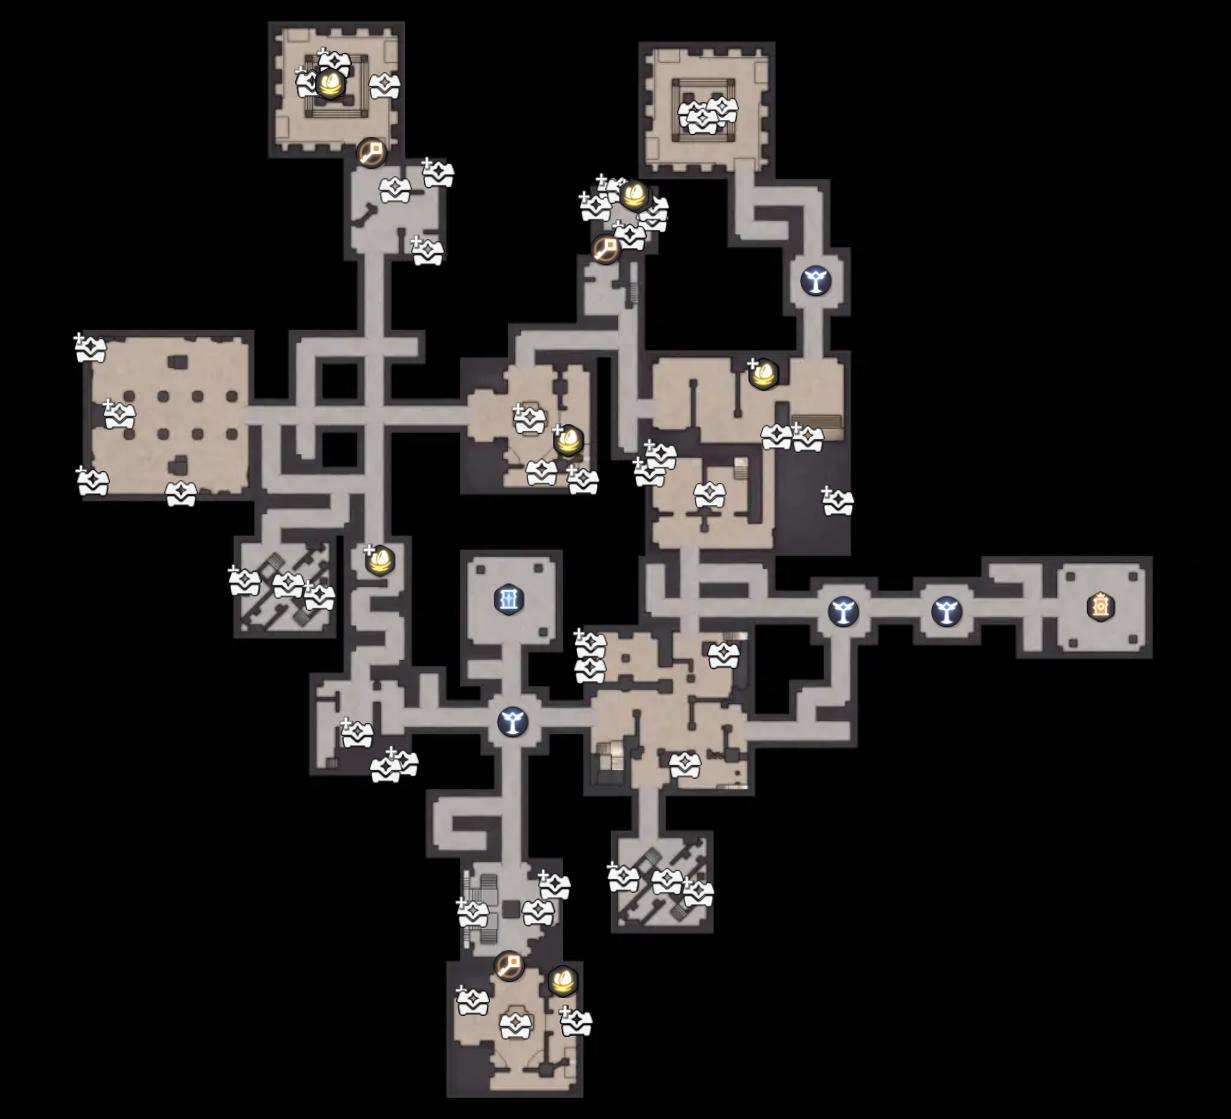
Dungeon Strategy
Prioritize Eggs Over Currency
Currency is not the objective. Spending too much time collecting currency will slow down your progress. Prioritize eggs instead.
Keys
Always bring a key into the dungeon.
You normally get the key refunded in the room, and there may be additional eggs inside. The NPC inside also sells keys for 150k instead of the normal 100k.
Moving Eggs
Try rolling an egg onto its side. This allows you to move it faster.
Monsters and Loot
Glowing monsters, marked red or yellow, drop high-value loot. Killing these monsters can save time instead of looting every chest.
Kill monsters as you progress to prevent their numbers from building up.
Use traps to kill annoying monsters such as Cubbo and Hummin.
Flying can be used to avoid bombs.
Gear and Inventory
You can repair your gear from your inventory, although maximum durability decays.
Before starting a run, make sure your gear is repaired and has at least 40 durability remaining.
Your effective weight limit is around twice the displayed limit before you stop moving. Take advantage of this when collecting loot.
If you run out of gear, buy replacements from the shop. The NPC inside the dungeon also sells gear if your equipment breaks.
The first Chaos Run ticket costs 20k. Buy it daily, as the price increases with every purchase.
Progression
Egg hatches do not count toward zone completion badges.
The Prismana Egg is roughly estimated to have a 1% chance.
Rookey Strategy
Bait and dodge Rookey’s three slams. He usually performs two slams in a row, followed by a delayed third slam after the first dodge.
- Bait and dodge the slams.
- Wait for the delayed third slam.
- Move in and damage Rookey after the third slam.
- Repeat.
Team Composition
Always bring a healer and heal after each fight.
A strong team composition is:
- 1 DPS
- 1 Regen
- 2 Healers
Any DPS can work as the lead.
Starters are very strong because of their Light typing.
Prismana Fulmintis equipped with Enhanced Lightblade is also strong.
Hexxin as the lead can cheese most encounters with Blackhole.
Accessory Farming
When farming accessories, check the weight category. Accessories with two or more pips are worth considering.
What to Loot
Prioritize loot in this order:
- Eggs
- Accessories
- Honeyglow Starine from Alpha Drops
- Essence, keys, and gear, including low-tier items, as they sell for a lot
- Random trash, while paying attention to the weight-to-value ratio
Monster Danger Ratings
The danger ratings below are for Nightmare and Chaos Mode and are marked as a work in progress.
All monsters are manageable solo, although the Alpha requires some strategy.
Avoid letting monsters build up into large groups. If you prevent large groups from forming, the monsters should remain manageable.
In Chaos Mode, the difficulty comes from mob density. Take it slow and do not rush through.
| Monster | Danger | Notes |
|---|---|---|
| Stellarys (Alpha) | 5/5 | Avoid Charm and Star Bomb attacks. Stellarys can be kited and cannot leave his room. Hit-and-run tactics work best. |
| Stellarys (Normal) | 1/5 | Manageable. |
| Rookey | 4/5 | Dodge his three-combo stun at all costs. |
| Pawney | 2/5 | Has a single stun and high burst damage. |
| Sparki | 3/5 | Killing them before they explode is the best tactic. |
| Hexxin | 3/5 | Stuns the player out of Twine and is annoying in crowds. Dodge sideways. |
| Hummin | 1/5 | Mostly annoying. |
| Budsquire | 4/5 | Drains EP and is highly dangerous in crowds. |
| Melloblum | 2/5 | Causes constant stuns. |
| Bateetle | 4/5 | Grabs the player and deals high damage per tick. Mash F to escape and be careful not to get chain grabbed. |
| Blazen | 1/5 | Manageable. |
| Helmut | 1/5 | Manageable. |
| Piopiota | 1/5 | Manageable. |
| Sherro | 1/5 | Manageable. |
| Budclaw | 1/5 | Manageable. |
| Shrubclaw | 1/5 | Manageable. |
| Nimbi | 2/5 | Its slow can be an inconvenience if HP is low. |
| Pranky | 1/5 | Manageable. |
| Tubster | 1/5 | Manageable. |
| Cornet | 1/5 | Manageable. |
| Minespine | 1/5 | Manageable. |
| Bailite | 2/5 | A minor inconvenience in crowds. |
| Cubbo / Grizbo | 3/5 | Can hit you at the worst times. Use terrain and traps to get rid of them. |
| Fenrier | 3/5 | Has a high-damage combo. Do not fight it head-on if HP is low. |
Extraction
Exit with your entire team. Do not leave anyone behind.
Full Map
Click to enlarge…
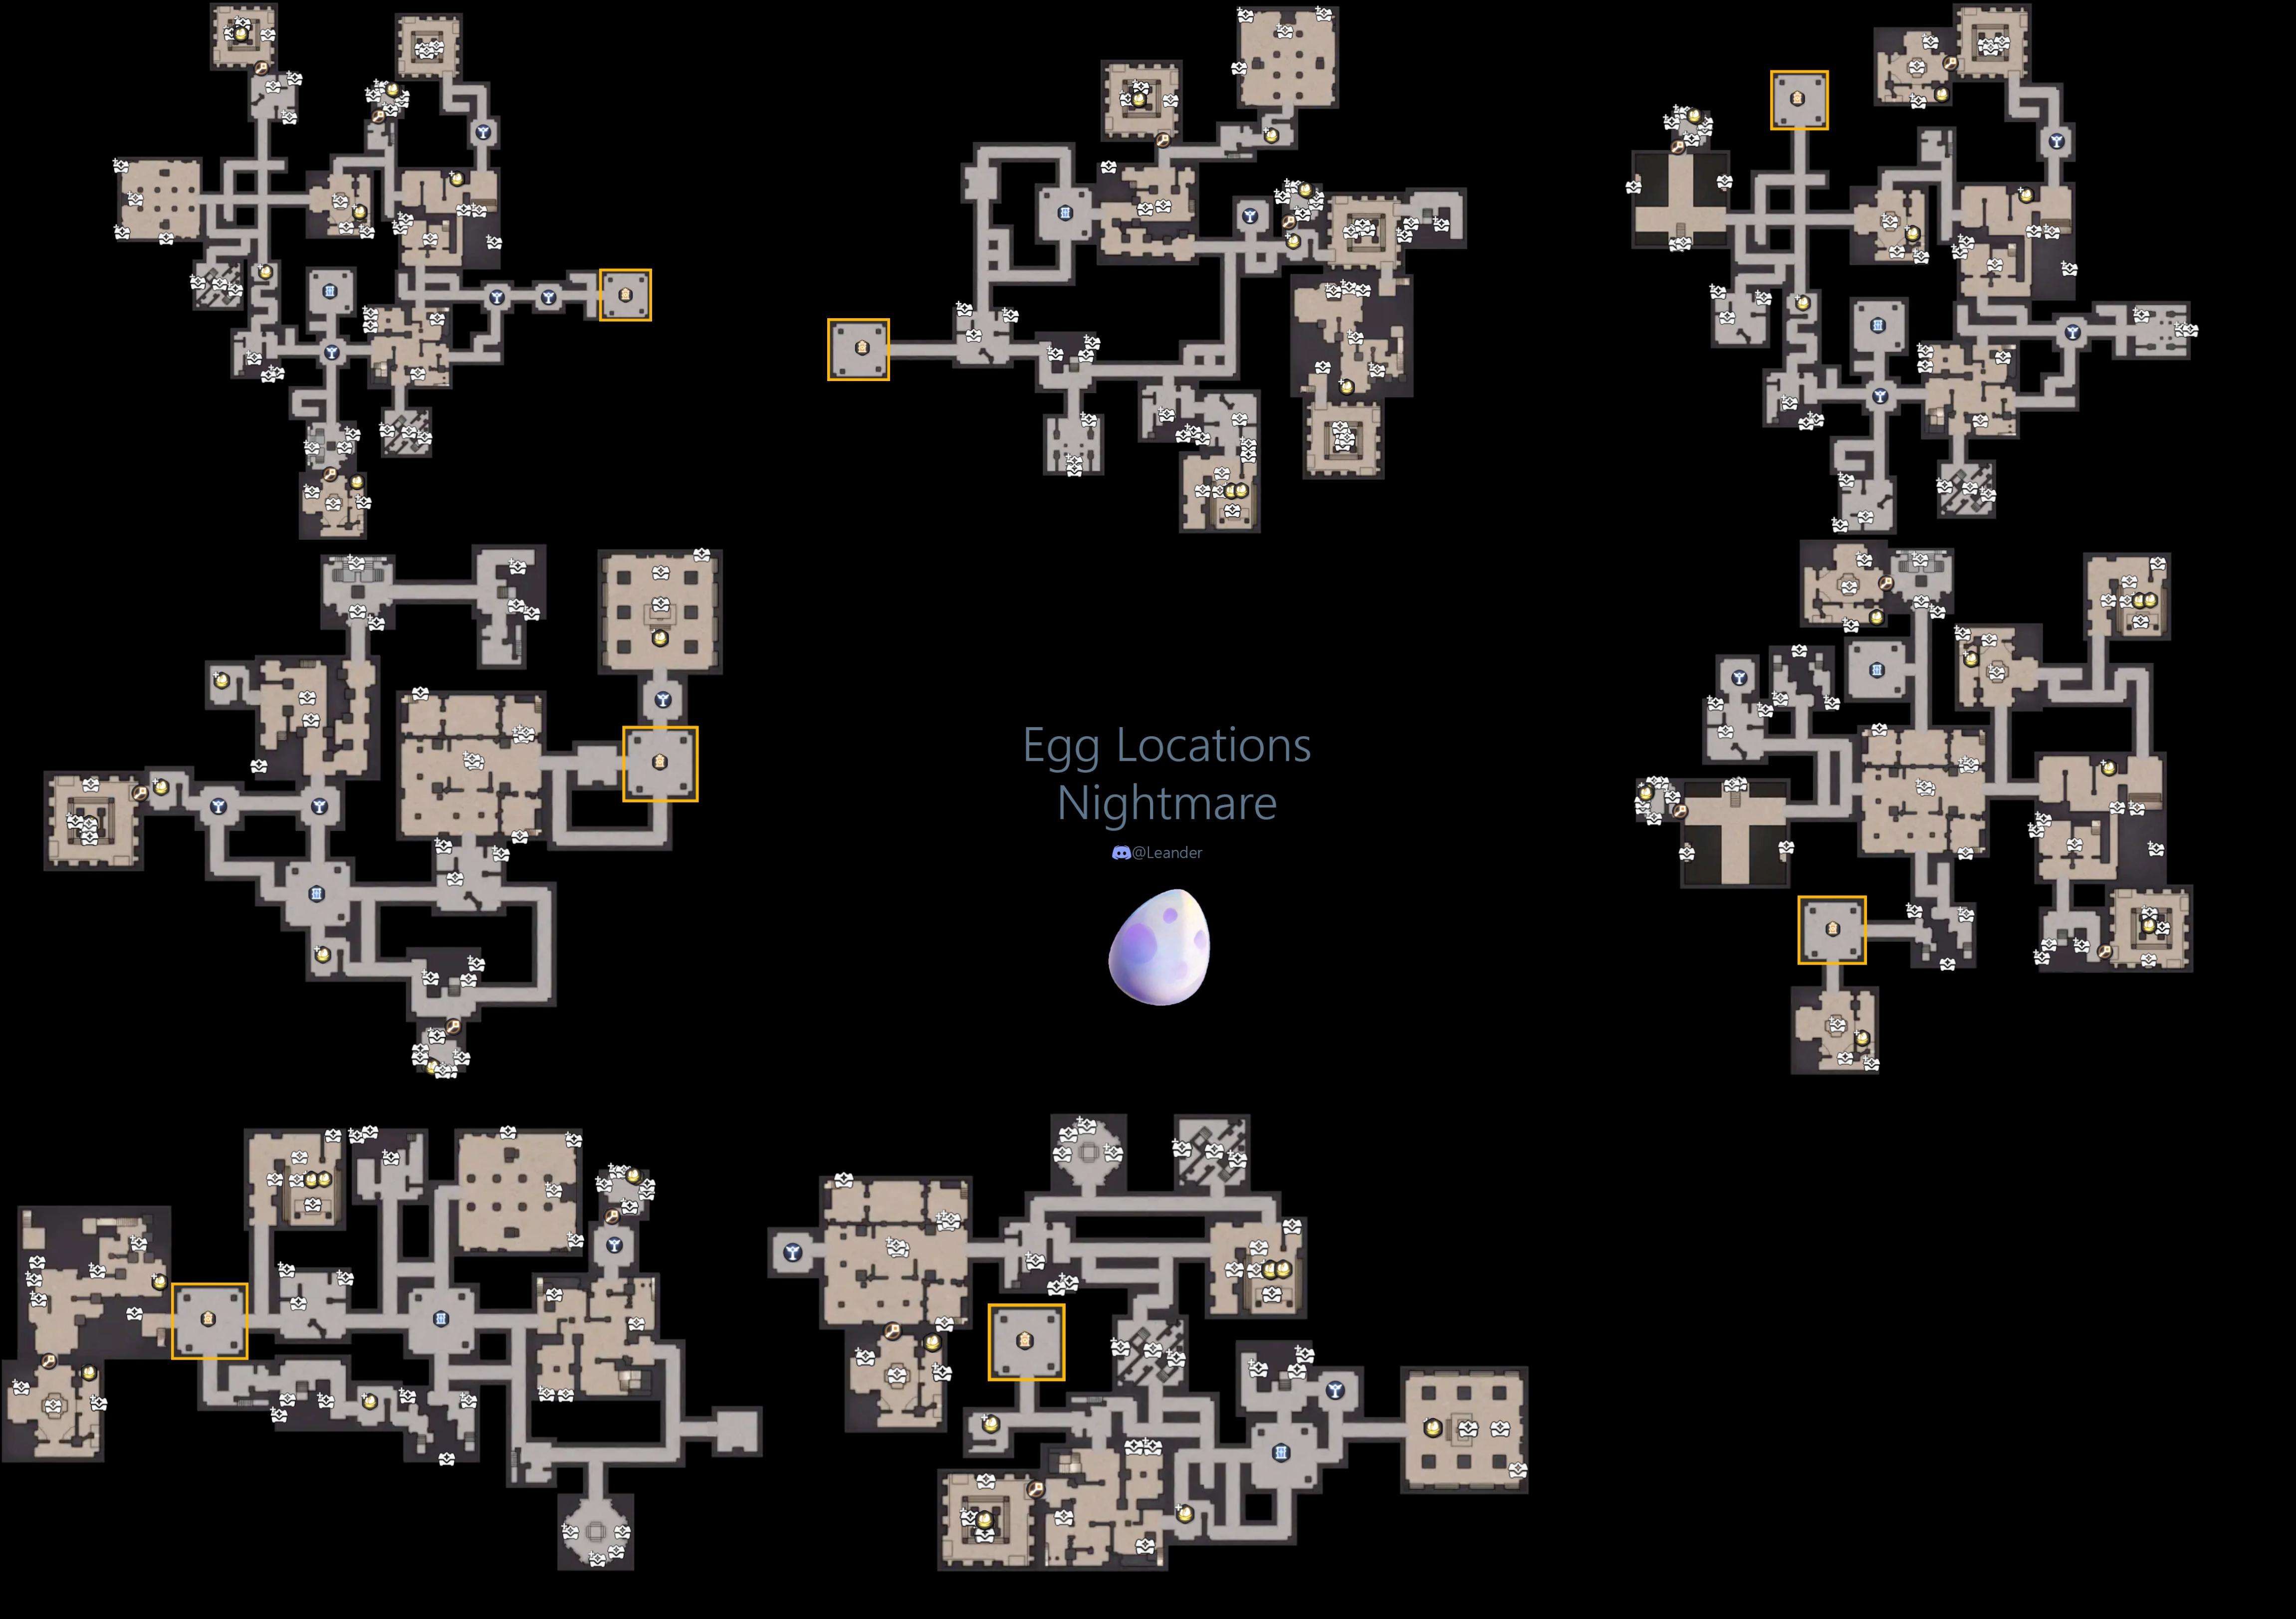
Egg Heist Optimal Routes
This is probably the most effective route for egg heist in every map.



Be the first to comment