
Warning for spoilery super-secret content! Guide to get into the Triplicate Space, what to do once you’re there, and how to catch the secret Bugsnax.
Guide to the Triplicate Space
Acquiring the Triangle Key and Finding the Triplicate Space.
I’m going to avoid giving any details as to the actual lore and story here, only directions, but nothing will be given the spoiler tags. If you clicked on this guide, then you’re here on purpose.
In order to get the key to the Triplicate Space, you need to make it to Broken Tooth, the eponymous Isle of Bigsnax. To do that, you need to complete all quests and sidequests for Triffany, Chandlo, Snorpy, Shelda, and Floofty. Proceed through the beginning quests until the camp is all set up. Head down into the Bunger Royale’s ravine, and send your Buggy Ball through the peelbug hole to scare a Cheddorb. This will open two gateways, one to the right and one to the left. Now it’s time to play with fire!
- Use the campfire to light the flare at the edge of the cliff.
- Use flare 1 to light the one across the way, just above one of the peelbug holes.
- Go through the gateway to find an unlit flare to your right. Light it from flare 2.
- Further in, to the left of the path, is another unlit flare. Light it from 3.
5 & 6. Pass through the next gateway to find two more unlit flares, with a Shrink Spice shrine between. Light either one (or both) from flare 4.
- Navigate the Buggy Ball maze, then light the flare just inside the door from either 5 or 6.
- Around the column is a large campfire. Light it from 7.
- In the corner between the ruin entrance and the ramp to the upper level is the last unlit flare. Light it from the campfire.
This will open a secret doorway into a strange, triangular hall that’s blocked with rubble. Laying on a stone is the Triangle Key.
When you pick up the Triangle Key, you’re sent a letter from a mysterious source, which gives you a hint to where you’ll find the door:
If you do not know the way, Grumpbeard will show you.
With this, travek to Boiling Bay, and head toward Floofty’s boathouse. Use the Lunchpad to launch yourself onto the upper deck. Jump off the prow into the hidden area on the other side of the rock wall, and you’ll find yourself in the Triplicate Space.
Note that while you are in here, you can’t use any of your equipment except for the Snaxscope, nor can you fast-travel out.
The Tapes
While there’s no achievement for listening to all of the tapes, it does give you some interesting backstory, as well as earning you a secret letter that comes with some new furniture for your home.
- Tape 1: The entrance room from Boiling Bay. It’s resting on a stone in the water.
- Tape 2: Central room, near the left hallway.
- Tape 3: Right room, in front of the left statue.
- Tape 4: Right room, rock-filled alcove on the right.
- Tape 5: Right room, Jamfoot’s hidden library, on the table.
- Tape 6: Right room, hidden area. Turn the left statue twice, central statue once, right statue twice, and they all should be facing the pendulum. This reveals the tape on the sand pile in the center.
- Tape 7: Left room (with the giant stone statues), on the floor next to the second right statue.
- Tape 8: Left room, on the dias at the far end, next to the reset button.
- Tape 9: Left room, in front of the hidden window that’s revealed once you solve the puzzle.
- Tape 10: Break room, on a chair in front of the door.
The Right Room (Pendulum)
This room only has three statues, but they need to be facing the same direction, toward the triangle decal on the left wall. You will only need to turn the two closest to the door, as the furthest one is already in the correct position.
- Left: Turn once.
- Right: Turn twice.
This will cause the pendulum in the center to swing, and open the door to a small library. Take the time to scan and look around everything if you want. Push the button in the back corner before you move on.
The Left Room (Cathedral)
A row of giant Cathedral Statues line either side of this room. You need to have all of the statues face the same direction, toward the middle of the room. Turning one statue also turns the two adjacent to it, and the dias on the far end has a button to reset all statues to their original position. I’ll be numbering from 1 (next to the door) to 7 (far end of the room)
Starting on the right side of the room:
- Statue 6 – Statue 4 – Statue 3
Left side of the room:
- Statue 4 – Statue 3
Once all of the statues are facing the right direction, a wall raises at the end of the room to reveal the button you need.
The Break Room & Cappucceetle
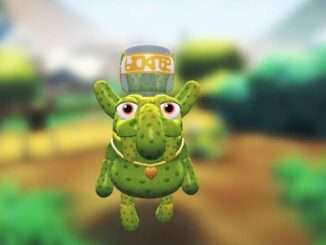
Once you’ve solved the puzzles in both the left and right rooms, return to the center and press the new button. This opens the door to the break room. Bring out your Snaxscope to scan a surprise snak: The Cappucceetle. This is Bugsnak is the most difficult to catch in the entire game.
The only way to catch it is by having it get stunned by another Bugsnak. If you get close to it, it will flee the area, and you’ll have to chase it down. However, while the Trip Shot won’t stun Cappucceetle, it can keep the snak from fleeing, so it can be easier to keep it in the area. If it’s in a zone you find easier for catching it and you accidentally scare it away, bring up your map and quickly fast-travel to a different area before Cappucceetle reaches the entrance. This will reset it and you can try again.
When it reaches its new zone, it will run in a path in a zone containing one of the Legendary Bugsnak statues, in this order:
- Boiling Bay (Megamaki)
- Sizzlin’ Sands (Mothza Supreme)
- Frosted Peak (Daddy Cakelegs)
- Flavor Falls (Mama Mewon)
I’ve gone through and tried each method for catching Cappucceetle. Some are much, much easier than others. Personally, I prefer using the Black Lollive in Sizzlin’ Sands. If anyone knows any other ways that I missed, do please let me know.
Boiling Bay
There are two methods to catching Cappucceetle here.
- Summon Megamaki, and let it stay in first stage (don’t try to stun it). it’ll path in the water, instead of flying, and should eventually collide with Cappucceetle. This will stun the little snak, and you can catch it in your net. It does mean you have to get close enough to the statue to trigger the encounter, which runs the risk of frightening away Cappucceetle. However, it’s fairly reliable, requires only some patience, and your biggest risk is Cappucceetle might get stunned too far away for you to reach it in time. If it wakes up, just back off, and wait a little longer for Megamaki to do another round.
- Catch the La Sodeaux that’s swimming around, and go to stand on the small sandbar between the log and the overturned green rowboat. Use chocolate to draw the Green Crapple to the next sandbar over, which will put it into the Cappucceetle’s path, then sauce the Crapple with chocolate as well. The Cappucceetle will be drawn to the Crapple; cover it in chocolate too. The Crapple will grab the Cappucceetle and toss it at its lair to stun it.
Sizzlin’ Sands
There are three options for catching Cappucceetle.
- Cover it in cheese, and eventually it’ll be caught by a Black Lollive. Once it’s snagged, you can catch it in your net.
- Have Flapjackarak wait in Cappucceetle’s path, covered in chocolate. If you time it right, Cappucceetle will get swept up and stunned by its landing.
- Place your Trip Shot cross the rocks right by the entrance to Scorched Gorge and scare Cappucceetle to make it try to run away. While the Trip Shot won’t stun it, it will keep the snak from being able to leave the zone. Find a Loaded Spuddy nearby, lure it in that direction, until the Cappucceetle is between you and it. When the Spuddy charges, it’ll hit the Cappucceetle, and stun it for you.
Frosted Peak
From the entrance, turn right, and run up the path to the campfire. Set yourself on fire, and run into the Scoopy Banoopy. Cover the Scoopy Banoopy in chocolate to lure the Cappuceetle to it, and the Scoopy Banoopy will stun it for you.
Flavor Falls
Another area with multiple methods:
- You’ll need a stockpile of chocolate for this one. The Cappucceetle is running circles in Mama Mewon’s arena. You’ll also have to try to keep your distance to avoid scaring Cappucceetle away, which means this might be the most difficult method. You need to lure it out, either with a trail of chocolate or with your Buggy Ball covered in chocolate. Draw it up the ramp, to the ledge along the middle of Flavor Falls, where the Sandopede crosses over. If the Sandopede collides with the Cappucceetle, it’ll get stunned.
- Place your Trip Shot against the rock wall just behind the two bushes bracketing the Garden Grove entrance. Scare Cappucceetle and let it try to escape, but the Trip Shot will block its exit. Cover Cappucceetle in cheese, and lure a Lollive over with more cheese. Once it’s caught by the Lollive, you can net it or grab it with the Snakgrappler. You can also trick the Sandopede into charging the Cappucceetle when it’s cheesed, which will stun it for you.
Be the first to comment