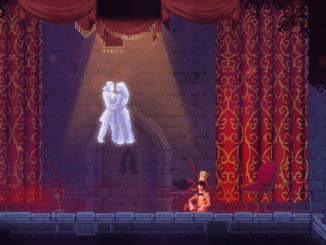
The Concierge is the first Tier 1 boss and is located in the Black Bridge. He drops the Challenger’s Rune and a total of 6 blueprints besides outfits (Flint, Heavy Crossbow, Impaler, Melee, Ammo, Alienation). His kit consists of only a few attacks and a total of 6 (or 4 on 1BC+) phases!
Guide to Concierge Boss
This guide can give you an insight into his attack patterns, give you an idea of how to dodge his attacks most efficiently and help you understand his phases.
You can practice this fight with the help of the Training Room. You should test different builds on him, but know that the Training Room scales differently than the main game does: you will deal less damage and also receive less damage (in most cases at least).
Attacks
Stab
The Concierge reaches back with one of his hands and quickly strikes in front of him.
- Can be parried or rolled.
- Can be double jumped, but only if the player is at the end of the attack’s hitbox (the hitbox is diagonal).
- Don’t jump towards him though, the hotbox of this attack is a death sentence. Just jump away or roll if you don’t have a shield.
- The Concierge will only use this attack when he is near the player.
- Simply rolling through his Stab and continuing to attack him with melee weapons is a great way to deal continuous damage. Just beware of the 5th and 6th phase, where the attack speed increases and the 6th phase, where ranged attacks will be used in close range.
- Up until his 6th phase, and as long as the player is close enough to the Concierge, he will ONLY use the Stab.
Aura of Laceration
The Concierge stops for a brief moment, charges up and creates a red aura around him, which will damage the player upon contact.
- The Concierge can still move and use other attacks while the aura is active.
- Can be rolled.
- This requires precise timing. The player must wait for the Concierge to begin moving and only then roll through him at the last second.
- The Concierge can only use this attack after at least 12 seconds have passed since the last time he used it.
- This attack will also be used after transitioning to his next phase (if the player is far away), which can force multiple Aura of Lacerations to be active at once.
- The damage received while standing in the aura can be reduced by having a shield in one of the main hand slots. The passive ability of the shield will then reduce the number of ticks you’ll receive.
- The Aura of Laceration can be interrupted during the wind-up. The Assault Shield is a great tool to hinder the Concierge.
Fire Wave
The Concierge reaches back with one of his hands and, after around half a second, sweeps with his hand across the ground, which creates a wave of fire that moves into both directions.
- The strike itself doesn’t hurt the player.
- The fire waves can be jumped/hopped over.
- Only the ground will be damaging, the visual fire geysers won’t threaten the player.
- Jumping towards him to dodge the attack is a good idea due to the Fire Wave moving away from the Concierge.
Leap
The Concierge kneels briefly and leaps across the arena, damaging the player upon contact.
- Can be ducked, rolled or parried.
- You can even stand still if positioned below the leap’s apex.
- If timed pretty well, it’s possible to roll with the Concierge. This reduces the downtime in DPS by reducing the time used for chasing him after the Leap.
- You will have to jump in order to parry him.
- If the Aura of Laceration is active while he leaps, then parrying will get you hit.
Mechanics
Phases
- Upon changing phases, he’ll receive a short force bubble that blocks all incoming damage (DoT damage still affects him) and roar at the start of the phase change, which will stun the player if he’s close enough.
- Stunned, freezing or displacing him right after the shield wears off will interrupt the Aura of Laceration.
- The Concierge will start in his 3rd phase on 1BC+, and do the same thing he will do in a phase transition.
Phase 1
- The Concierge will follow the player and use his Stab when in range.
Phase 2
- The Concierge will follow the player and use his Stab when in range.
- He’ll use Aura of Laceration when he isn’t close to the player.
- The Concierge will transition to this phase at 90% HP on 0BC.
Phase 3
- The Concierge will follow the player and use his Stab when in range.
- He’ll use Aura of Laceration when he isn’t close to the player.
- If the cooldown for Aura of Laceration hasn’t reset yet, then he’ll use the Fire Wave instead.
- The Concierge will transition to this phase at 80% HP on 0BC.
Phase 4
- The Concierge will follow the player and use his Stab when in range.
- He’ll use Aura of Laceration when he isn’t close to the player.
- If the cooldown for Aura of Laceration hasn’t reset yet, then he’ll alternate between the Fire Wave and Leap instead.
- The Concierge will transition to this phase at 60% HP, regardless of BC.
Phase 5
- The Concierge will attack similarly as in phase 4.
- His attack speed will increase by 50%.
- The Concierge will transition to this phase at 45% HP, regardless of BC.
Phase 6
- The Concierge will attack similarly as in phase 4, although he can’t use Stab twice in a row.
- After using Stab, his next attack will count as him not being near the player, so he’ll use either the Fire Wave, Leap or Aura of Laceration (if its cooldown has reset).
- His attack speed will be 100% faster than in phase 5.
- The Concierge will transition to this phase at 30% HP, regardless of BC.
Knockback & CC
Knockback
- The Concierge can be interrupted by items with displacement characteristics (such as the Assault Shield).
- Displacement can also interrupt his Aura of Laceration attack if he gets displaced during the wind-up.
CC
- The Concierge is very vulnerable to being frozen, stunned, rooted or slowed.
- While rooted, Concierge can still use all of his attacks but will stay in place during his Leap attack.
- Be careful of the Leap attack if you root him during it, he can still continue it if the attack hasn’t ended!
Strategy
General
The Concierge is probably the most simple boss, as he has only 4 attacks and the fight can usually be finished pretty quickly. Concierge attacks pretty slowly and most of his attacks can be easily avoided, however, Aura of Laceration is significantly harder to avoid as it requires rolling through the Concierge while he is moving.
The first 4 phases can be easily passed by attacking the Concierge, rolling to his other side when he attacks, and continuing attacking again. He will only use the Stab as long as the player is close to him, although this requires you to be close to the boss throughout the fight. In the 5th & 6th phases the Concierge begins to attack very rapidly, so making sure to prioritize avoiding attacks over dealing damage is advised.
Healing would usually not be an issue since Concierge moves and attacks slowly, but beware of his Leap when distancing yourself to heal.
Flawlessing
Melee and Ranged weapons both work well. If melee weapons are used, then dodging the Stab will be essential to dealing more damage, alternatively it can also be parried.
Though you could probably use turrets or other long ranged items (e.g. Owl of War) to do most of the work and merely focus on dodging.
Corrupted Power is great for dealing more damage, worrying about the drawback of getting hit isn’t a problem because of the flawless goal (the same applies to the Cursed Sword).
Ice Armor is great for negating damage on a hit every 30s, but this might only come into play once or twice during the fight.
Rooting the Concierge makes it much easier to avoid his attacks with a ranged setup, especially his Leap will be prone to rooting.
DoT effects (especially poison & Barbed Tips) will be very effective for the fight because they will keep damaging the Concierge even during the phase transitions, where he’s surrounded by a force shield.
It is easier to flawless the Concierge on 1BC because of the fewer phase transitions, these will shorten the duration of the fight, reduce the number of forced Aura of Lacerations, force shields and stuns from the screams by 2!


Be the first to comment