
Repellent Additive Platforms Guide
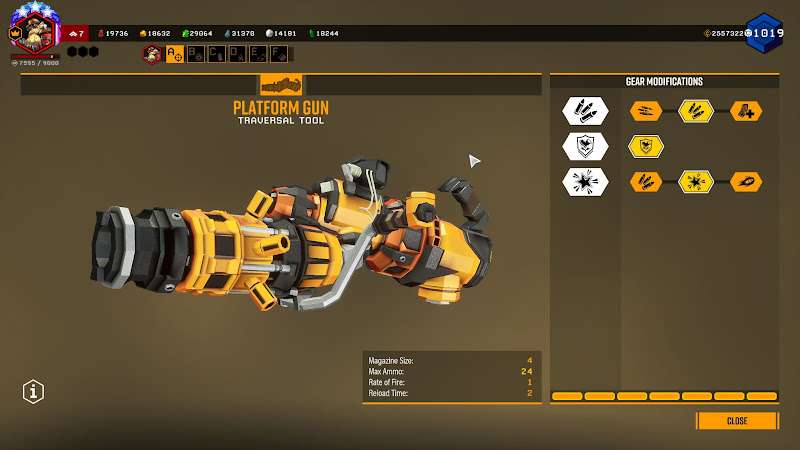
Repellent Additive is the Tier 3B upgrade for Engineer’s Platform Gun. Taking Repellent Additive will cause platforms to encourage Glyphid enemy types to path around the platforms. These include (non-exhaustive):
- Grunts, slashers, guards
- Praetorians, Oppressors and Dreadnoughts
Notably, these do not include:
- Flying enemies
- Shellbacks and younglings
In this guide, we will cover the basics of Repellent Additive platforms and use that to demonstrate how to construct effective holds with Repellent Additive platforms. We will also cover some useful tips and tricks towards the end of this guide.
The Basics of Repellent Additive Platforms
The Case of a Single Repellent Additive Platform
Pathfinding in Deep Rock Galactic is achieved by computing the cost from traveling from one point to another based on a Navigation Mesh (the “navmesh”). A navmesh consists of many points and path segments connecting between points to form a grid. Each path segment incurs a certain cost for the Glyphid enemy if it travels along that path segment, and the Glyphid enemy will select a path consisting of path segments whose costs when summed together is the cheapest to travel along.
Let us consider the following scenario illustrated in the diagram below. Suppose that a grunt has to travel from point A to points B and C. To travel from point A to point B, a grunt can take the L1 path. This path has nothing special, each segment between points of the navmesh incurs equal cost for the grunt. Now suppose that a grunt wants to travel from point A to point C. The diagram below illustrates two possible paths: L2 and L3. L2 crosses over a Repellent Additive platform. L3 goes around the Repellent Additive platform.
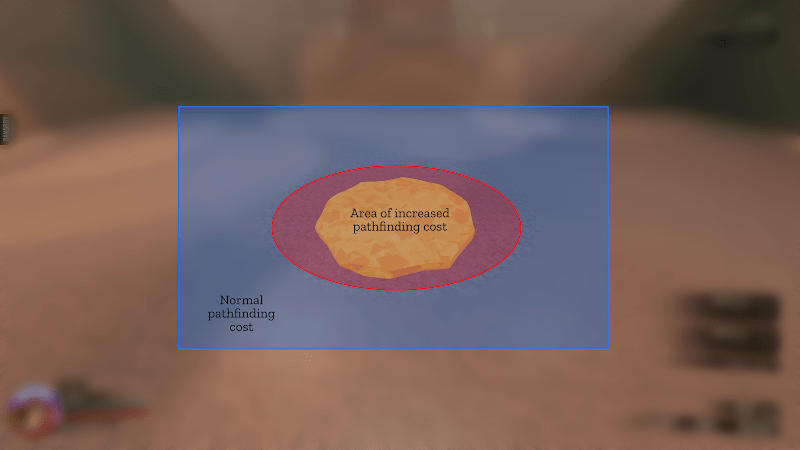
Notice the red segments: these path segments incur increased traveling cost for the grunt because the Repellent Additive platform causes the navmesh segments it covers (and a small external area surrounding it) to incur additional traveling costs. The magnitude of the increased traveling cost incurred by Repellent Additive is not precisely known, but in the case of a single platform, it is sufficient such that the “longer” go-around-the-platform L3 path is cheaper for the grunt to take compared to the “shorter” but more expensive L2 path which goes across the Repellent Additive platform.
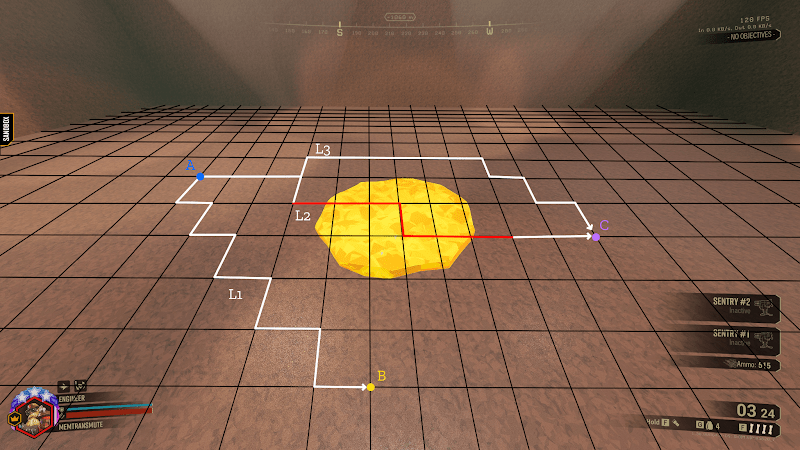
In short, the Repellent Additive upgrade causes the materials covered by the yellow platform material as well as a small area surrounding it to incur increased pathfinding cost. This can cause grunts to favor paths around the platform if the start and destination locations are separated with a platform in between them. This is illustrated by the figure below.
Chaining Multiple Platforms in a Row
The increased pathfinding cost incurred via a single platform is hefty enough such that we can chain a few platforms together in a row, and still have Glyphid enemies prefer to path around the row of platforms to reach the player on the other side.
A good rule of thumb for chaining platforms is having 4 platforms with small gaps in between them as the limit on the number of platforms in a single row (when there is only 1 row).
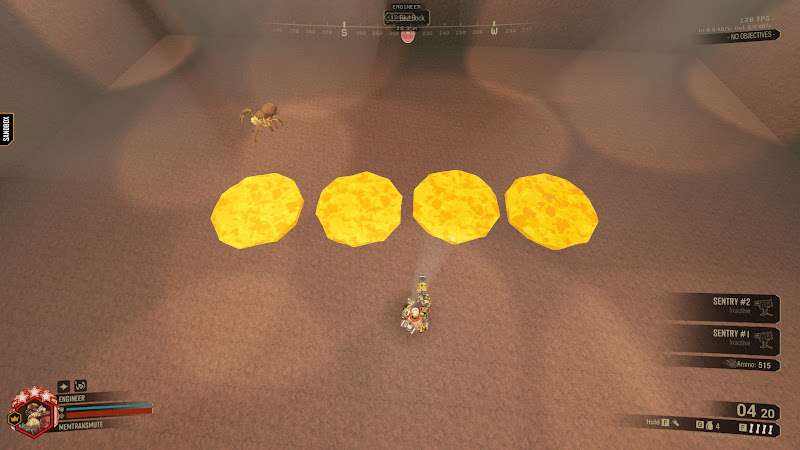
If you want to have a longer line that is still effective, you can alternate platforms in a second row. This will increase the pathfinding cost for the Glyphid enemy trying to reach from the other side of the line to the player.
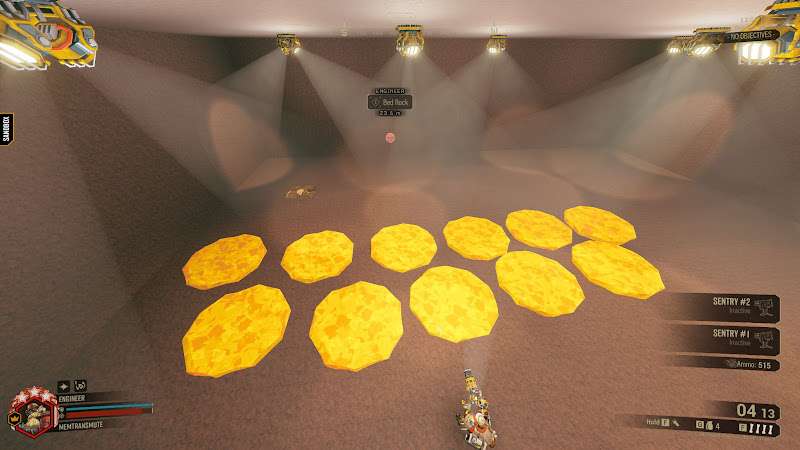
You can use more rows of alternating platforms to cover an even longer line.
When Can Repellent Additive Platforms Fail?
There are a few cases when Repellent Additive platforms can fail.
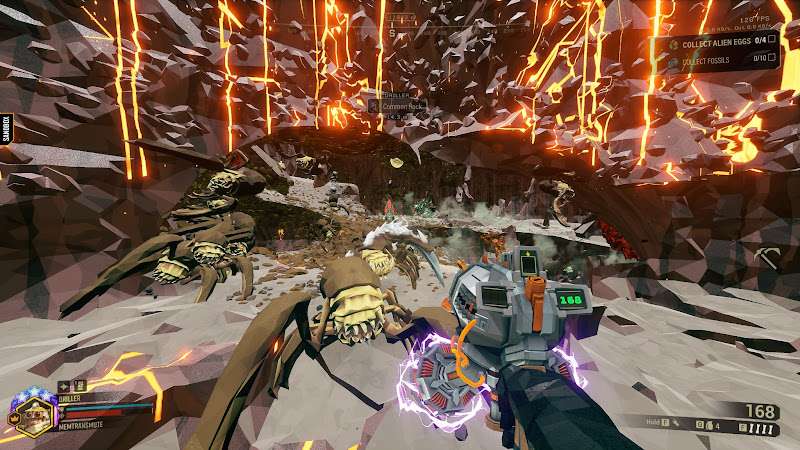
Magma Core Hot Rock and Meteor Material
Hot rock in Magma Core and Meteorite material caused by the small and large meteors both incur the same additional pathfinding cost as Repellent Additive platforms. Be aware of their existence, and treat them as if they are large patches of Repellent Additive material when designing your setup. On Magma Core, some attention needs to be paid to hot rock holes on the floor because those can reduce the effectiveness of your platforms. This includes C4 usages especially.
Bugs Pushing Each Other
Sometimes when Glyphid enemies bunch up, they can push each other over your platforms which can potentially cause them to path directly across the platform if that becomes the cheaper path.
Wandering Bugs Due to Aggro Limit
Only bugs which have aggro on players respect repellent. If some bugs are wandering, they could simply ignore the repellent pathing cost.
Plugging Holes in the Floor and Ledge Extensions
When you have a Repellent Additive setup, using platforms to plug holes in the floor and/or extending ledges e.g. on hold objectives can have unintended consequences with respect to bug pathing.
Constructing Effective Holds with Repellent Additive Platforms
How elaborate a Repellent Additive platform hold is depends usually on the length of time the team is expected to hold at the location. The longer the anticipated duration of stay, the more elaborate the hold. No matter how complex, the guiding principles are the same:
- Reduce the number of angles that Glyphid enemies can attack from.
- Encourage bugs to group together / clump up into tighter chokes.
We now show some Repellent Additive setups, ranging from quick setups to more complex setups. We will refer back to the principles to explain why the setups are done the way they are.
Quick Point Extraction Holds / Quick Open Holds
In some scenarios like Point Extraction, it is not expected that the team will be staying at the hold for a prolonged period of time, since it is expected that the team will mostly be moving or pushing objectives and only returning to the hold for swarms. This can also be used in e.g. Mining Expedition or any other mission type if the team is more or less stuck in a non-ideal location as a quick response to help alleviate the pressure.
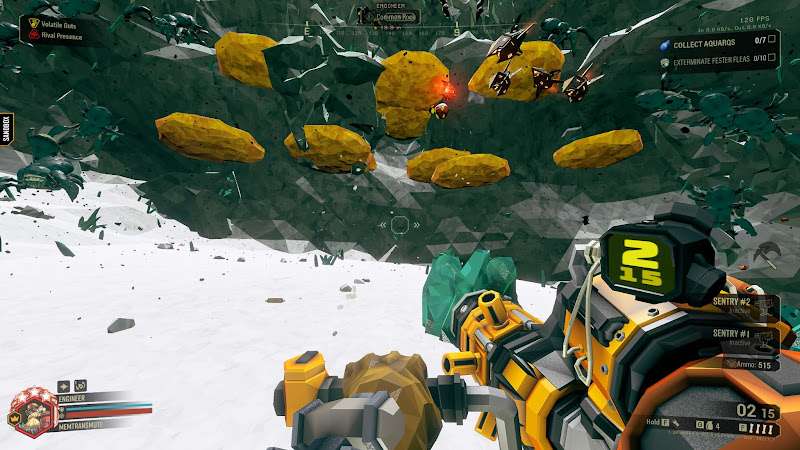
Here, we set up two rows of alternating platforms. This can be done very quickly. The team now doesn’t need to worry about the back since the Glyphid enemies will be encouraged to path to the sides.
You can further improve this quick hold by adding a simple line of 4 in front.
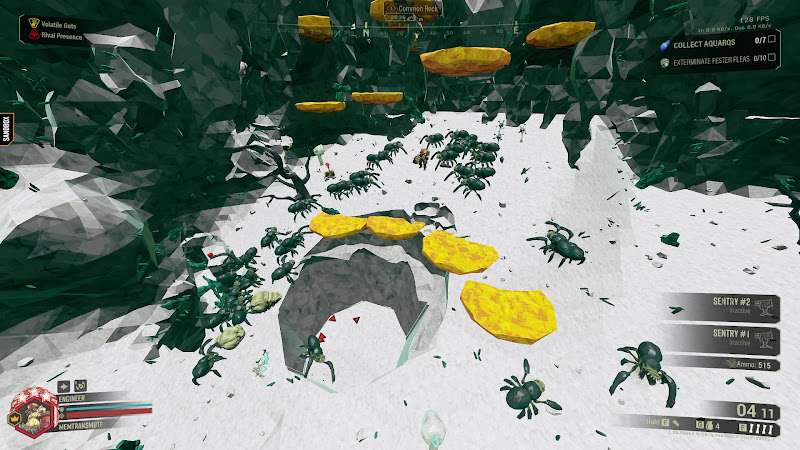
Tunnel Holds
In Mining Expedition / Egg Hunt mission types, you often have plenty of tunnel systems to work with. These are excellent locations for holds since you can typically block one end off so that the team only has to pay attention to one side. On the other side where enemies are expected to come from, you can set up platforms on the ceiling and on the sides to encourage Glyphid enemies to path on the floor and group up at a choke.
Salvage Operation Hold Objectives / Black Box Holds (With a Vertical Wall)
On hold objectives like Uplink Repair, Fuel Cell Refuelling and Black Box Repair, where you often have a wall to work with, you can set up platform lines on the wall to encourage bugs to path to the sides. You can also set up a few platforms between the hold objective and the broken drop pod (for salvage) to discourage bugs from pathing on the drop pod. You can have the driller carve the hold area out a bit for more kiting room.
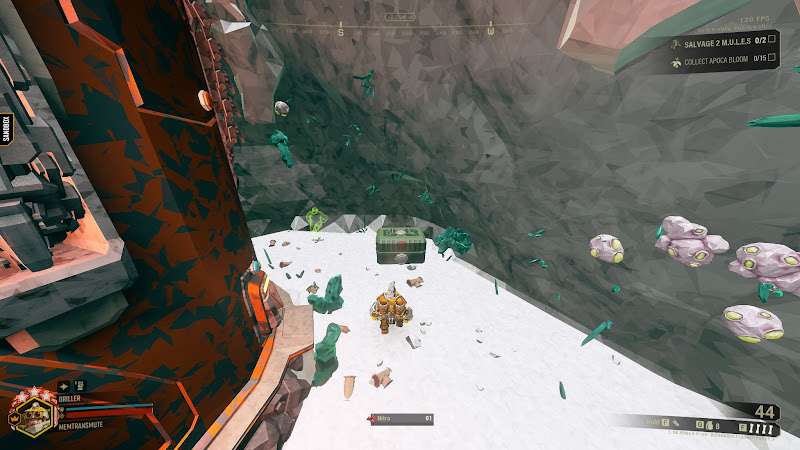
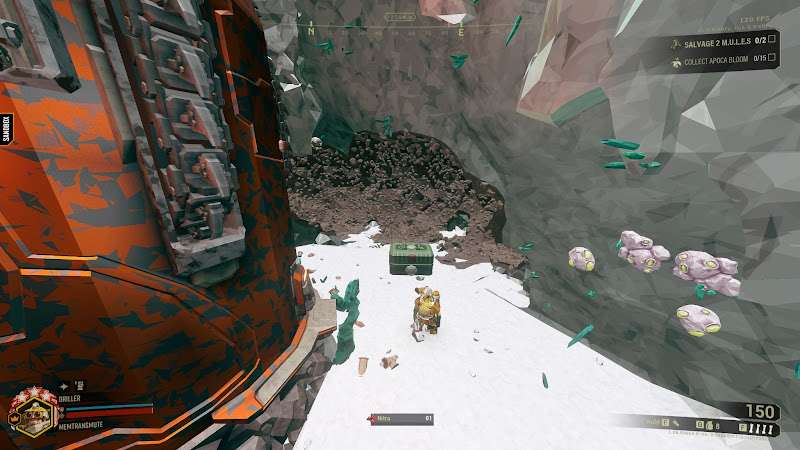
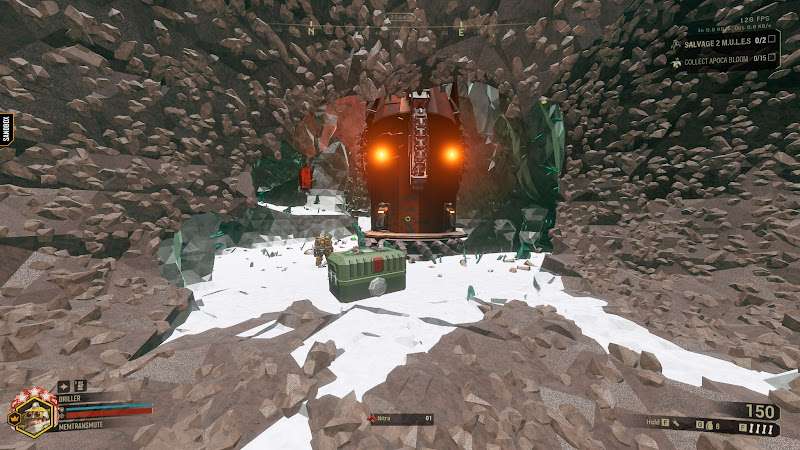
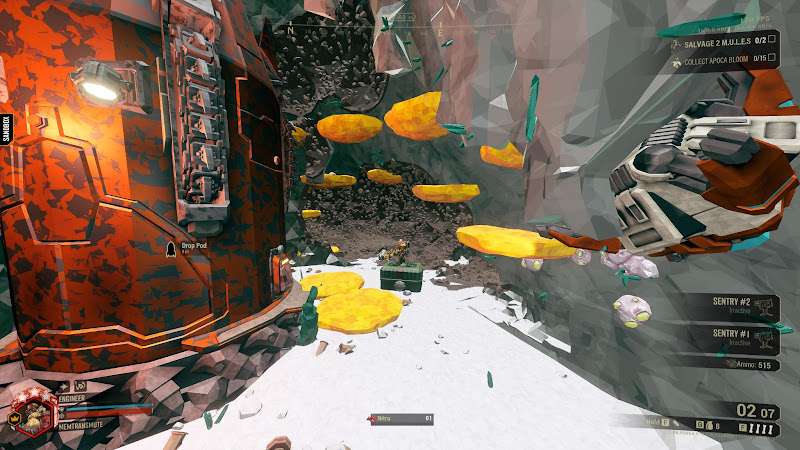
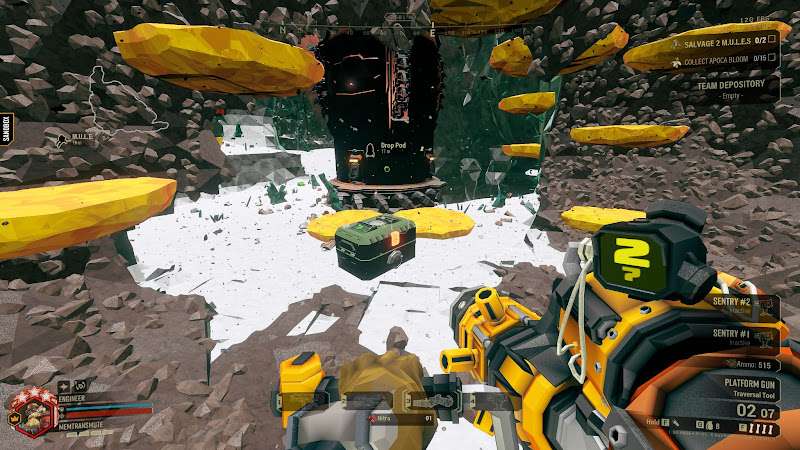
With this setup, Glyphid enemies will be encouraged to path from the sides of the drop pod and not from the ceiling / on the drop pod.
Middle of Nowhere Open Holds
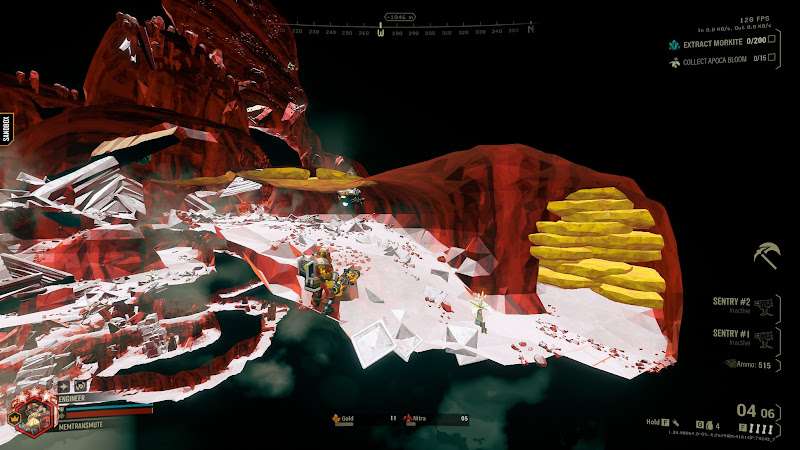
Sometimes, especially for Black Box objectives, you have to hold in the open without any walls to work with. Naturally, you are exposed 360 degrees all around. But you can make it much easier for your team by setting up a crescent-shaped hold (illustrated below) to reduce the amount of angles that Glyphid enemies will attack you from.
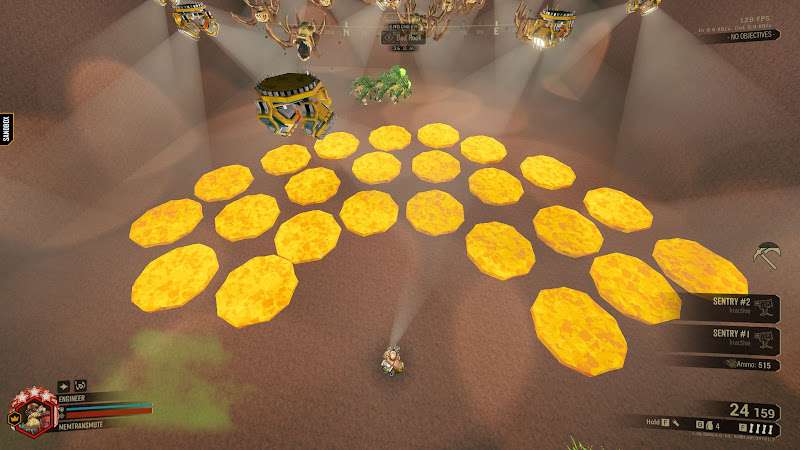
The triple semiring of platforms can encourage Glyphid enemies to path around to the other side of the platforms. This way, your team only has to worry about a very restricted angle.
Tips and Tricks
Animation Canceling to Increase Platform Gun Rate of Fire
You can increase platform gun rate of fire (as long as your ping is less than 100) by animation canceling. You can fire with left click and then immediately cancel the reload animation by right clicking, forcing the reload to complete early.
Spend your time and resources wisely; start setting up repellant before resupplying
This seems obvious but it’s a good habit to get into. In missions with hold objectives (Salvage or those with Black Box secondary) there will likely be lull periods where your team is exploring the cave to gather resources and progress the objective; as an Engineer, your first instinct should be to identify a prospective hold location and set up plats accordingly.
The sooner you do this, the sooner your team will have a safe rendezvous to return to whenever a wave spawns. Failure to accomplish this would deprive your team of a stable footing in the mission, and cost them precious resupplies when your current platform reserve is not sufficient for a proper repellant setup.
Additional Remarks
It is not clear whether macteras respect bug repellent. If you have definitive answers or conclusive evidence for this, please do contact the author with the information so he can update the repellent guide.
Errata
Previously, the guide claimed that Glyphid Web Spitters, Glyphid Acid Spitters and Glyphid Septic Spreaders do not respect repellent. This seems to be not true, repellent seems to affect all Glyphid enemies. Since their pathing prefers the ceiling and/or staying away from the players, usually repellent usage does not try to account for them, and actually only optimizes for other Glyphid enemies which prefer wall/floor and non-evasive pathing.
I sincerely hope this was helpful. Good luck to you!



Be the first to comment