Elimination Missions are my favorite, if there were statistics for missions played then eliminations would be my most played by a long shot. Another sad truth of it is I’ve probably have more losses then successes, I find this to my teammates majority of the time. I’m not calling my team mates bad, they simply don’t understand the proper way to deal with Dreadnoughts. After explaining my strategy multiple times to new players in lobbies, I thought it would be easier to provide for the community my ideas on proper Dreadnought elimination. This guide is to not only to cover basic tips of elimination Dreadnought but as well as cover 2 man strats, 4 man strats, and in the future solo missions as well.
Welcome
Welcome to Killing Dreadnoughts for Dummies! The purpose of this guide provide ideas of ways with dealing with Dreadnoughts. These tips and strats are all collected from my own experiences and things I have learned from the community and It only seems proper to make this guide for the community to enjoy.
Know Thy Enemy
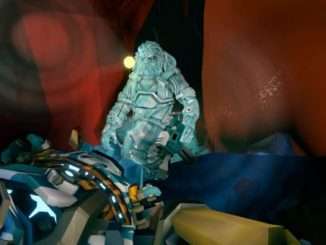
Dreadnoughts are currently the biggest Baddies in DRG. The best way to deal with Dreadnoughts is to know what a Dreadnought is and I find it surprising that there is much about the Dreadnought that isn’t common knowledge among even veteran players, even I learned some more things about Dreadnoughts from writing this guide that I didn’t know.
The Stats
The Dreadnought is the biggest beast of the current horrors of hoxxes. Knowing the stats of a Dreadnought won’t be life or death, but it could help in the decision making of mods or perks.
The Dreadnought boasts a mighty amount of health that is protected a shield that regenerates back.
Dreadnought health and shield (courtesy of the gamepedia cause I couldn’t find it anywhere else).
A Dreadnoughts health and shield health depends on the hazard and amount of players.
I will only be listing health for 4 man strats since they would have the most influence on the strategy out of any other.
- Hazard 1 3600 health and 800 shield
- Hazard 2 4500 health and 1000 shield
- Hazard 3 4950 health and 1100 shield
- Hazard 4 7200 health(wow) and 1600 shield
- Hazard 5 same as Hazard 4
The Dreadnoughts attacks also deal a flat 17.5 every hit with the fireballs dealing 28 AOE damage. The swarmer ball deals no damage at all.
The Dreadnought has 50 resistance to fire, electrical and explosive damage (as for cold damage I have no idea but still unrelated to freezing power, the bigger they are, the more freezing power you need so yeah).
The weakpoint as everyone already knows is the abdomen which is 200% bonus damage and does work with hollow-point bullets and similar mods
The Armor
The Armor is what Makes the Dreadnought such a menace in the first place, anywhere that isn’t the abdomen is completely immune to damage, status effects won’t be applied unless it hits the abdomen with the shield down, so save your fire damage and stubby guns for when the shield is down.
The most important part when fighting a Dreadnought is armor breaking does not work on the Dreadnought! Armor breaking mods do not bypass the indestructible armor nor does it give you the bonus damage for breaking the shield on it’s abdomen. So before you go into any elimination, always unequip your armor breaking mods as they do not work on the Dreadnought. It’s better to bring a mod that can increase your clip by 3 bullets than an armor breaking mod that does absolutely nothing if you are the Dreadnought DPS.
The Attacks
The Dreadnought will do everything he can with the four attacks he has to wipe you and your team.
The first attack is the basic attack. It’s pretty simple, he whacks you and you take damage, nothing much to it.
However there are times where the Dreadnought will charge at you to close the distance and basic attack you, so be wary of this if you are trying to keep the distance.
The basic attack is also capable of destroying terrain and he uses it when trying to removed obstacles between you and him.
The next attacks are the projectiles. The Dreadnought will stay still in place to launch 1 of 2 projectiles at you. The first one is a fireball that does AOE damage, he will most of the time shoot the projectile at you when he isn’t charging at your or roaring, so be prepared to bob and weave. the most dangerous part of this attack is the fact that it leaves a crater significantly deep crater that you can’t get out of most times unless you have some assistance. This means you will be trapped and whacked a few time or worse, instantly killed. The second projectile is an egg that shoots in a lobbed arc unlike the fireball. This egg will spawn Dreadnought variant swarmers(basically the exact same as a brood nexus swarmer, just darker) that will scitter around and apply toothpicks worth of damage on your fellow Dwarves.
The attack also apply a pheromone on you if you are hit by it that will attract not only the swarmers but other enemies to hit you also. the only enemies immune to this is the Dreadnought as he will switch targets when he feels like it.
The fourth and final attack is his roar. The roar initially doesn’t do anything, it only serves in notifying you of his AOE attack where he slams the ground around him and anything with a health bar in range is obliterated. The attack is simple, he roars, and then he kills. The attack as not dependent frequency unless you are doing it solo which happens every 4-5 seconds. If you aren’t a solo team, it is very important to force the Dreadnought to use the attack, as it will leave him vulnerable and still for a very long time.
Preparation (Elimination Only)
Preparing for a dreadnought is nothing new to most players and many pick up on the idea quick. If everyone is low, call in a supply drop, if the terrain is clunky with unnecessary debris, clear it. Overall, here are some basic tips.
Build a transportation system
Unless you’re a scout, you will need some system of retreating and re-engaging the dreadnought. This isn’t a difficult task. A Driller can make tunnels systems in the floors and walls for the team to travel through. One or two Zip-lines put distance between you and the Dreadnought or to get a better position. Even platforms that have a staircase to high ground or placed on the floor if a dwarf needs to make a leap of faith. Mobility is key and will not only save the lives of your friends, but potentially lead to clean sweeps on a Dreadnought.
Clean up duty
Keep the area clean of enemies, not just the current cave you’re in, I’m talking vicinity! checks the dirt patches and tunnels near the cocoon. it could very well save the life of your gunner who needs to dedicate his ammo on the Dreadnought instead of pesky grunts. As for periodic swarms/mini-swarms, don’t wait for the next one to come. if the cocoon is there and the coast is clear, you pop it.
Game Plan
This was a pretty obvious one, but before the mission even start you gotta have a line up for the mission. This includes selected perks, weapons build and support item builds, grenades, all that. The keeps going into the game itself and even the midst of the fight , you need a plan and you gotta be able to change the plan accordingly. Map out the situation before popping the cocoon, a simple way of approaching this is asking yourself and the team things such as do we have a means of retreat and kiting potential or do we even bother fighting the Dreadnought here or lure it to another system? These are the questions you gotta be asking and have answers too.
Tips (for Elimination)
For the newer players or returning players who would like to freshen up on eliminations, or veterans hoping to learn something new from this section of guide, these are all simple things that you should keep in mind for the Dreadnought fights.
Resources
Always makes sure you have enough nitra for at least one resupply, if not then make not of all the red sugar nearby and play conservative.
Distance
Distance between you and the dreadnought is important. It means less basic attacks it’s hitting you, more time it’s facing away from your team, and more opportunities where it will go for a range attack and can be shot at.
Communication
Communication is any teams greatest weapon. Telling who currently has Dreadnought aggro, knowing if someones currently reloading or out of nades. Communication is what makes or breaks the fights.
Loadouts
It important to have a proper loadout for Eliminations. This is the same as communication but this deserves it’s own spot. Being able to build around a teams weakness via mods can make or break any mission in the mod dire of situation. So once again, it’s important to plan accordingly
Kiting
Kiting is the most Important part of Dreadnought for Elimination and just in general. Recognizing who has aggro and who doesn’t will allow the team to maximize their DPS. The is only a result of efficient kiting. I hope to provide you with some new ideas for Kiting or maybe you’ll be able to take something else from this.
In General
For any class, you need to be able to kite without any of your support tools. No grapple hooks or Zip-lines, you need to be able to kite without these tools when worse comes to worse.Use the environment to your advantage. Something as simple as elevator plants could save your life. Another part and probably the greatest tools used for efficient kiting, The Pillar!
The are a prime example of pillars and the Bane of any Dreadnought, allowing every to literally run circles around them. Pillars are a miners best friend as they always can lead to a quick kill on a Dreadnought, be sure to use anything that is in a similar fashion of a pillar as well.
One more thing that’s very important, when going into a Elimination mission, always bring Weekend Athlete. Weekend Athlete is required for these missions as it allows you to put as much distance as possible between you and the Dreadnought and can be used to escape into narrow tunnels, the onll exception to this rule is the Scout for obvious reasons.
The Gunner
The Gunner is the most important in an Elimination and Dreadnought killing in general, not just for his DPS but for his Zip-line. Setting up 3 zip-lines in a cavern where there are no spots for the Dreadnought to reach the Zip-line, you essentially have give 3 teammates invulnerability. always set up at least 2 Zip-lines as the Gunner and make sure you have the Zip-line perk as it will make it easier for you to move along the Zip line for better angles.
The Driller
The Driller should provide some sort of tunnel system unless the area of the cocoon is incredibly open, whether it’s into the walls or under the floors, a system of retreat is good for everyone.
However, if you”re taking the aggro of the Dreadnought, what you need to do is simple. Find yourself a nearby wall and drill into it can give yourself some wiggle in case he chucks some fireballs into your little home.
The Scout
It’s pretty simple with Scout. Just use your grapple hook. nothing crazy or anything, if the Dreadnought gets close the zip right pass him in hopes of baiting out his roar.
The Engineer
The Engineer has the hardest time in Eliminations since hes heavily centered around positioning, and it only makes things worse once the Dreadnought decides to Aggro on him. Some characters can take a pass of Weekend Athlete but Engineer cannot as it’s his only reliable form of kiting. His platforms are completely dependent on the layout of the map and can either get the team an easy Dreadnought kill or end up completely useless. Safe to say that Engineer has the hardest time with Eliminations.
The 4 Man Strategy
Self explanatory, this section covers the basics of a 4-man team for Eliminations. This truly puts the strengths and weaknesses of the team in the spotlight and it’s up to the team to either cover those weakness or further build towards their strengths. The core idea of the 4 man strat is time management. Get in, grab the loot on the way, kill the Dreadnoughts, then book it. Time is key.
In General
Establish your priorities, what enemies require the immediate attention of DPS or the entire team to kill rather than a Dreadnought. A dreadnought is number one priority of DPS; However, there are enemies that can take priority such as Cave Leeches, Grabbers, Trawlers, Wardens, etc. These are things you need to keep in mind because the Dreadnought won’t be the only enemy in the mission and you have to be prepared.
Stick together! This is the most important part, the team needs to be together. The obvious reason is cave leech and such, power in numbers, but the main reason is that it ironically makes eliminations slower. Unless you’re coordinating to split up in hopes of getting to the cocoon quicker, splitting up forces the game to last longer. The missions don’t get progressively harder, but the longer the game last, the more resources you exhaust. which brings me to the next point.
Be sparing of your ammo, avoid any overkill if possible. Your pickaxe is most trusted ally, use power attack as often as you can. If you got three grunts on you, pick them to death, you have shield for a reason so abuse them and red sugar isn’t as scarce as you think. Always aim for the weakpoints, it practically double the damage output. Don’t be afraid to use grenades either, most grenades don’t have an effect on the Dreadnought anyways so feel free to chuck the explosive ones.
Roles
There are two major roles that the team needs to split up into (technically 3) in order for this to work.
The first role is DPS. Not a shocker but these are the big bad guys who will be tearing apart the Dreadnought quickly. it’s simple, you keep your attention on the dreadnought and hammer out as much damage as possible. Usually Gunner and Scout will fill these roles as all their weapons deal direct damage rather than explosive or some element damage. The scout will be the one to hammer through the shield mostly as his burst is through the roof but doesn’t mean he can’t wait until the shield breaks either. Unless for some godforsaken reason the gunner is running thunderhead, the gunner usually wants to pepper the shield with the secondary or or tap fire his leadstorm until the shield breaks, the Gunner is able to dish out the most consistent damage of all the classes, this is why he is important for mission as not only his utility but rather his DPS brings him all together.
The second roles is Grunt Duty. The roles are more oriented towards the the clearing of other minor enemies and providing crowd control for the DPS to keep them alive, This where the Engineer shines in the comp because he can provide so much coverage with sentries and lure, forcing every enemy but the Dreadnought is such an amazing feature that was accidentally made. The Lure will only draw towards normal that aren’t the Dreadnought because of the aggro mechanic. Unlike the Dreadnought, normal enemies will attack whoever they like cause they don’t have a dedicated target. It works like this, the Dreadnought “picks” a target every few seconds, this is similar to the pheromone bomb that count has. the scout throws the pheromone bomb at a bug or plant which he “picks” to be the target. This same mechanic applies to the Dreadnought, he picks a target to chase. This makes the Lure an incredible device in the fight. Keep in mind that there are case where the Dreadnought will aggro onto the Lure, this usually happens when he switches targets. As for the driller, he is an all rounder. He provide incredible CC with the Cryo cannon and the chance to instantly kill smaller enemys. The Cyro Cannon can be used to extend the duration of vulnerability on the dreadnought or prevent the shield from charging a bit longer. The Driller opens up opportunities for the DPS. Not to mention EPC is stupid when it comes to clearing grunts and harmful terrain.
The “so-called” third-role is Praetorian Duty. These can be given to Scouts as they can stun lock Praetorians to Death with M1000 stun builds or Engies as they can coral them away with Grenades and Throwables. These are for teams who are worried about the praetorians overwhelming them. A simple role that isn’t required but does help.
The 2 Man Strategy
The 2 Man Strat is incredibly simple to a point where it doesn’t really need a dedicated section, but it’s still worth mentioning. The idea is the pure opposite of of the 4 Man Strat, take you’re time. You have extra resources thanks to the reduced man power. The Core of this idea to to make killing the Dreadnought as clean as possible.
In General
You want to try and find nitra before doing anything else, nitra is a priority as it’s the life blood of this comp. Without a supply drop present in each fight, your chances of winning decrease exponentially.
Be patient with swarms. Making sure the the cocoon is clean of enemies and keeping track of the time since the last swarm is key to this. You don’t want any additional problems when killing the Dreadnought. Always have a supply drop ready to access before destroying the cocoon, the Gunner is gonna need ammon and shields and the second Dwarf will need his throwables ready for action, resupplier perk is a must have.
The Rollout
The needs one thing only to work, a Gunner. This strat won’t work without a pure DPS gunner build (not pure DPS but you get the idea) The Gunner will be doing the Bulk of the damage while the other Dwarf Scout or Driller do everything the keep the Dreadnought on him. The Dreadnought will come after the Gunner eventually, this is where extra resource come in handy, the Gunner needs to toss out Shield the second the Dreadnought is in range of an attack. The Gunner wants to be behind the Dreadnought as much as possible.
As for the second player, you want either a Scout or Driller. They can put the most distance on the Dreadnought while having enough to break the shield for their gunner, their throwables are vital for the comp as it keeps the Dreadnought stopped, applies pressure to the shield, or can keep extra enemies off the gunner if need be. Kill the Dreadnought quick and easy, wait for the next swarm, then kill the next Dreadnought, that’s how the strat works. Simple as that.


Be the first to comment