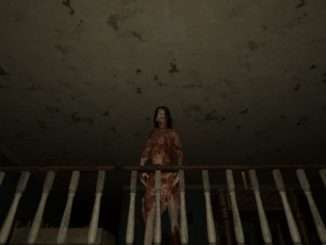
Currently I completed The Town map on all 3 difficulties coop and on the first 2 difficulties on single player. NGL it took quite a bit of time to do this (currently 45h in game).
Guide to the Town Map
Game Generic Information
- The number of stuns required to calm down Azazel is not fixed depending on current level, it might randomly vary +-1.
- The number of stuns required to calm down Azazel does not depend on difficulty level.
- The more time you take to calm down Azazel, the faster he will activate next time.
- On coop, Azazel activates faster, and takes more stuns to calm down.
Map Generic Information
- Everyone seems to think the map is harder because he is the only one that shoots. Well, he shoots you dead only when he is not active. And when he is, it takes 3-4 shots, it just didn’t feel like much of an issue for me, I guess depends on preference.
- At level 4/10 on normal difficulty and 0/10 on hard and nightmare, a sand storm starts which makes seeing Sam much easier. This is the only map where something like this happens, make good use of it. Similar would be the lightning in The farm, except that happens only sometimes, the sand storm is always helpful.
- After playing so much on this map and switching to the farm now, it feels like Anna fights back UV harder than Sam (probably to balance the addition of shooting).
- The bot seems to have a slightly different general pattern of moving each time you play, so if you lose you might just not have been in luck. (ex: some games he goes to the church very often, other games he barely goes there)
- Only 4 pentagrams are activated at a time.
- The position of the pentagrams is randomized, especially on the buildings that have more floors: sheriff, bank, hotel, saloon. If you think about switching the order so that these are not left last, don’t bother (More details about this in the next section). I already tried that and it does not bring much of a benefit, much more important is the number of books you burn each time.
- I never used the hiding spots on this map, idk when they would be useful since Sam sometimes checks them out anyway even of no one is hiding there.
- You can keep one book on the altar, there ghosts cannot steal it, you can stack books in the back-left corner of the church, there they will be stolen very rarely.
Building Specifics
- Buildings with one entrance door increase the chances of being caught- buildings with multiple entrance doors are reduce the chances of being caught, if the doors are in he same direction because you see him coming either way. If the doors are in different directions you have more chances to get caught because you can’t watch both at the same time.
- In the saloon and hotel you can drop from the balcony by stepping on a chair or box, and then on the table.
Easiest to hardest buildings (slightly subjective):
- Stable – one of the closest, only one door, if you escape the best solution would be to hide in the general store.
- General store – close to the church, has 2 doors but he will never come from the side, which means better escape chances: either hide in the stable or run in a circle between the 2 doors
- Saloon with pentagram 1st or 2nd floor – close to the church, 1 door, you can escape in the balcony.
- Guns shop – close to the church, 2 doors.
- Hotel with pentagram on 2nd floor, moderate distance to the church, Sam can only come to you from the stairs but you can easily escape from the balcony.
- Clothing shop – moderate distance to the church, 2 doors in the same direction.
- Bank with pentagram on 1st floor – closest to the church using the hole in the ceiling. It has more chances of being caught though. Has 2 doors in different directions and he can also drop on you from above.
- Storage – close to the church (go trough the hole in the bank ceiling), has 2 doors in opposite directions, the iron bars are also not helping.
- Hotel with pentagram on 1st floor, moderate distance to the church, 2 door in opposite directions.
- Sheriff with pentagram on 1st floor – moderate distance to the church, 2 doors, sort of the same direction, but too close for comfort.
- Mine – furthest from the church, 3 ways for Sam to come to you, but from the same direction.
- Bank with pentagram below 1st floor – it is one of the worst positions in the game since you have no way of escaping from there if Sam comes after you.
- Sheriff with pentagram on 2nd floor – same as 12), but further from the church.
Setup
- Gather 10 gasoline to the church door.
- Bring matches to as many pentagrams as possible (additional matches appear after Sam spawns, you don’t need to do all of them, at the beginning there are about 7-10).
- Open all doors (pay attention to the direction they open, they might be in your way in some situations. It would be very awkward to lose because of this).
- Locate all batteries (there should be 4 on normal difficulty, 3 on hard and only 2 on nightmare).
- Bring medkits to more accessible locations (coop only)(depending on preference).
- After spawning Sam, unlock all boxes and bring all books to their respective pentagrams.
Strategy
It is always a good idea to hide in the Hotel or Saloon balcony, if you manage to get there.
- You can easily see him from the balcony, you can easily escape from the balcony.
- These buildings have central location, if sam chases you from there, you can basically run anywhere you want.
- In the saloon it is better to wait him at the ground floor, after you stun him go to next floor, he will rarely chase you there.
Another good spot is above the bank:
- You can escape through the hole and run to the hotel since that is another good spot.
- It is true he usually drops from there too, but the chance is pretty high that he will lose you.
Put the batteries in these places, or near the church, depending on preference.
Book Burning Order
I will make this notation to summarize the logic in this section: Current level / Stacked books / books to search for / books remaining.
At the start: 0/0/4/6
- Now you gather 4 books always, since after that it’s going to get harder anyway.
- At this point Sam will activate at most once, but only if you are inefficient.
Now we are at 0/4/0/6
- We will explore what happens when you burn 4 or 3 books from this point.
First, for 4 books burnt:
- 4/0/4/2 – now of course we gather all 4, following the same logic from the beginning.
- 4/4/0/2 – now we have 4 possibilities:
- 8/0/2/0 – search 2 books on level 8 is suicide on single player.
- 7/1/2/0 – obviously better than 1), you need to search for 2 books on level 7.
- 6/2/2/0 – this is ok single player and probably the best on coop, I personally don’t like doing a 6+4 (on single player) because it takes a long time to burn 4 books (without interaction speed perks) and it’s a pretty good chance he will come to you and at high level you have no chance.
- 5/3/1/0 – does not make much sense to burn only 1.
For 3 books burnt:
- 3/1/3/3 gather books => 3/4/0/3 and now we split cases again.
- 7/0/3/0 – gather 3 at level 7? no thank you, he will activate faster that you can do 1 of them, also worse than 2) from the previous point.
- 6/1/3/0 – this is the better alternative, you will face 1-2 activations, but you will arrive at 6+4 which I don’t like.
- 5/2/2/1 – this is the one I am going for, maximum 1 activation at this step, and then you need to gather only 1 more at level 7, which is doable.
- 4/3/1/2 – again does not make much sense.


Be the first to comment