
Advice on how to get past the Grizzlys in Kaycee’s Mod.
Guide to Beat Grizzlys
Introduction
By the time you unlock the Grizzlys challenge, you should have a decent grip on the game mechanics. You don’t need me to tell you high level things like “Geck good”. But Grizzlys present a very specific challenge, in that you need to build the deck to get past them in the space of a single map without Mycologists. Not to brag but I’m getting half-decent at doing this, so I thought I’d write some notes.
The most success I’ve had with Grizzlys comes from breaking down the challenge into two parts:
- Make a hole
- Deal 5 damage
The other strategy I’ve deployed successfully is:
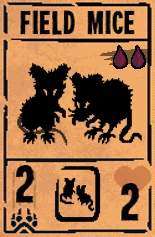
- Draw Field Mice
Geck + Fecundity for Spam
So Fecundity is easily the best effect in the game. Play a card, draw a duplicate. Horrendous.
Honestly, it’s hard to screw up Fecundity. You’ve automatically got a good chance of success if you get offered Field Mice at the start of your run. But there’s combinations that I’ve specifically run against Grizzlys.
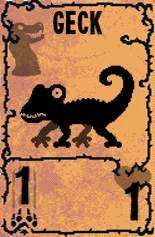
Geck is a basic card with no summon cost. Imbue Fecundity onto Geck and you get infinite Gecks.
For Grizzlys, you can lay down a full row of Gecks. Gecks will deal some amount of power. They’ll take the hits from the Grizzlys. Repeat.
This strategy is brainless. The only concern is that you may run out of cards to draw. So try to focus on campfires for upgrading your Gecks’ damage.
It’s worth noting that Rabbits could also worth similarly, but why bother? Geck starts with +1 power and has a kin.
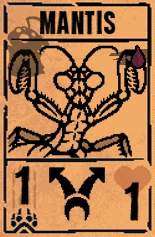
Mantis God + Fecundity for Layered Multipliers
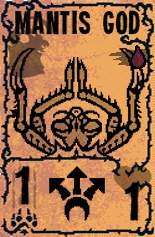
Mantis God hits straight ahead and diagonally. This makes Mantis God very efficient, effectively implementing a 3x multiplier to damage. In fact, Mantis God can trivially end most battles in a single round once it has a single point of damage increase. But that won’t get you through the bears.
Fecundity allows you to lay down a wall of Mantis Gods. It’ll cost you 4 blood, sure, but you’ll have time to stall in the first round of boss battles. If you can get your Mantis God to a very achievable 3 damage, that will allow you to pass Bears. With 4 Mantis Gods on the field, that’s 2 hits to each Grizzly in the centre columns and 2 undefended hits for 6 damage.
Pack Rat for Item Farming

One of the strategies for clearing a hole in the Grizzlys is to rely on items. Use a pair of scissors to create an instant hole. Use an hourglass to buy a turn to kill a single Grizzly.
The most efficient way to fish for items is to get a Pack Rat, and then imbue it’s effect onto something cheaper than 2 blood. If you’re playing the zero cost deck, any of those starting cards would be a good pick.
Dire Wolf for Double Strike
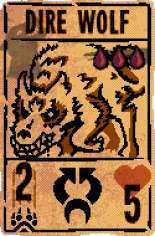

Dire Wolf’s effect is Double Strike. You strike forward twice. Pretty self-explanatory. But this ability is one of the most reliable ways to get through Grizzlys, assuming you can play it right.
The safe way to play this is to draw Dire Wolf and then imbue it’s effect onto a card with at least 3 damage. That’s Grizzly, Wolf, Great White, and probably a few other cards. Treat Double Strike as a multiplier and nothing more.
The other way to play Dire Wolf is to go all in and try to get it to 6 damage. First hit kills a Grizzly, second hit does direct damage. This will allow you to breeze through Grizzlys, but it’s a struggle to achieve this in the first map. Optimal luck on 2 power campfires will give you 6 damage on Dire Wolf, but I wouldn’t recommend it.
Warren + Fecundity for Endless Summoning

Warren is a single blood card that gives you what is effectively a base Squirrel when played.
With Fecundity, you can sacrifice your Warren to play Warren endless, giving you an infinite supply of blood and bone.
Any number of summons can benefit from this strategy but two cards stand out:
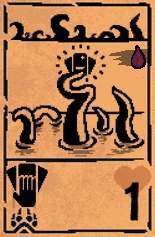
- Hand Tentacle’s damage scales by the number of cards in the your hand.
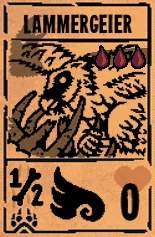
- Lammergeier’s damage scaling by your bone tokens divided by 2.
The magic number is 6 or 12 — 6 to kill a Grizzly and 6 overflow to kill the Grizzly behind it.
Obviously if you want to play Warren, the bone deck is the one to pick. Rat King and Alpha aren’t great cards, but they have usable effects and will get you through the early battles.
Touch of Death + Bifurcation
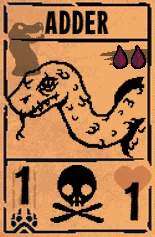
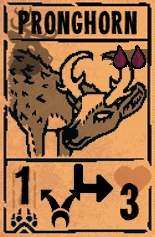
In lieu of items, Bifurcation + Touch of Death is an effective way of making a hole in the wall of Grizzlys. If you’re lucky, you may see Adder and one of Mantis or Pronghorn in your initial offerings.
Raw Damage Cards
There’s very little to say here. If you are able to make a hole, you’ll need to deal damage.
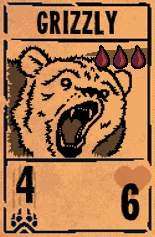
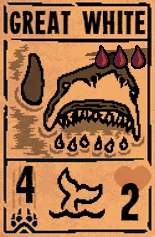
Grizzly and Great White stand out at 4 power, requiring the minimum investment to reach 5 power. A single point from a power campfire, a Fledgling sigil, or a pair of pliers will give you the extra damage that you need.
Wolf and Moose Buck have 3 power but you may struggle to get them to 5 power in time for the first boss, unless you are willing to push your luck with a power campfire. Wolf Cub will turn into a Wolf but you cannot use a Fledgling sigil to reach 5 power.
Birds That Help You Draw the Cards That You Need
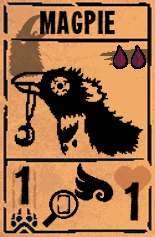
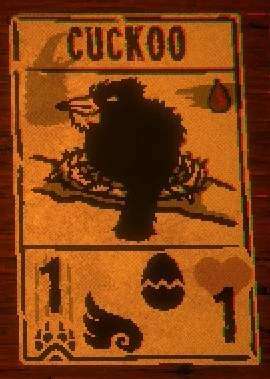
Two other noteworthy cards are Magpie and Cuckoo.
Magpie allows you to draw an arbitrary card from your deck, which is of obvious value when you have one or two built-up cards that you’re relying on. At 2 blood, it’s an obvious candidate for imbuing it’s effect onto something cheaper.
Cuckoo is probably the best stalling card in the game, allowing you to lock down an entire lane (unless you are unlucky and spawn a Raven Egg).
Tl;dr
- Pick the zero cost deck. That’s Rabbit, Tadpole, Geck. It’s probably the safest bet.
- Spend your pelts. There’s a few broad directions you can go in from here.
- Field Mice is literally the best. If you draw it, pick that and get Fecundity onto your Geck as soon as possible.
- Otherwise, look for the following cards: Dire Wolf. Adder plus Mantis or Pronghorn. Grizzly or Great White. Cuckoo. Warren. Magpie.
- If you drew Dire Wolf or Dire Wolf Pup, focus on Double Strike.
- If you drew Adder + a Bifuration card, you’ll need an altar to combine these cards, and you’re still looking for high-power card.
- If you didn’t draw Adder + a Bifurcation card, hold onto your items and try to get to a backpack so that you draw a Pack Rat. You want to get Trinket Bearer onto a cheap card so that you can farm for scissors or hourglass. And you still need to draw a high-damage card to power up.
- As always, keep your deck small. Anything that increases your deck size decreases the chance of drawing cards you actually need.
- That includes cards you could sacrifice/myco down the line. Cards that are powerful later are probably a liability right now.


Fecundity no more work, but you can restart the game going to main menu after having seen the card by the trader
Fecundity was nerfed
yes but Fecundity was nerfed
Fecundity was nerfed, please update with other strategies.