
How to Play Lust Goddess on Windows 11 Using the Android App
If Lust Goddess frequently crashes in the browser client, running the Android version through an emulator may provide a more stable game experience on Windows 11.
These instructions have been tested with the Nutaku version of Lust Goddess.
Which Version of Lust Goddess Should You Use?
The setup depends on the version of the game you play.
- Nutaku version: Follow the instructions below to run the Android app through BlueStacks.
- Lust Goddess website version: You have two options:
- Download the Android APK from the official Lust Goddess website using Chrome inside BlueStacks.
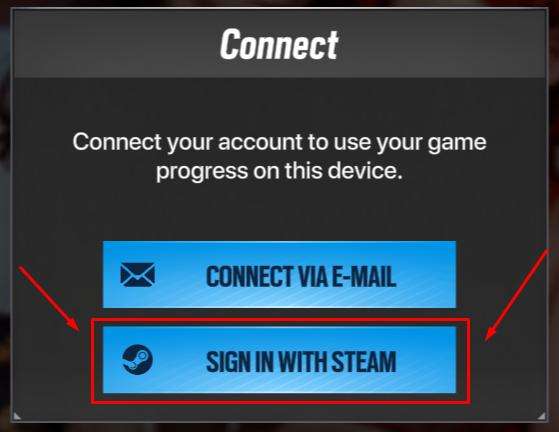
- Switch to the Steam client. Refer to the guide on migrating from the web version to Steam for instructions.
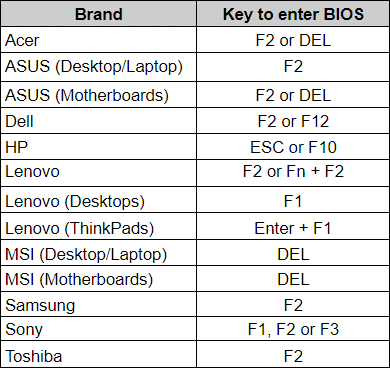
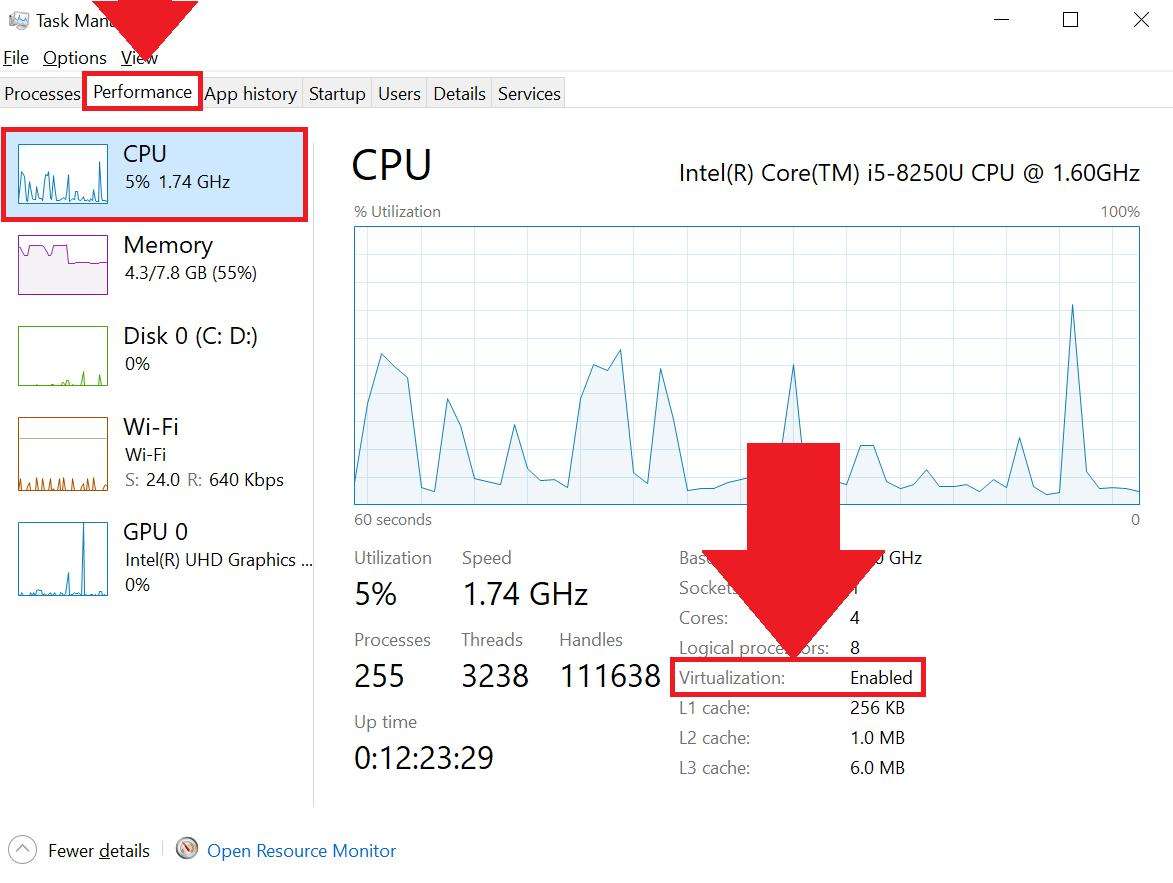
Step 1: Enable Virtualization in Your BIOS
Enable virtualization in your computer’s BIOS before installing the emulator.
For instructions, see the BlueStacks guide to enabling virtualization on Windows 11.
Step 2: Download an Android Emulator
Download an Android emulator for Windows.
The recommended option is BlueStacks. Alternatively, you can use MuMu Player.
Step 3: Install and Sign In to BlueStacks
Install BlueStacks and sign in using an existing account or create a new one. Available sign-in options include Google, Facebook, or Apple.
Step 4: Download the Lust Goddess APK
Download the Android APK corresponding to the version of Lust Goddess you play, such as the Nutaku version or the version available through the official Lust Goddess website.
Step 5: Open the APK in BlueStacks
Double-click the downloaded APK file. It should open automatically in BlueStacks.
In BlueStacks, navigate to My Games and select Lust Goddess.
Step 6: Open the Game in Chrome
The game opens a Chrome browser inside BlueStacks. You can use it without creating a separate account for the browser.
Step 7: Log In and Download the Game
Log in to Nutaku or Lust Goddess, depending on the version you use.
The game patch downloads automatically and is approximately 1 GB in size.
After major game updates, you may need to delete the existing APK file and download it again before launching the game.
Optional BlueStacks Settings
The following adjustments are optional and allow you to customize the experience.
Improve Graphics Quality
- Open BlueStacks settings.
- Navigate to Display.
- Set your preferred resolution and pixel density.
For example, you can set the resolution to 3840 × 2160 and the pixel density to 320 DPI for better graphics.
Adjust Memory Allocation
- Open BlueStacks settings.
- Navigate to Performance.
- Increase the memory allocation if necessary.
The default allocation is 4 GB of RAM, while Lust Goddess needs approximately 2 GB of RAM.
Customize Emulator Preferences
Open Settings > Preferences and disable any functions you are uncomfortable with.
Performance and Stability
In testing, Lust Goddess ran League Battles in auto mode for one hour without crashing. Opening multiple windows to load as many graphics as possible also did not cause a crash.
The game ran smoothly, with memory usage of approximately 1.5 GB of RAM. This was half the memory usage observed during normal play.
BlueStacks also provides several useful controls:
- Top toolbar: Access the home screen and recent apps, allowing navigation between tabs similar to a browser.
- Side toolbar: Access functions such as audio muting, screenshots, screen recording, and memory trimming.
Troubleshooting Freezes and Slowdowns
In rare cases, BlueStacks may freeze, stutter, or slow down the entire PC. The following adjustments may help resolve these problems.
Adjust BlueStacks Performance Settings
If BlueStacks consumes too many system resources, it can cause the operating system to freeze.
- Open BlueStacks settings by clicking the gear icon on the side or bottom panel.
- Navigate to Performance.
- Set CPU allocation to Medium (2 to 4 cores).
- Allocate 4 GB of RAM if your computer has at least 8 GB of total system memory. Do not allocate all your PC’s memory to BlueStacks.
- Open the Graphics tab.
- Under Graphics engine mode, switch between:
- Performance (OpenGL)
- Compatibility (DirectX)
- Test both modes to determine which is more stable.
- Ensure that the dedicated GPU is turned on.
- Save the changes.
Disable Conflicting Windows Features
Hyper-V frequently conflicts with BlueStacks and can cause system lockups.
To disable the relevant Windows features:
- Open the Windows Start menu.
- Type
Turn Windows features on or offand press Enter. - Find and uncheck the following options:
- Hyper-V, including its subfeatures
- Virtual Machine Platform
- Windows Hypervisor Platform
- Click OK.
- Restart your PC.
Official Lust Goddess Platform Information
For additional information about platform differences and account access across devices, consult the official support articles:



Be the first to comment