
This covers two aspects of the game that aren’t well explained: Lock picking, and how to customize your ship.
Lockpicking
Сrеdit gоеs to Nightwalker!
Starfiled uses a new lockpicking mechanic, like all new iterations of Bethesda engines. My personal opinion of the new lockpicking system is it is far better and more skill-based than previous games. However it does require some thinking ahead before you pick.
Locks have 4 cylinders key positions, as seen below:

To successfully pick a lock, all the pins for each of the 4 cylinders need to be aligned wit the pin holes. When slot a digipick position, those pin holes get filled and only a digipick that perfectly aligns with the empty pins can be used. The outer cylinder disappears only when all the pin positions have been filled by slotted digipicks. Only then can you work on the inner cylinder and finally unlock the box. There is no time limit, so take your time figuring it out.
Use the standard movement keys to rotate the cylinders and select them. Before slotting any digipicks, do the following:
- Quicksave in case you mess up.
- Cycle through each cylinder, align/rotate two digipicks cylinders for the outer cylinder first (don’t slot them yet!) so all pin positions will be filled by the pins for the two chosen digipicks
- Before slotting any digipicks, align the digipick pins for the inner ring. At this point, you may need to change which digipicks you’re using for the outer ring, which is why we waited to slot the digipics
- Double check all pin positions to make sure they align and aren’t conflicting with other digipick positions you have selected
- Slot the two chosen digipicks for the outer ring. Once the second pick has been used, the outer cylinder will vanish allowing you to work in the inner ring.
- Since you already aligned the inner ring cylinders, this next stage will go fast:slot the remaining two digipicks cylinders.
- Collect goodies and XP
Modding Your Ship
This is really an amazing part of the game. Unfortunately they did a really crappy job of explaining how to do this. The only similarity this has to Kerbal Space Program is that there are snap locations. That’s it. Your ship is in 3d, but the ship designer works on a 2d-ish plane. The mouse controls your x and y position, and the keyboard controls your Z position (the z position is what took me forever to figure out, and yet it was right on the screen). Let this be a hint to you in using the interface: Look at everything on the screen. The instructions are all there in front of your face, although not always obvious as to what they do.
The first planet you visit is Jemison orbiting Alpha Centauri (In the real universe, scientists have only been able to confirm planets around Proxima Centauri, but Alpha Centauri is believed to have planets). Here you are able to modify your ship by talking to this guy that’s near your pad, and terminal where you can sell goods before passing through another security checkpoint (yeah, his eyes are closed; I guess he didn’t like me shining a flashlight in his face–hey it was dark!):
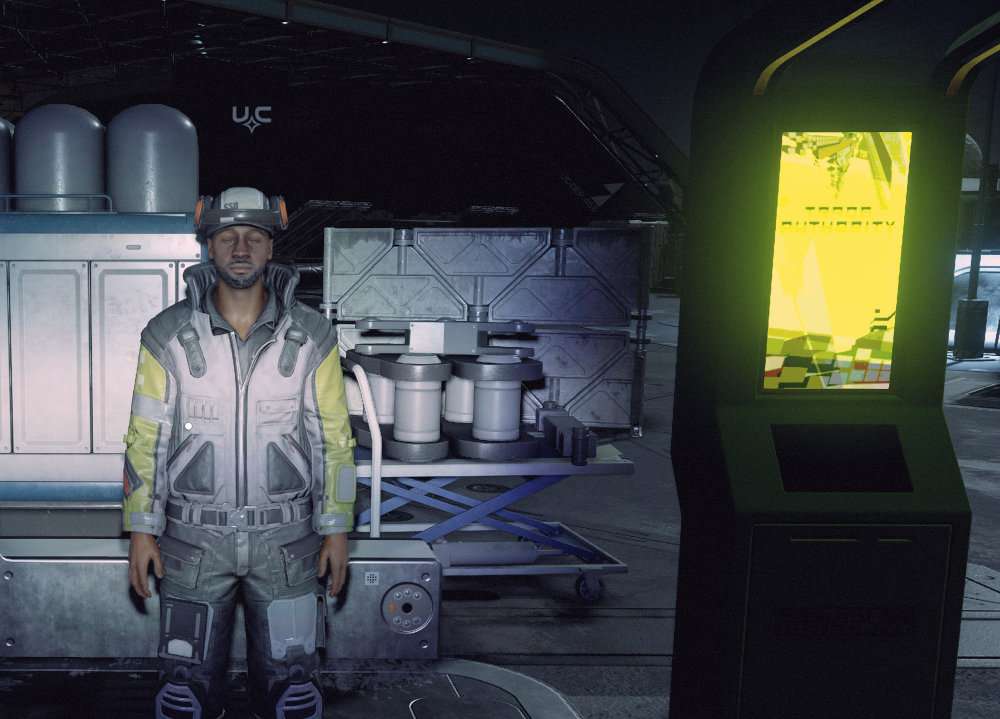
You will pass him as you’re walking down your ramp into New Atlantis. Talk to him, and he’ll give you some general information, as well as allow you to buy new ships, and modify your existing ship. When you return to Alpha Centauri, you’ll be able to fast travel to any visited site on the map. Once you land, just fast travel back to your ship, and then exit to get back to the landing pad quickly.
Now the build screen:
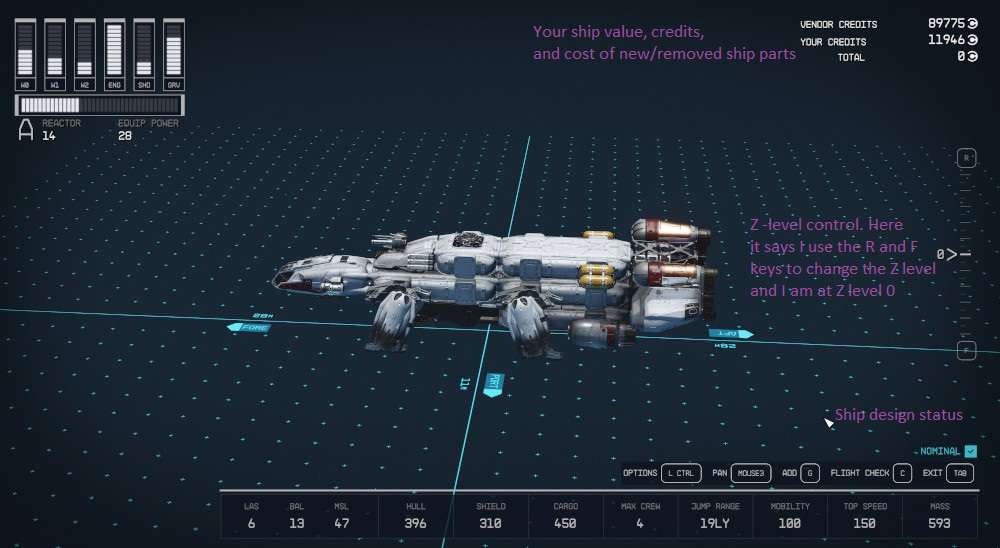
This ship was already modified. Technically it has 6 crew positions, but only space to house 4 passengers total, which is why my crew size is limited to 4. The lower right corner you’ll see a notice regarding your current ship design. Right now it says “Normal” which means the ship is fine. This will change to “Error” or “Warning” while you manipulate your ship and move parts around (and finally back to “normal” when your design is fine) You can check your build by hitting “C” (or whatever key your screen tells you to hit) and it’ll pull up a list of warnings/errors if there are any.
Grab any part of your ship to move it around. Double-clicking a part will select all attached parts/components. Now that you have room, you can add parts by hitting G.
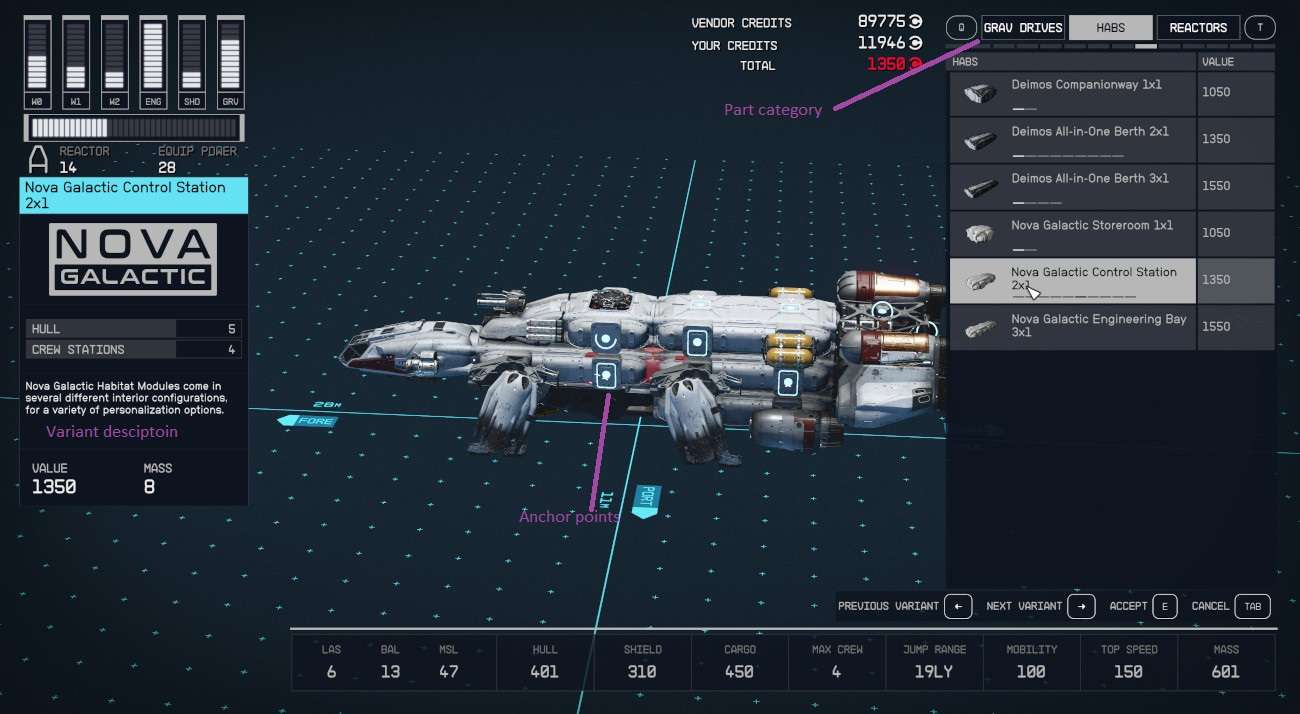
The little horizontal under the part name indicate that there are different variations of the selected part. The Nova 2×1 part I have selected has 10 variants that serve different functions (I have a few of these, one that adds 4 crew stations, 2 hab locations, and a captain’s cabin). There are multiple part categories, Some of them can be rotated (engines only can be rotated 180 degrees, while other side attachment parts can be rotated 90 degrees).
When you have a new part selected, use the keys (R/F in my case) to change the z-plane the part is on. If you mess up, you can always undo your last action (the key for this will be shown in the lower right side of the screen, along with all other allowed key bindings for the current window). Exiting the designer will give you the option to save your ship (if you have enough credits for the design, and there are no errors) , or loose your design.
If you want to know how to access your ship’s cargo, there is a activity mission that will direct you to the appropriate panel in the cockpit. You can also access your ship’s inventory when on board by hitting the Q key, you can also directly sell from your ship’s cargo when at a station/planet–again, follow the notes on the screen. If you used any storage containers on your ship, Everything loose about the ship, and in those containers, will be dumped into your ship’s cargo hold.
Have fun!


Be the first to comment