
Contents
DB BR 143
Overview
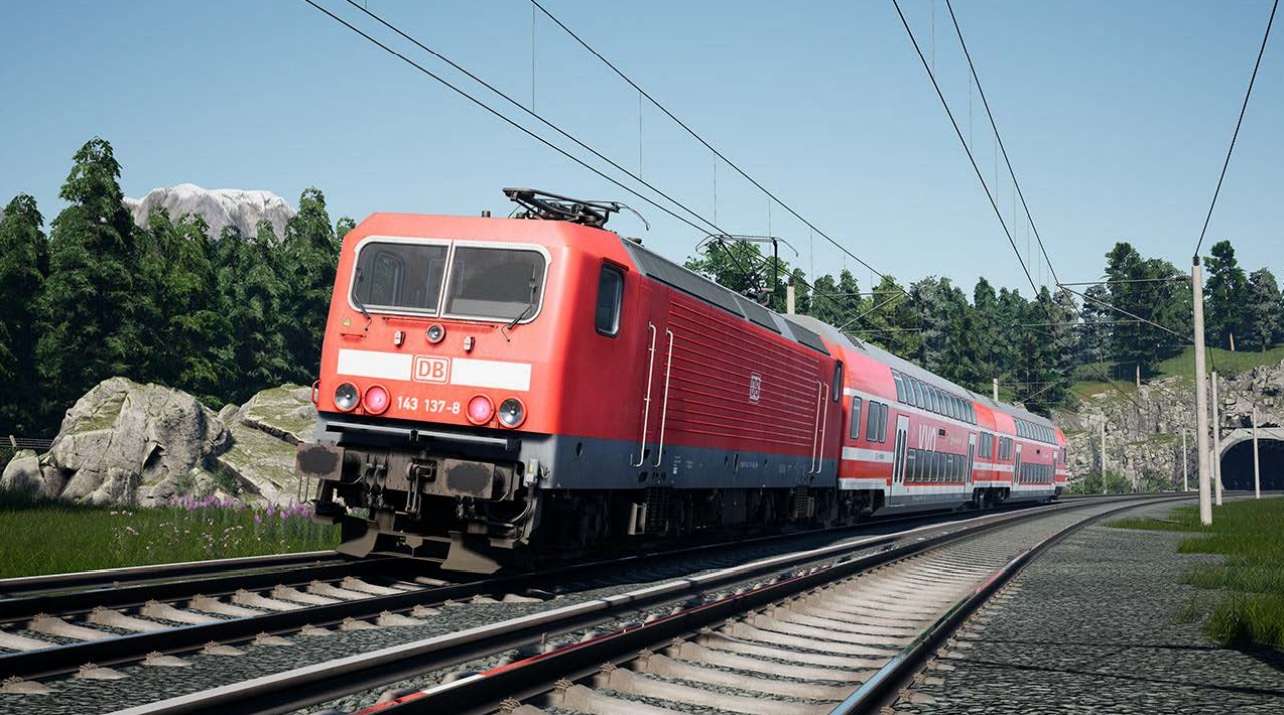
A German classic in every right, the DB BR 143 dates back to the 1970s and was the answer to the Deutsche Reichsbahn’s mass electrification project. With the conversion of many lines to electric power, combatting the 1973 oil crisis, a new fleet of electric locomotives would be needed to replace ageing diesels of Soviet origin.
Originally known as the DR Class 243, this box-like locomotive was based on the heavier 250 (DB BR 155) but better suited for medium freight, and primarily passenger work, and following prototype tests, the production locos were ready for the next decade.
With literally hundreds built, there are not many places one can go without finding at least some 143s dotted about, even with their age, the first few did not start to be retired until 2008. For Dresden, the 143s continue to play a role on S-Bahn lines, but also on the occasional regional, and even freight service, keeping up its diverse role to this day.
- Manufacturer: LEW Hennigsdorf
- Build Location: Hennigsdorf and Dresden, Germany
- Build Date: 1982-1991
- Number Built: 646 locos
- Power Type: 15kV AC OHLE
- Power Output: 4990 horsepower
- Length: 16.6 Metres (54 ft)
- Weight: 82.5 Metric Tons
- Top Speed: 120 km/h (75 mph)
DB BR 143 Cab – 1/2
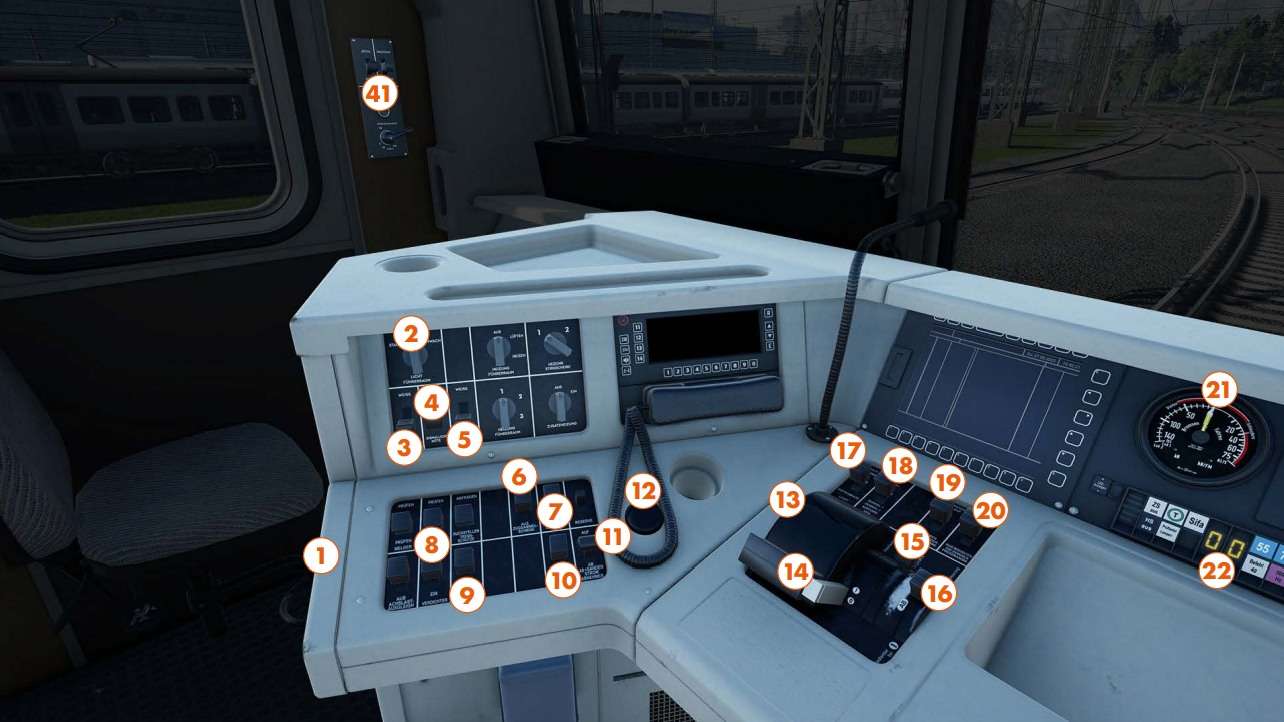
- 1 – Handbrake Handle
- 2 – Cab Light Switch
- 3 – Headlight Left Switch
- 4 – Headlight Switch
- 5 – Headlight Right Switch
- 6 – Train Line Power Switch
- 7 – Train Lights Switch
- 8 – Compressor Switch
- 9 – Traction Motor Fan Switch
- 10 – Main Circuit Breaker Switch
- 11 – Pantograph Switch
- 12 – SIFA Button
- 13 – Reverser Handle
- 14 – Speed Selector Handle
- 15 – Force Selector Lever
- 16 – Auxiliary Control Lever
- 17 – Instrument Lights Switch
- 18 – Desk Light Switch
- 19 – Running Program Switch
- 20 – Traction/Brake Program Switch
- 21 – Tractive Effort Gauge
- 22 – Tap Changer Indicator
DB BR 143 Cab – 2/2
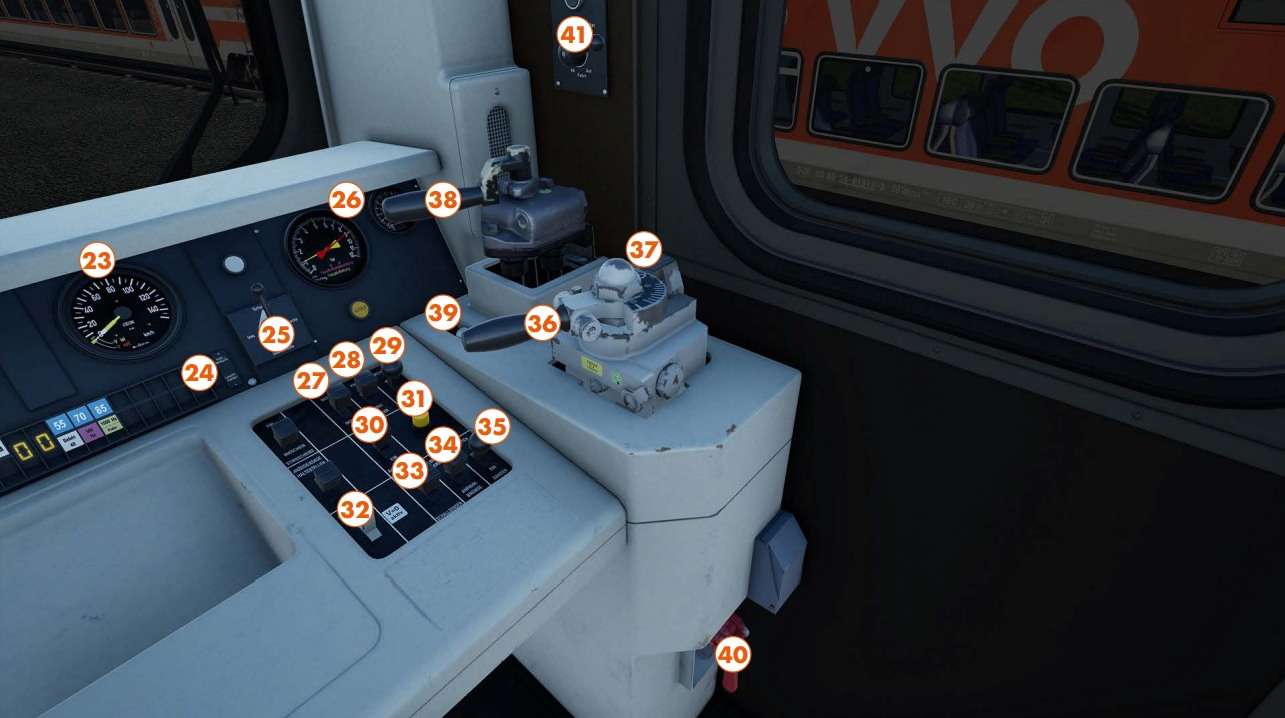
- 23 – Speedometer
- 24 – Indicator Check Button
- 25 – Door Side Selector Switch
- 26 – Brake Pressure Gauges
- 27 – PZB Override Switch
- 28 – PZB Release Switch
- 29 – PZB Acknowledge Switch
- 30 – Headlight Brightness Switch
- 31 – Brake Release Button
- 32 – Passenger Doors Switch
- 33 – Horn Switch
- 34 – Brake Bridging Switch
- 35 – Sand Switch
- 36 – Train Brake Handle
- 37 – Train Brake Key
- 38 – Direct Brake Handle
- 39 – Wiper Toggle and Speed Select
- 40 – Emergency Brake Valve
- 41 – Shunting Controls
DB BR 143 – Corridor
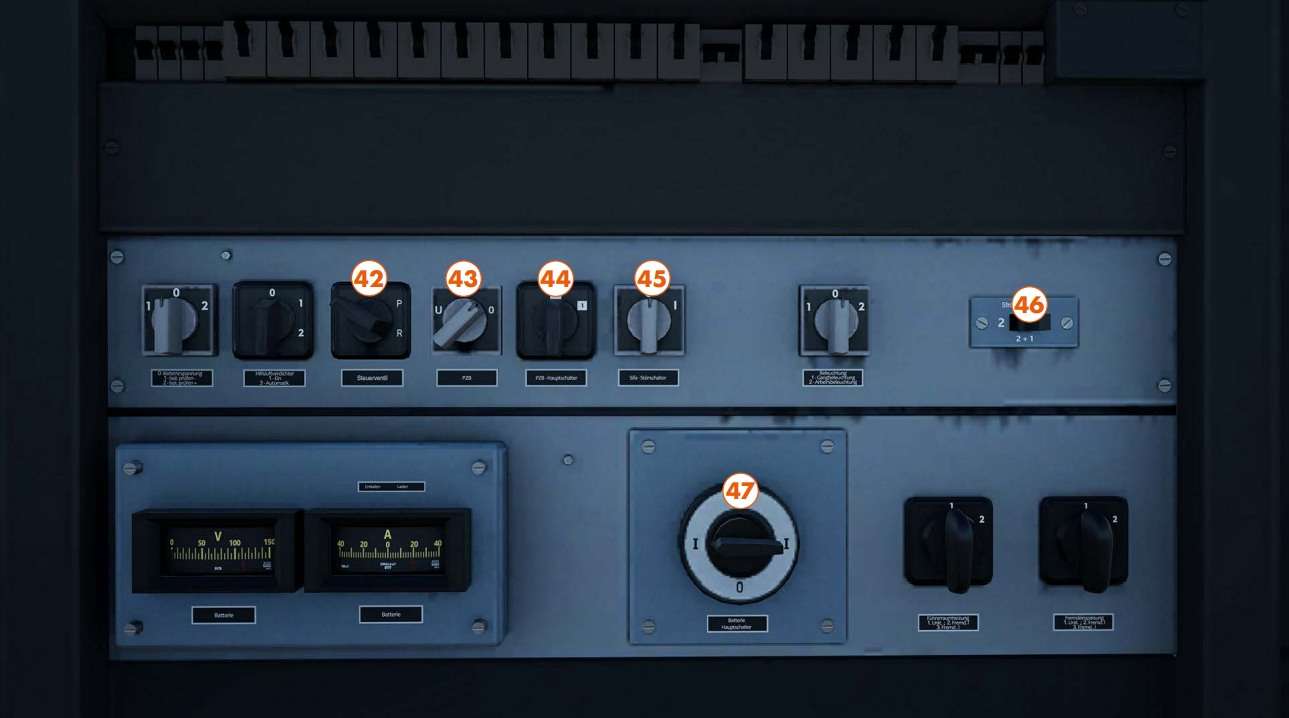
- 42 – Brake Selector Switch
- 43 – PZB Mode Switch
- 44 – PZB Isolation Switch
- 45 – SIFA Isolation Switch
- 46 – Pantograph Selector Switch
- 47 – Battery Switch
Procedures & Unique Features
Throttle Control
- Unlike most locomotives, both in Germany and overall, the main throttle on the DB BR 143 acts much more like a built-in speed set selector; instead of manually managing power, and setting AFB, each notch on the 143’s throttle is set to different speeds in 10 km/h increments between 0 and 120 km/h.
- Behind the scenes, this speed selector is automatically cycling through the tap changer, running up and down the 31 available notches of power.
- If you wish to have manual control, without the speed being automatically set, move the Speed Selector to On, and then use the Auxiliary control to manually cycle the tap changer, you can see this number increase and decrease on the digital display in front of you.
- Auxiliary control can be useful for applying small amounts of power during shunting/coupling procedures, and it can also let you push beyond the 120 km/h speed limit should you wish to.
- Lastly, you can also control how much power is applied by using the Force Selector, this will limit or even boost the available tractive effort for finer control and additional pulling power when needed.
Other Bits & Bobs
- To enable the train brakes, you must first ensure that the Brake Key has been turned on to cut them in.
- The headlights and red tail lights share the same controls, move the outer light switches up for white headlights, and down for red tail lights.
Changing PZB Mode
- Make sure that the locomotive is stationary, and the PZB Isolation Switch is set to Off.
- Set the desired PZB Mode by moving the PZB Mode Switch to “U”, “M” or “O” – this switch is found in the main corridor between the 2 cabs.
- Re-enable PZB with the PZB Isolation Switch.
- If the total BrH (braked weight percentage) is less than or equal to 65, set the PZB Mode to “U”, if the BrH exceeds 65 but is less than 111, set the PZB Mode to “M”, otherwise set the PZB Mode to “O”.
- In Timetable Mode, the correct PZB Mode for your train should be automatically selected.
Be the first to comment