
Lner BR Class 801 Azuma
Overview
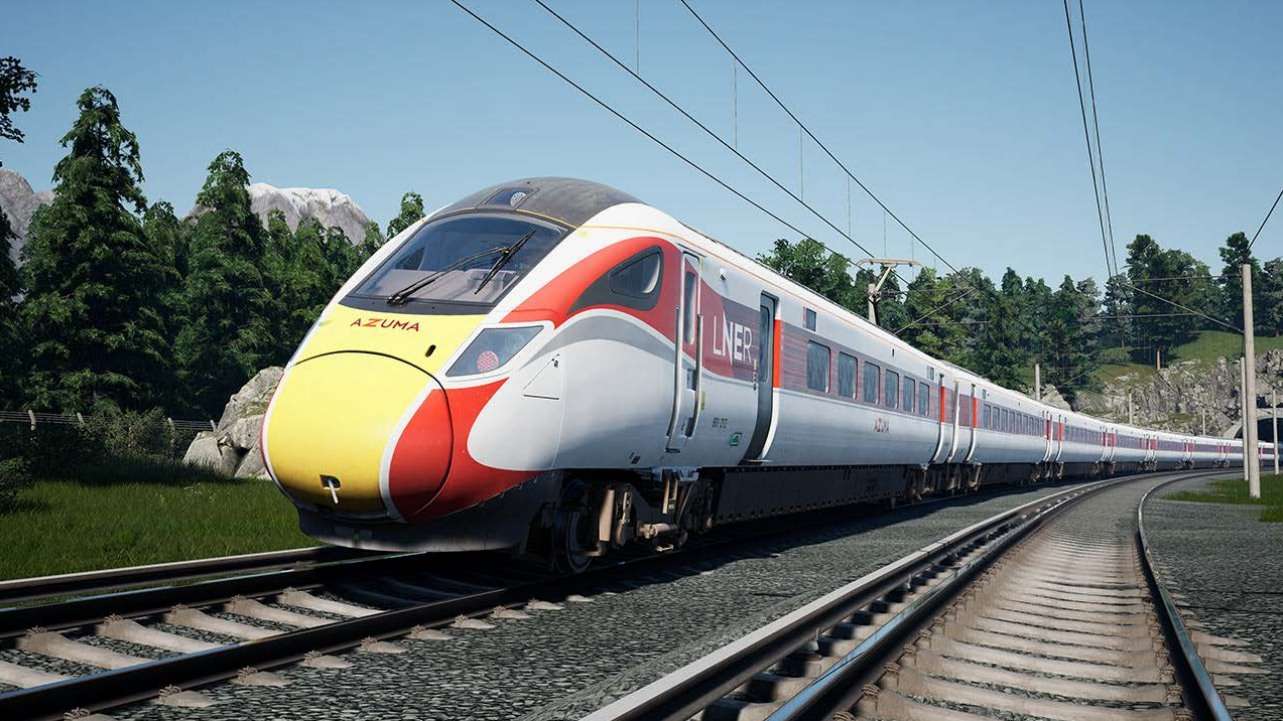
It’s been “all change” for inter-city travel throughout the UK over the past several years, spearheaded by the introduction of the state-of-the-art AT300, a high-speed platform of trains which was designed to modernise fleets on the Great Western and North Eastern fronts. Introduced in 2009 initially as the Hitachi Super Express, the new trains would replace the iconic HST and Class 91s and usher in a new era for the UK. The first of the “Intercity Express Programme” trains entered service in 2017, and LNER’s Azuma fleet of Class 801s would take their first passengers 2 years later.
Named the “Azuma” (Japanese for “East”), the fleet quickly became the flagship for LNER’s express services, being welcomed onto every new route with fanfare and supported by artwork from the great railway illustrator, Tom Connell. Comprising of 2 subclasses, the Class 801s can serve in 5, 9 or 10-car formations, and operate the bulk of services on LNER’s electrified network, being only fitted with a single backup diesel engine for shunting and emergency use only.
- Manufacturer: Hitachi Rail
- Build Location: Newton Aycliffe, England
- Build Date: 2017-2020
- Number Built: 42 sets
- Power Type (AC): 25kV AC OHLE
- Backup Prime Mover: 1× MTU 12V 1600 R80L
- Coaches: 5-car (801/1)
- Coaches: 9-car (801/2)
- Capacity (801/1): 302 seats
- Capacity (801/2): 611 seats
- Length (801/1): 129.7 Metres (425 ft)
- Length (801/2): 233.7 Metres (766 ft)
- Top Speed: 125mph (200 km/h)
Lner BR Class 801 Azuma Cab – 1/3

- 1 – Headlights Switch
- 2 – Headlight Indicator
- 3 – Hazard Lights Button
- 4 – HVAC Fan Speed Switch
- 5 – HVAC Mode Switch
- 6 – HVAC Temperature Switch
- 7 – Downlighter Button
- 8 – Cab Central Light Button
- 9 – Reading Light Switch
- 10 – Desk Illumination Switch
- 11 – Reverser
- 12 – Master Key
- 13 – Power Handle
- 14 – Snow Brake Button
- 15 – Emergency Brake Plunger
- 16 – Train Door Control Button
- 17 – Door Close Interlock Button
- 18 – Left Doors Release Buttons
- 19 – Guard’s Signal Button
- 20 – SPAD Acknowledge Button
- 21 – Overspeed Button
- 22 – AWS Brake Acknowledge Button
- 23 – Train Stop Override Button
- 24 – TPWS Brake Release Button
- 25 – Driver Reminder’s Appliance (DRA)
Lner BR Class 801 Azuma Cab – 2/3
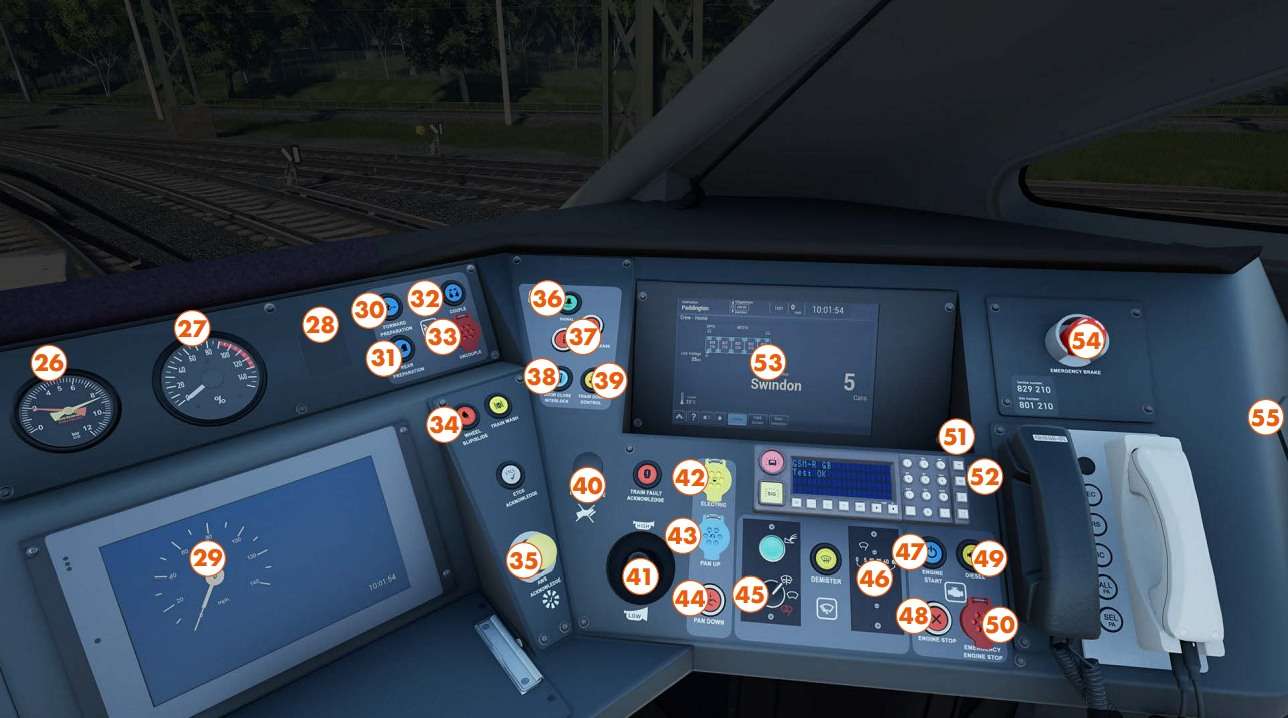
- 26 – Main Resevoir and Brake Cylinder Gauge
- 27 – Braking Effort Gauge
- 28 – AWS Sunflower
- 29 – Speedometer
- 30 – Forward Preparation Button
- 31 – Rear Preparation Button
- 32 – Couple Button
- 33 – Uncouple Button
- 34 – Wheel slip/slide Button
- 35 – AWS Acknowledge Plunger
- 36 – Guard’s Signal Button
- 37 – Right Doors Release Button
- 38 – Doors Close Interlock
- 39 – Train Door Control Button
- 40 – DSD Override Button
- 41 – Horn Lever
- 42 – Electric Mode Button
- 43 – Pantograph Up Button
- 44 – Pantograph Down Button
- 45 – Windscreen Wiper Position Switch
- 46 – Windscreen Wiper Speed Switch
- 47 – Backup Diesel Start Button
- 48 – Backup Diesel Stop Button
- 49 – Backup Diesel Mode Button
- 50 – Backup Emergency Engine Stop Button
- 51 – GSM-R On/Off Button
- 52 – GSM-R Contact Signaller Button
- 53 – Train Management System (TMS)
- 54 – Emergency Brake Plung
- 55 – Reading Light Switch
Lner BR Class 801 Azuma Cab – 3/3
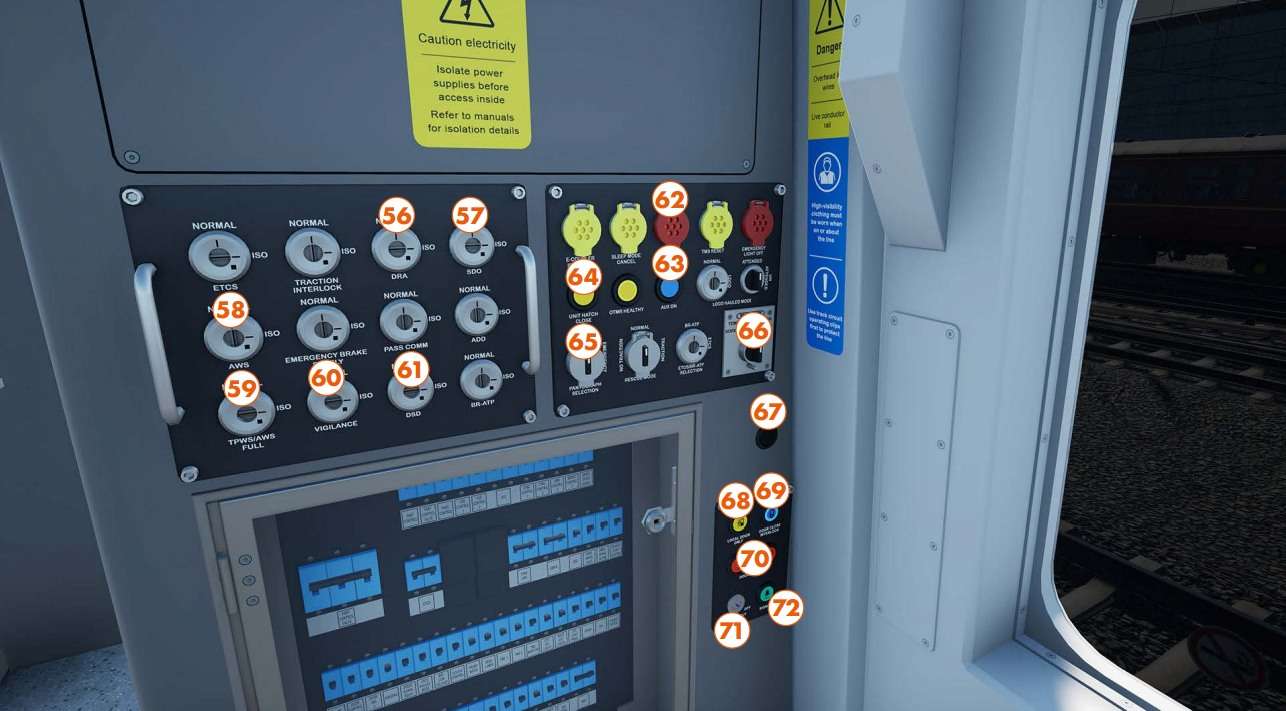
- 56 – DRA Isolation Switch
- 57 – SDO Isolation Switch
- 58 – AWS Isolation Switch
- 59 – TPWS Isolation Switch
- 60 – Vigilance Isolation Switch
- 61 – DSD Isolation Switch
- 62 – Auxiliary Off Button
- 63 – Auxiliary On Button
- 64 – Unit Hatch Close Button
- 65 – Pantograph Selection Switch
- 66 – TPWS Temorary Isolation Switch
- 67 – Cab Light Button
- 68 – Local Door Only Button
- 69 – Door Close Interlock Button
- 70 – Left Doors Release Button
- 71 – Control Panel Active Switch
- 72 – Guard’s Signal Button
Procedures & Unique Features
The Emergency Diesel Engine
- Unlike the fully bi-mode Class 800 and 802, the Class 801 is regarded as an EMU, however, it still features a single rescue engine that in reality is reserved for emergency use only.
- To turn on Diesel Mode you must do the following:
- Be stationary with the Reverser in Neutral.
- Press and hold the Engine Start Button for 10 Seconds.
- Press and hold the Diesel Button for 10 Seconds.
- If the Pantograph is raised, press the Pan Down Button until it has lowered.
- Note, depending on your formation, as only a single diesel engine is present your performance will be severely limited, a 9-car 801 does not move in a hurry!
The Train Management Screen (TMS)
- Within the TMS, there are several things you can monitor and change while on your journey, firstly, you can adjust the brightness between 5 different levels using the light button.
- It is able to tell you on the main screen what the next station stop and overall destination of your train is, although by pressing the up arrow, you can toggle the Next Stop Reminder to Off.
- The main screen will also show you all the door statuses throughout the train, and pressing on the question mark will bring up the key, telling you what each colour means, for example, doors in red are unlocked or open.
- When pressing the up arrow, you can also click on the following screens:
- Traction Status will show you which pantographs are raised, as well as the line volts and Traction Motor torque.
- Brake Status will show you the overall Main Reservoir pressure, as well as the Brake Cylinder pressure in every coach.
- Panto Selection will let you choose which pantograph you want to use, if one is already raised, press the Pan Down Button in the cab, then on the TMS, press the Pan Select Button and then Confirm.
- If you are on any page, Home will return you back to the main screen.
- The Dark Screen button will turn off the TMS, tapping anywhere on the screen will wake it back up Coupling and Uncoupling.
- As is common with a lot of high-speed stock, the coupler on the Class 801 is hidden behind a nose cover.
- To reveal the coupler so you can perform a coupling procedure, on both units you must have the Master Key in, and the Reverser in neutral, then press the Forward Preparation Button to open each nose.
- Once you’ve drawn up and physically coupled to another unit, press the Couple button for X seconds.
- To uncouple, press the Uncouple button for X seconds and then slowly pull away from the other unit.
- To re-cover the coupler, press the Unit Hatch Close Button on the rear wall of each unit.
Other Bits & Bobs
- The BR Class 801 has a dual-volume horn functionality in similar respects to the BR Class 395, designed to play louder or quieter automatically depending on the context the train is in.
- When the Master Key is in and the train is between 0 and 100 mph, the horns will sound with 6.5 bar of air pressure.
- When the Master Key is out, or the train is above 100 mph, the horns will sound with 10 bar.
Be the first to comment