
Shadow Swordsman Class
As one of the strongest melee DPS classes in the test version, Shadow Swordsman excels in PVE rankings and has outstanding performance in PVP as well. It can be said that it is versatile for both modes. However, between the two special Specs, “Duel” requires more precise control and knowledge, and it can be challenging to achieve good DPS if the player doesn’t really optimize their rotation. Therefore, it is recommended that players with less knowledge of the class avoid using it at the beginning. This guide provides a detailed gameplay base for Shadow Swordsman, and any errors are welcome to be corrected.
First of all, Shadow Swordsman is divided into two special specs, which are also the two main playstyles: “Cunning” and “Duel”. “Cunning” focuses on sustained DPS, making it more suitable for PVE. Cunning is relatively easy to play, as long as you apply poison DOT for increased damage, and then follow up with continuous DPS.
“Duel” focuses on burst DPS, making it more suitable for PVP. Duel requires controlling the “Roulette Showdown”: Use high DMG Skills when the roulette points at a weakness spot and use skills with low cooldowns on non-weakness spots to keep pushing the pointer clockwise. Poor rotation control can lead to the wrong usage of skill priorities on weakness spots, since they can be easily skipped during fights. It will cause the DPS to drop significantly low. Therefore, “Duel” requires more experience to achieve good numbers in PVE. Those who master it will be unparalleled assassins, while those who struggle will be seen as dead weight in a party.
Cunning
Rotation:
First, the skill rotation:
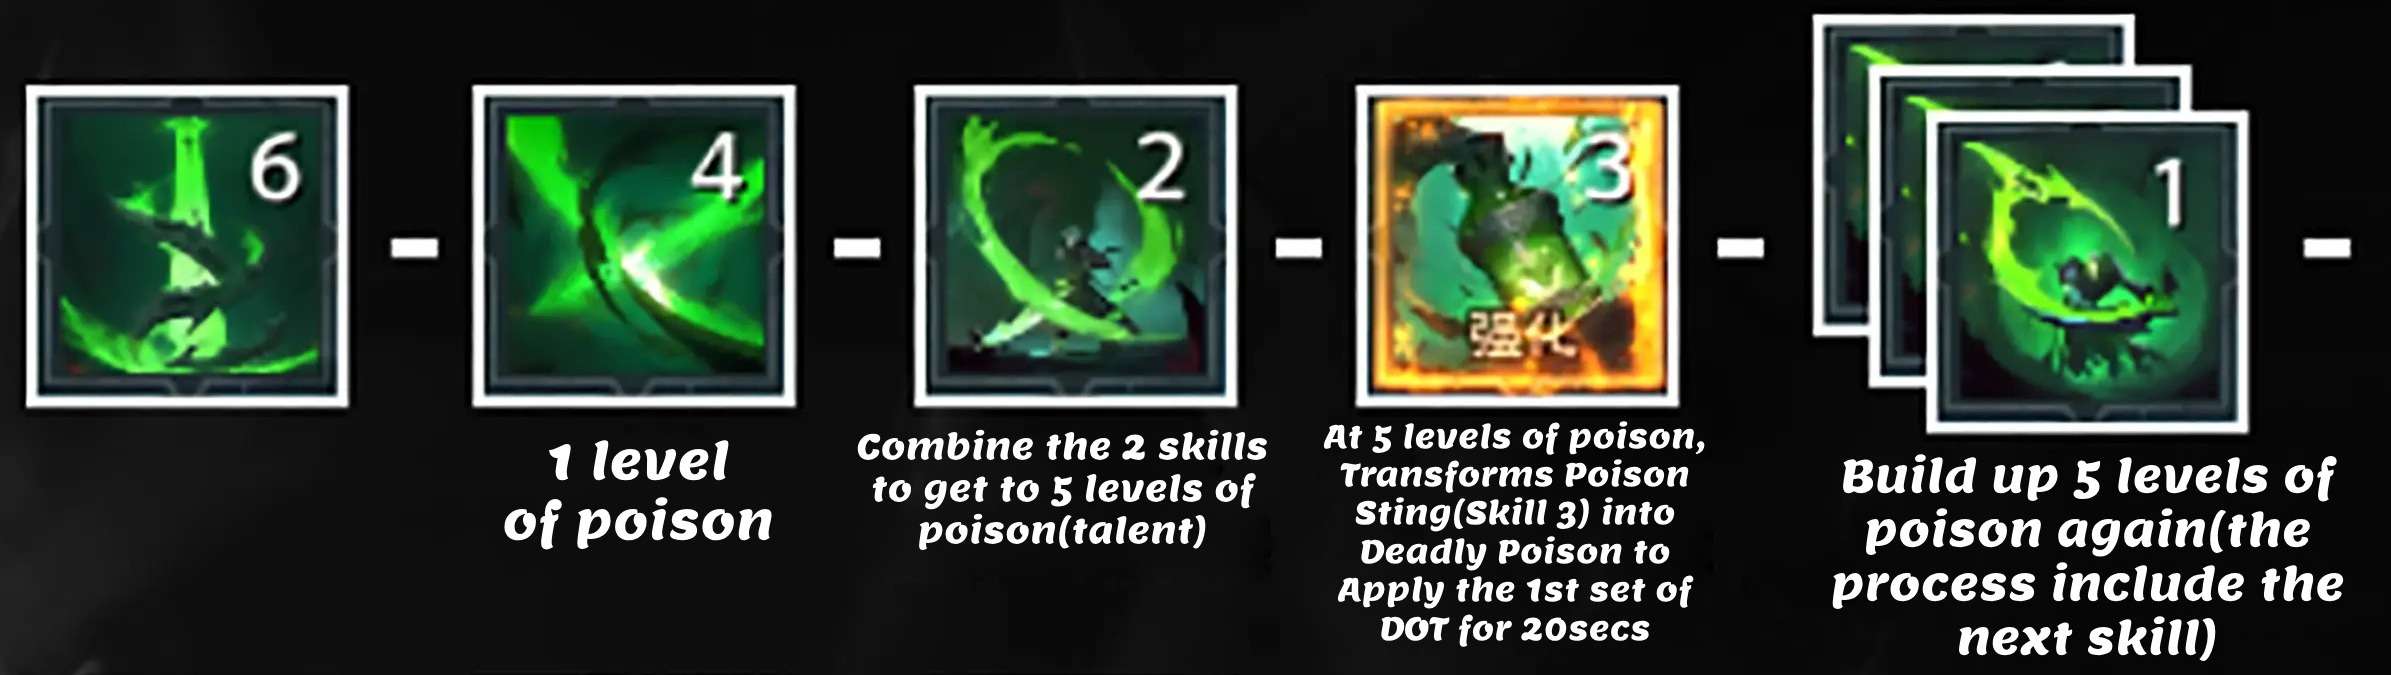
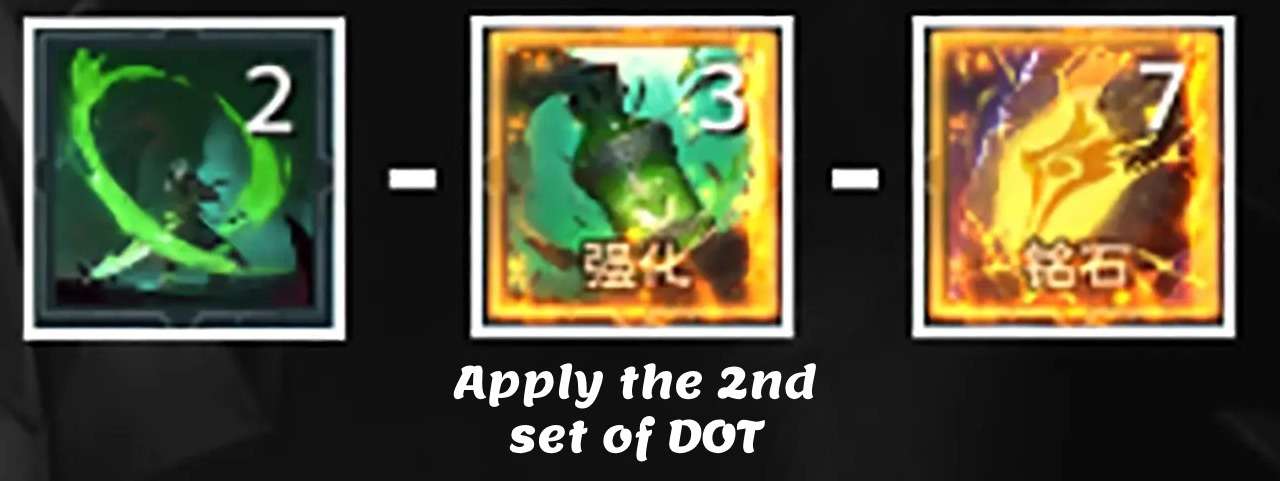
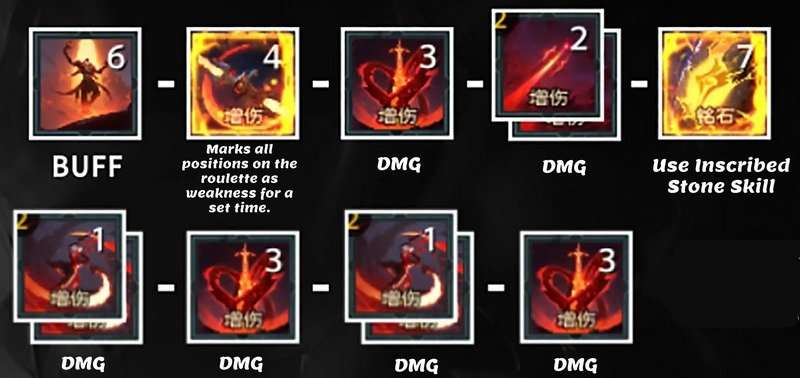
After applying two sets of DOT, use the Inscribed Stone Skill and take advantage of the remaining time of Skill 6’s Buff for full DPS output.
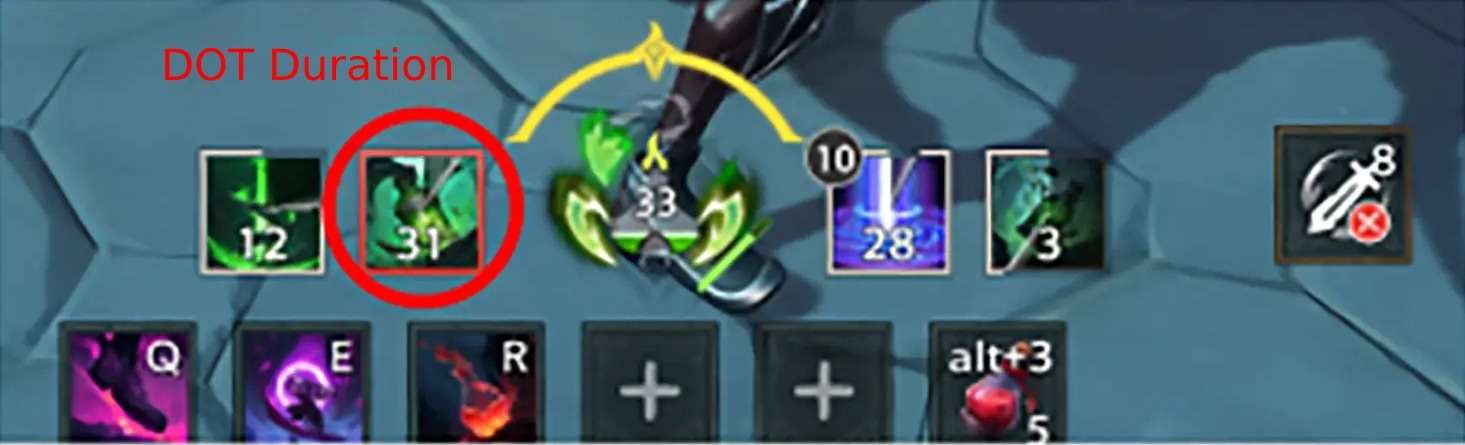
Note: During Inscribed Stone Skill, Deadly Poison has increased damage and extends its duration by 2 secs. Plus, Skill 1 grants an additional level of poison without consuming Energy. Therefore, the rotation during Inscribed Skill should be as follows:

Build some levels of Poison with skills 1 & 2, and consume them with Poison Sting (skill 3). Poison Sting consumes 2 levels of poison per use, so make sure you don’t go above 4 levels, otherwise Skill 3 will change to Deadly Poison. Pay attention to your energy and consider saving it for priority skills. (2 > 3 > 1).
The duration of Deadly Poison’s DOT cannot go above 40 secs. So, do not use Deadly Poison when you have 20+ secs of DOT. Instead, keep using Poison Sting for DPS, before you have to reset your DOT.
When Skill 4 is off cooldown, use the combo (4 -> 2 -> 3) to quickly apply a set of DOT. (You don’t want to over-gain more than 5 levels of poison. So, make sure you use all of it before committing to this combo.)
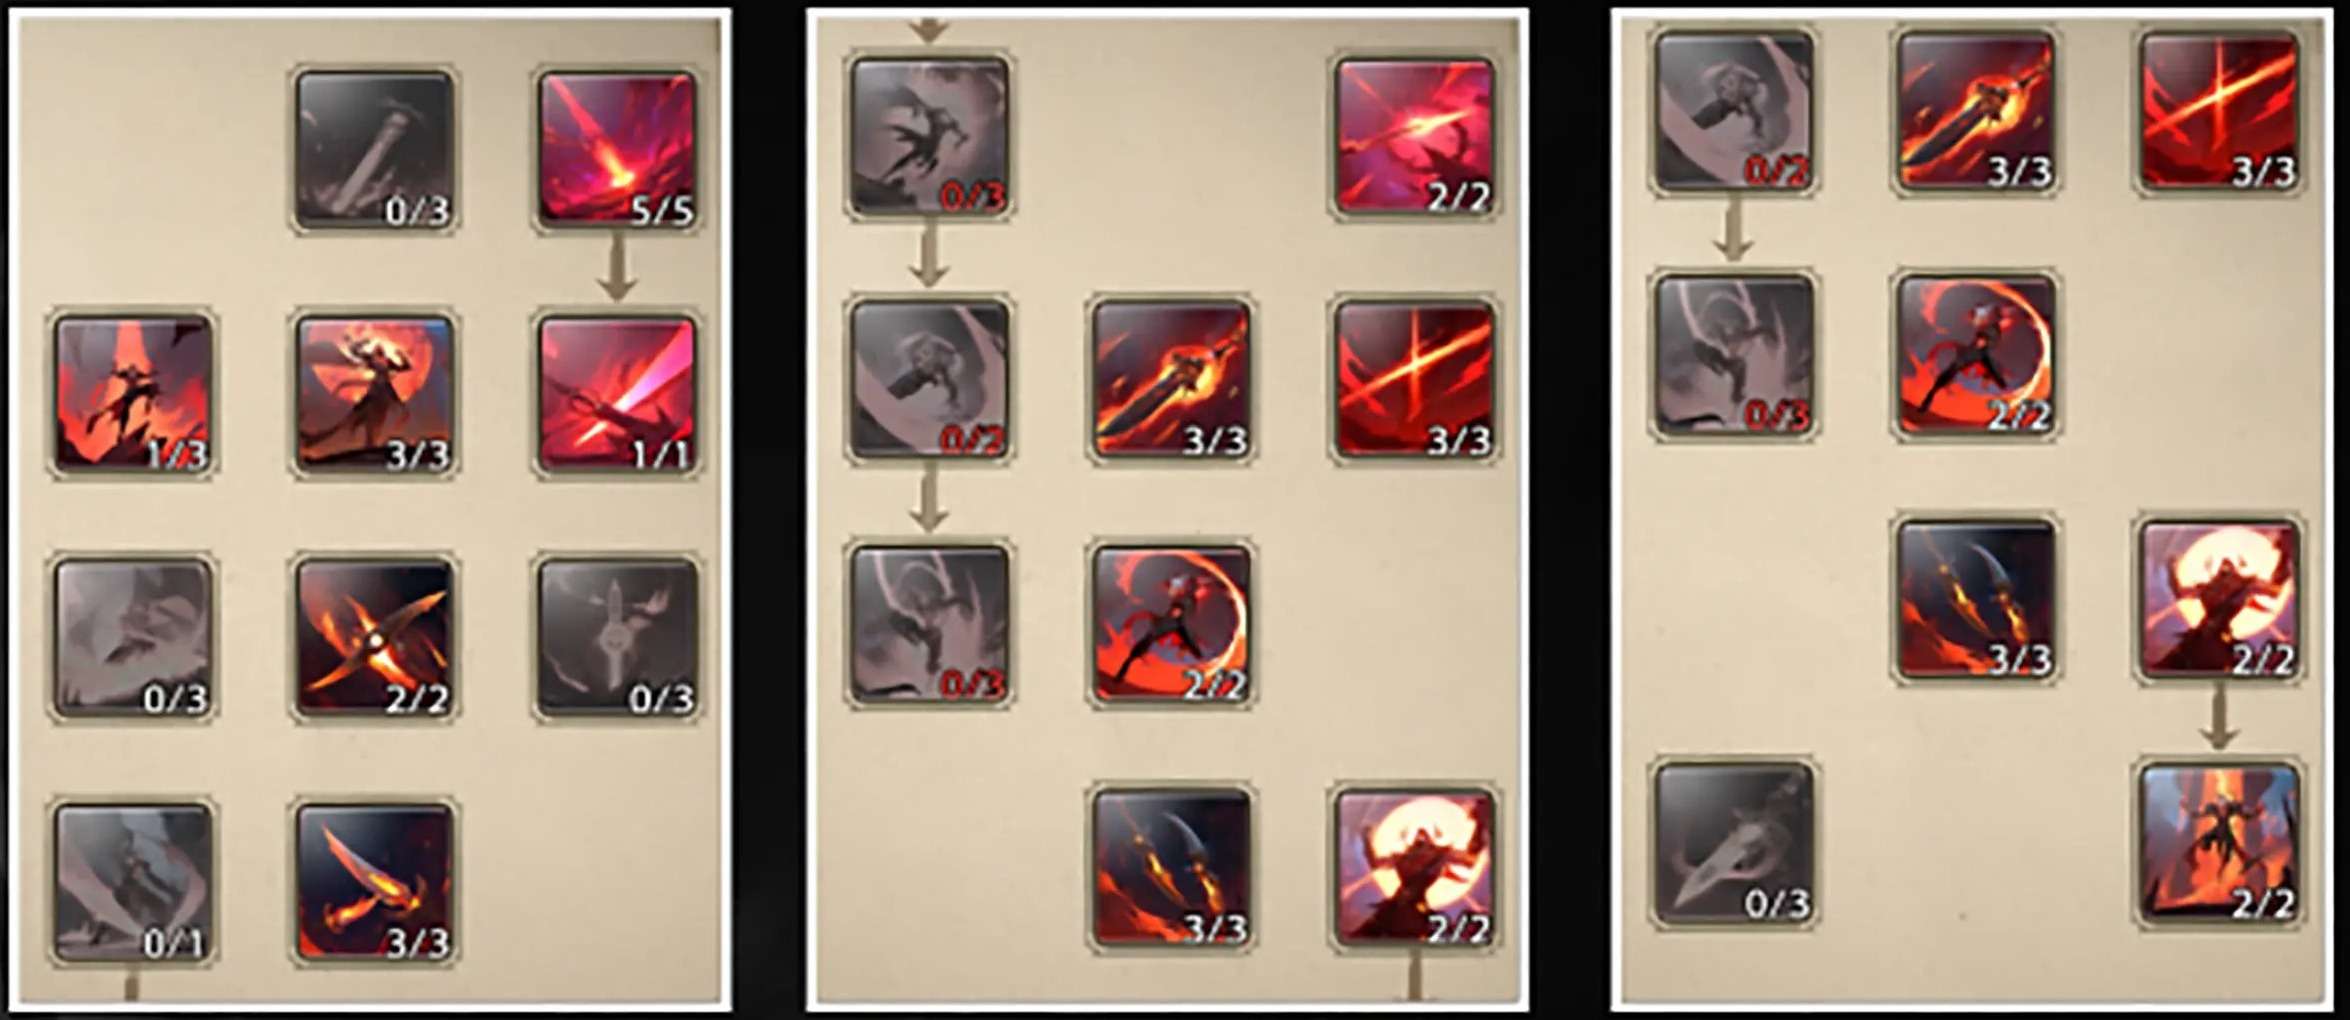
Talents:
Recommended Build:
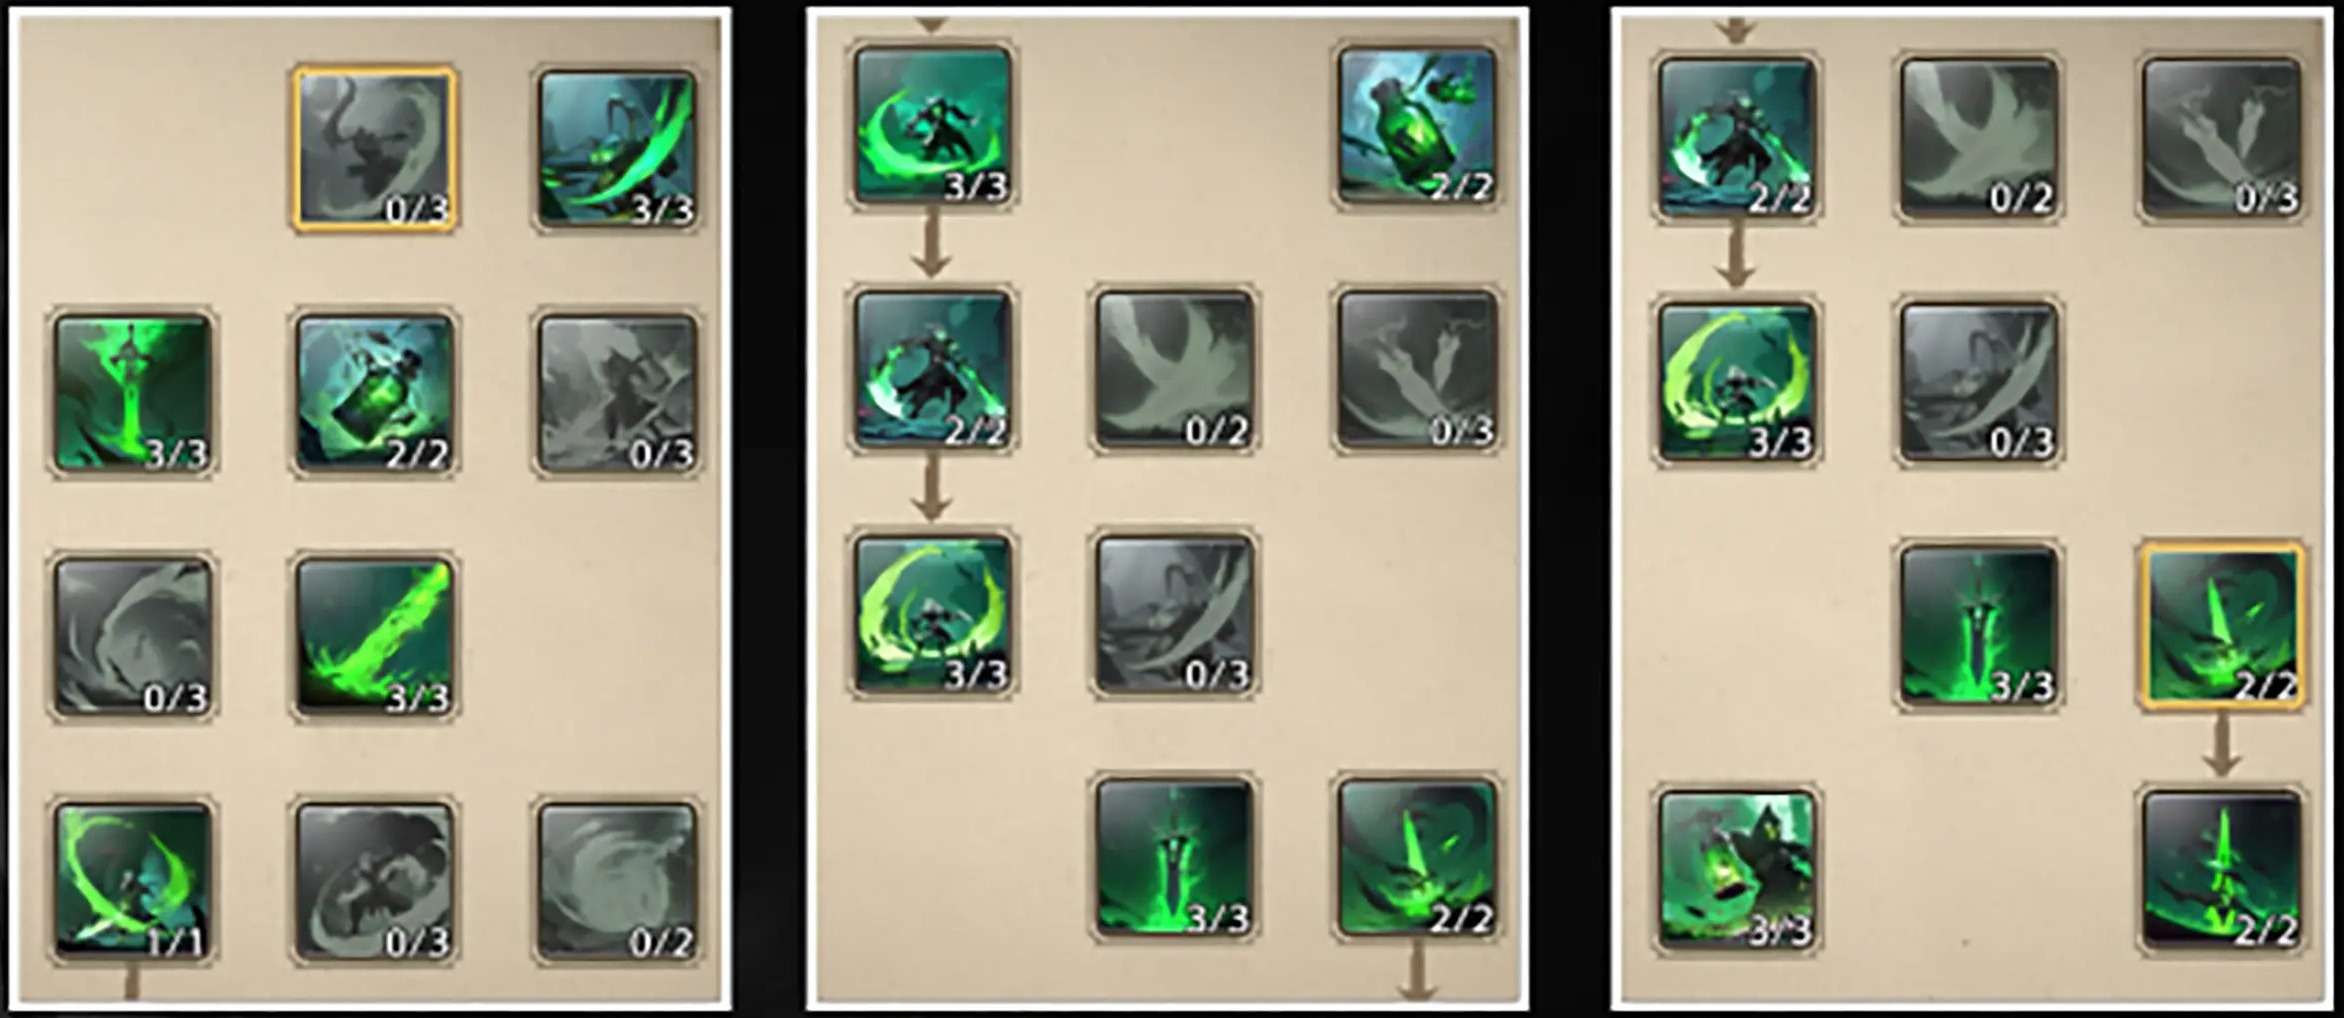
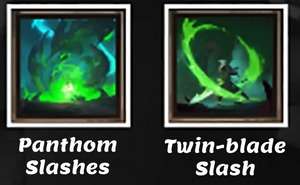
Note: It’s recommended to use “Twin-blade Slash” over “Phantom Slashes” because it can directly give 2 levels of poison, making rotation easier and better.
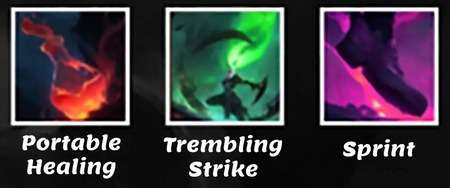
Recommended Ultimates for PVE:
- Portable Healing
- Trembling Strike (Boss Mechanics)
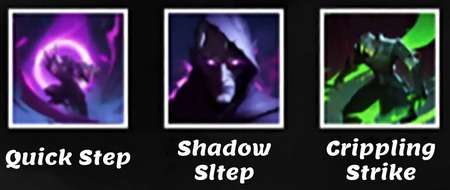
- Sprint/Quick Step

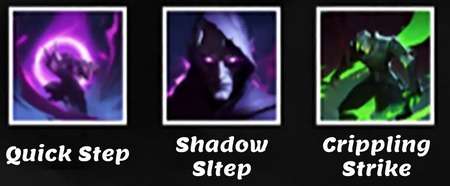
Recommended Ultimates for PVP:
- Quick Step (Positioning)
- Shadow Step (Stealth)
- Crippling Strike (Slow and Heal Reduction)
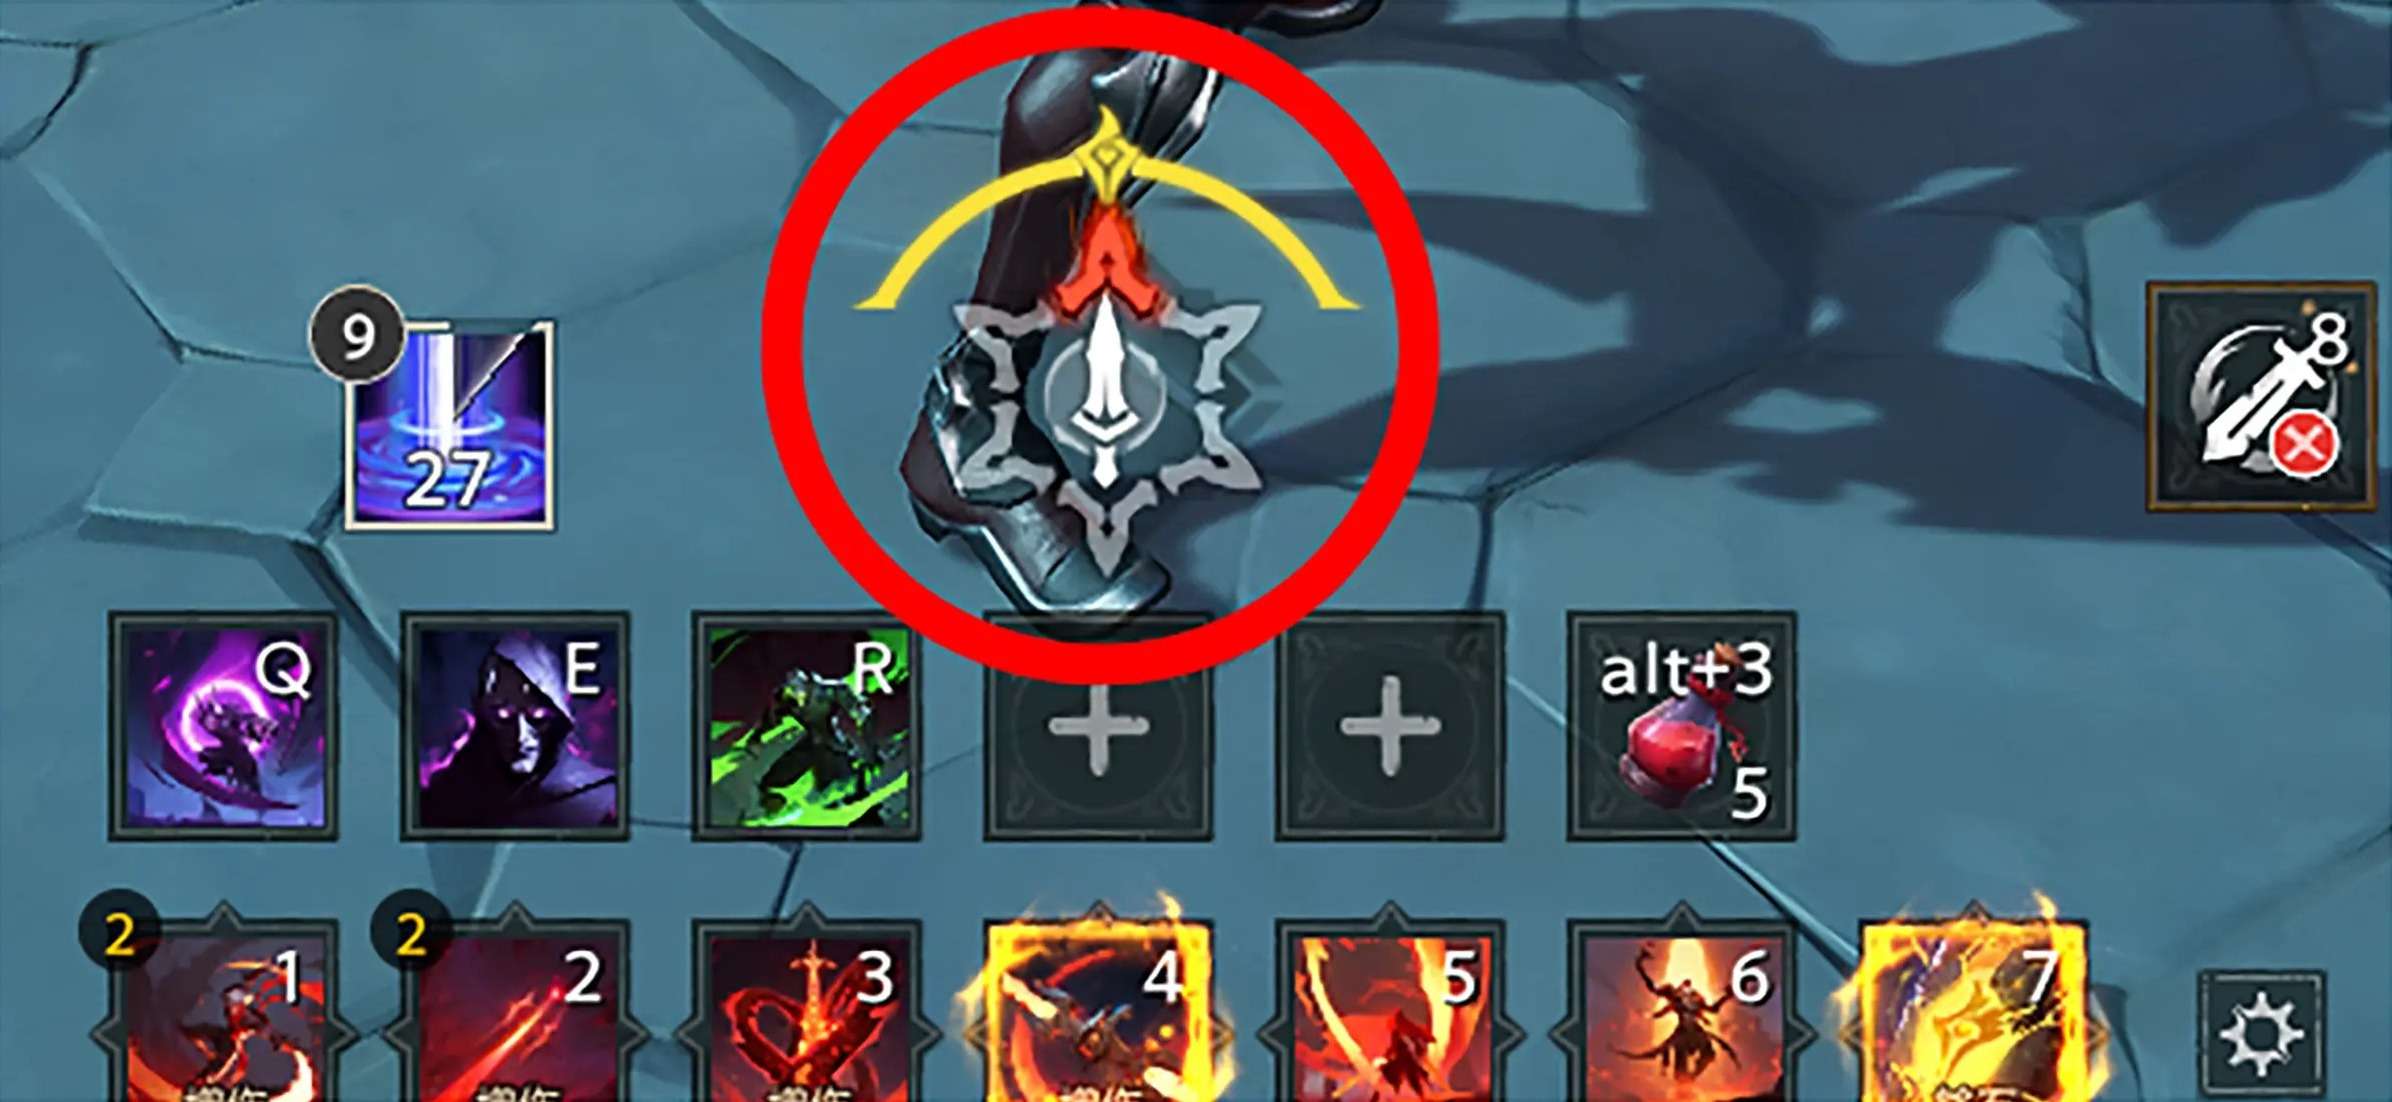
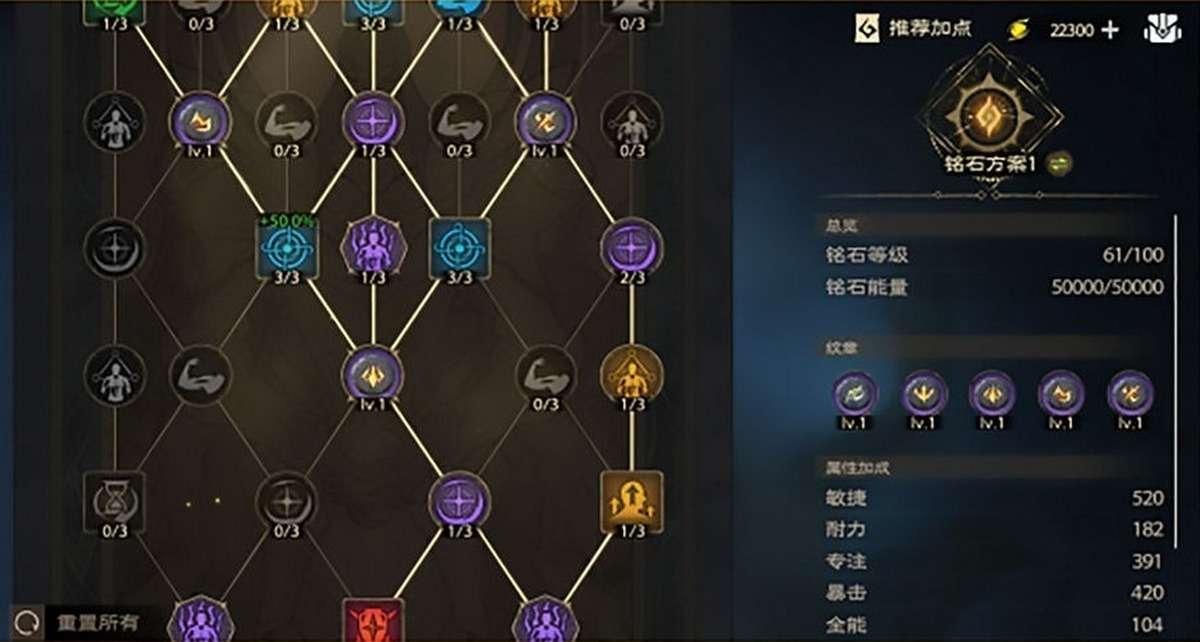
Inscribed Stone:
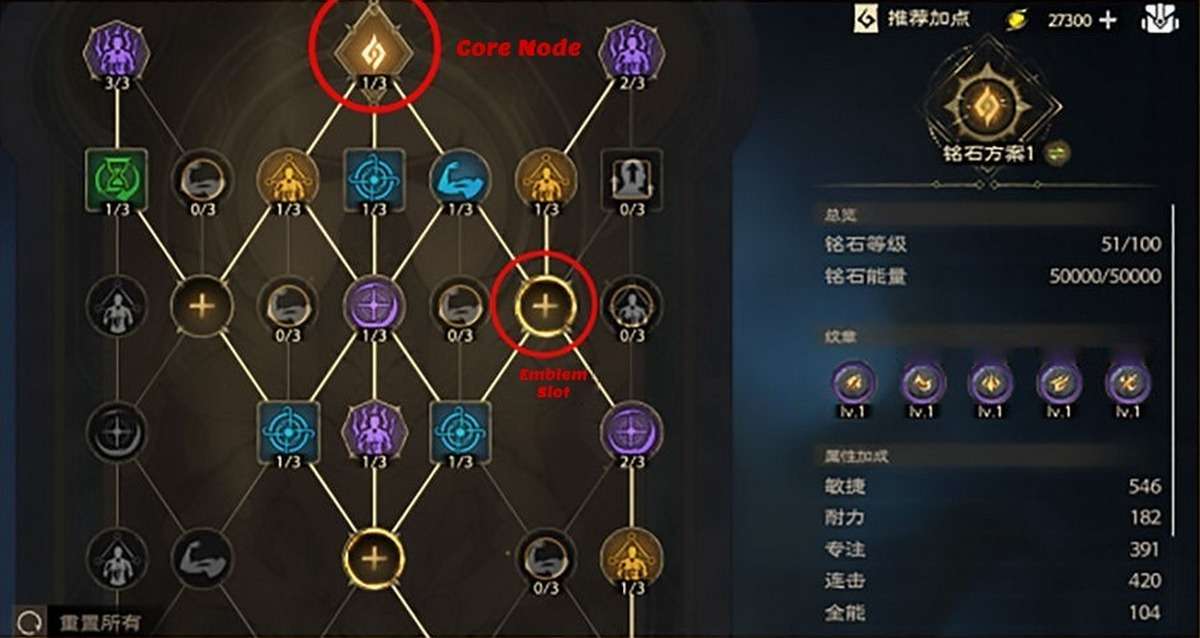
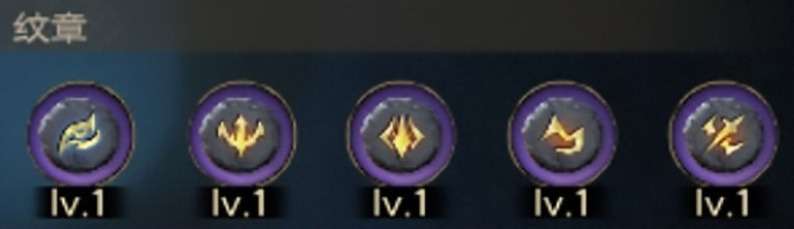
For the inscribed stone, it is recommended to allocate one point in each attribute during the early stages, as you benefit the most from the first level cost. Additionally, we need to prioritize unlocking the core nodes in the center and the five emblem slots, as these will significantly increase combat power.
In the later stages, prioritize fully unlocking the core node, then upgrade according to the following attributes:
- Inscribed Attributes: Resonance > Combo = Specialization Effect > Omni = Cooldown > Agility > Focus
Note: Prioritize Resonance because it enhances the charging efficiency of Inscribed Stone Skill (Skill 7). During battles, we need to pay attention to the charging time of “Skill 7” and try to match it with the cooldown of “Skill 6” (buff). This way, we can maximize the effectiveness of the inscribed stone skill. When the charging time is consistently improved, you no longer need to add points to resonance. At this point, you can choose between “Omni” or “Cooldown”.
- Equipment Attributes: Hit > Resonance > Combo > Specialization Effect > Omni > Cooldown > Agility > Focus
Having an excessive “Hit” attribute is unnecessary. So, you should stop adding it as soon as it reaches the required amount for the current group instances you’re facing.
Duel
Rotation:
The rotation starts once the roulette is pointing at the red weak spot.
Rotate the roulette with Skills 1 & 2, and use priority highlighted skills.
The core of the Duel Spec is: When the arrow points at the red weakness spot, the damage of skills 1-4 will be increased by 40%. Therefore, we need to control the use of Skill 3’s high damage at the weakness spot. Skills 1 and 2 are mainly used to move the pointer on the roulette. When Skill 3 is on cooldown, prioritize Skill 2 to benefit from the weakness spot.
Talents:
Recommended Build:
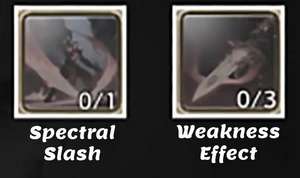
This guide uses “Swift Strike” as Skill 2, which has a fast cooldown and can hold 2 charges, improving the rotation and roulette control.
“Spectral Slash” has a long cooldown but provides more weak spots. You can consider using it together with the “Weakness Effect” talent in the last row.
Recommended Ultimates for PVE:
- Portable Healing + Trembling Strike (Boss Mechanics) + Sprint/Quick Step
Recommended Ultimates for PVP:
- Quick Step (Positioning) + Shadow Step (Stealth) + Crippling Strike (Slow and Heal Reduction)
Inscribed Stone:
In terms of inscription stones and equipment attributes, Duel is very similar to Cunning. Simply change all “Combo” attributes to “Crit” and it’s done.
- Equipment Attributes: Hit > Resonance > Crit > Specialization Effect > Cooldown > Omni > Agility > Focus
Note: Besides Crit, it is highly recommended to build up Cooldown because of the Passive Talent “Fast Duel” which reduces the cooldown of skill 4, allowing you to use it twice within the cooldown of skill 6. The Hit attribute just needs to meet the requirements of the current boss you are facing. Resonance is prioritized until skill 7’s recharging time is roughly matched with skill 6’s cooldown.
That’s all! I really appreciate it if you’ve made it this far. See you in the game!


Be the first to comment