
Contents
Useful Tips and Tricks
Movements
Bunny Hopping (Better Movement Option)
Atlantis’ super jump setup works well, but it can be simplified. All you need to do is double jump, dash a bit before hitting the ground, and jump as soon as possible. The speed gained from the super jump can be preserved by jumping again immidiately after landing in a manner similar to Bunny Hopping (bhop) in Source games like CounterStrike. By alternating super jumps and double jumps, stamina is regenerated quickly enough to bhop as long as necessary.
Demonstrates this technique. With practice, more speed could be conserved between super jumps.
Shows the same route traveled using conventional means. Bhopping isn’t quite twice the speed, but it’s pretty close.
Greatsword Jumping Atacks
I have been levelling colossus (Dont know if it works with other two-handers) and noticed that jumping atacks are pretty good for animation canceling and movement while atacking. So incase smo havent noticed this here is a simple guide. Basically, you can jump atack and cancel that with either another jump and atack or a heavy. Keep in mind you can cancel with heavy at anytime.
Meaning you can cancel the aftercast or even before the atack connects and also heavy has a decent range and great break power.
I have been using either:
- Jump + Atack + Jump Cancel + Atack + Heavy Slam (would work even a split second before hitting the ground).
Or if the enemy is gonna break easily:
- Jump + Atack + Heavy Slam.
Maps / Locations
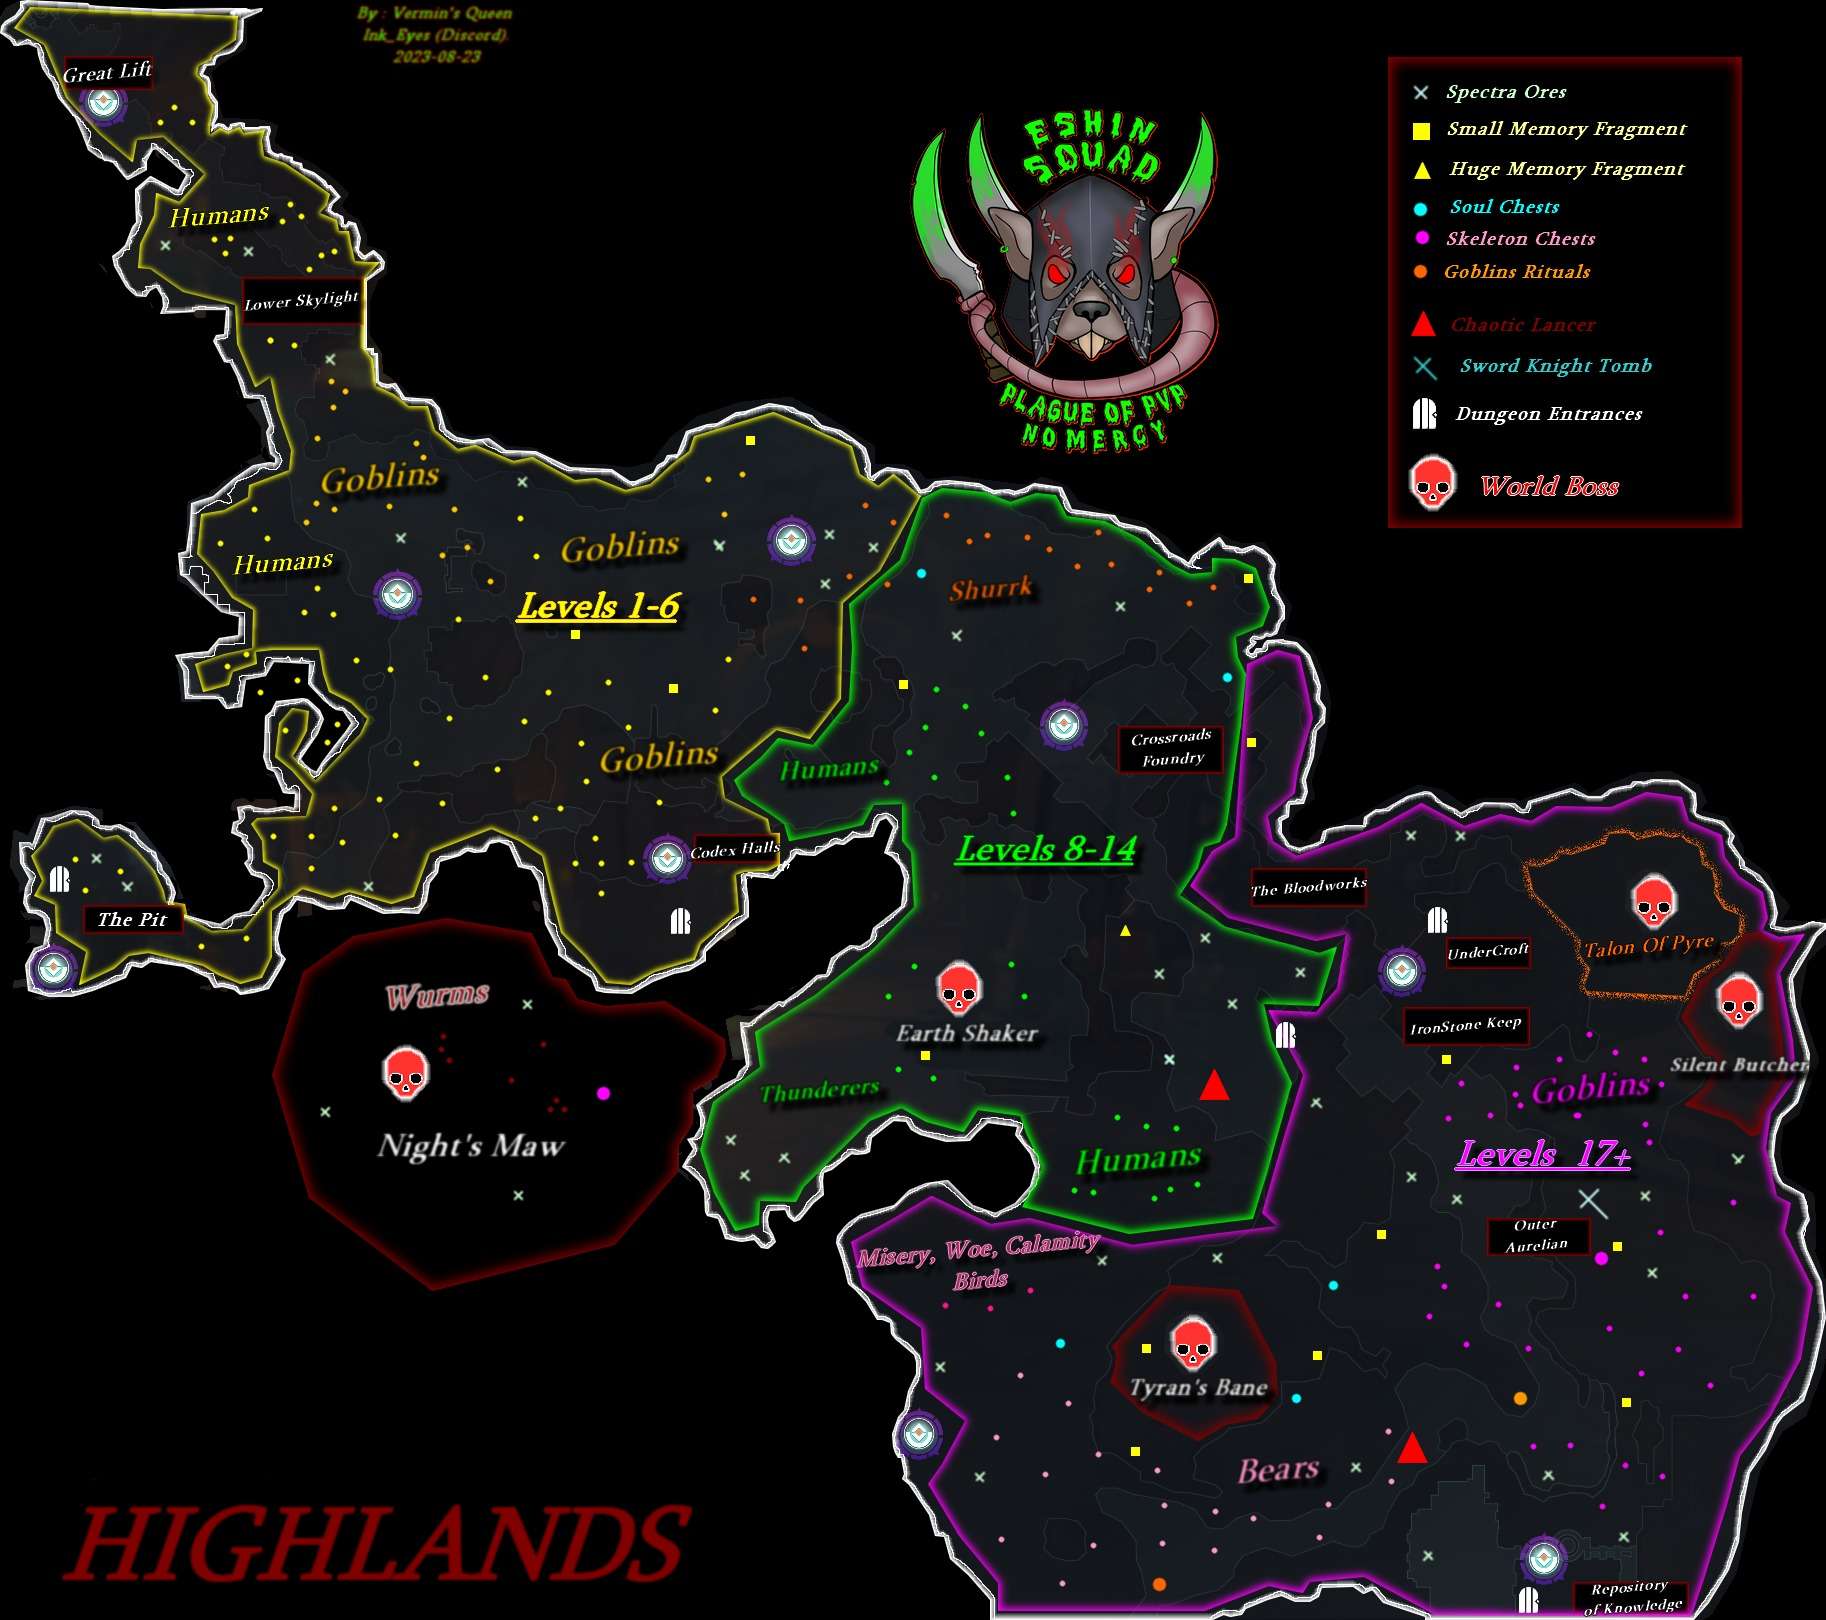
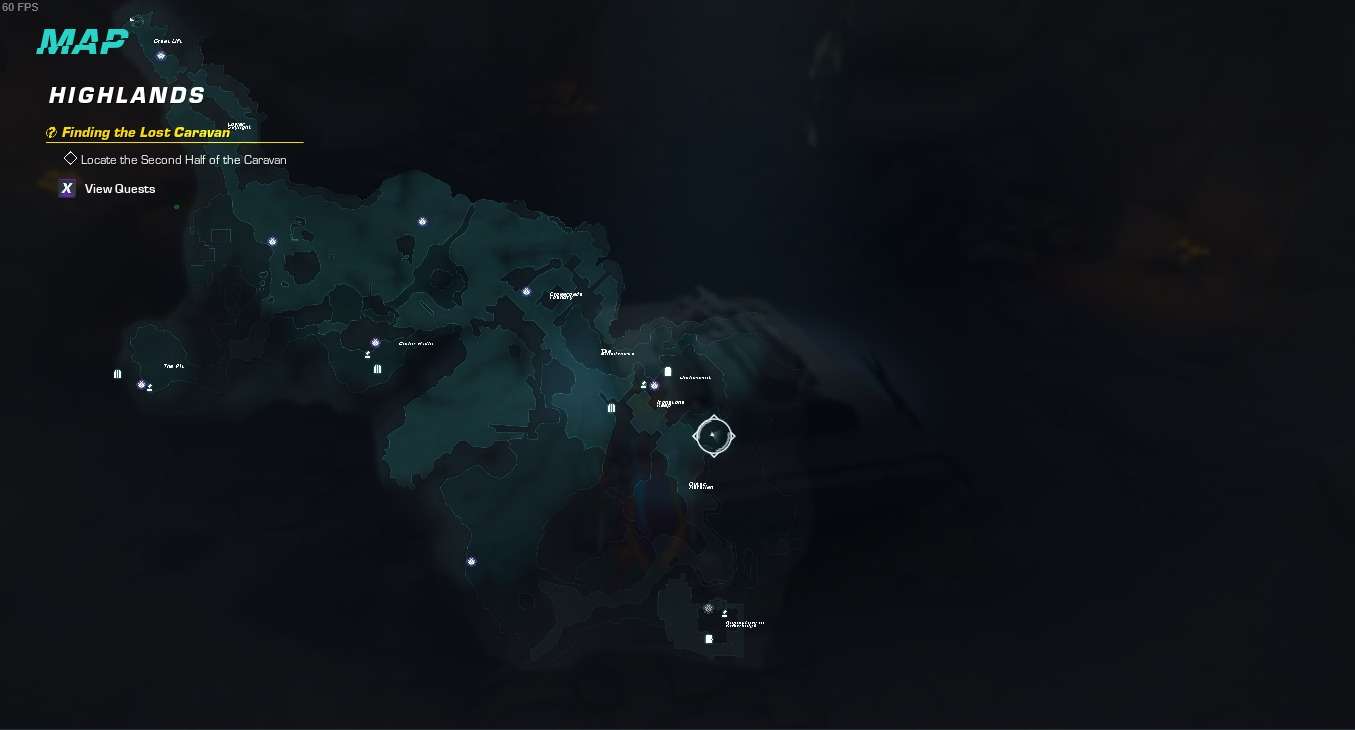
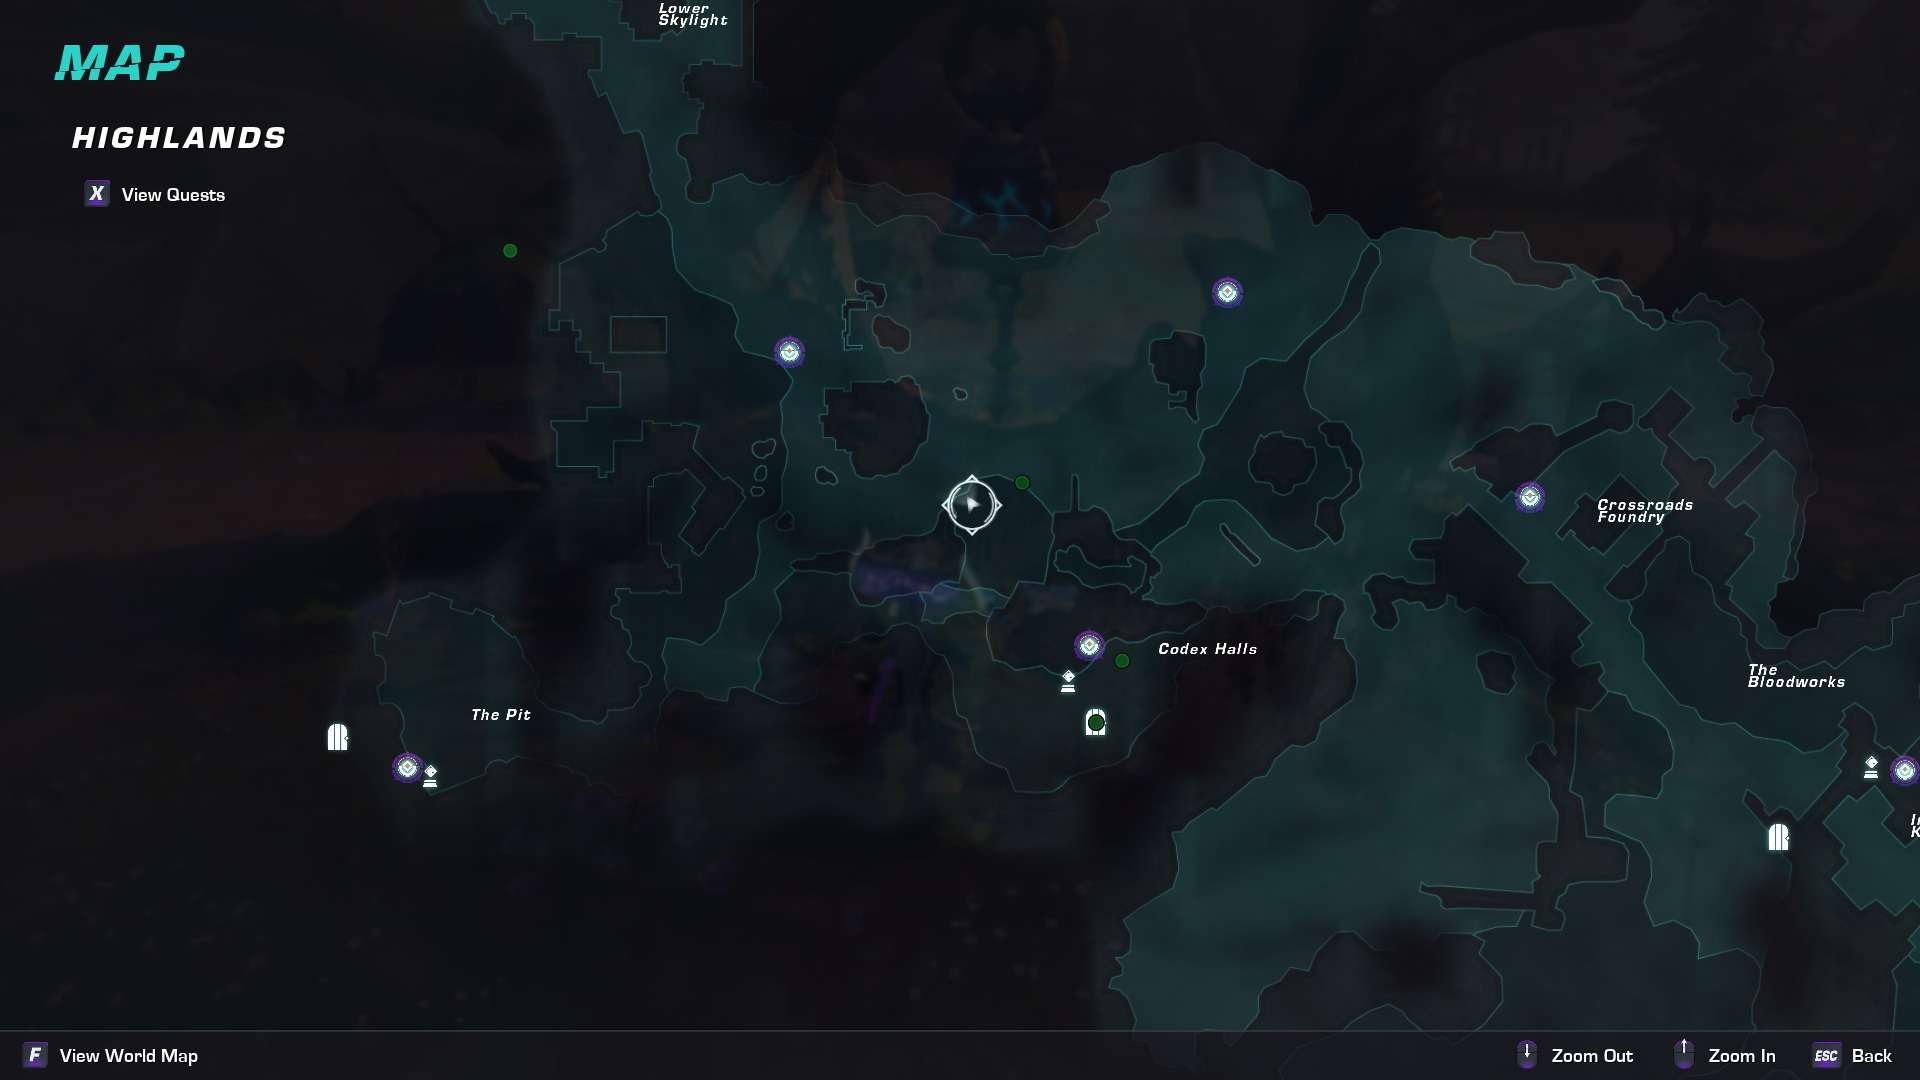
Highlands High Spot
You have the Sens of the direction of Rorona Zoro and you cannot find your travels in the Highlands? Couragous adventurer, you’re Lucky! First the Times, The Eshin Squad accept to share here “Precious” Thing with the stranger, Yes-yes. Look look!
Frostmarch Map
Click to enlarge…

Location of the Stone Kings Tomb
- Teleport to Ironstone Keep.
- Move out to the right side out of the castle.
And then you see a door way with a tent on it, run towards that. And you will see a grave inside.
Click to enlarge…

How to Find The Bell Tree
In case you were struggling like me to find it.
General Tips
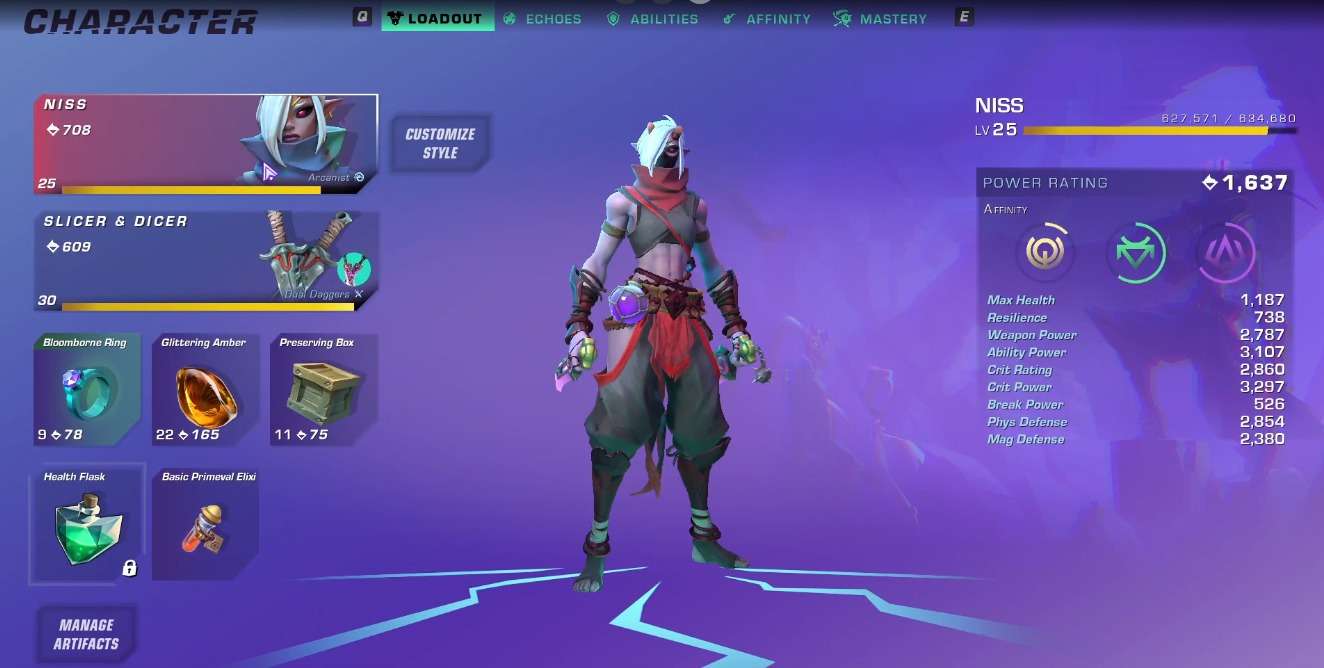
Stats Definition
- Max Health: Increases your Max Health
- Resilience: You have a “Shield” at the bottom left of your screen, you have damage reduction while you have this shield, if it breaks all attacks that hit you staggers you.
- Weapon Power: Increases the Damage of your equipped weapon,and your Equipped Weapons Ability
- Ability Power: Increases the Damage of your Abilities. (1-4 Skills)
- Crit Rating: Crit Chance (Unknown Values)
- Crit Power: Increases the damage of your critical hits.
- Break Power: Increases the Damage you do the enemies resilience/break bars, Once an enemies break bar is broken they take 50% more damage (iirc)
- Phys Def: Increases resistance to physical attacks (Not worth RN)
- Magic Def: Increases resistance to magical attacks (Not worth RN)
Lost Zones and Their Power Level
Power – Zone – Encounter
- 96 – Codex Halls – Codex Halls Expedition
- 206 – Codex Halls – Broodmother S’ilreth
- 361 – The Pit – The Pit Expedition
- 507 – The Pit – The Bloodspawn
- 655 – Codex Halls – The Trial of the Lingering Light
- 752 – Undercroft – Undercroft Expedition
- 929 – Undercroft – Archon Commander
- 1098 – Bloodworks – The Bloodworks Expedition
- 1253 – Bloodworks – The Bloodbore
- 1312 – Undercroft – The Argent Hand
- 1371 – Repository – Repository of Knowledge Expedition
- 1467 – Repository – Ryv’n the Devourer
- 1528 – Repository – The First
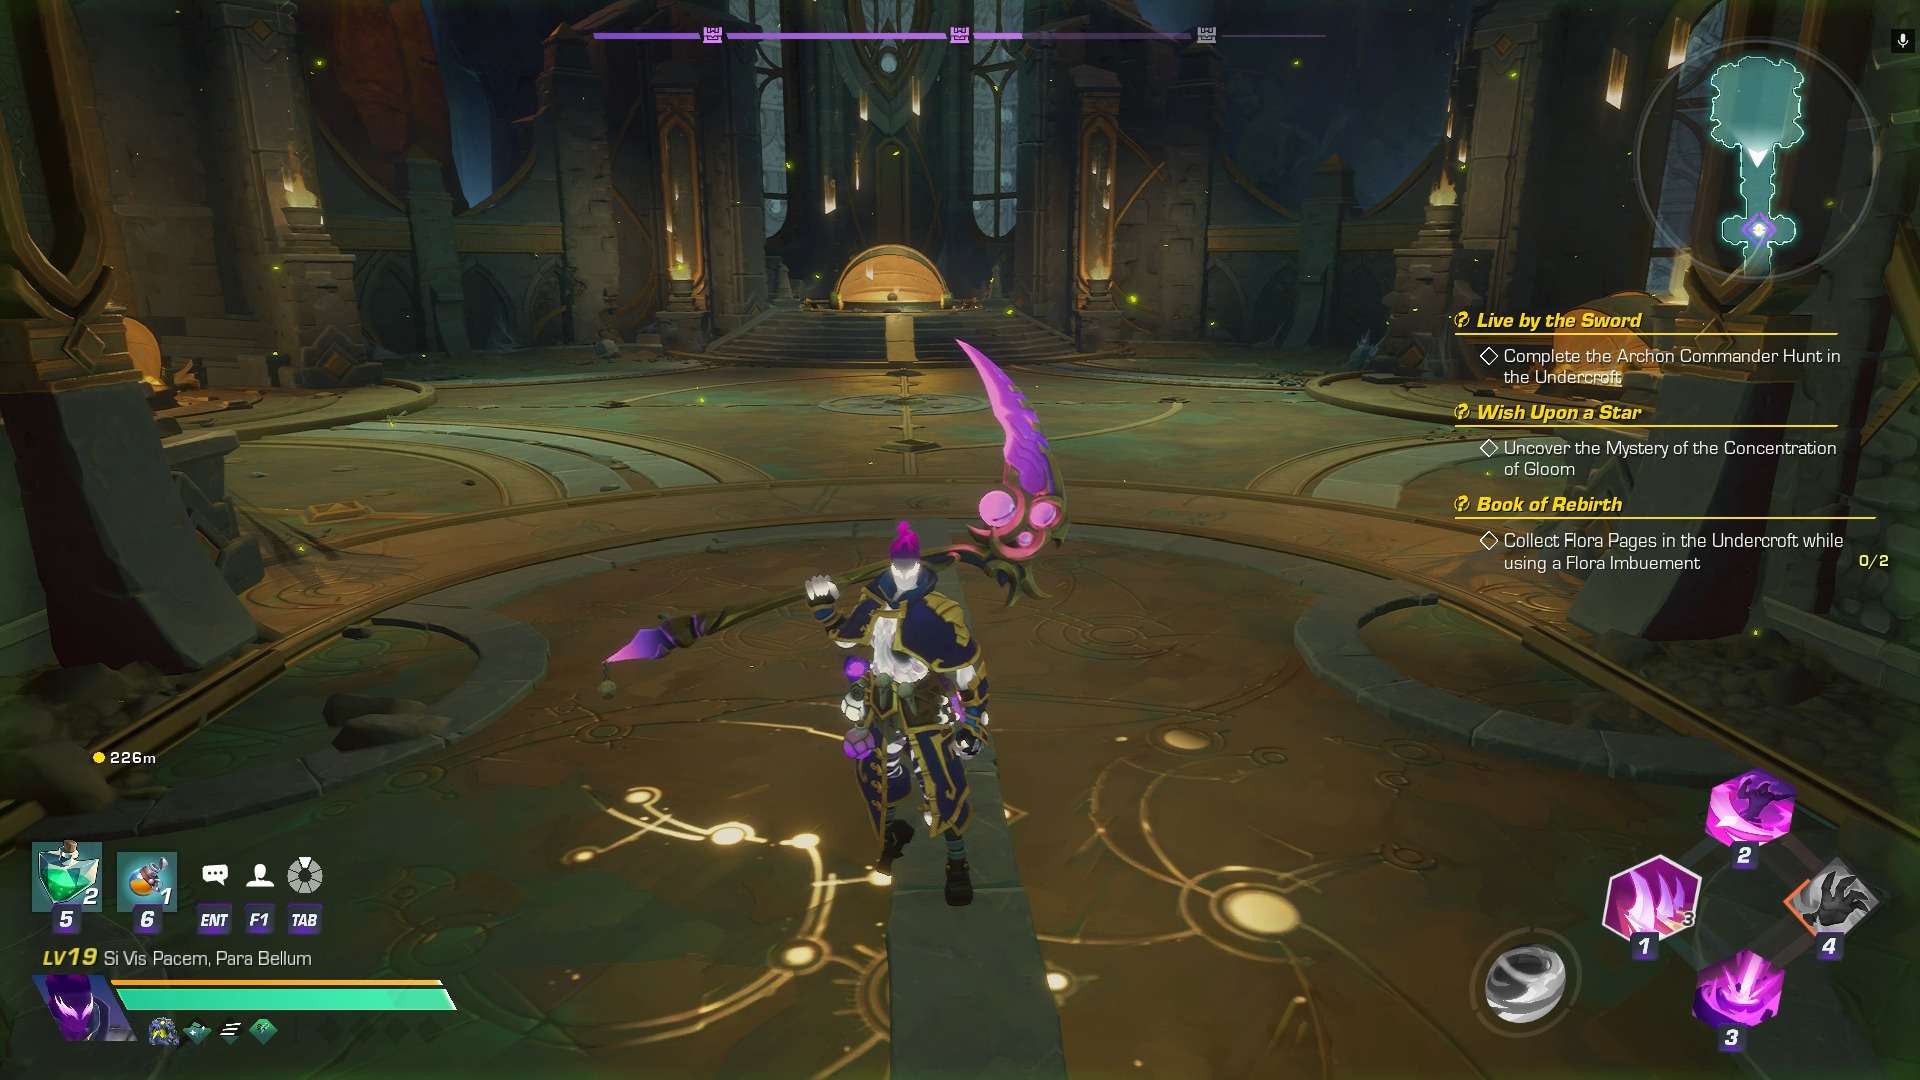
- 1637 – Shrouded Woods – Shrouded Woods Expedition
- 1761 – Shrouded Woods – The Storm Twins
- 1823 – Bal Duum – Baal Dum Expedition
- 2052 – Bal Duum – Grand Deceiver Maras
- 2117 – Bone Orchard – The Bone Orchard Expedition
- 2117 – Bone Orchard – Kolaar the Beastmaster
- 2313 – Bal Duum – Dread Legion
Dungeon Imbuement Buffs
- Chaos – Increase max stamina by 40%
- Flora – Reduce incoming damage by 15%
- Greed – Increase move speed by 20%
- Shadow – Increase all damage done by 15%
- Solar – Increase max health by 20%
How to put buffs?
There is a chalice at the beginning of dungeons where you offer imbuements in exchange for buffs.
Imbuements Effect Bone Orchard Prisoner Drops!
S2 Bone Orchard in the Reaver Woods is full of cages that you can use rusty keys on to free prisoners, which most of the time with give you an accessory for your troubles. This is a small pool of like 4 different accessories, but with an imbuement you can get imbuement-specific drops from them!
Running at S2 puts the power rating 2313, which is what is needed for level 30 drops.
Use Your Elixirs
If you have two elixirs, pop one at the beginning of the expedition and right at the end when you are completing the dungeon. If you only have 1 elixir, pop it at the beginning for the XP bonus. Same goes for bosses. I was able to climb to 25 in less than two days of playtime on PC while dealing with the que boss / server issues and definitely could have gone further w/o breaks and proper use of the elixirs.
Hidden Knowledge Quest Tip
For those wondering how to get hidden knowledge quest done, you need to keep rolling undercroft until you find a room like the one in picture. Seems that it is a RNG thing. I got it on tier 4 with flora mod activated.
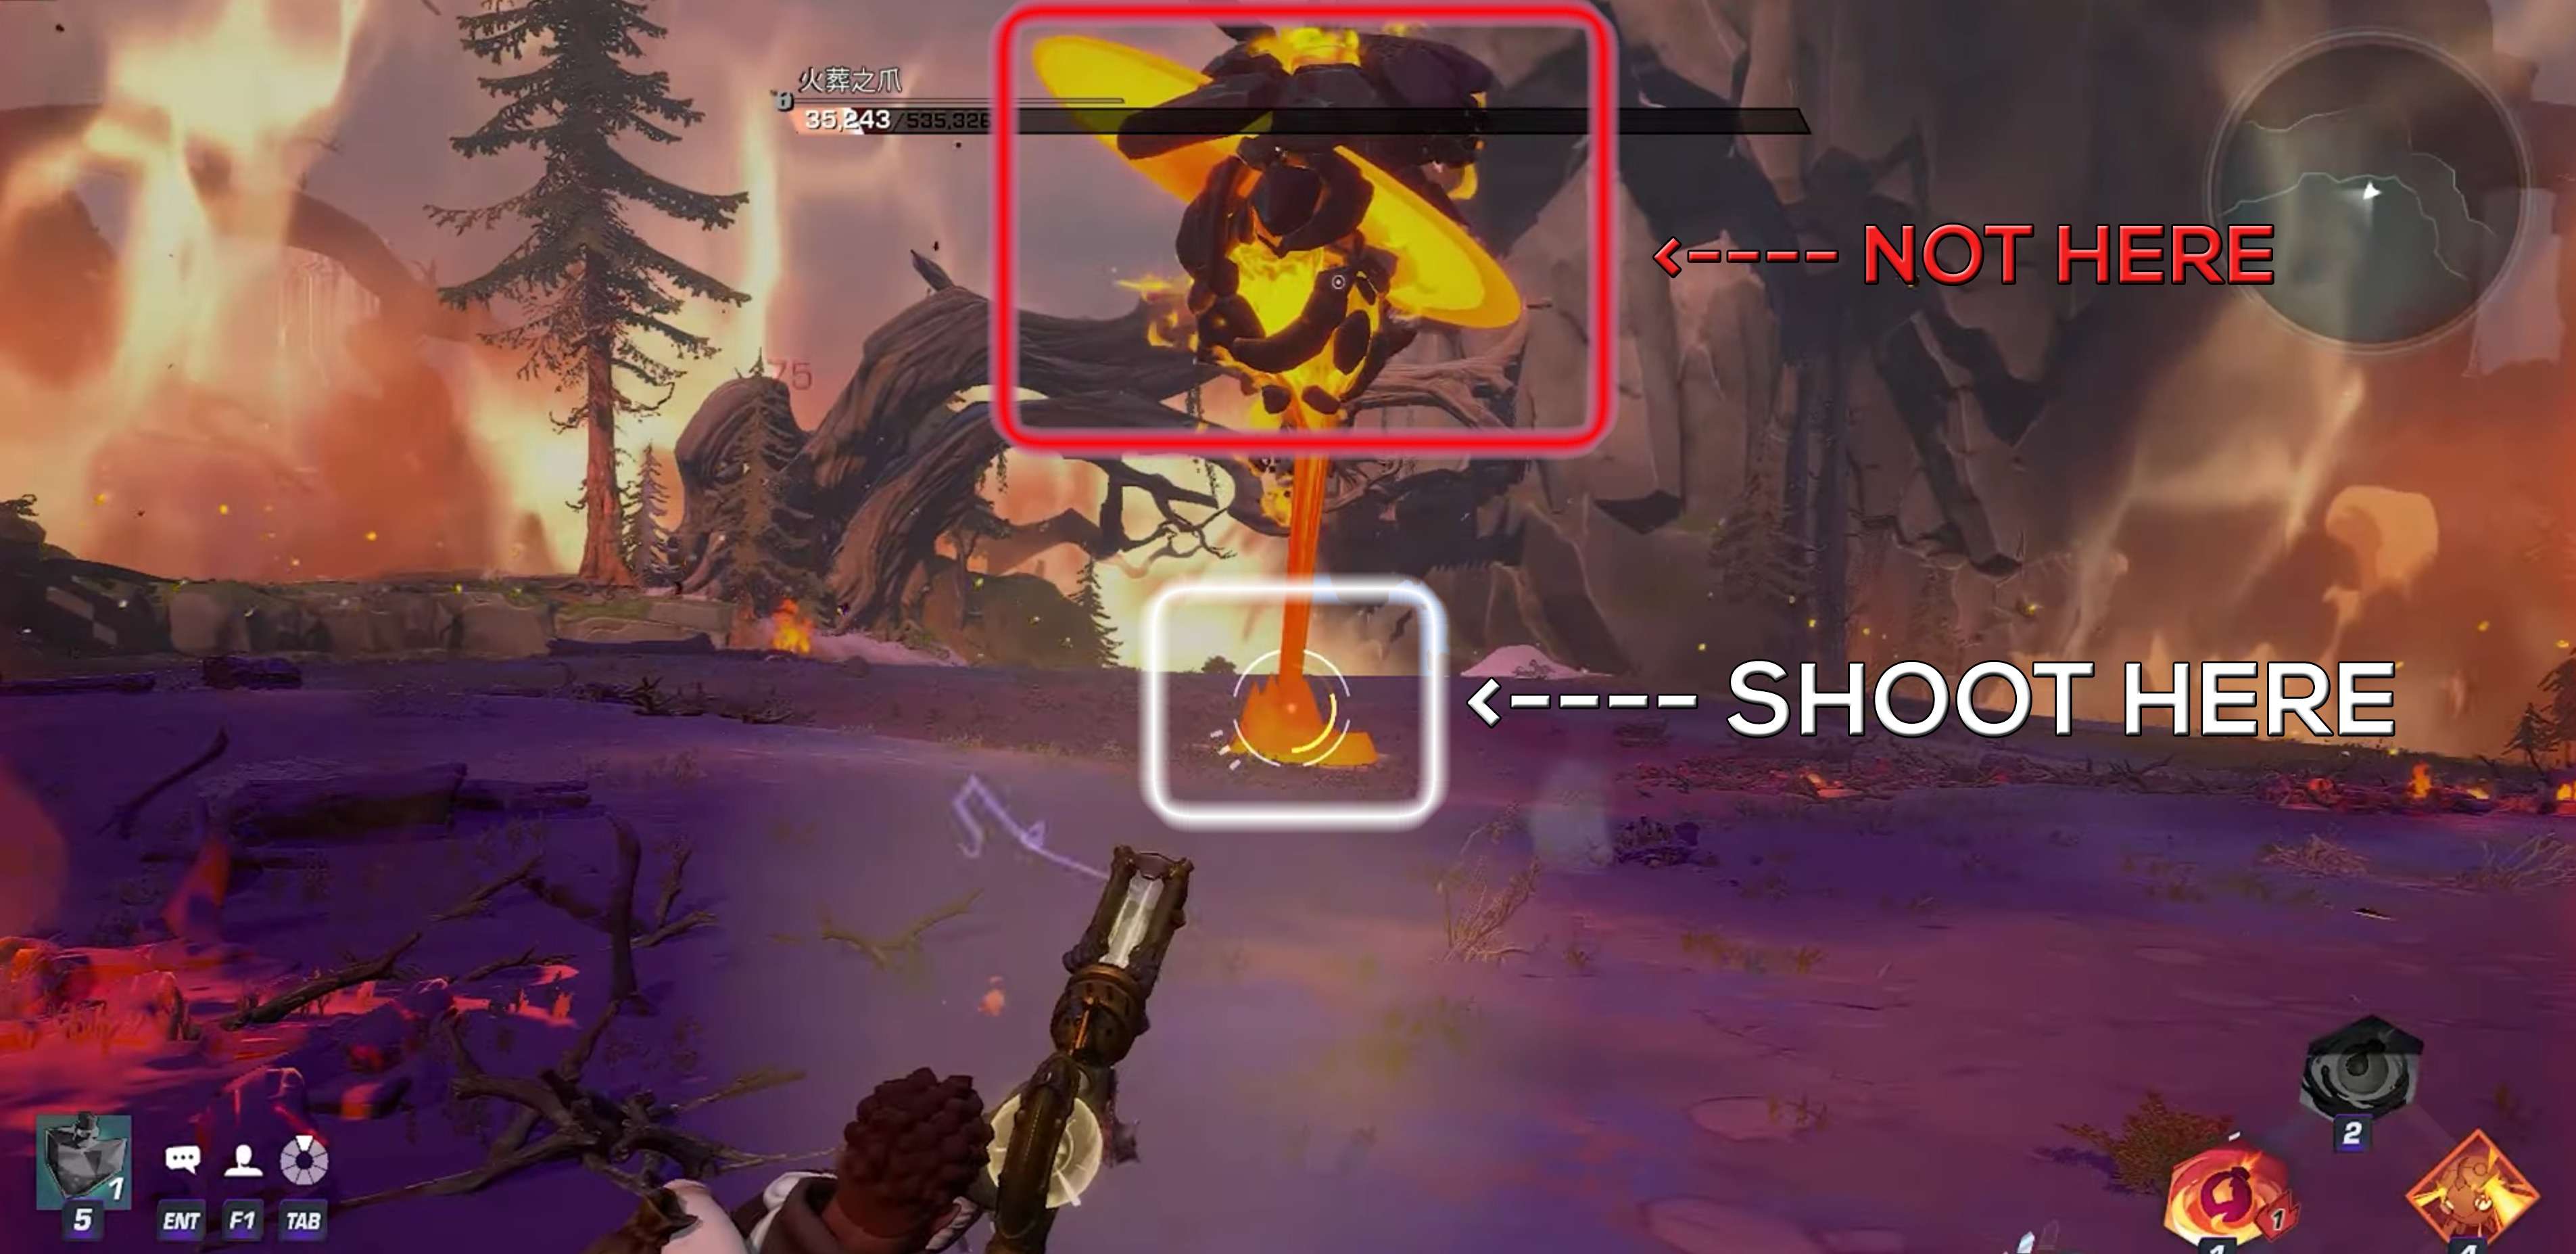
Talon of Pyre (DPS Phase) Tip for Ranged Weapons
I’ve been working on farming Talon of Pyre and during his DPS phase, I was having trouble with him always “bugging out”. He would do his animation, seemingly take no damage, then go friendly. Well, turns out, I was shooting him in the wrong freaking place!I feel so stupid, so I wanted to post this to help anyone else having troubles.
This is specifically for ranged weapons. When he goes into the air, you shoot him at his firey base, not his body! That’s why he wasn’t taking damage.
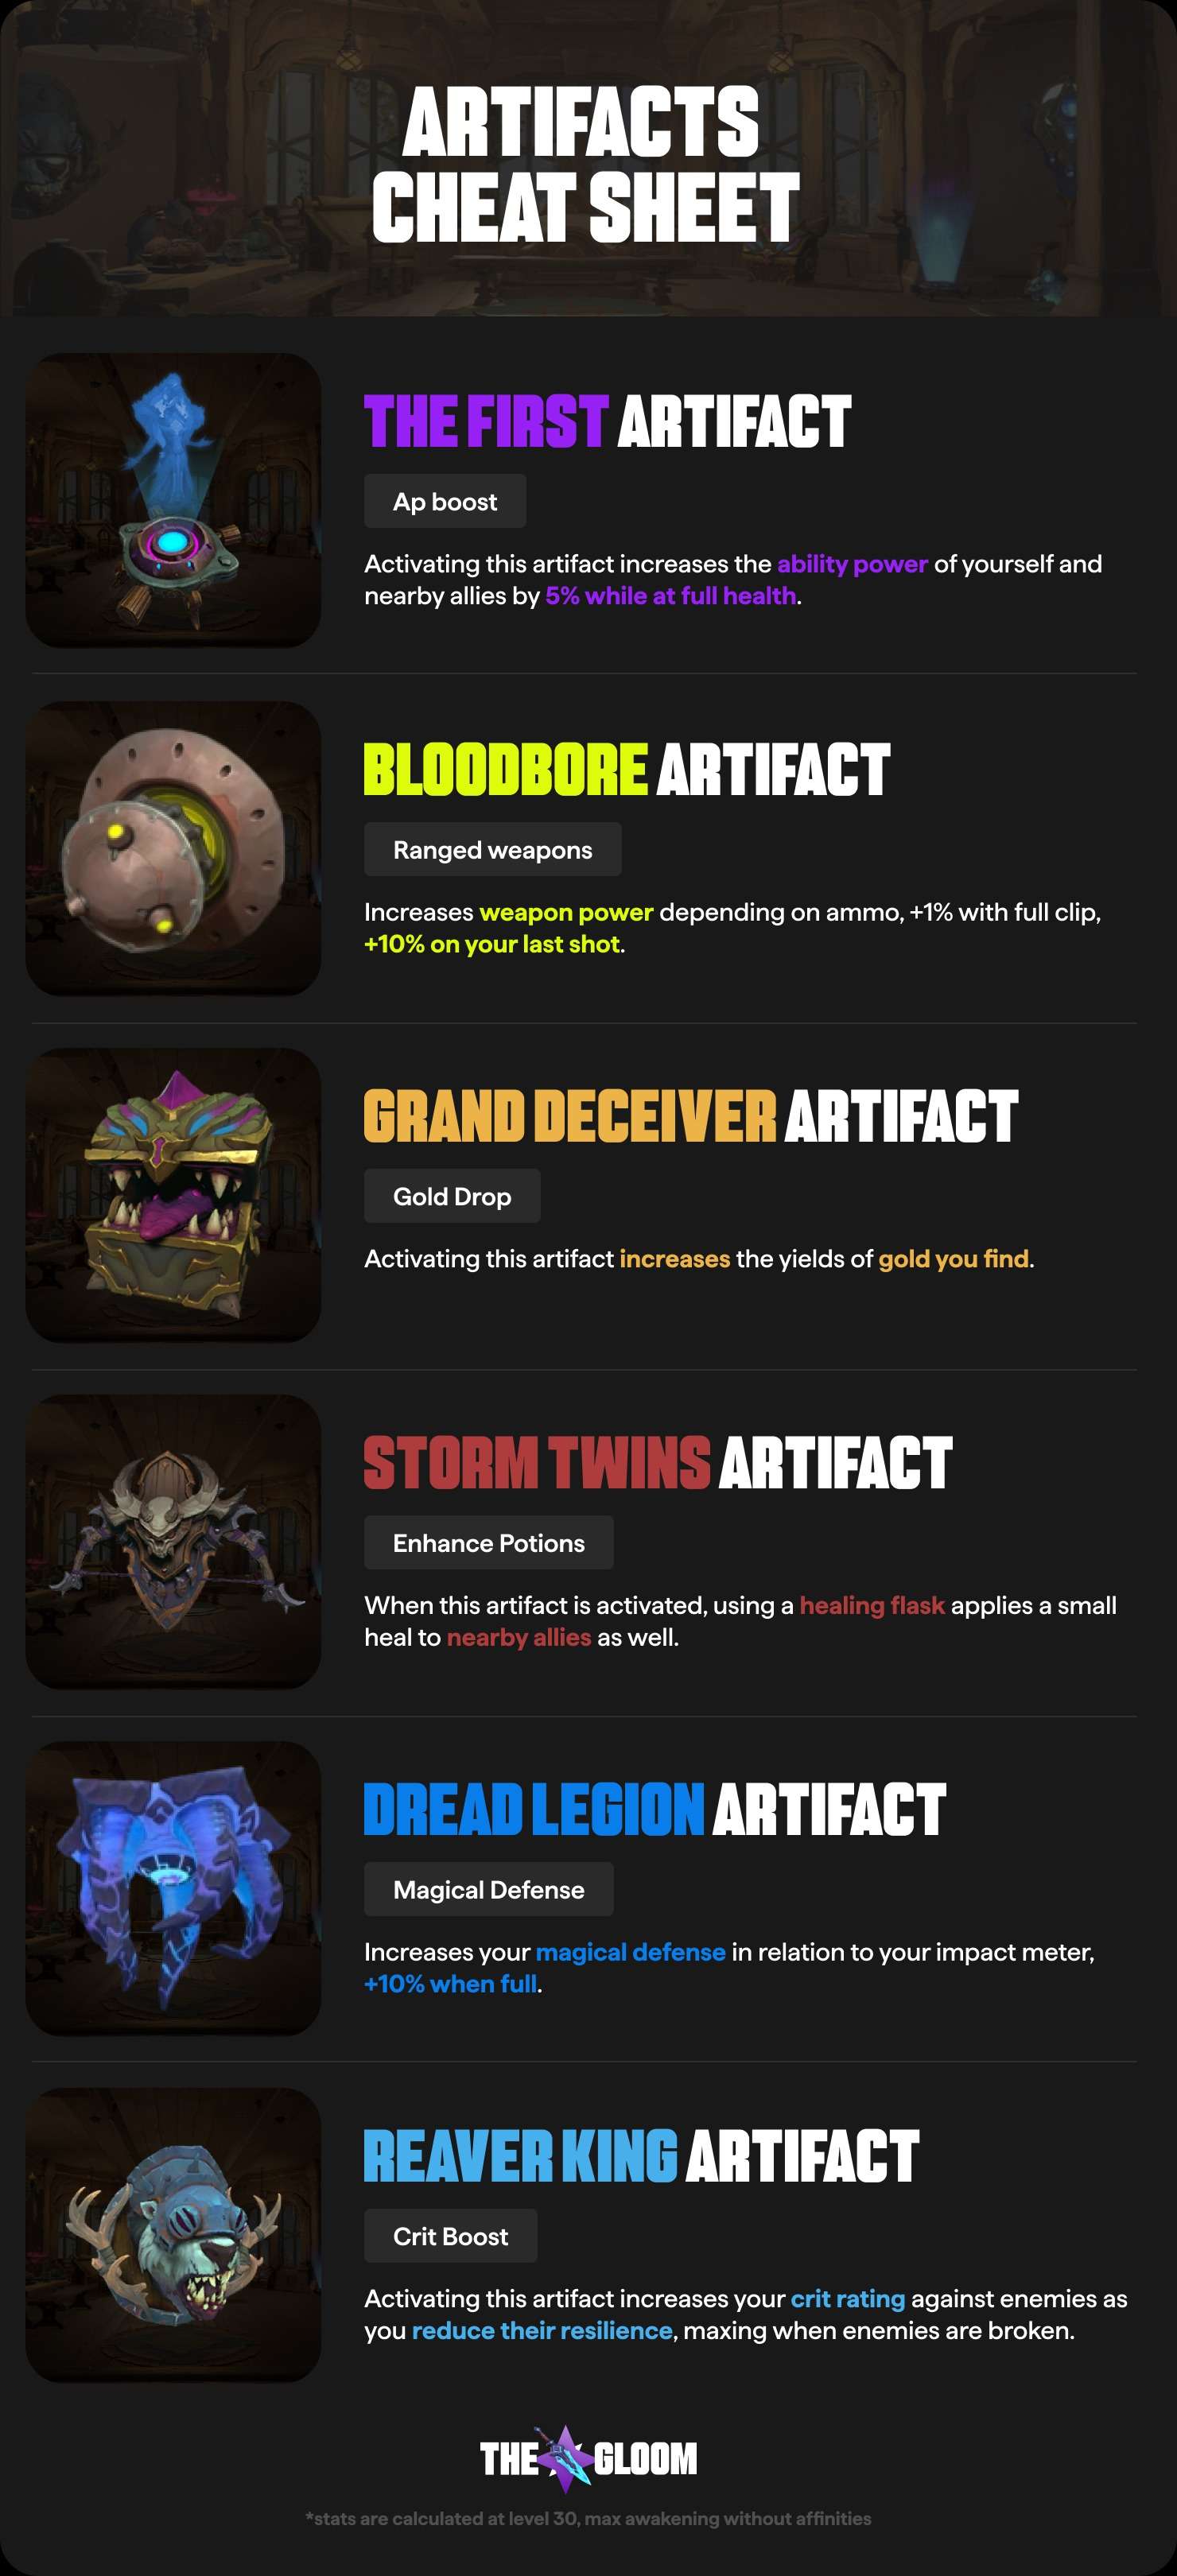
Artifacts Cheat Sheet
Quick list of the available artifacts for new players:
Puzzles
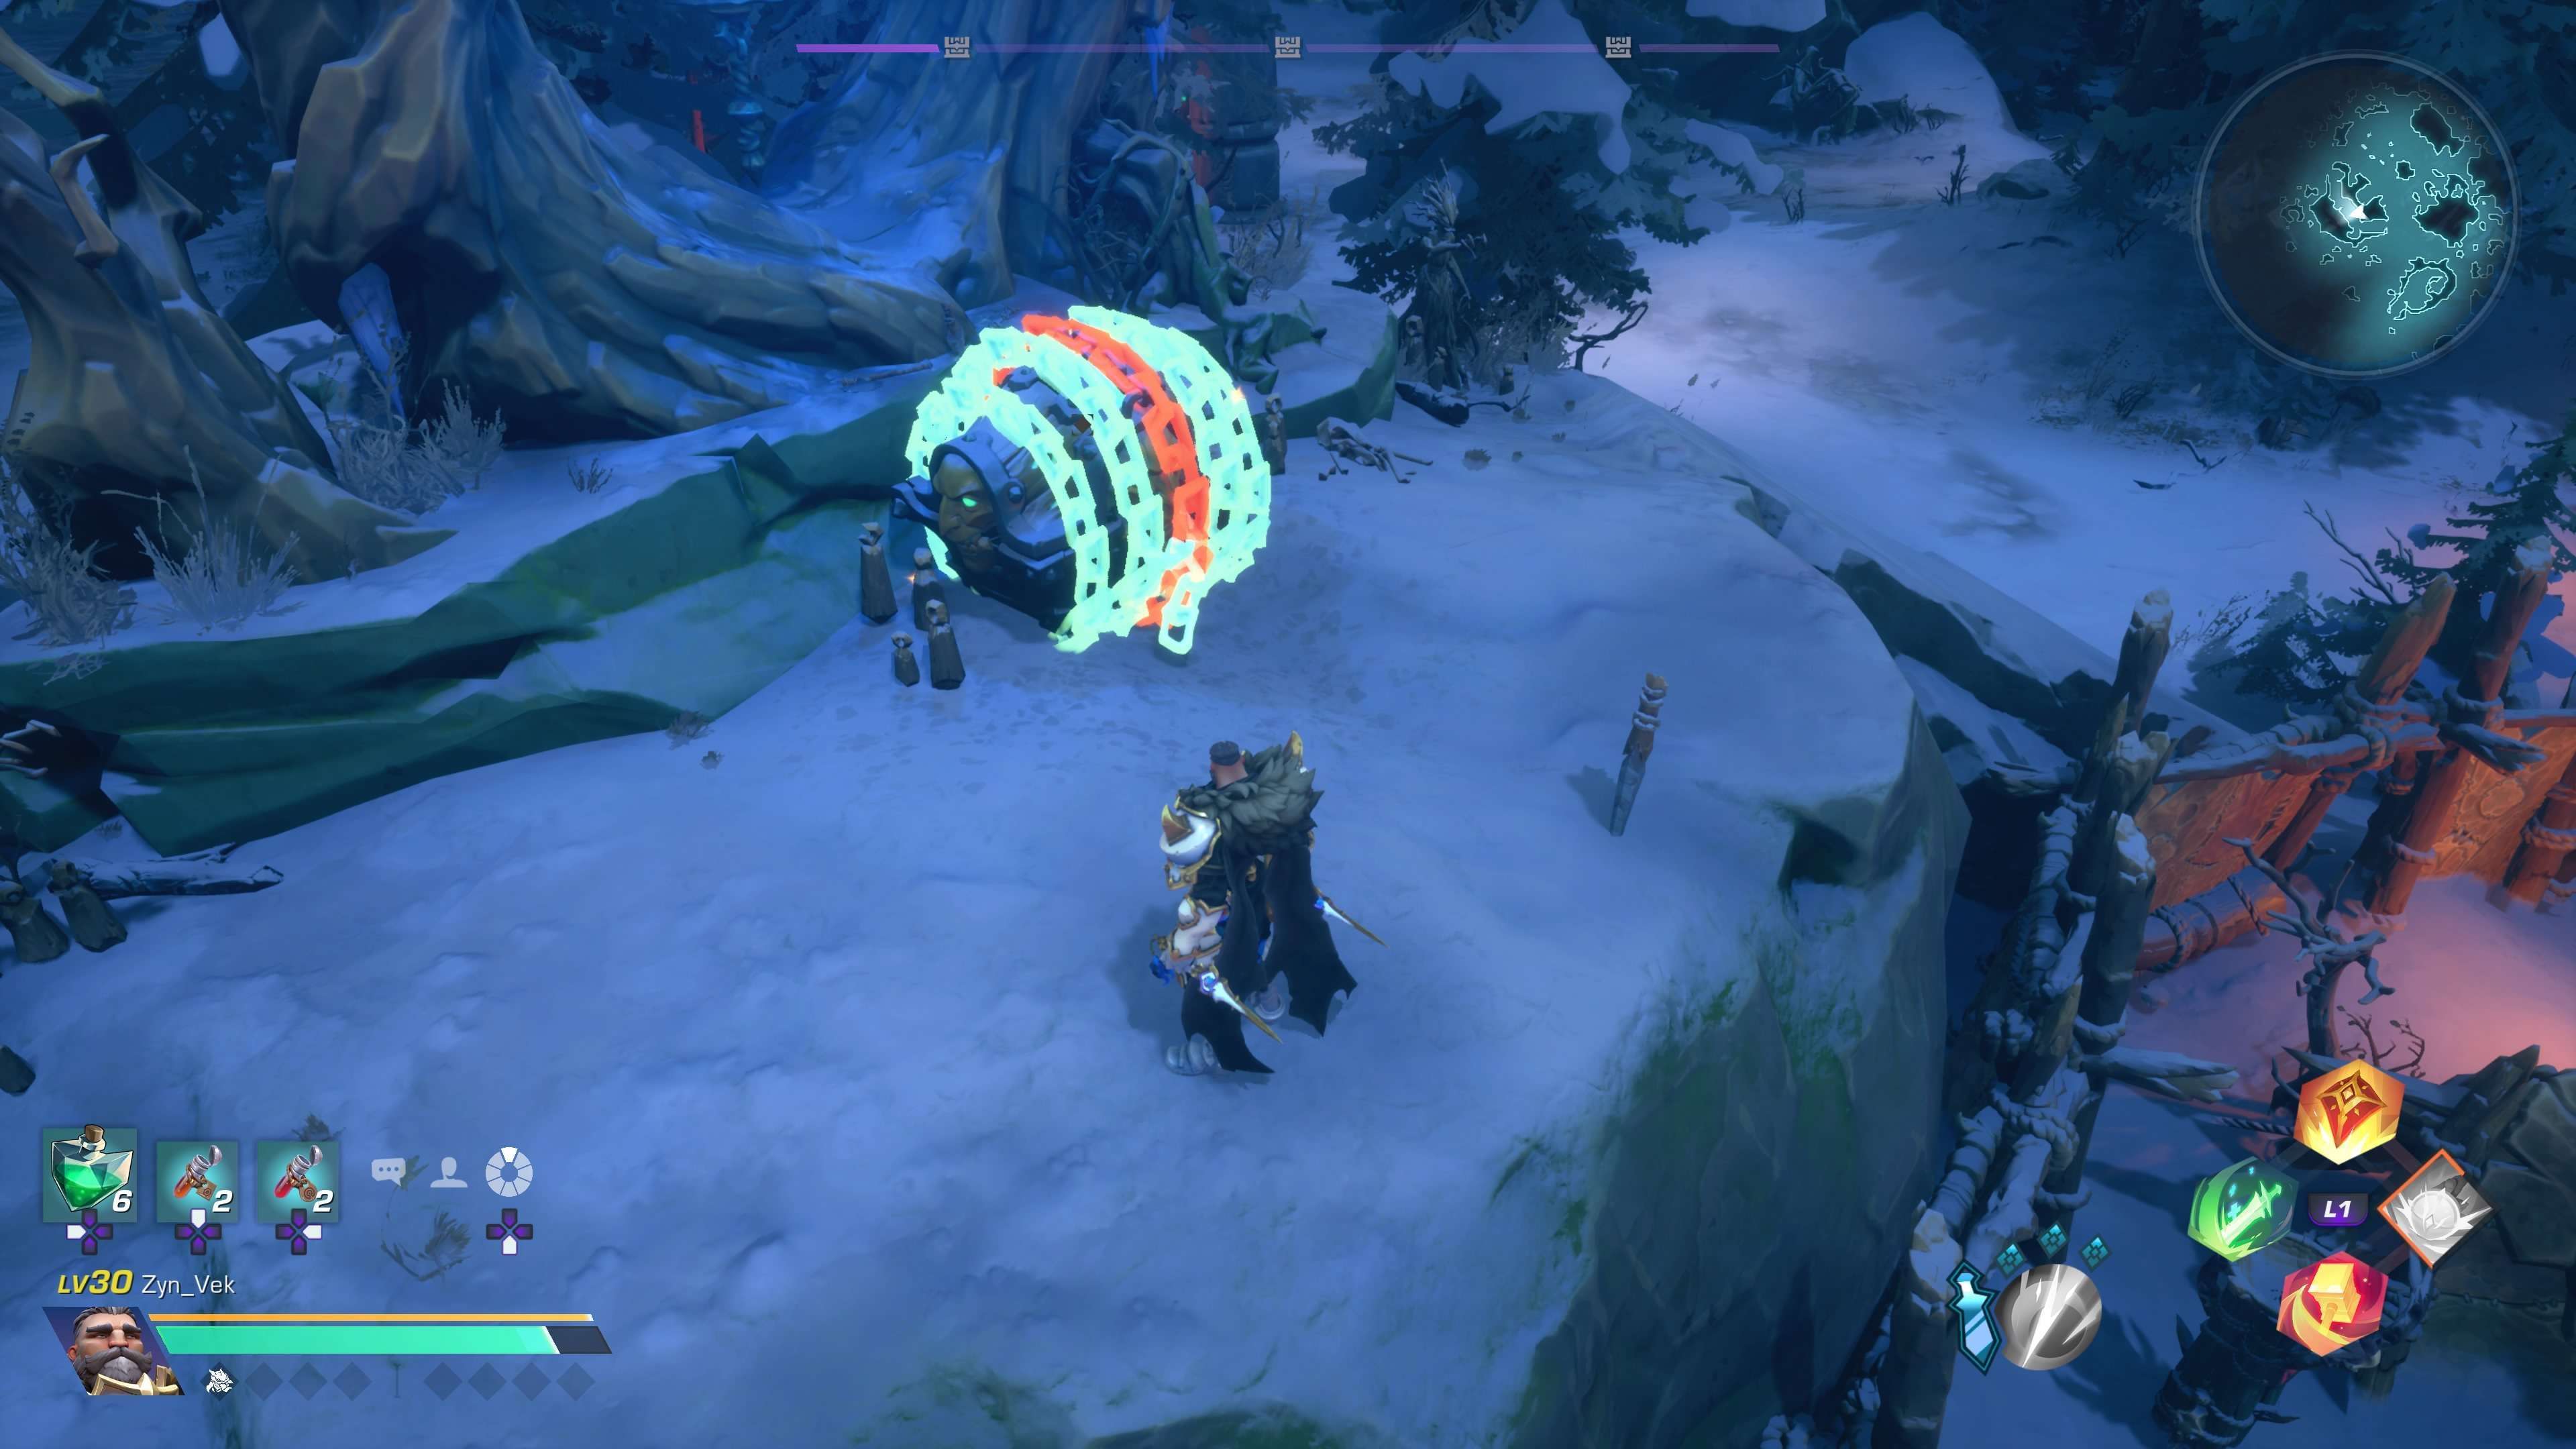
Hollow Heart Chest Puzzle
Chained Chest Puzzle.
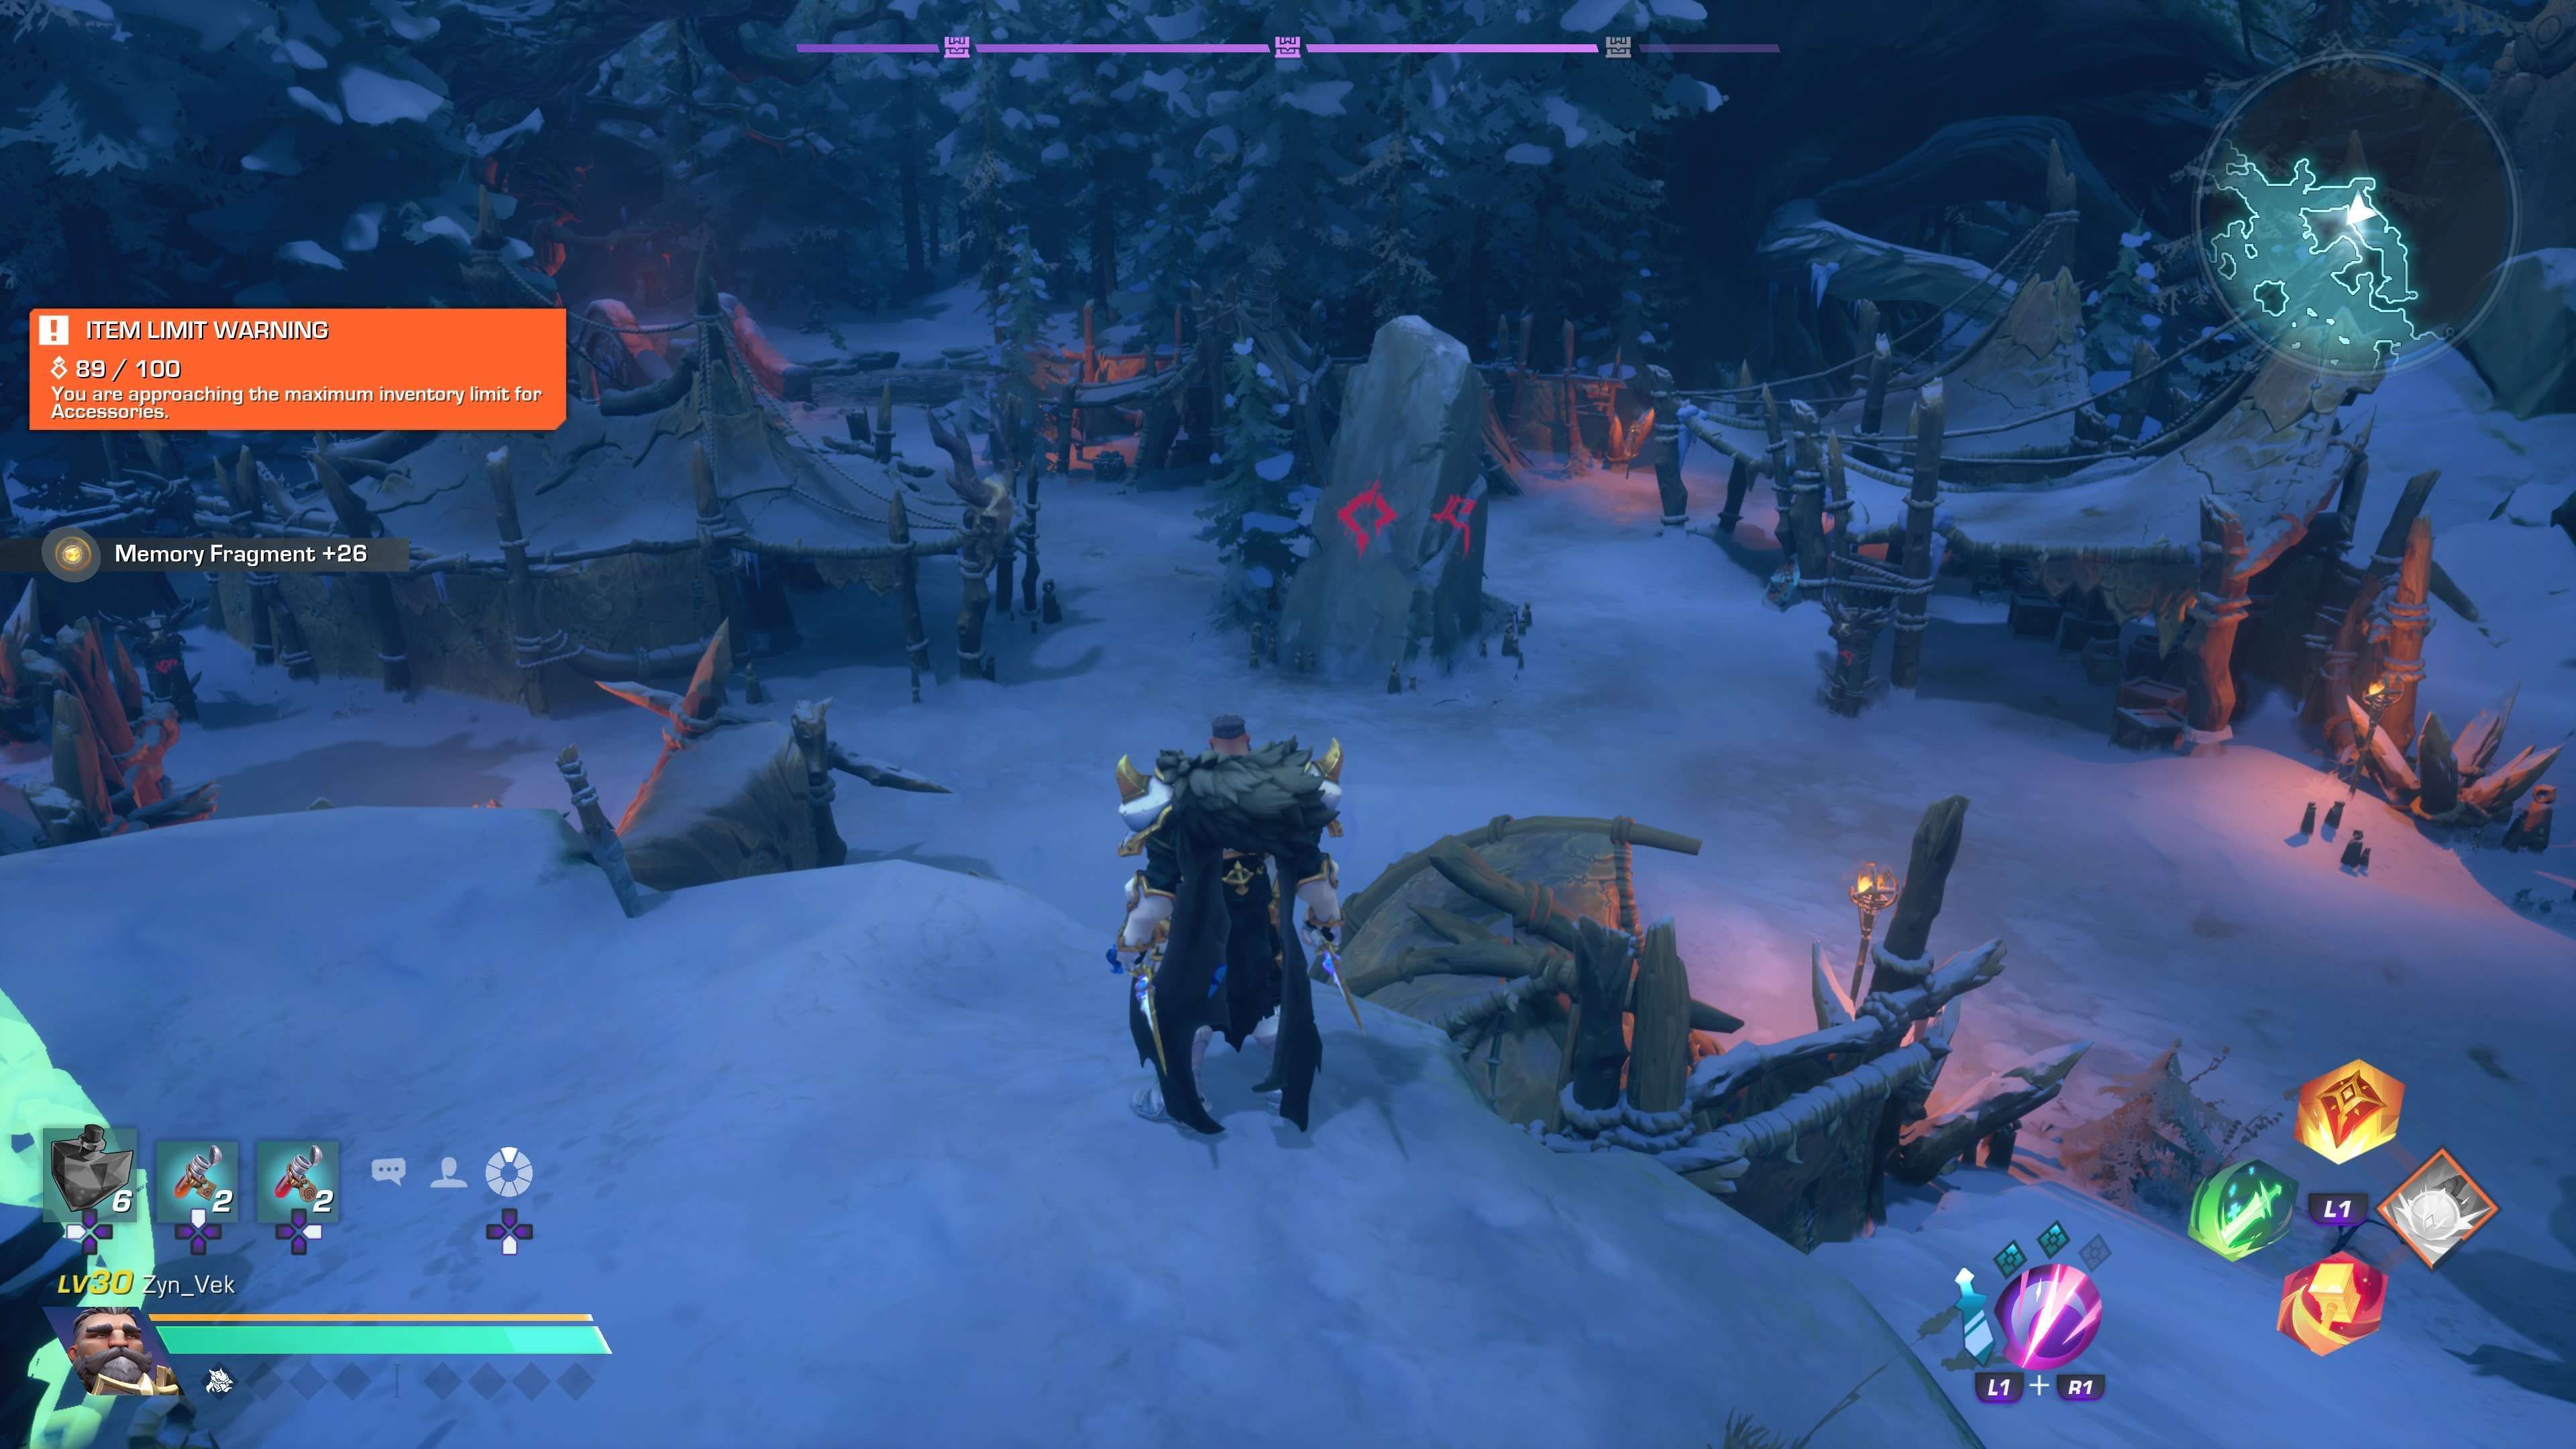
In the center of the camp will be a large stone with 4 runes on each of its 4 sides. The runes correspond to torches through the camp that also have runes on them. You need to light the 4 torches with the same runes as the 4 on the central stone. Lighting the wrong torch will lock a chain. Another wrong torch will lock all the chains and the chest.


Mass Deception
Quick video showing the Mass Deception event for the quest or just generally not failing it.
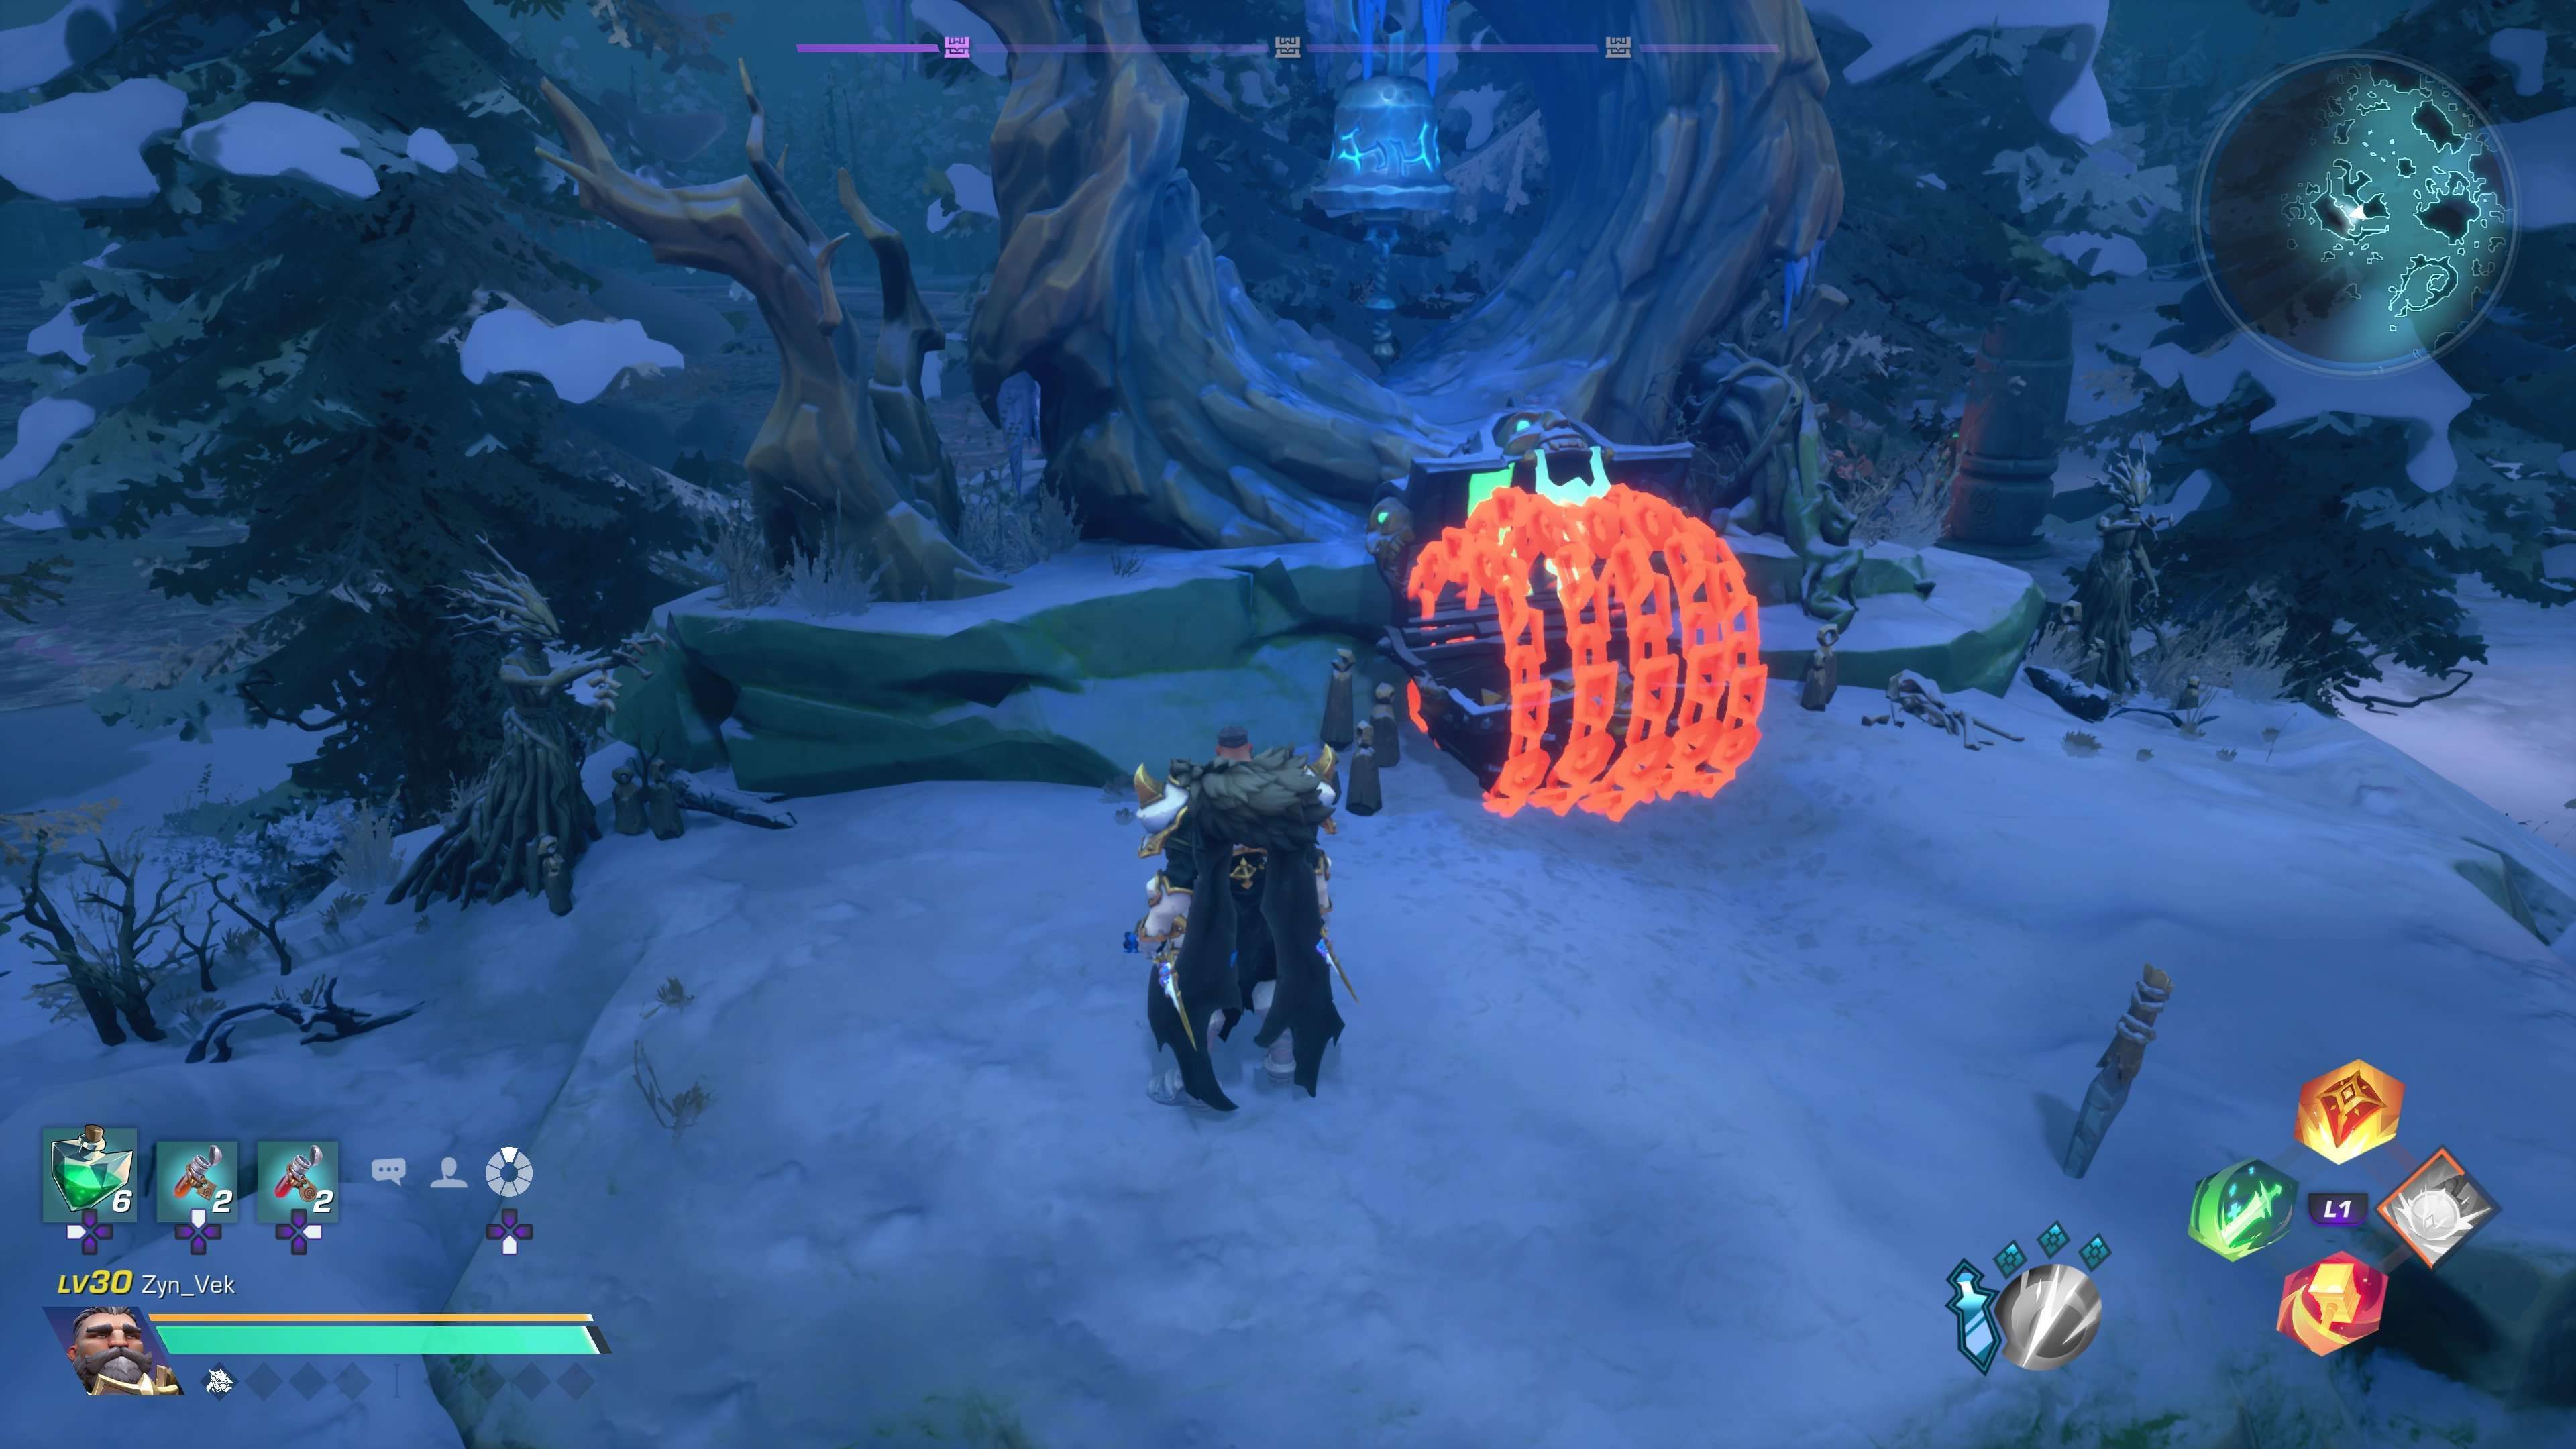
For now the real chests have magic chains over them and the fakes have no chains. The order you open each group will go from least to greatest, so you start on the group with 2, then 3, 4, and 5. You will probably want to check out where everything is beforehand so you know where to go.
Going forward, I’m not sure if it’s intended to be as obvious. I thought maybe they were all supposed to have chains. If it gets changed at some point the fake deceiver chests jump around until their pile is activated. You would have to move to the next pile immediately after finishing the previous pile and watch to see which ones are jumping around.
Heroes / Wayfinders
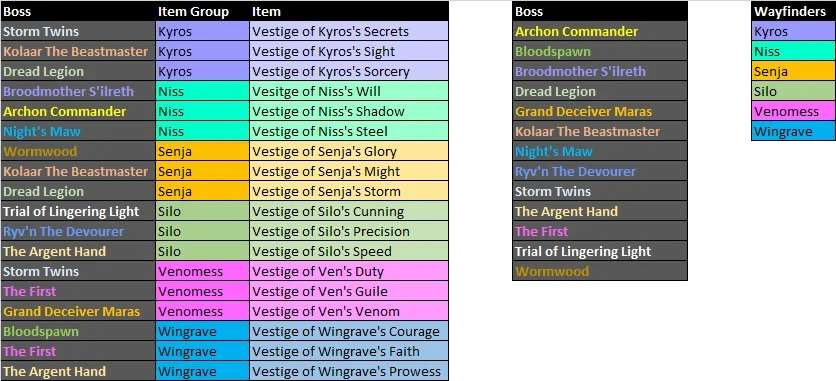
How to Unlock X?
This image shows who to get the parts for each character from.
Kyro’s Can Get Basically Unlimited Rake Charges!
So just a heads up, if you run dual daggers and get the mastery up, you can get 1-3 Innervation orbs per flourish, you simply attack 4 times, flourish to spawn 3 orbs and keep rinsing and repeating. This then goes with the Focus Mastery Infused/Excess Orbs where you have a 50% chance to get a Rake charge upon picking up an innervation orb along with bringing the max charges up to 5. Not only that, but keeping up 300% damage multiplier with daggers is extremely easy, has great I-Frames and allows your abilities to scale up in damage as well.
This essentially allows you to mass spawn innervation orbs and with a 50% chance to get a rake per one you get so many per fight. Definitely recommend trying it out as I feel like this will be nerfed once the game stabilizes out.
Also just hit level 14 and got the heal perk at t3 Rake and it heals for about 223 per hit and with 5 swings up basically at all times it’s giving insane sustain besides 1 hit mechanics (or just because my armor/health is too low currently for the content i’m fighting)
Further food for thought, doing this combo charges your dagger’s meter up extremely fast so even though I personally run Night’s edge for the AP damage but potentially with Harvest Moon not only would you be spawning nonstop innervation orbs for you and your team, you’d also have insane uptime on the group damage buffs as well.
Wingrave Fast Combo Tip
With sword and shield Wingrave is able to spam his righteous strike by doing this combo:
Shift+E - > E -> E or Shift+E -> E - > LMBAfter Shift+E you have to wait a moment before the next E, just a little moment.
Tier List
- S Tier = Excels in this category, plays with ease/clears quick.
- A Tier = Very Good in this category, can clear relatively fast.
- B Tier = Good enough to clear content, takes some work but can clear fast.
- C Tier = Playable, decent for clearing, takes some work.
- D Tier = A lot of work for minimal results.
- F Tier = Unplayable, Impossible.
Rankings:
AP Heroic Kyros/Kyros:
- Solo Play: A
- Group Play: S
- Mobbing: S
- Bossing: S
- Ultimate: S
- Damage: S
- Support: B
- Leveling: D
- Endgame: S
- Overall: S-
AP Niss:
- Solo Play: A
- Group Play: A
- Mobbing: A
- Bossing: B
- Ultimate: B
- Damage: A
- Support: F
- Leveling: B
- Endgame: B
- Overall: B-
AP Venomess:
- Solo Play: S
- Group Play: S
- Mobbing: A
- Bossing: A
- Ultimate: C
- Damage: A
- Support: S
- Leveling: S
- Endgame: S
- Overall: S
AP Silo:
- Solo Play: B
- Group Play: B
- Mobbing: S
- Bossing: A
- Ultimate: A
- Damage: S
- Support: F
- Leveling: C
- Endgame: B
- Overall: C-
AP Wingrave:
- Solo Play: D
- Group Play: S
- Mobbing: F
- Bossing: F
- Ultimate: S
- Damage: F
- Support: S
- Leveling: A
- Endgame: S
- Overall: D+
AP Senja:
- Solo Play: C
- Group Play: S
- Mobbing: A
- Bossing: C
- Ultimate: B
- Damage: B
- Support: A
- Leveling: C
- Endgame: B
- Overall: B
WP Kyros/Heroic Kyros:
- Solo Play: A
- Group Play: A
- Mobbing: A
- Bossing: S
- Ultimate: C
- Damage: S
- Support: A
- Leveling: A
- Endgame: S
- Overall: A+
WP Niss:
- Solo Play: S
- Group Play: A
- Mobbing: D
- Bossing: S
- Ultimate: F
- Damage: S
- Support: C
- Leveling: C
- Endgame: A
- Overall: A
WP Venomess:
- Solo Play: S
- Group Play: S
- Mobbing: A
- Bossing: S
- Ultimate: D
- Damage: S
- Support: B
- Leveling: S
- Endgame: S
- Overall: S
WP Silo:
- Solo Play: S
- Group Play: B
- Mobbing: B
- Bossing: S
- Ultimate: C
- Damage: S
- Support: D
- Leveling: B
- Endgame: A
- Overall: A
WP Wingrave:
- Solo Play: S
- Group Play: S
- Mobbing: D
- Bossing: B
- Ultimate: S
- Damage: B
- Support: S
- Leveling: S
- Endgame: S
- Overall: S
WP Senja:
- Solo Play: B
- Group Play: S
- Mobbing: B
- Bossing: B
- Ultimate: B
- Damage: B
- Support: A
- Leveling: C
- Endgame: B
- Overall: B
I hope you found this useful!

Be the first to comment