This explains how temperature works in the game. It also covers how to build a cold room to keep food from spoiling. Exact temperature calculations are not included. No math formulas or degree-by-degree details are provided.
Rule 1: What Temperature Are We Going For?
Short answer: 5°C and below. From what my experiment with Stew Piles that I place them in the stockpile zone around the town.
Here is the result:
- 1. In the field outside, 23.9°C, take 2 days to rot.
- 2. In the field outside (raining), 11.5°C, take 4 days to rot.
- 3. In the wooden house, 19.4°C, take 5 days to rot.
- 4. Underground, 7.2°C, take 20 days to rot.
- 5. Underground (deeper), 4.4°C, never rot.
- 6. Underground (deepest), -1.8°C, never rot.

Rule 2: Watch Out Your Stair
Since the stair doesn’t separate rooms from each other, which mean if you dig the ground as I do in the screenshot below, it will count as one room, so this mean the lower floor will have the same temperature as the top floor.
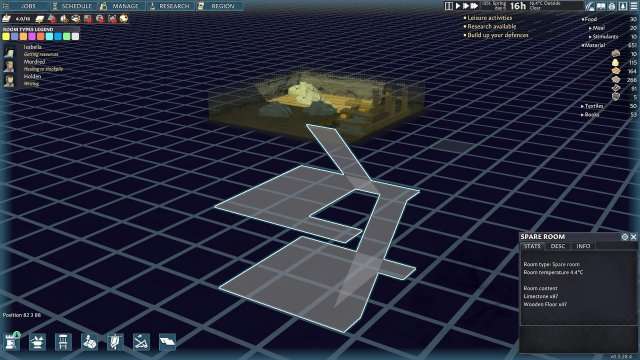
If you make a stair like this, it will be a little more difficult for the temperature to go down when you dig down, because it will average the temperature from every floor. The simple solution is to create a new room at the lower floor and separate it from the main stair with a door.
Rule 3: What Important is Not How Much the Floor is Lower, But Above
You may think that the temperature is lower because you are at the lower floor. But the truth is, what make your room temperature drop is what it is that stay above your room.
Let’s see more example of what I did before I explain furthermore.
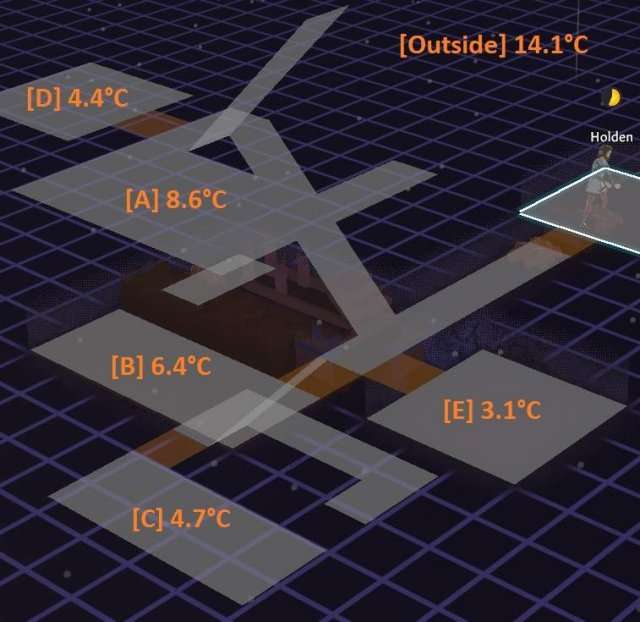
As you can see that room A, B, and C, are directly above from each other and separate by a simple wooden floor. While room D is in the same floor as room A, and room E is in the same floor as B.
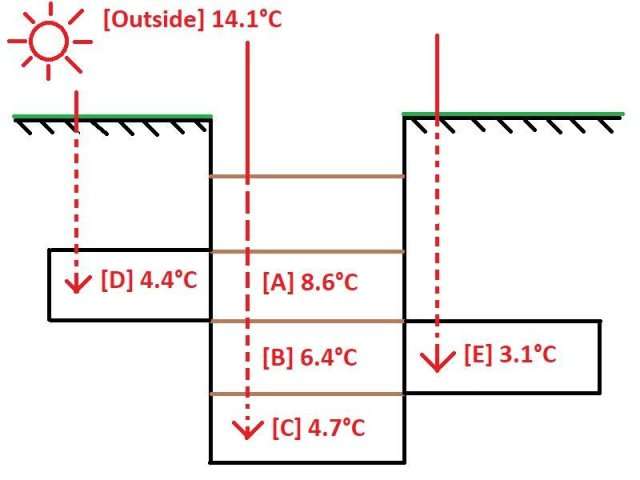
You may noticed that room D and E have lower temperature than room C even it is on the upper floor. Why? Because there is a chunk of dirt above it to protect the heat rather than three slim floors of wood, which is very logical. This can be explain more in my drawing below.
Rule 4: Heat From the Floor In Underground
I was surprise to find out about this at first, when you build the wooden floors in the room underground, it will generate some heat which you need to be considering when building cold room underground. Let’s see the example:
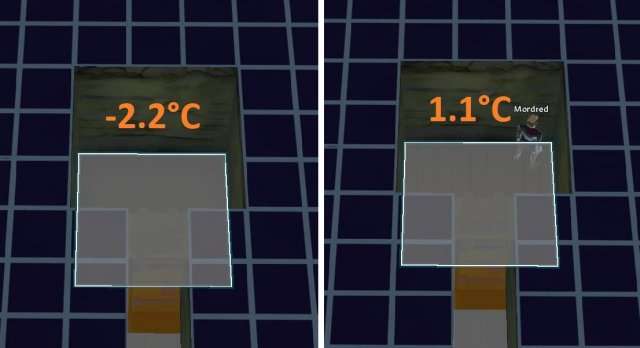
This is the same 3×3 room which is located two floor below ground. The one on the left have nothing on the floor and the temperature is -2.2°C. Then, I built 3×3 wooden floors in that room as you can see in the right of the picture. The temperature suddenly increase to 1.1°C, this can be conclude that the floor did generate some heat underground.
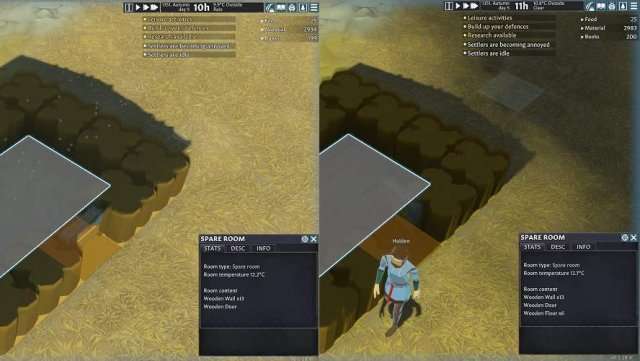
However, this rule doesn’t seem to be apply with the room above ground. As you can see in the above screenshot is that the room without floor in the left has 12.2°C, while the room with wooden floor in the right has only 12.7°C which is not change very much (it’s increase a little bit, because the outside temperature increase).
Rule 5: The Invisible Room Radius
This is another surprise thing that I found out, every room have floor radius two more block away from the floor inside the wall. This may sound confusing, so let’s me show you another example photo.
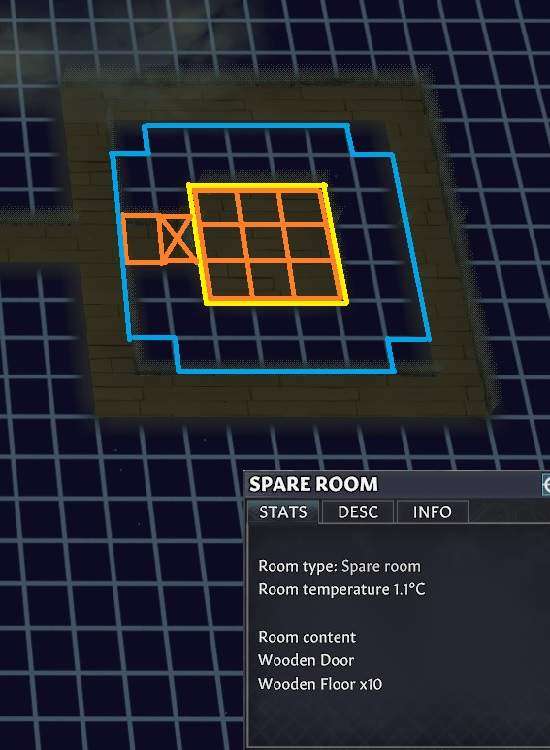
From this photo, I build a room of 3×3 underground in the yellow line with wooden floor, and the blue line is the room radius. As you can see from the info box, they count every thing in room radius, so there are 10 wooden floors as in orange line, and 1 wooden door in the cross orange line with the room temperature of 1.1°C.
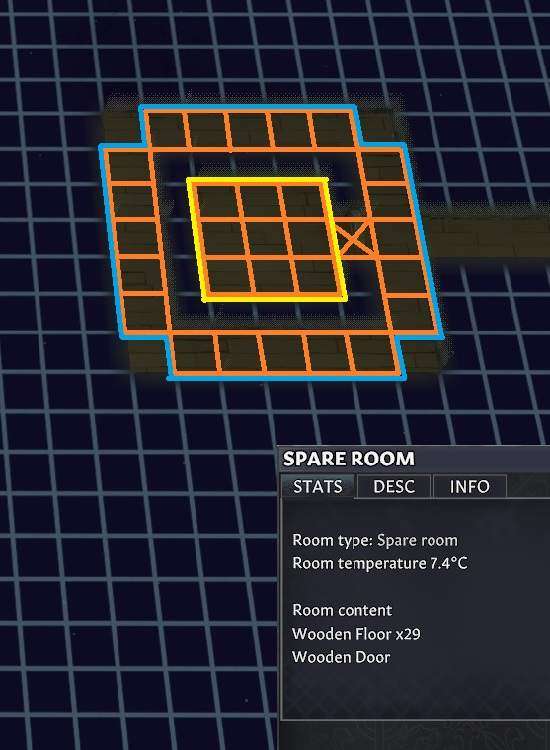
Another example, it is a 3×3 underground room in yellow line with wooden floor, and the blue line is the room radius. This time, the info box say there are 29 wooden floors because it’s count every floor in radius even it is outside the room. In the previous rule, we knew that the underground wooden floor generate heat, and with these 29 wooden floors, the room temperature suddenly jump to 7.4°C, so better watch out.
Since, the floor doesn’t generate heat above ground. So, you don’t need to worry about this rule above ground. I still don’t know why this rule exist, it look like the radius only count wall and floor as part of the room, but not the furniture. So, you can’t create a Library with book shelf on the outside of the room.
Rule 6: Room Size Is Matter
While I experiment thing underground, I noticed something from the stair rule about expanding your room vertical and then the room temperature will be averaged from each floor.
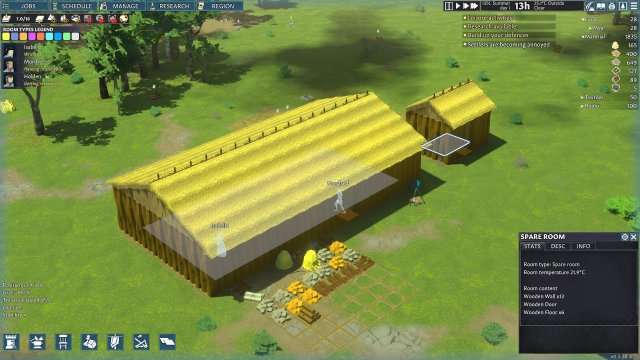
Then, I wonder what the temperature will be if I expand horizontal. So, I create two building with the same material, same wooden floor, wall, door, and thatched roof. The only different is it size. Turn out the big one has lower room temperature at 19.5°C, while the smaller one has 21.9°C. Therefore, room size is matter somehow.
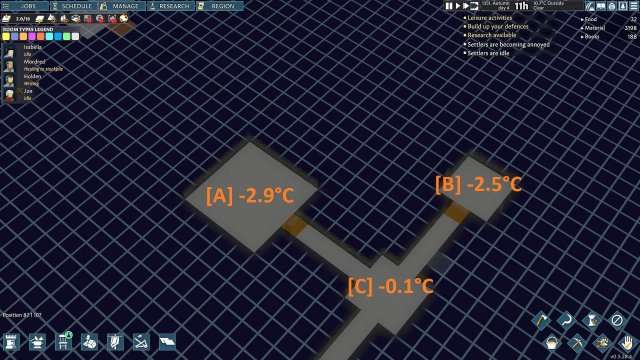
This is also true, with the underground room. As you can see, room A which has a bigger room size also colder than room B.
Rule 7: Cold Room Above Ground, Is It Possible?
Short Answer: Yes, but maybe not worth it.
So, from what we learn so far, we need a chunk of dirt above room because it is better than roof and floor in order to protect room from heat, and we need a very large wall to make our storage room deeper from the sun. And this is what I come up so far…
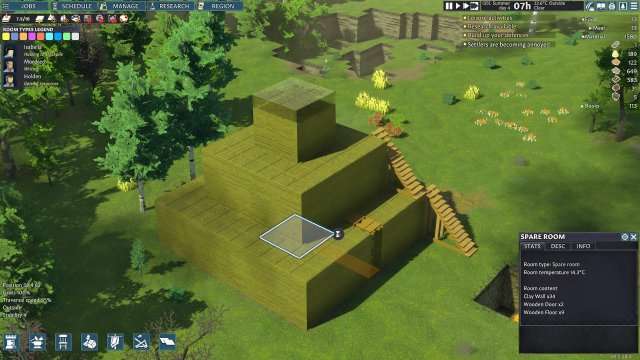
Yep. It is pyramid of dirt which allow you to store a 3×3 square in the center. I manage to reduce the temperature from 22.6°C to 14.3°C with this method. If I keep adding wall and roof, the temperature will slowly drop later.
But as you can imagine how much time and resource you need to complete it, which I think it isn’t worth the time and resource to do. Also, you can make a room bigger to reduce more heat, but you will need more material to make wall and roof also.
Rule 8: My Best Practical Solutions
So, in this last section, I will show you my best method to create the cold storage room. What I consider most is that these methods can be done in 1-2 day early game, with minimum resource needed, and can be done with any villagers you got.
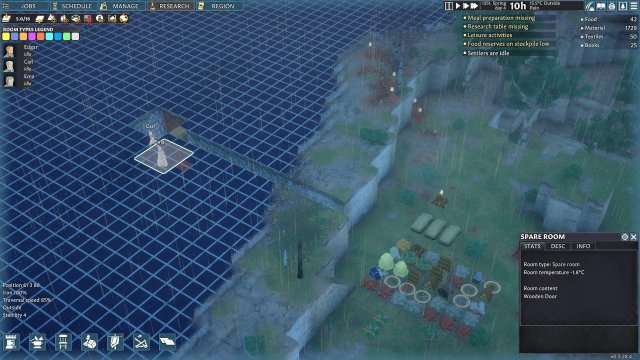
If your map has mountains, build your food storage in the mountain. Dig a tunnel into the mountain. Longer tunnels mean colder rooms. My screenshot shows a room at -1.8°C with an outside temperature of 15.5°C.
This method is slow. If you find metal while digging, it takes longer. Only one villager can dig at a time because the tunnel is one block wide.
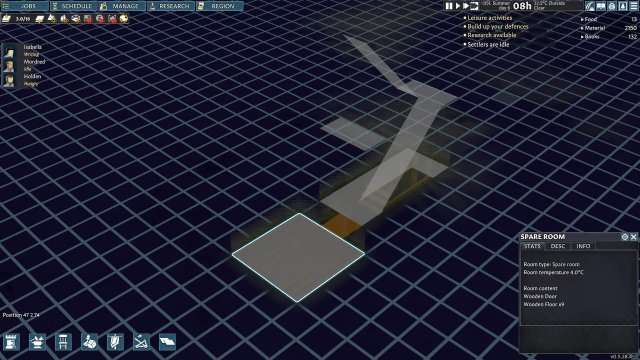
For any other scenario, just dig two floor down the ground as in the screenshot and create a room at the end of the stair, I can get 4°C from 22.5°C sunny day.
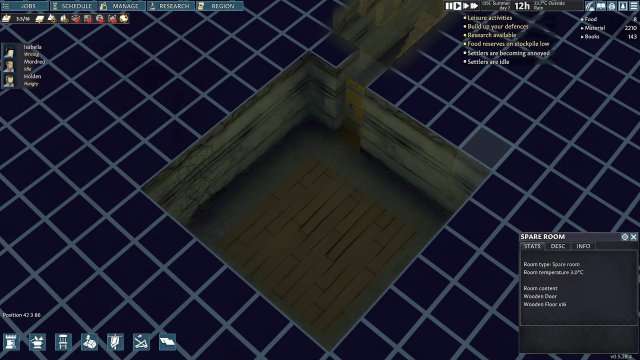
If you somehow still want to get lower temperature, you can create bigger room and remove floor around the room as in the screenshot above. Since those wooden floor did generate a heat somehow, removing them will cause the room to be cooler, but don’t forget that your food need to be on the wooden floor, so don’t zone your food storage on dirt. With this method, I did lower my temperature to 3°C.
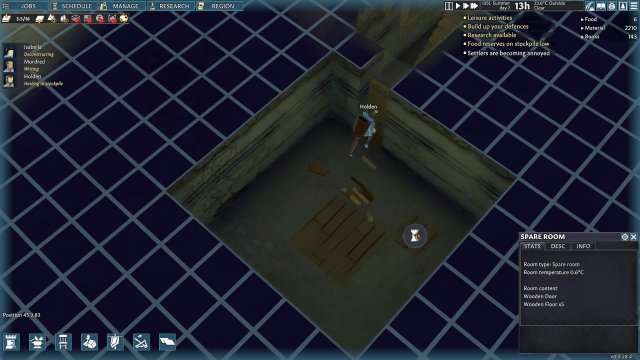
As you can see, by removing another outer layer of wooden floor, I manage to lower my temperature again to 0.6°C. So, basically just keep expand the room without building the floor, the temperature will keep getting lower.




Be the first to comment