
Other Borderlands 3 Guides:
- Tips and Tricks.
- Borderlands 3 Shift Codes!
- Easter Eggs and References.
- How to Find Rick and Morty and Legendary Gun.
- All Eridian Slab Locations Guide.
In Borderlands 3, there are certain chests that will always have exceptional loot (and a much higher chance of containing epic or even legendary loot). These Red Chests can be found in each region – sometimes at the conclusion of a boss fight or hidden in a side mission, and while their level is tied to the region, they can be reopened when quitting and restarting the game.
This guide contains the locations of all known Red Chests in Borderlands 3.
Pandora Red Chest Locations – Covenant Pass
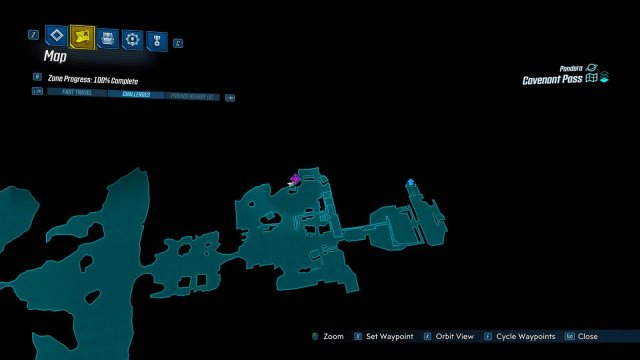
Covenant Pass Red Chest
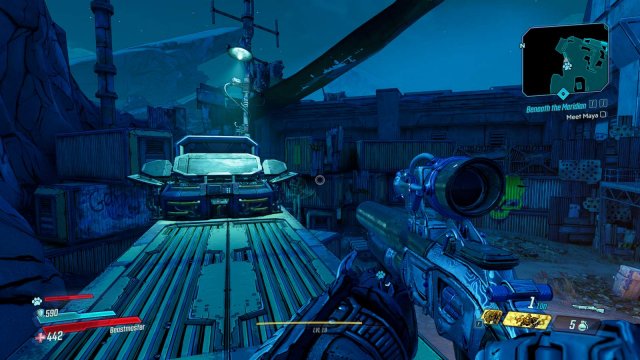
There is only one Red Chest located in Covenant Pass at the start of the game, and it cannot be reopened as it is central to the main mission, as it will always hold a Shield for the Character.
You can find it in the big outdoor arena before fighting Shank, and it is located on top of a pair of shipping containers to the left of the entrance to the boss lair.
Pandora Red Chest Locations – The Droughts
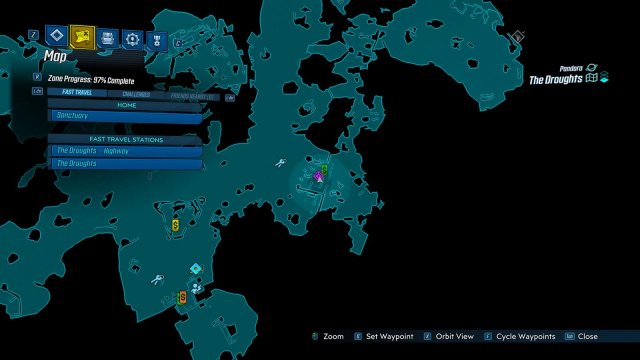
The Droughts Red Chest 1
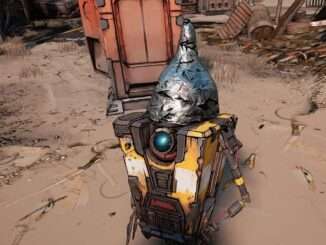
The first Red Chest is hidden in the scrapyard close to where you’ll find Claptrap after leaving the Crimson Raiders outpost at the start of the Droughts. However, it can only be opened by completing the side mission Powerful Connections, and doing the optional objective to add a human spine to power up the vending machine.
Upon doing so, Marcus will reveal a hidden trap door behind the vending machine that leads to a secret room with the Red Chest. This secret area will remain open upon subsequent explorations.
The Droughts Red Chest 2
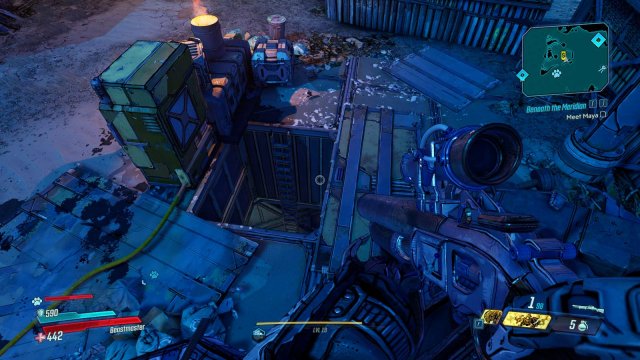
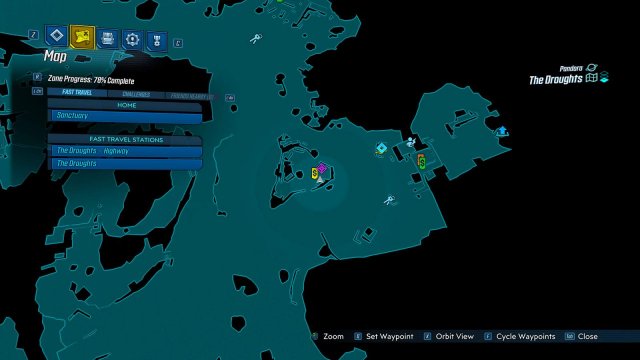
This Red Chest is located at the bandit outpost that part of the Side Mission – Dump on Dumptruck. You can locate the base by taking a vehicle and driving north from the Crimson Raiders base across the gap and looking for a tall building on the left.
After defeating Dumptruck (or the Badass that takes his place), you can look up above where you defeated the enemy to spot two targets – one that sprays water onto a disconnected yellow power line, and the other target will electrify one half of the line, allowing the water to connect the electricity. Follow the yellow power line to find an open trap door down to the ground floor of the outpost where you will encounter the Red Chest.
The Droughts Red Chest 3
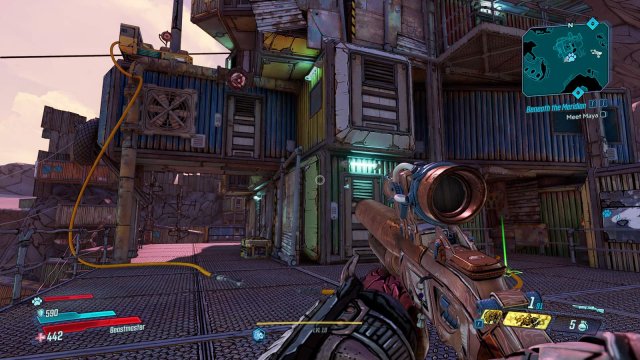
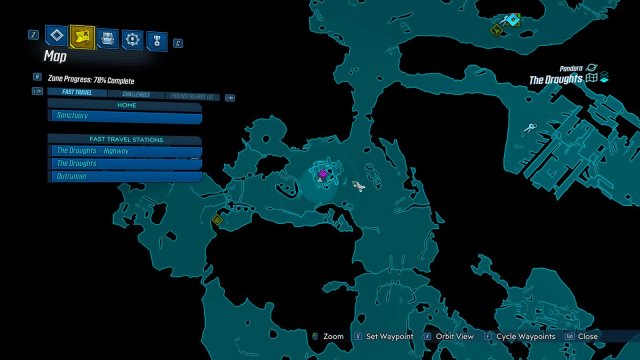
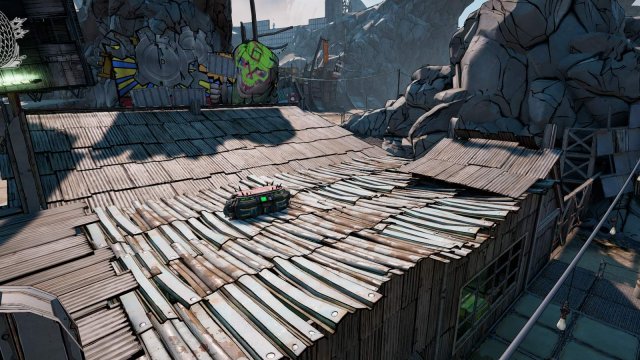
This Red Chest is cleverly hidden by Ellie’s Garage, located just to the right of the Crimson Raider base at the start of the region.
To reach this Red Chest, you’ll need to get to the roof, which will require you to head to the back area of the garage, then turn left to climb some debris and carefully cross the narrow wall (you can’t mantle up the wall so you need to climb up on the side and jump), and then clamber up onto the roof of the garage to reach the chest.
Pandora Red Chest Locations – Ascension Bluff
Ascension Bluff Red Chest
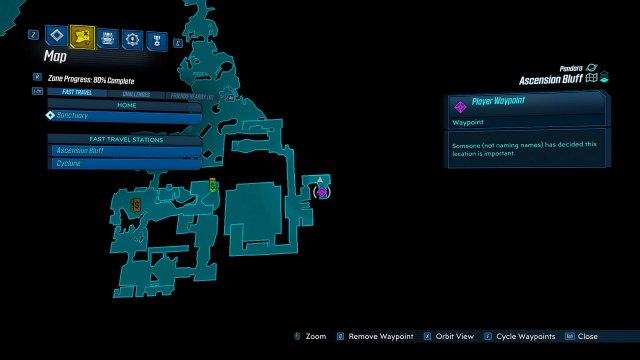
There is only one Red Chest to find in the Ascension Bluff, but you cannot obtain it the first time you explore the region, as its located in a sealed chamber at the Holy Broadcast Center.
To unseal the room, you will need to wait until the main story brings you back to fight against the New Mouthpiece. This time, when you defeat the boss – you’ll be instructed to use the organ in the next room, and this will unlock the far door to reach a Red Chest.
Devil’s Razor Red Chest 1
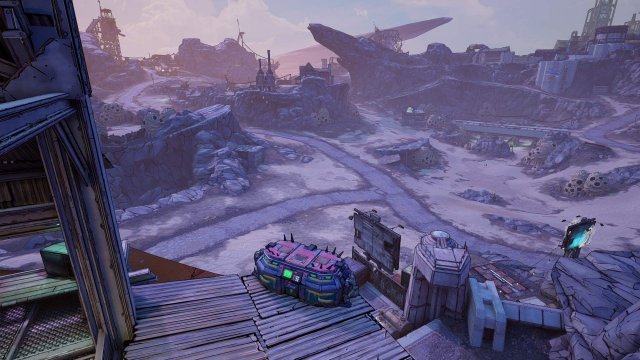
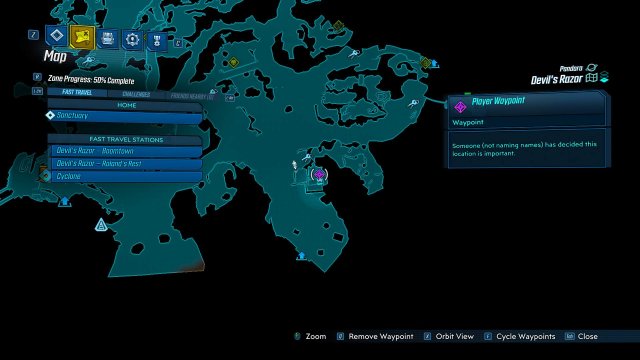
The first of two Red Chests found in the Devil’s Razor is located high at the top of a tower fort in the southeast part of the map, not far from a Catch-a-Ride Station and the exit to another region.
Clear out the bandits guarding this post, and look for stairs and a path to circle the tower and run, jump, and climb until you reach the top to find a small room with a roof you can walk onto and find the chest at the edge.
Devil’s Razor Red Chest 2
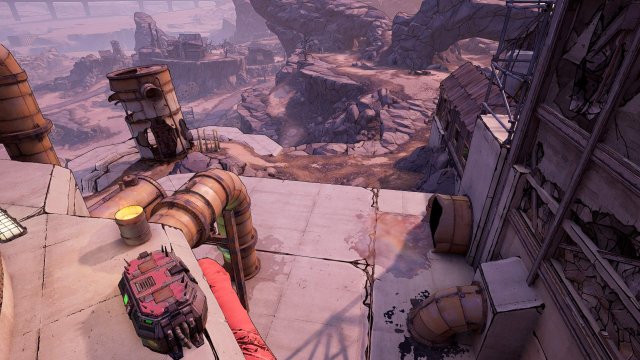
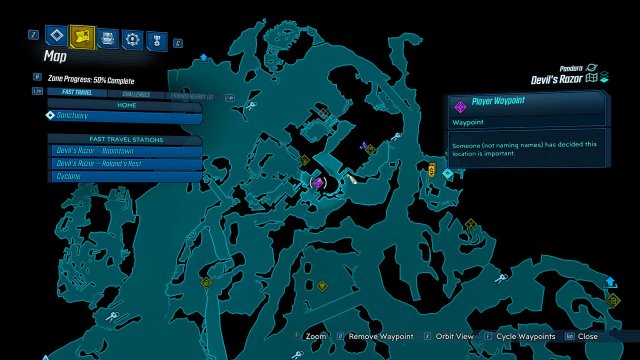
The second of two Red Chests in the Devil’s Razor is a bit trickier to find as it’s technically located out of bounds on the map. You can find it to the east of the Sin-e-plex movie theater area, located on top of a system of pipes.
The bast approach is to travel west of Boomtown and move along the walls on the opposite side until you spot some low pipes going into the ground, and use them to climb up to the low rooftops of the facility. Make your way past the pipes around a circular building and move along the eastern edge to find the chest perched on the edge.
Splinterlands Red Chest 1
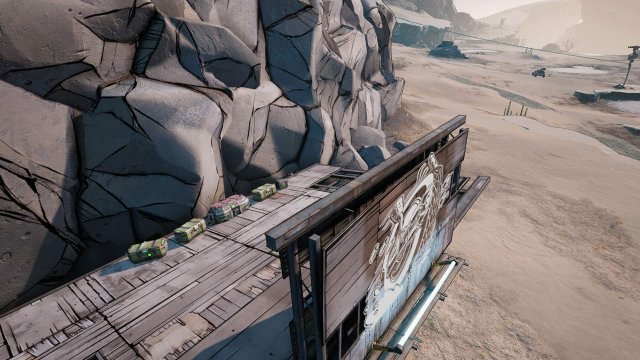
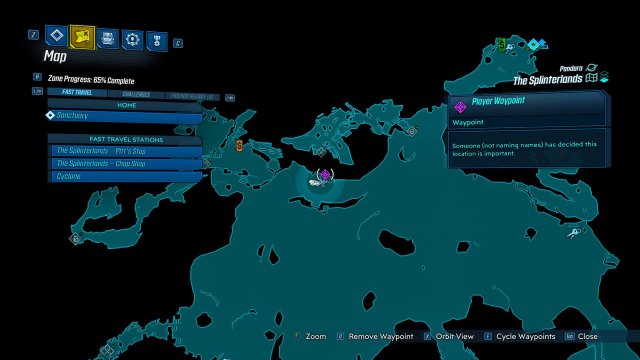
The first of the Red Chests in the Splinterlands is easy enough to reach – but can be also easy to miss. It’s located at the Catch-a-Ride Station on the north end of the map below an encampment in the vast desert.
To reach it, you simply need to arrive at the car station, and then use the cliff boulders to climb up onto the roof of the Catch-a-Ride station to find several loot chests on top, the Red Chest among them.
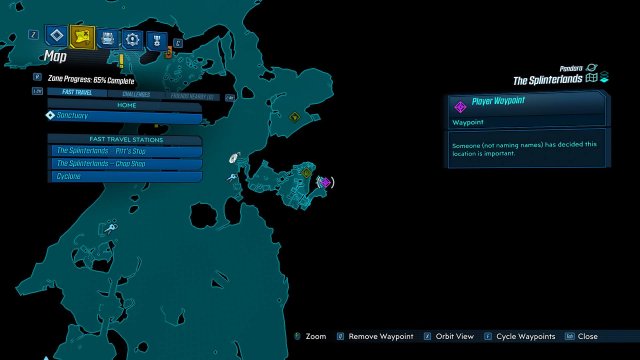
The second of the two Red Chests in the Splinterlands is located at the end of the unnamed amusement park area with the large roller coaster – in fact, it’s a prize related to the coaster itself.
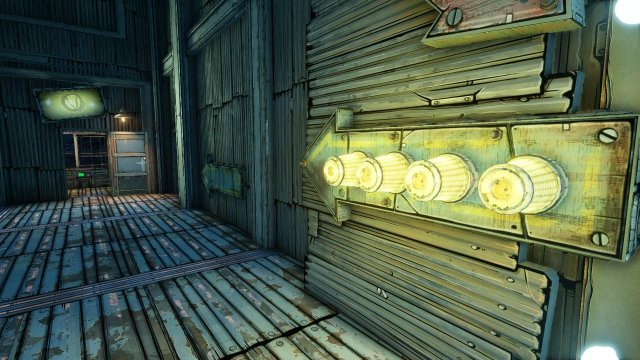
Fight your way through the amusement park in the southeast area of the map until you reach the room where the coaster is located. A locked door on the end holds the Red Chest, but first you’ll need to get into the rollercoaster and shoot at several bullseye targets as you race through the attraction. Hit them all, and the door will be open upon your return.
Carnivora Red Chest 1
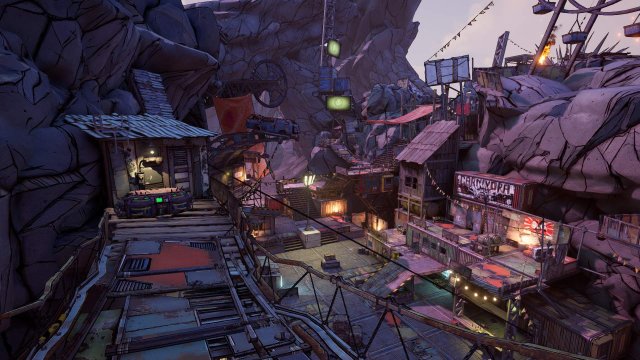
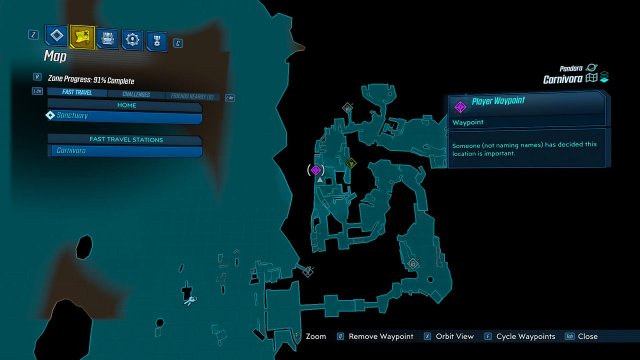
The first of two Red Chests located in Carnivora can be found early on when entering the region, above the makeshift town called the Stacked Deck.
As you enter the first wide open area past the main gate, you can look high up to the left to spot a small bridge that’s out of reach. Move to the second part of this long area, and then quickly double back the way you came by looking for a higher path. Once it leads back to the previous area, jump over some green containers to find the bridge, and the Red Chest is located at the other side.
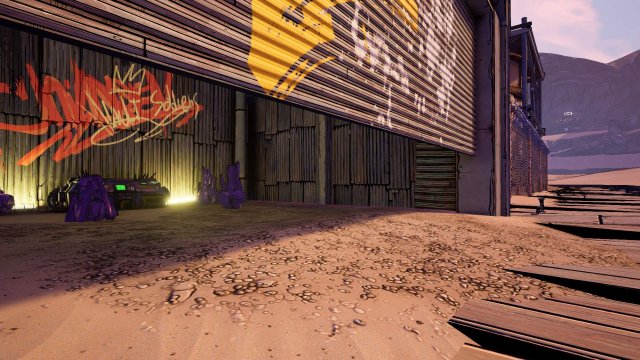
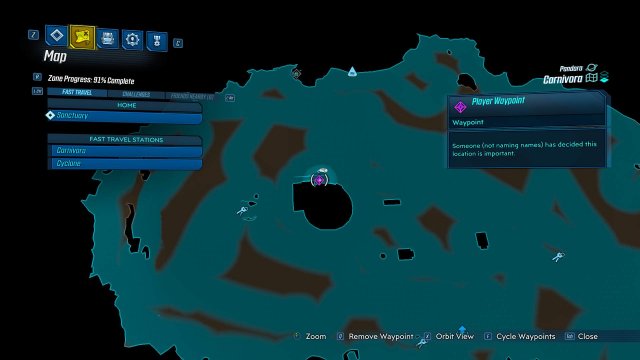
The second of the two Red Chests located in Carnivora can be found in the vast desert area, on the north side of the large circular structure that highlights the top northwest area of the map.
Head long the north side of the massive dome, and you should find a garage area with a half-opened garage door you can slide under. Inside, surrounded by Eridium shards, you can find the Red Chest.
Guts of Carnivora Red Chest 1
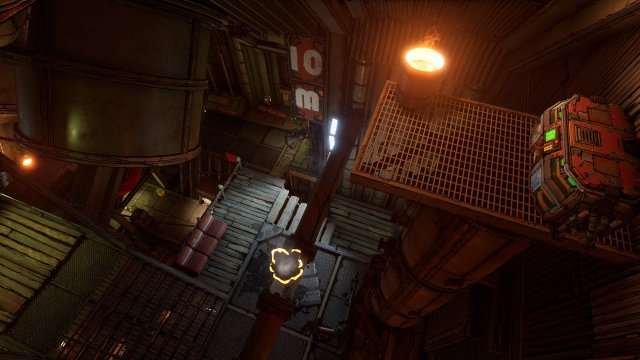
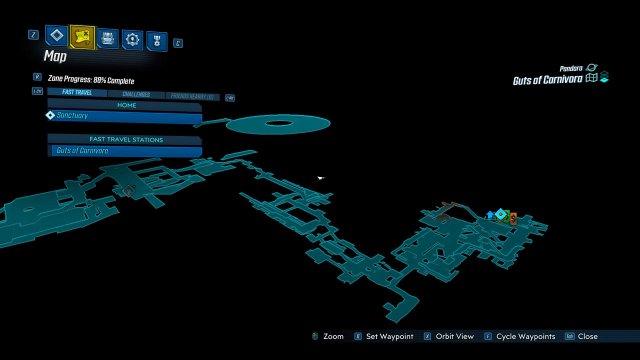
The first of the two Red Chests located in the Guts of Carnivora dungeon can be easy to miss, as its hiding up top in large inner guts room below the big circular room.
To reach the Red Chest, you must advance through the central guts room to the top floor, and look on the far side for a broken pipe vent below that can boost you up against the far wall where a small platform at the top of the room holds the Red Chest.
Guts of Carnivora Red Chest 2
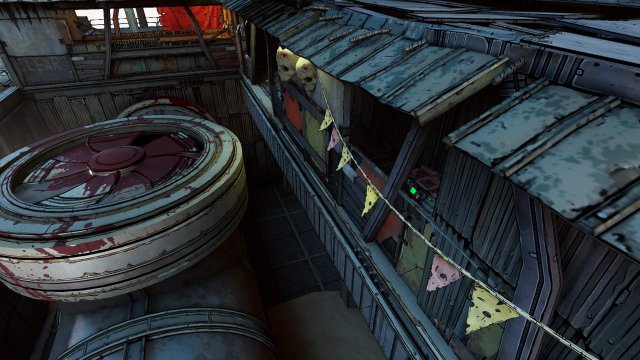
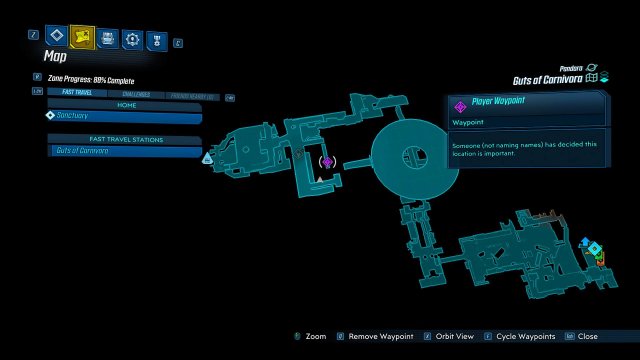
The second of the two Red Chests in the Guts of Carnivora is located in an open area above the Windswept Catwalks, after you defeat the miniboss and return to the area before the large central room.
Right before the main room, look for a large metal tube with a bloody fan in the middle, and a small narrow covered hall on the other side. Carefully jump to the fan and move to the other side without getting sliced to jump into the hallway where the Red Chest is located.
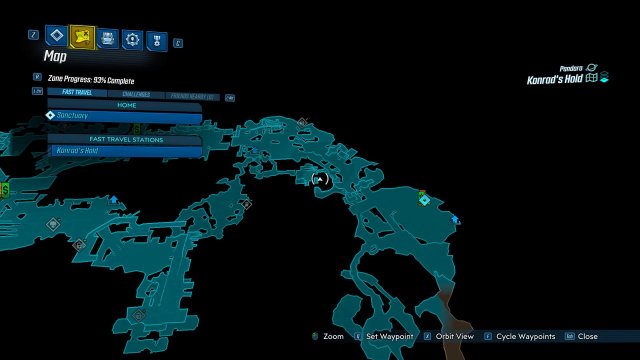
Konrad’s Hold Red Chest
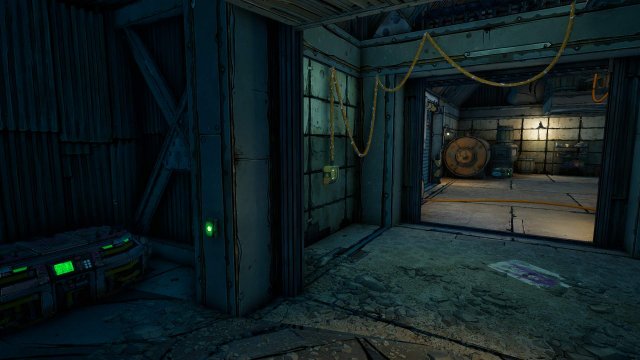
There is only one Red Chest located in Konrad’s Hold, can it can only be reached during the Childhood’s End side mission that takes you into the bowels of the region below the main areas.
After entering the underground bunker area, you’ll reach a large room with a generator and yellow wires leading to different doors. Hitting the two switches in the room can electrify different parts – so make sure you electrify the two wires leading to the left side of the room to open up a door and activate a button to reveal a secret side room with the Red Chest.
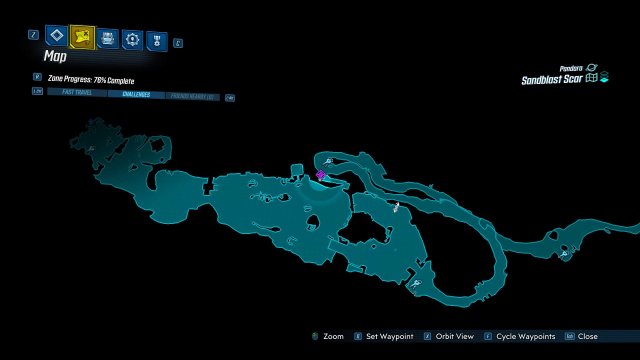
Sandblast Scar Red Chest
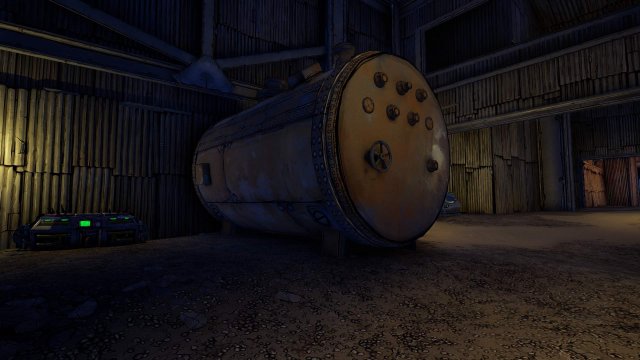
The only Red Chest located within the long Sandblast Scar driving area can be found towards the end of the region, after making several switchbacks on a narrow curving road leading to a stronghold full of enemies.
Once you drive your car over a jump and down into the stronghold area, get out of the vehicle and hang to the right where a large building is. Enter and move left to the end of the large room, and look behind a very large tank to find the Red Chest on the other side hiding in the corner.
Cathedral of the Twin Gods Red Chest 1
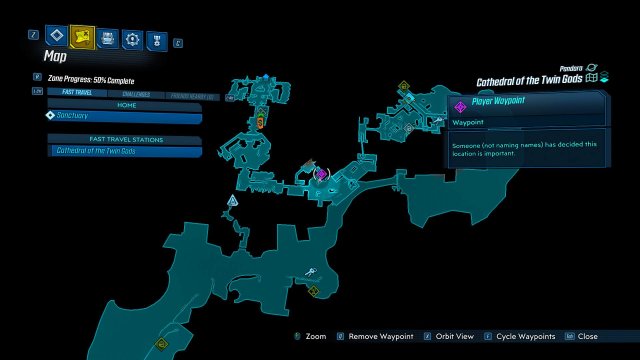
The first of two Red Chests located at the Cathedral of the Twin Gods can be found shortly after entering the Outer Sanctum, in a room hiding off the main path of your attack.
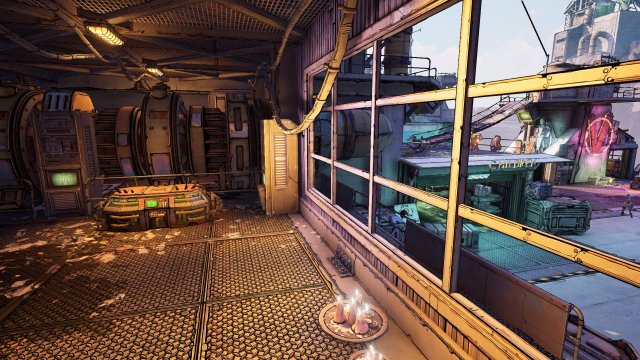
Once you’ve entered the Sanctum, battle your way through the large outdoor area until you see a row of windows along the right with a room you can’t enter from outside, and head left to go inside instead. Once in the hallway, look right to find a boarded up doorway you can break apart, which will lead you to a Dead Claptrap. Head right from this down into the room you could spot from outside, and a Red Chest can be found in the corner opposite the locked door leading out.
Cathedral of the Twin Gods Red Chest 2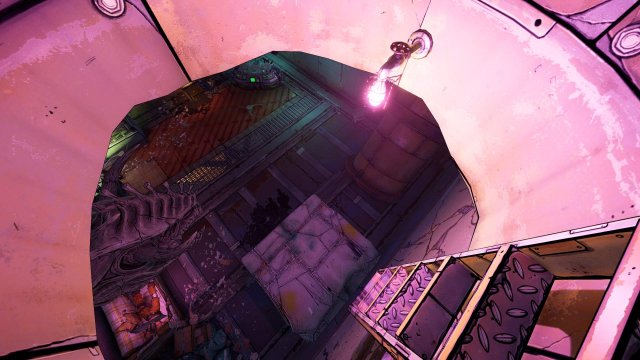
The second of the two Red Chests located in the Cathedral of the Twin Gods is technically an extra reward for taking on a challenge.
After you defeat the boss located at the end of the sanctum, drop down into the Eridium Sluice pit below, but don’t enter the new region yet, instead. Head further into this sewer area to find an arena housing a Target of Opportunity – Crushjaw. Defeat the miniboss that emerges from a small hole, and then jump in to the hideout to find a Red Chest below.
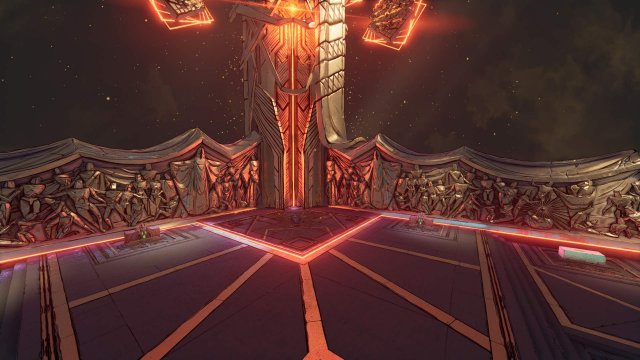
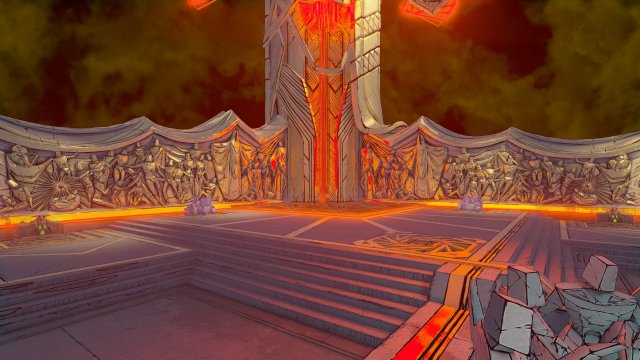
The Red Chests of the Destroyer’s Rift are technically at the very end of the game. The only way to reach them is to defeat the final boss of the game, and then enter the portal that appears, taking you to the Vault that houses two Red Chests and more loot!
Promethea Red Chest Locations – Meridian Outskirts
Meridian Outskirts Red Chest
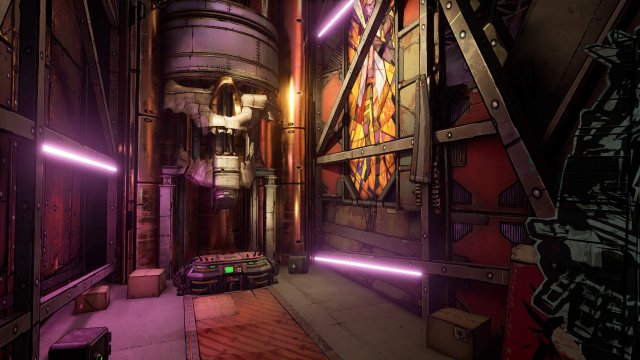
This Red Chest is a tough one to spot, as its located in a small makeshift room in the Meridian Outskirts underpass area. You can find the Red Chest located in a bandit camp that’s located on a high platform up and to the left when you first enter the region from the fast travel point.
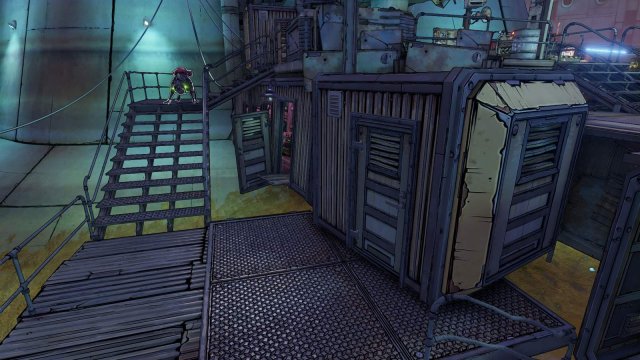
Take the lift up to where the Side Mission Maliwannabees will take you, and fight your way to the north side of the platform. Near the end, make sure to take the left path to go down a level, and where the stairs begins to go up, look for an open shipping container room with a purple light, and hop into the open door to find the chest inside.
Meridian Metroplex Red Chest 1
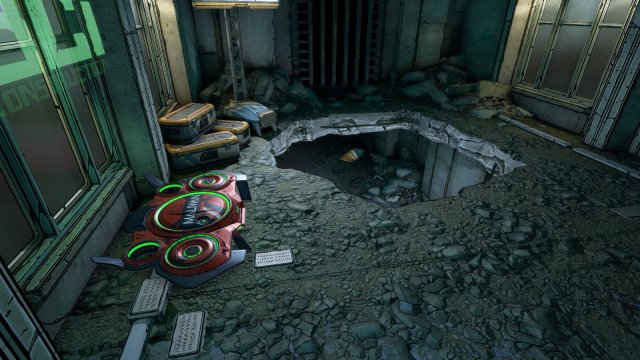
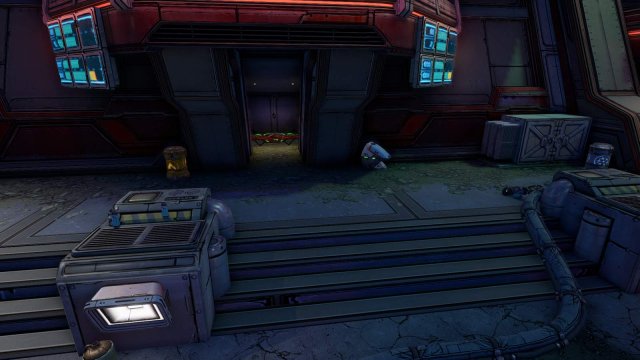
This Red Chest is essentially given to you as part of one of the main story missions, at the Maliwan Armory in the Meridian Metroplex.
During the Main Mission – Hostile Takeover – you can meet up with Zer0 past the Meridian Mercantile and assault the armory together in the left part of the region. Once the battle is over, follow Zer0 into the armory and you’ll find a Red Chest right before a hole in the floor that takes you back to the main roads.
Meridian Metroplex Red Chest 2
This Red Chest is also given to you as part of a main story mission reward for a tough boss fight in the Meridian Metroplex.
After raiding the Maliwan Armory with Zer0 during the Main Mission – Hostile Takeover, head to the far right of the zone near the Spaceport, and go down to fight the boss, Gigamind. After the fight is complete, look around the arena for a small alcove where a single red chest waits for you.
Meridian Metroplex Red Chest 3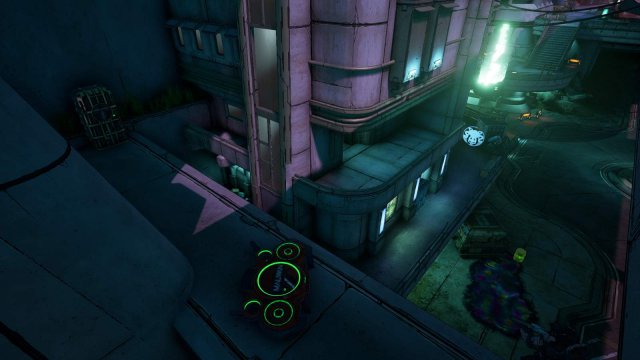
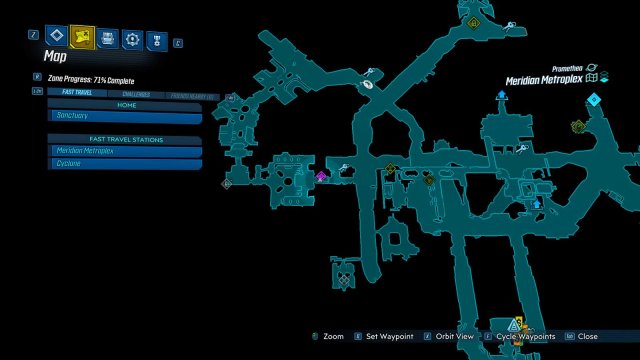
The last Red Chest for the Meridian Metroplex is located in a tricky to reach area near the center of the zone. It is also the location of a Typhon Dead Drop.
You can find it by heading to the center of the zone that leads to the Lectra City area, and is heavily defended by Maliwan troops. From the Catch-a-Ride station, go up the stairs and stick to the right side, as you’ll want to use the shipping containers to climb up the far right and double back along a small platform that crosses the road below. Climb over the container blocking the way and duck under a low ceiling to reach the other side of the street where both a Red Chest and the Typhon Log have been stashed.
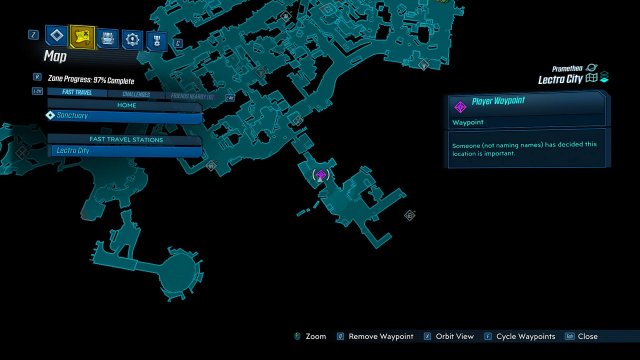
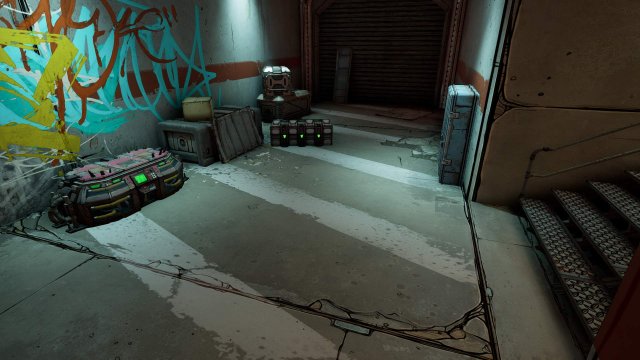
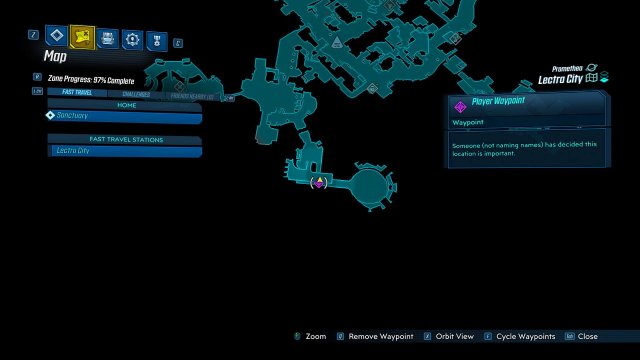
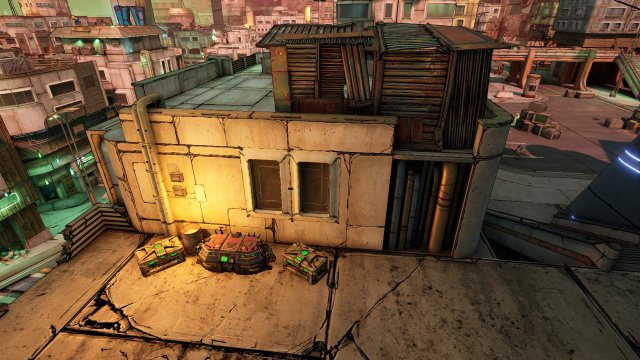
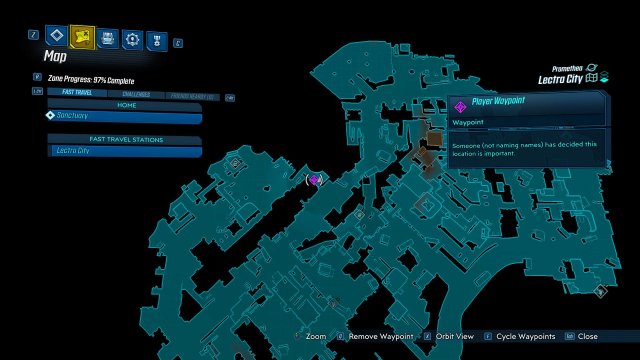
Lectra City Red Chest 1
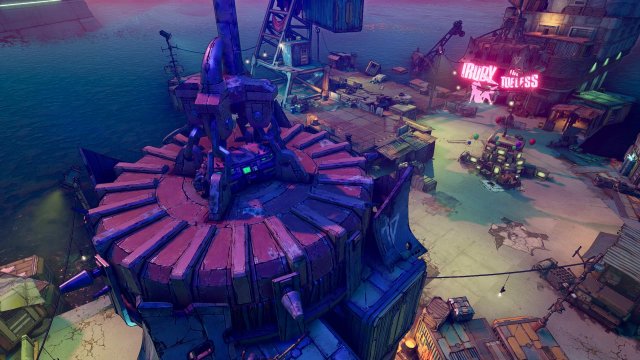
The first of three Red Chests found in Lectra City can be found at the southern seaport, aptly named Big Dock Energy. It’s also where you’ll fight one of the Killavolt contestants, Trudy.
As you approach the docks, look for a stack of shipping containers on the right, with a large magnetic crane at the top holding onto a container. Climb you way up to the crane magnet, and you’ll find the Red Chest placed on it.
Lectra City Red Chest 2
The second of three Red Chests found in Lectra City can only be obtained by completing the Kill Killavolt side mission in Lectra City, given by Moxxxie. You’ll find the chest – and Killavolt – in the far western side of the city along the south.
Be sure to check out our guide on How To Kill Killavolt if the boss and his electrical floor gives you trouble (and you’ll need to kill the other battle royale contestants first before facing him). Once defeated, turn to exit the arena, and in the hall leading back up, you’ll find a Red Chest as your reward (the door will lock when you return, requiring you to defeat him each time you wish to open the chest).
Lectra City Red Chest 3
The third Red Chest in Lectra City does not require you to undertaker any side missions, though it is at the site of one of the battle royale contestants, found in the north central area of the city.
Take the long way down the main street until you can curve right and up to a fortified area where the battle royale contestant is. After defeating the opponent, look for a small stairway on the right that leads up to a high balcony looking back down on the main road below – and the Red Chest will be up here.
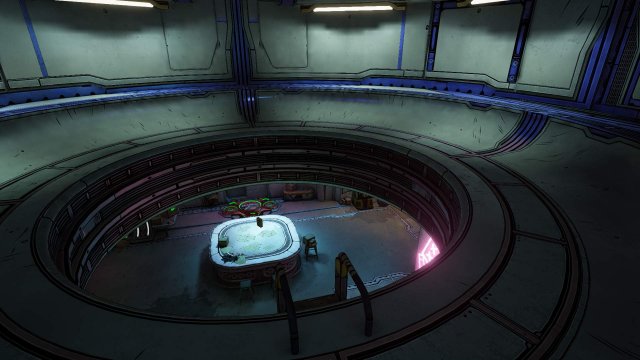
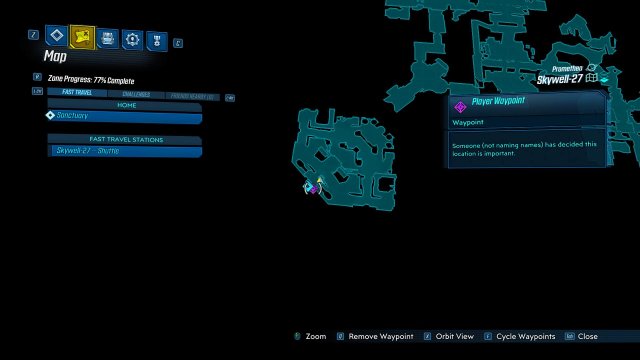
Skywell-27 Red Chest 1
The first of two Red Chests is located inside of Katagawa’s Pleasure Pit, located deep within the Skywell before you descend down to the lower levels. However, it’s located in a hatch that can’t be accessed until you progress further into the level.
Once you’ve reactivated the elevator back up into this room, look on the right side of the main complex room and you’ll find what looks like an elevator shaft with a small hole in the middle. Climb down and you’ll find the pleasure pit that includes a slot machine, goodies, and the Red Chest.
Skywell-27 Red Chest 2
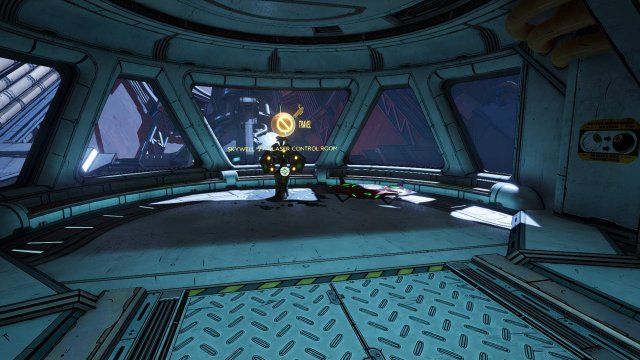
The second Red Chest in Skywell can be found at the very end of the region, and requires you to defeat the Katagawa Ball boss at the end. It’s located in the arena at the lowest part of the Skywell, requiring you to take the lift down twice.
After defeating the boss, look for a small room at the far end of the boss room that opens up to reveal a one-way fast travel station, and you’ll find the Red Chest next to it.
Atlas HQ Red Chest 1
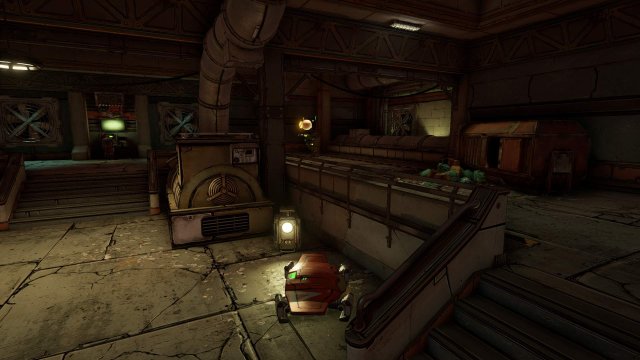
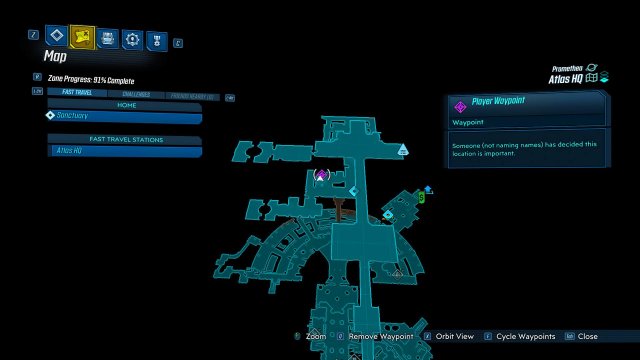
The first of three Red Chests at Atlas HQ can be found at the very end of the region (in fact all red chests here require you defeat the boss of this area). You can find it in the far north side past the CEO’s Office, after defeating Katagawa Jr.
Once you’ve defeated the boss on the rooftops below the CEO’s Office, head into the maintenance room that opens up to lead you back to the office. While here, look in the recessed floor area of the room by some stairs, and you’ll find the Red Chest.
Atlas HQ Red Chest 2
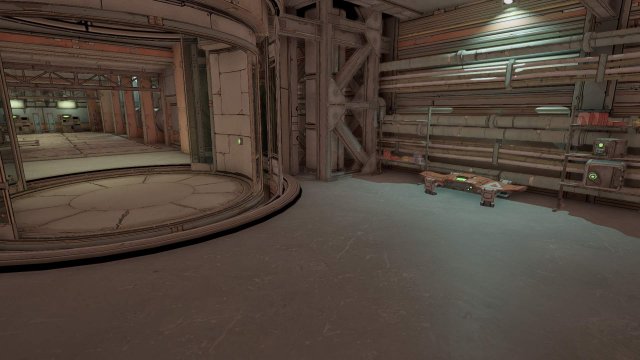
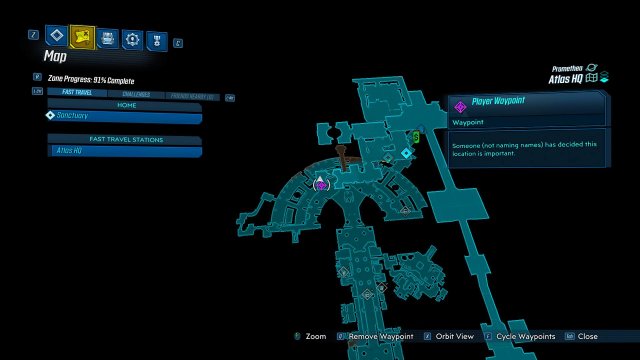
The second of the three Red Chests in this region of Atlas HQ is also found after defeating the boss of the area. It’s located by an elevator at the far north part of the HQ, down below the CEO’s Office.
From the first Red Chest located in the maintenance area after defeating Katagawa Jr., head into the next room where you’ll find an elevator lift to take you back up into the CEO’s Office. However, move past the lift to the other side of the room, and you’ll find a Red Chest hiding here.
Atlas HQ Red Chest 3
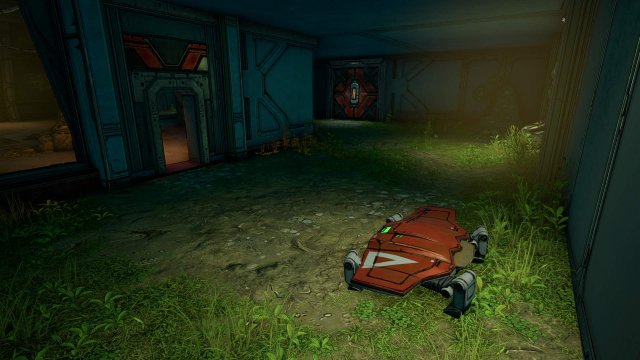
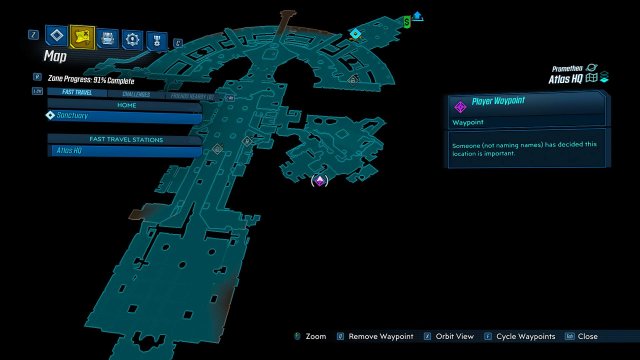
The third Red Chest located in Atlas HQ is locked through a side mission that can only be undertaken after defeating the boss of Atlas HQ area. Once you have the side mission, you can find it down in the Skunkworks Labs along the eastern side of the map, in a secret area down from the second floor.
Speak to Rhys after defeating the main boss of the Atlas HQ area, and he’ll give you the side mission Ratch’d Up to locate the maintenance guy. This will lead you to his room on the second floor of the main hall, and you can then locate a secret door to a lab. Once you complete the quest you’ll be dropped into a grassy Ratch pen, and in one of the rooms at the back, look in an empty pen to find the Red Chest.
Neon Arterial Red Chest
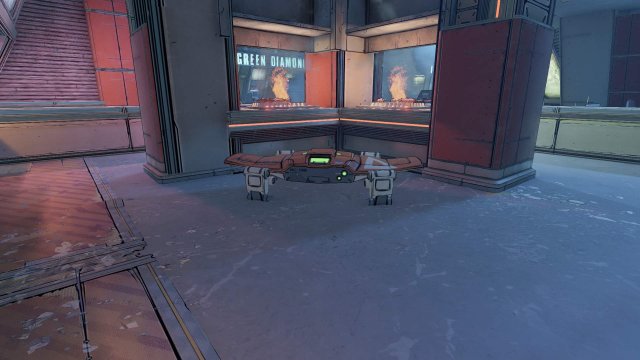
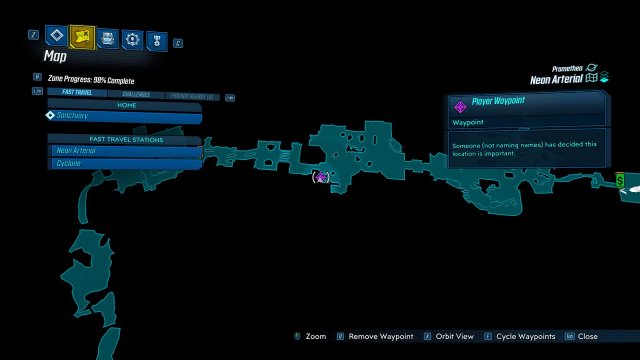
There is only one Red Chest in the Neon Arterial region, and it’s located towards the very end when you leave your vehicle to enter the Green Diamond Station that’s overrun by bandits.
Once you enter the train station’s first big room, take out the enemies and look near a large sign for Tickets to find a food counter with a grill in the middle. Look around the back behind the counter and the grill, and you’ll find the Red Chest hiding on the other side.
Forgotten Basilica Red Chest
Like other main Vault Bosses, there are two Red Chests located after defeating the Vault Guardian in this region. Once you’ve defeated the boss, enter the Vault of the Rampager, and you’ll find two Red Chests along with other loot chests in the back of the vault.
All 57 Red Chest Locations (Video Guide)
Pandora
- 00:05 – The Droughts
- 01:58 – Ascension Bluff
- 02:26 – Devil’s Razor
- 04:23 – The Splinterlands
- 07:04 – Carnivora
- 08:37 – Guts of Carnivora
- 09:55 – Konrad’s Hold
- 10:25 – Sandblast Scar
- 10:51 – Cathedral of the Twin Gods
- 12:18 – Destroyer’s Rift
Promethea
- 12:48 – Meridian Outskirts
- 13:30 – Meridian Metroplex
- 14:58 – Lectra City
- 16:16 – Skywell-27
- 17:37 – Atlas HQ
- 18:44 – Neon Arterial
- 19:12 – The Forgotten Basilica
Athenas
- 20:09 – Athenas
Eden-6
- 21:15 – Floodmoor Basin
- 22:58 – The Anvil
- 25:07 – Jakobs Estate
- 26:33 – Voracious Canopy
- 29:26 – Ambermire
- 31:12 – Blackbarrel Cellars
Nekrotafeyo
- 31:51 – Desolation’s Edge
- 33:13 – Tazendeer Ruins
- 34:08 – The Pyre of the Stars






Be the first to comment