With the new Model Editor, FBX import is finally possible. Find out how to inside!
Exporting to FBX from Blender
Overview / Prelude
This guide is for those who have a finished model. If your model needs animations, you should have those animations ready. This includes having the character skeleton and animation frames set up correctly. You need to know how to rig if your model needs animations.
I’ll be using the current version [2.81] of blender for screenshots.
This guide does not instruct how to use the Model Editor beyond importing the model. Other than that, lets get started!
Prep Work
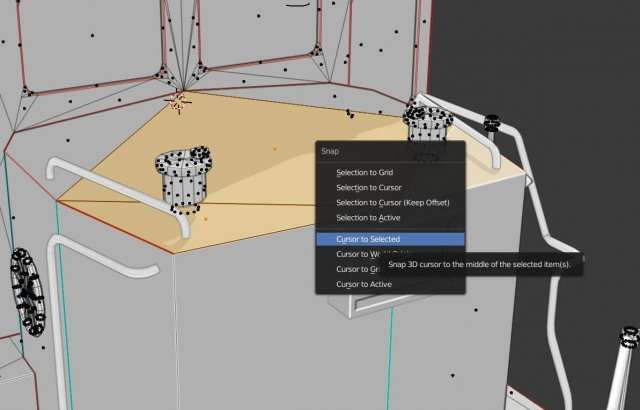
Open Blender. Prepare your model and have the deltas correctly where you want them, and all objects origins set to where they need to be.
Tip: I suggest selecting a face in edit mode, selecting that face or faces and shift s, and cursor to selection.
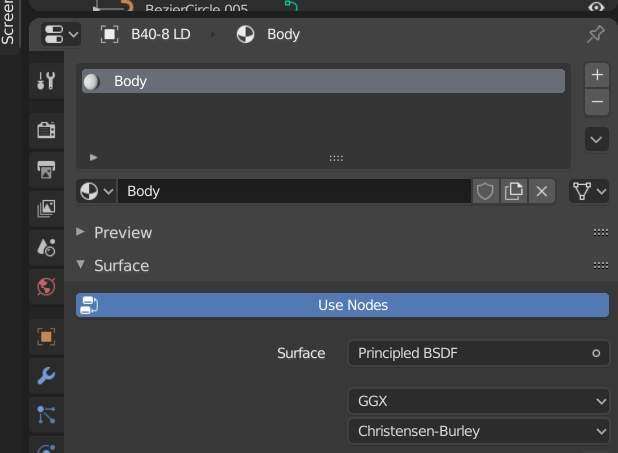
In your materials tab, make sure you have only one material per object. For some reason, you can no longer have multiple materials per object.
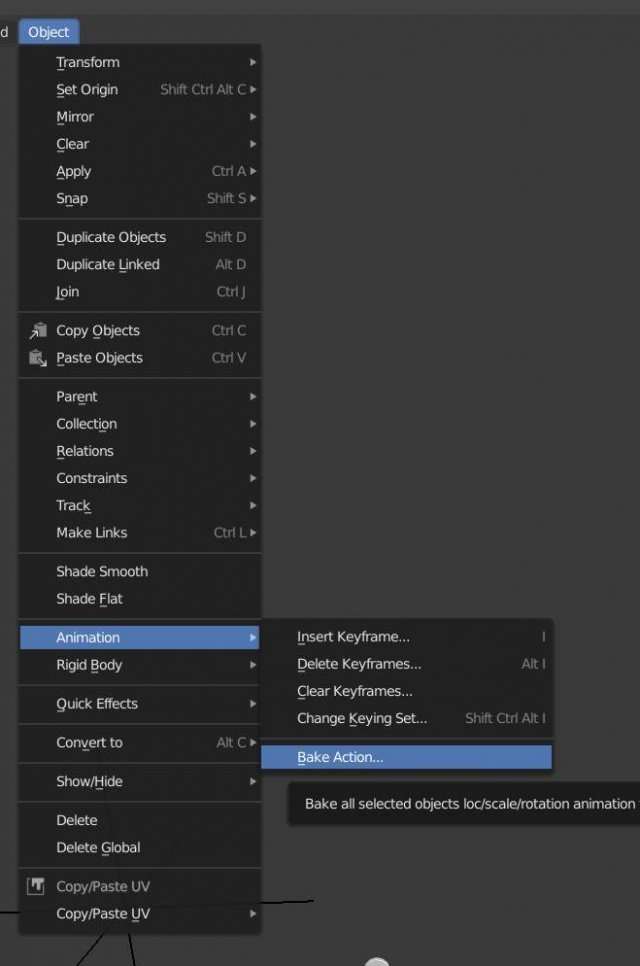
If you have animations, make sure the actions are baked and the animations function correctly before hand.
If you haven’t, do so.
Tip: select all the objects with the initial object last to make it active. Then hit object -> animations ->bake action….
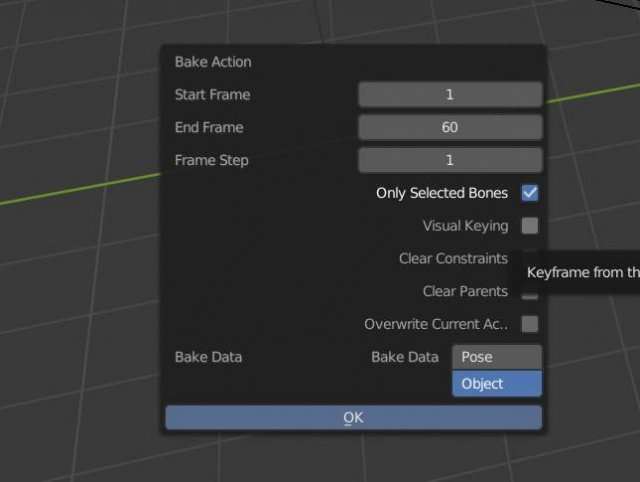
For the options, make sure yours line up. I always find that the top option needs to be checked. These are the options from my Black Diamond mod.
Last before we get into the meat and bones of the settings, make sure your scene is set to your animation type. I know of a few at the time, but I’ll list the ones I know. These cover trains & wagons exclusively.
-drive
-open_doors_left
-open_doors_right
-close_doors_left
-close_doors_right
-open_all_doors
-close_all_doors
-wheels
Export Settings
Hey, you got this far, congrats!
Okay so once you’re all prepped and ready, heres the juicy bits. I have run into an error (not sure if its me or blender) where the export settings disappear. If that happens, just select what you want to export in object mode, and ctrl c. Open a new blank .blend and ctrl v it there. For animations, you will need to reset the timeline in terms of length.
These are the settings I used for the black diamond. You can use selected objects based on your current setup, here I just simply had done ctrl-v thing i mentioned a bit ago. Active collection is based on heirarchy. If you’re organized, this is better than selected objects.
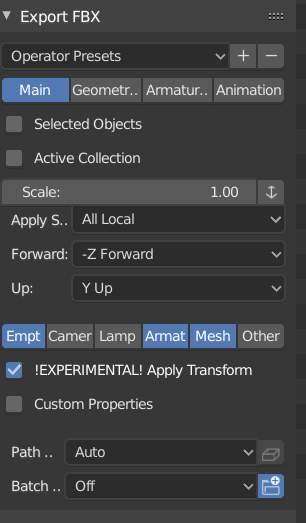
Scaling
This bit….it got me confused for a few days. For some reason, all local seems to work best, with it set to a scale of one and that icon next to that [Apply Unit] is unchecked.
Blender defaults have you covered for the forward and up. Long story short, depending on your program the Z[ed] axis may not be up always…
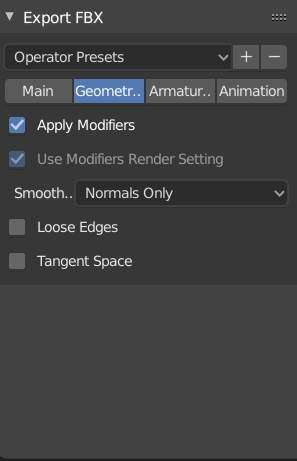
Geometry Tab I didn’t touch anything in, it all seemed to work fine by default. I would leave Apply modifiers so that way you can keep your workspace clean for future edits (like the mirror modifier or edge split).
If your model does not have animations, you can export your model and skip Animations.
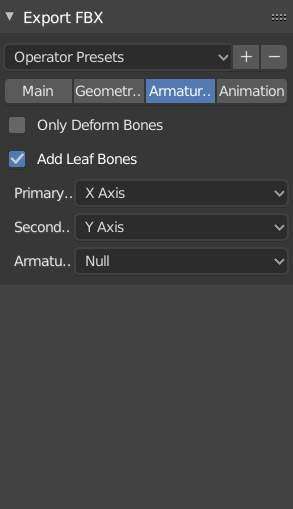
The armature tab is very important, armature doesn’t behave the same as the mesh. How your roll on your armature is will reflect how your animation is in game, and the axis aren’t the same either. X axis is your primary, with Y being your secondary.
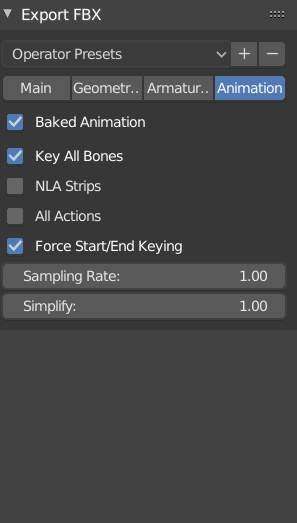
Animations tab is also just as important. The “Bake Animation” bakes all actions into one big animation. The name, it depends on this:
See “driver”, at top center? That’s my scene name. You name that based on the action you’ll be using. It also serves as the name for the “Baked Action” setting under the animations tab in the FBX Export Settings. I suggest this only if you have only one animations and not like, say, doors. You’ll need NLA tracks for that I believe. (looking into that more myself)
Key all bones just means its keyframing all bones.
I only had the one animation needed here, and thats the drive animation. So I disabled all actions and nla strips. Forced Key is needed, don’t know what that does, and never played with sampling.
Moving on.
Setting Up Model Editor
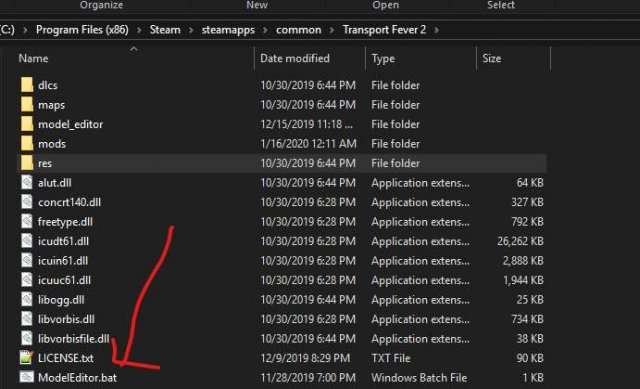
Alright, first. Model editor is not an .exe, its .bat file under steamapps/common/Transport Fever 2.
Next, is fbx_import folder. This can be found here:
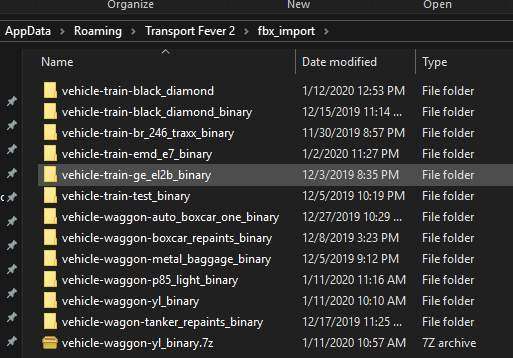
See on mine, black diamond has a binary and no binary? Blender uses the binary language. FBX has 2 forms, ASCII and Binary. Because this is a blender export guide (and because I don’t know crap about 3ds and Modo), I’m going to skip over the ASCII and focus on the binary.
So it would be this in how you set it up, note the dashed vs the underscores respectively:
vehicle-[insert mod type]-[insert mod name with spaces as underscores]_binaryNext, in that new mod folder, create a new folder again, with the same name just dropping the binary. So it would look like this:
vehicle-[insert mod type]-[insert mod name with spaces as underscores]Then for the file name. Again, same format, only at the end of the file name, add _lod0. If you have multiple LODs, add a second FBX file with the respective lod. So it would look like this:
vehicle-[insert mod type]-[insert mod name with spaces as underscores]_lod0.fbx
vehicle-[insert mod type]-[insert mod name with spaces as underscores]_lod1.fbx
vehicle-[insert mod type]-[insert mod name with spaces as underscores]_lod2.fbx
Next in the staging folder. You can find that here:
- Program Files (x86)\Steam\userdata\[insert steam id]\1066780\local\staging_area
In the staging folder, create a new folder for the mod. Like TpF1, it requires “_1” at the end of the name of the folder. There will need to be a new file named “mod.lua” for the Model Editor to see the folder. Mod.lua code luckily has not changed, so if you’re converting an old mod, you’re in luck, you can just copy paste.
Now for importing!
The Model Editor
Alright. Here is the moment we’ve all been waiting for! Since this is an importing guide and not a Model Editor Guide, I’ll keep this section short.
Now, select the drop down at the top.
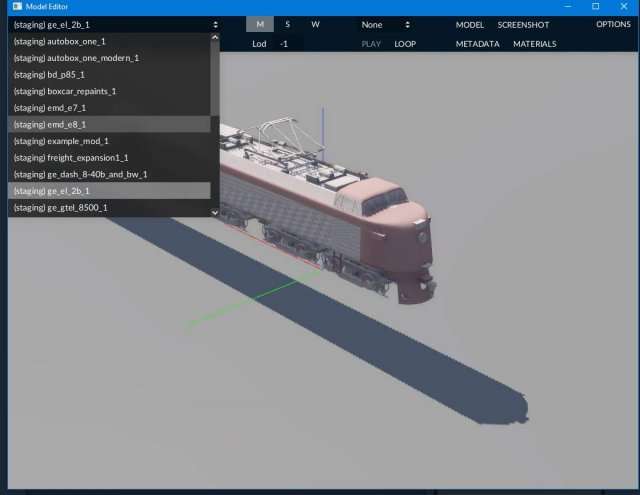
Next, go to import. Select FBX. Go to your new mods FBX location and select the FBX. It should now import correctly. Congrats! You got this far!
Some Notes:
- The Model Editor, to my knowledge so far, does not display Multiple Units [that i am aware of]. So that config file will need to be done by hand.
- Now its important to note, it will take some trial and error, I’ve been messing with this thing for 2 months at the time of writing. Yes, 2. So be patient with yourself. You can even see here, that loco is floating.
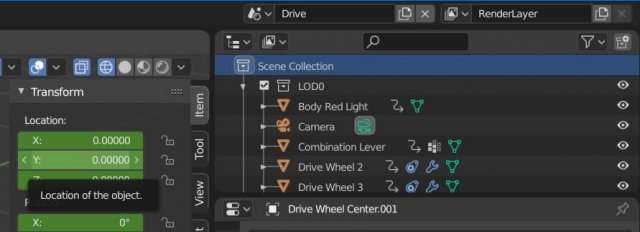
A major mistake I made was adding 0’s to the rail vehicle selection in metadаta:
backBackwardParts = {  },
backForwardParts = { },
blinkingLights0 = {  },
blinkingLights1 = {  },
fakeBogies = {  },
frontBackwardParts = {  },
frontForwardParts = {  },
innerBackwardParts = { },
innerForwardParts = { },
It’s here in the ME:
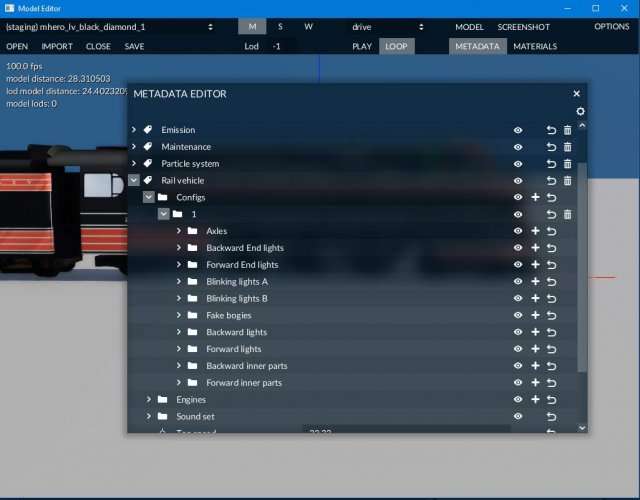
I don’t know if the model editor caused this, but all the values were zero. Check that the selection matches the image, unless you are changing the numbers intentionally. This error caused problems for me for a while.
Be the first to comment