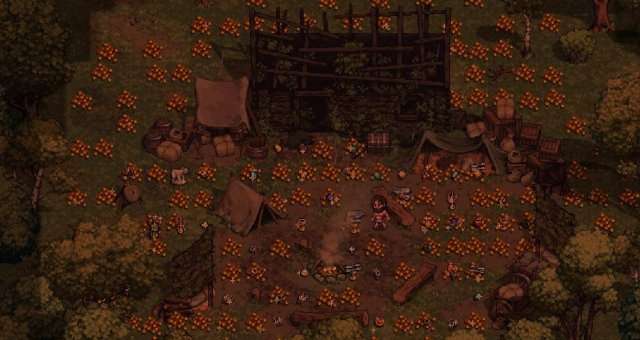
This is basic tips for starting and playing Geomancy or mix builds with this Skill Tree.
Geomancy Basic Guide
Introduction
Sorcery Skill Tree – Geomancy. If there is a word to describe Geomancy with it, it’s a word – Control. If you are interested in this, but need some tips – you are welcome to read this work.
The information will be on the follow categories:
- Gear and Attributes.
- Skills Introduction.
- Gameplay.
- Lvl 1 example.
- Gear and Attributes.
We don’t have much of a choice yet, so it’s pretty obvious.
Weapon
- Witch Staff / Hermit Staff [for max Boulder Toss] / Geo Staff [for melee combat w/o staff skill tree].
- If you don’t want/can’t get Witch Staff, but have extra money – Pilgrim Staff is a nice placeholder. -Cost and -CD it gives is equal to getting Geo Cowl over Apprentice Cowl.
Weapon Enchant
- If you are not going to melee – get -spell cost +MP enchant.
- If you are going to melee get any kind of +magic damage enchant. Preferably +shock, +prionic or +frost. Others aren’t bad either. This kind of damage scales with MP.
Armor
- Geo Cowl / Witch hat.
- Geo Mantle.
- Any kind of Aquamarine rings for -CD.
- Any kind of Amethyst rings for -spell energy cost.
- Gold Sapphire Ring for regen and MP(Magic Power).
- Pagan Amulet / Sapphire Pendant.
You want to have enough -CD for your Runic Boulder (RB) to reach 1 turns CD.
For that you need to have less than 75 cooldown duration. 74.5 would do the trick. It’s rounded up in the status window, but it uses exact value. After that get -50% spell energy cost and as much +energy regen/+max energy as possible. The amount regenerated per tick is 5% of your max energy. Meaning you need to invest into 7 vitality to get +1 energy per tick and it’ll also increase energy regen speed. A bit of vitality is very beneficial to prevent you from drying up from RB uptime, but slamming everything into Willpower is a viable choice too. Both are very impactful.
Skills Introduction
Geo Tree Skills
Runic Boulder [RB]
- Bread and butter skill. You can place it in your vision on a free cell with a chance to Knockback enemies around it. It’s a breakable terrain that also blocks vision. You can use it not only to Knockback, but also as a shield from archers or make melee enemies walk a long way around. Use it with creativity.
- Don’t be afraid of the 3 turn Stun either.
- If you use SS on RB that got attacked – you won’t get Stunned.
- If you summon another RB and the old-old one that got attacked disappeared – you won’t get Stunned either.
- You will get Stunned if RB is completely destroyed or you manually tried to cancel it (by right clicking) or it disappeared due to LoS.
- But if the responsible enemy is already dead – everything is fine.
Rune of Enfeeblement [Enfeeble]
- A beast of a passive.
- -10% phys res, -15 Knock/Stun around each of your RB.
- Currently it even stacks. You can surround the enemy with your RBs for -30% phys res and -45% Knock/Stun. Absolutely insane.
- The only downside is that it’s too slow to activate.
- Meaning, if you RB->SS, there won’t be any effect from Enfeeble.
- You have to RB->any action or wait->SS for Enfeeble to kick in.
- Weave inordinary attacks to be effective.
Rune of Binding
- Don’t even try. Don’t even look at it. This is a late game passive. It’s here for Runic Explosion and Boulder Toss. You’ll save up 8 mana on SS, if it goes after RB – is it worth a skill point?
- Also, the current bugged Enfeeble is very anti-synergy with this passive.
- Btw, you can’t get free cast with it.
- Energy cost caps at 20%.
Stone Spikes [SS]
- An easy to use spell with OK dmg and ability to trap/block your enemies. Knockback chance is also a lvl higher than RB’s.
- It’s actually bugged – if you have multiple RBs standing in a certain position – it’ll try to Knock enemies away from the older RB, while you were trying to use SS on a new one. Spikes will land from the correct RB, but before that – enemy will be pushed away and can land on an unexpected, for you, cell. Beware.
Here’s the example:
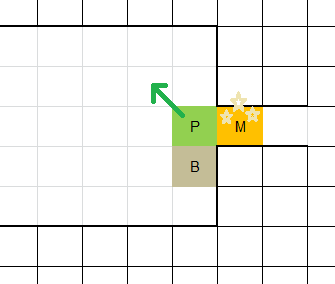
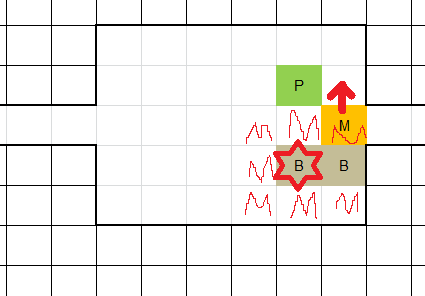
- You used 1st RB, attacked, stepped back, used 2nd RB.
- If you use SS after that – you’ll get enemy Knockbacked in the incorrect direction.
- To be safe from this bug, try to remember that right now SS pushes enemy away from the first RB it came in contact (Enfeeble debuff range) with.
Rune of Absorption
- Some meager energy replenishment. The magic here is that even with meager energy replenishment can make a lot for us.
Rune of Fortifying
- Don’t even look at +60% on SS’s crushing dmg. Not worth it.
- The actual use of this passive is to help you with Stone Armor.
- And the last part (+durability of RBs&Spikes) may come into play after AI rework, but it’s clearly not needed yet.
- Imo it’s too much random stuff in 1 skill and all minor things.
Stone Armor
- Not needed at the current stage.
- Actually a viable choice for Pyro.
- Stone Armor + Fumble from Burning – and you are very tanky. Along other things, it’ll also give you resistance to fire, which can be very good.
Petrification
- A great CC skill. If there are too many enemies to deal with using just RBs and SSs – throw that one and you’ll even become more powerful for those turns.
Earthquake
- A large CC and debuff skill. Energy burn is also nice.
- This is a skill to allow you fighting very high Stun/Knock resistant enemies.
- Daze on top of Daze is Stun, btw.
- Don’t step into it though.
- Hold the edge and keep enemies inside.
- The downside is that it can be a little tricky to use: we need an unbreakable terrain for top dps. You’ll have to be a little creative with positioning this skill.
Staff Tree Skills
Hail of Blows [Hail]
- -dmg part applies only to physical dmg. Your magical dmg from staff and enchanting actually hit your enemy up to 3 times with full power.
- Also, with Destabilizing Hits each hit can Knockback. And each hit can crit = cleave.
Destabilizing Hits [+Knock]
- Enables you to get enormous benefit from Enfeeble.
Battle Trance [+Crit]
- Nice thing.
- Bug: crits restore mana with it.
Step Aside! [SA!]
- A nice gap closer and AoE Knockback.
Other Staff Skills
- The only one worth mentioning in context of a Geo/Staff would be Unwavering Stance.
- You can ramp up stacks pretty high, if you don’t drop the buff. Peacemaker can help you hold the Earthquake.
Skill Order
Geo-Staff
To get rolling you need Enfeeble and +Knockback chance from Destabilizing Hits. That’s what you really need. Later grab Battle Trance too. After that – anything goes.
Pure Geo
Other than SS, your priority is getting Enfeeble too. And that’s the end, actually. All those passives are so-so. Petri is good, even though you rarely need it. See for yourselves. You can get Pyro and burn them, while getting MP from RBs. You can mix in archery to shoot helpless trapped enemies. After grabbing Petri, you can even go back into Staff Tree, as Geo-Staff is hoping for Earthquake on later lvls too. You’ll only have a different start.
Raw Spell table
Damage and effect of the Spell is determined by Spell’s basic values and your Magic Power and Geomantic Power.
There is a slight difference in damage calculation based on the type of damage.
For Physical damage from the spell, the formula is:
- Spell’s Physical damage = Basic_Value * (Magic_Power + School_Power)/100.
For Magical damage from the spell, the formula is:
- Spell’s Magic damage = Basic_Value * Magic_Power/100 * (1 + School_Power/100).
Right now, as a general rule, additional effects on spells, like Knockback chance or Ignite chance, are scaling on the following formula:
- Effect_Value = Basic_Value * (Magic_Power + School_Power)/100.
Gameplay
First of all. Did you know what middle mouse button does? You can move camera with it.
And now The most useful tip in the guide:
- To get rid of the annoying RBs – use Rest to narrow down your Vision – they’ll disintegrate.
- It’s way more convenient than right clicking each and every boulder to destroy them.
- Or just hide behind a tree.
- Geomancer’s gameplay is closely connected with Knockback mechanics.
- Successful Knockback against something Stuns for 2 turns and deals damage.
- Knockbacking enemy against unbreakable terrain deals 15% his max_hp physical dmg.
- If you Knockback an enemy into a living target or breakable entity – most of the dmg will be done to the 2nd target. Dmg done to the 1st target will be negligible in this case (though it’s different if 2nd target is larger than 1st target).
- But if you really need that Stun to go through – don’t hesitate to Knockback enemy even into yourself.
For any variant of Geo it’s good to hit the Stunned enemy with a few melee attacks to conserve some energy. But there’s a slight difference in the way you position, depending on what you are trying to do.
If you are playing around SS (Stone Spikes), you’ll want to avoid getting hit by your own SSs. This sometimes makes it hard to go into melee at all. But that is sometimes. While you can finish enemies only with RBs and SSs, it takes a decent amount of energy and time, but safer. Try to understand what enemies you want to kill like that and when you want to change your position and mix in melee attacks.
Also, starting with SS is slightly easier, as it has higher basic Knockback chance making things more reliable on low MP&GP. Other than that, in case all that still failed – you have blocked the way with Spikes and it’s still safe (if you planned accordingly).
If you are playing around Staff skills – you are the Knockback source too. Rather, after getting Destabilizing Hits – you are the finishing touch (+25% dmg for 2 turns on each Knock).
The synergy is solid:
- Your RBs provide you with MP, increasing the magic dmg on your Staff attacks, Enfeeble empowers the Knockback (both chance and dmg) and other Phys dmg. With that, each hit of Hail can Knock and even normal attacks can do so too.
- Sometimes you need to step aside to place RB on the spot you were standing or move away to pull the enemy into other obstacles (walls).
- Sometimes, for more CC (Crowd Control), you can cancel existing RB and place a new one in its place next turn.
For example, when you are confident in your RBs connecting, while hugging a wall you can wait for enemy to engage you in melee:
- RB on your side to Knock enemy diagonally into a wall.
- Hit.
- Step back.
- RB on your side the same way.
You can repeat it until you are satisfied or have 3 Enfeeble debuffs for big SS or 2 Enfiible into SA! and/or Hail. This pattern works with RB on a 2s CD, so it works from lvl 1.
If you are not confident in your RB connecting you can start from distance. That they 1st Boulder even though it can do dmg, mostly we’ll think of it as a buff/debuff for the upcoming 2nd Boulder. Like that, if you already have 1s CD on RB – your next RB will come, while enemy is in Enfeeble from first RB. Or, if you don’t have that CDR yet – you can use your own body to stop enemy there, in the Enfeeble.
- Upon reaching 1s CD on RB (or by taking some hits) there’s an excellent setup you can make using a corridor.
- You’ll need a clear 3×3 space at the exit of the corridor.
- Use first 2 Boulders diagonally, while enemy is on the last cell of the corridor.
- Step back diagonally, letting the enemy move 1 step forward.
- Boulder 3rd time.
- And land a massive staff finisher (SA!>Hail) on top of the gorgeous triple Enfeeble.
Sadly this setup doesn’t work well with SS, due to a bug, mentioned in the skill description above. You can simply SS after just 2 Boulders. Or make use of another setups using the unfortunate bug.
The rule is:
- Mob will be Knockbacked by Spike from the first Boulder that started “touching” it.
Like this:
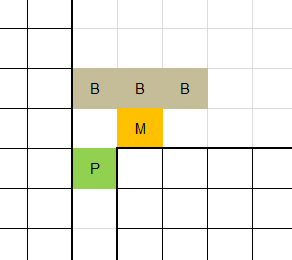
Boulders were places from left to right. Now, if we use SS on the Right one – enemy will be Knockbacked to the bottom-right – into the wall.
If there’s no convenient wall for the easiest setup – you can always use random unbreakable obstacles. Just try calculating a little. For example, 2 trees placed in a Knight Chess-Piece movement pattern – is an excellent spot for a triple RBs. Which can be altered (if 1 of them is see-through) into triple RB (with 1 of Knockbacks being into RB, which doesn’t deal 15% max_hp damage to the target) into StepAside!->Hail on the 3 Enfeeble stacks. That’s an overkill setup.
- Or 2 trees on a line with 1 space between them for 2 RBs with Enfeeble. Into SS.
- Or 2 trees on a line with 2 space between them…
- 2 long Bush.
- 3 space trees.
You can use just a single tree for double Enfeeble (1 Knock against RB) into attack->StepAside!->Hail
Or the plainest of the plain, using the same single tree:
Non-diagonal RB > SS >> RB> cancel_RB > RB > etc, with normal attacks weaved in, while standing next to the same tree.
Or you can transition patterns, though there’s no need for that yet…
Boulders and LoS
That being said, there’s another mechanic you might want to pay attention to. RBs need to be in your Line of Sight (LoS) to be kept alive. Once you LoSed your RB – it’ll disintegrate after 1 turn (though there’s a high chance it’s a bug and it should disappear sooner).
The cost of keeping up RB depends on Spell Energy Cost. Which is decreased by said RBs. Once you stack enough – your regen will be able to keep up, allowing you to take on prolonged fights.
- As RB increases your MP and GP (and other attributes) – your spells will always have a swimming parameters.
- To make it clear, let’s take SS for example.
- In idle state your tooltip on SS will always be a lie.
- It says it’s 19piercing+4crushing with 74% Knockback chance for 25 energy.
- But you’ll always be using SS after you have at least 1 RB.
- With 1 RB it’s 22piercing+4crushing with 89% Knockback chance for 22 energy.
Since your Knockback chance on RB and SS depends on itself there’s a way to make use of it.
Stable Pull Example
At the beginning your energy regen / spell cost allows you to Rest and still regen energy. That is used in a stable pull strategy. To increase the chances of your combo (RB-SS) connecting on desirable surfaces (i.e. Stunning on initial RB) – you pre place RB close to yourself. And Rest. On full mana you make your next move just like that. Ideally you place the extra RB in a way that allows you to get rid of it using LoS while moving where you wanted, without wasting your turn on destroying it or burning mana keeping it up. Or you can make use of it later – it’s all situational.
Here’s an example of making use of all the stated above.
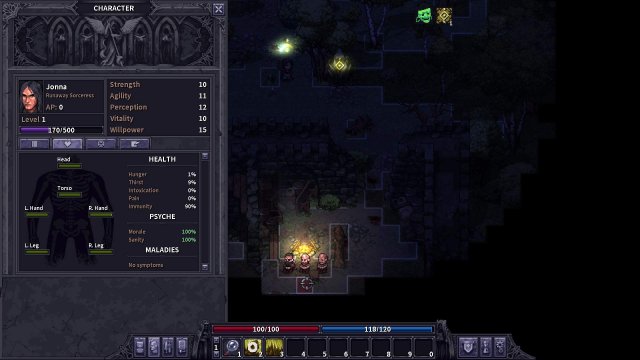
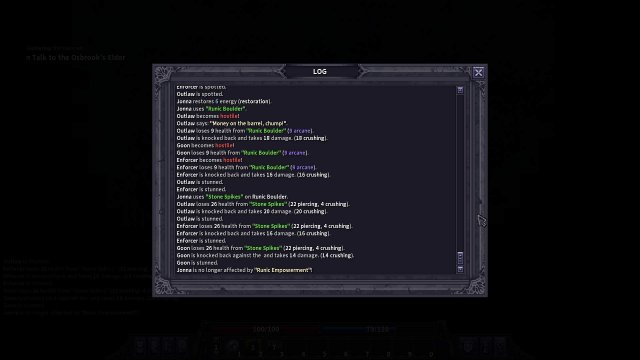
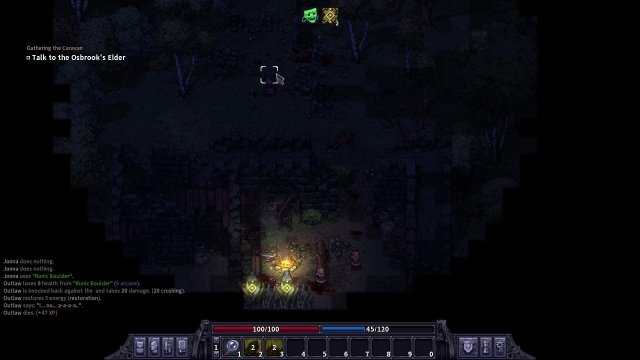
We pre-placed RB almost behind the tree and Rest’ed till full energy, while bandits were out of sight. Then we walked closer. RB is currently out of LoS and it’ll disappear next turn, but we a landing our RB this turn with higher chances, than idle-state. We use SS immediately after that, this time Stunning all of them.
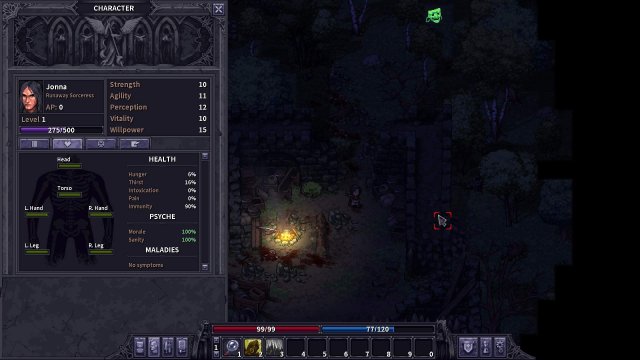
After that we use 2 more RBs – one in the same spot we used to hit all 3 of the enemies and another one on the fat bow-Outlaw to finish him off, while Enforcer and Goon are making their way towards us. After that we move upwards one step to clear up 2 existing RB with 1 turn.
This step actually didn’t matter, since we had enough time to destroy them manually, but as a demonstration of using your turns efficiently – it is worth mentioning.
- The rest of the fight is simple, so we’ll end the example here.
- In the example we didn’t wait between RB -> SS, because we didn’t have Enfeeble. We won’t be waiting either, if the Enfeeble bug is fixed.
Being Ambushed from all sides with not even a single unbreakable terrain in sight
That’s actually the most interesting thing that can happen to you at this stage on the game. Knockback enemies into each other. Maneuver with your RBs in the middle, hide behind them from archers. Just take note that if you are Knocking 2 living targets the damage will be spread – Spell dmg to 1st, most of the Knock to 2nd. But that’s better than Knocking against your Boulders or Spikes. Be creative. Sometimes it’s nice to use a Boulder to reposition enemies to land even better move with your next spell.


Be the first to comment