

AION 2 Global Progression Guide
AION 2 Global’s launch version has a character level cap of 45 and a highest equipment grade of Unique (gold). Progression involves more than increasing gear score (GS). Story quests, permanent map rewards, skills, Daevanion boards, pets, Arcana, equipment upgrades, and crafting all contribute to character development.
Character level, individual equipment item level, and overall GS are separate values. Always check the exact statistic required by a dungeon or activity in its entry window.
Equipment grades follow this progression:
| Grade | Typical color |
|---|---|
| Common | White |
| Rare | Green |
| Epic | Blue |
| Unique | Gold |
Unique is the highest equipment grade in this launch progression. Heroic equipment and Heroic crafting are outside the scope of this route.
1. Settings and Controls
Keep weapons visible outside combat
Navigate to Settings → Graphics → Camera / Direction → Miscellaneous Effects and enable Display Weapon Outside of Combat. Leave combat and check the character model to confirm the setting works.
This option is cosmetic and does not affect damage or character statistics. If your client uses a different menu layout, look for the Miscellaneous Effects section.
Reduce the teleport flash
Under Settings → Graphics → Camera / Direction → Miscellaneous Effects, set Teleport Effect Color to Dark. Teleport once to inspect the change.
The darker option reduces the brightness of the transition. You can restore the previous setting later. This option changes appearance, not teleport functionality or guaranteed frame rate.
Make boss attacks easier to read
Under Settings → Combat, enable available combat indicators such as Skill Range and Boss Orientation.
During your first attempt at an encounter, observe the boss’s front and the direction of dangerous attacks. Indicators help with positioning, but each encounter has its own mechanics.
Improve camera visibility and performance
Under `Settings → Graphics**, reduce effects that obscure the floor, targets, and dangerous areas. Disable Camera Shake if it makes combat uncomfortable.
Enable FPS and network indicators where available. Compare solo combat with party combat to understand how your system performs under different conditions.
Lower graphics settings do not resolve network latency. Choose settings appropriate for your hardware and connection.
Configure keybinds and the HUD
Use Key Settings and the HUD editor to make essential actions accessible.
Prioritise convenient keys for:
- Defence and healing.
- Movement and interrupts.
- Important active skills.
- Health and target information.
- Important cooldowns.
Place essential interface elements near your usual area of focus while keeping the boss visible. Test the layout against a weak enemy before using it in difficult content.
Switch control modes and use navigation
The default controls include:
/: Switch between AION 1 and AION 2 control modes.Alt+1: Navigate to the tracked objective.,(comma): Sit down to recover.
Check your keybinds if you have changed the defaults.
Automatic navigation should be monitored manually. Enemies, cliffs, and obstacles can interfere with the route.
Keep Skill Queue enabled
Navigate to Settings → Combat → Controls → General and leave Skill Queue enabled.
Test ordinary key presses to determine whether the next input is accepted while the current skill finishes. Before configuring macros, check normal input response and skill queue behaviour.
Animation alone is not a reliable measure of input response.
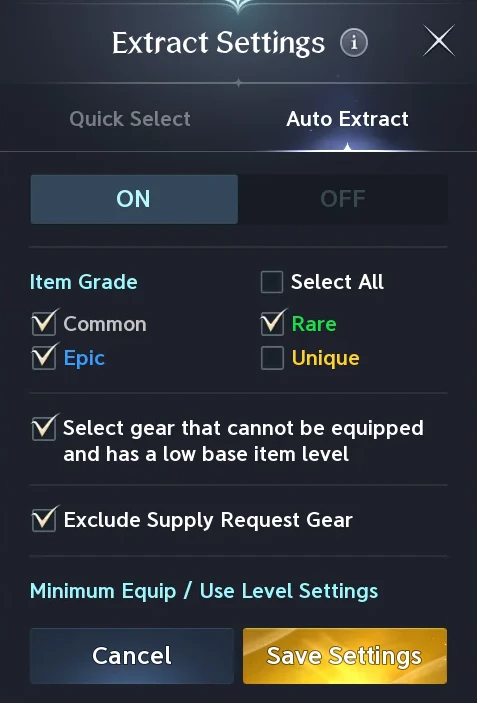
2. Levelling from 1 to 45
Follow the main story
Use the quest journal to track the main story until the next area or progression system unlocks.
After completing a major quest:
- Check your inventory for rewards.
- Equip useful upgrades.
- Apply available progression items.
- Spend relevant skill and Daevanion points.
- Review newly unlocked systems and objectives.
This prevents rewards from remaining unused while your character continues progressing.
Select side quests by their rewards
You do not need to complete every objective in an area before continuing the main story.
Prioritise side quests that provide:
- Equipment for missing slots.
- Wisdom Stones.
- Daevanion Crystals.
- Required district progress.
- Other materials needed for immediate progression.
Check rewards before accepting quests. Save distant or non-urgent objectives for a later route that combines several nearby tasks.
Complete district progress when the story requires it
Some story progression gates require 100% progress in a specified district. These gates occur around character levels 22 and 33.
When this requirement appears:
- Open the quest journal and identify the required district.
- Check the district’s progress gauge on the map.
- Complete regional quests and sealed dungeons.
- Check the gauge after each objective.
- Resume the main story as soon as the required progress is reached.
A fixed number of completed quests does not guarantee 100% progress in every district.
Asmodian side-quest route examples
The following stops apply to the Asmodian route.
Altgard camps with Dari and Rizel
When the story takes you nearby, inspect the quests offered by Dari and Rizel. Check their rewards, follow the accepted quest markers, and combine nearby objectives into one visit.
The Altgard story area containing Viron
Inspect local quests, including Fight Poison with Poison if it appears in your journal. Accept nearby tasks, complete overlapping objectives, and turn them in together.
These examples apply to Asmodians. Elyos characters should complete the equivalent progression objectives in Verteron.
Unlock Exploration dungeons
Exploration dungeons become available at the following character levels:
| Dungeon | Unlock level | Additional requirement or note |
|---|---|---|
| Krao Cave | 20 | Can be attempted solo in Exploration mode |
| Urugugu Canyon | 28 | Can be attempted solo in Exploration mode |
| Fire Temple | 35 | Requires 500 GS |
The unlock level and the level required by a particular story quest may differ. Use the difficulty needed for your current objective.
Manage dungeon loot while levelling
Completing a dungeon run and claiming its loot are separate actions.
Before opening an end-of-run reward cube, check its reward and your Odyle Energy balance. If the equipment will soon be replaced and the reward does not solve an immediate problem, consider saving energy for level 45.
Conquest and Transcendence also have restrictions involving unclaimed runs. Do not assume that completed runs can remain unclaimed indefinitely.
Enhance temporary equipment conservatively
Equip your best available weapon first.
If damage remains insufficient, moderately enhance a temporary weapon, roughly to +5. Upgrade temporary armour only when there is a clear need.
Reserve Kina for equipment that will last longer. The belt and amulet follow separate progression systems and should not be treated like ordinary temporary equipment.
Preserve important inventory items
Keep the following items during the story:
- Your belt and amulet.
- Useful gold equipment.
- Valuable manastones.
- Hidden-cube keys.
- Unfamiliar materials that may have a progression use.
Check the Shugo Festa key limit and spend keys before the balance reaches its cap. Unwanted gold equipment may later serve as material for Sync or Transfer operations.
Troubleshoot difficult fights systematically
Before spending more resources, inspect your character’s current setup.
Check for:
- Empty equipment slots.
- Unclaimed or unequipped rewards.
- Unspent skill points.
- Unspent Daevanion points.
- Unselected Specialty perks.
- Missing defensive bonuses.
- Poor positioning against an attack area or the boss’s front.
- Insufficient damage.
Identify the actual problem and change one thing at a time. Retry the same fight after each adjustment so that you can determine what helped.
3. Home Map and Permanent Rewards
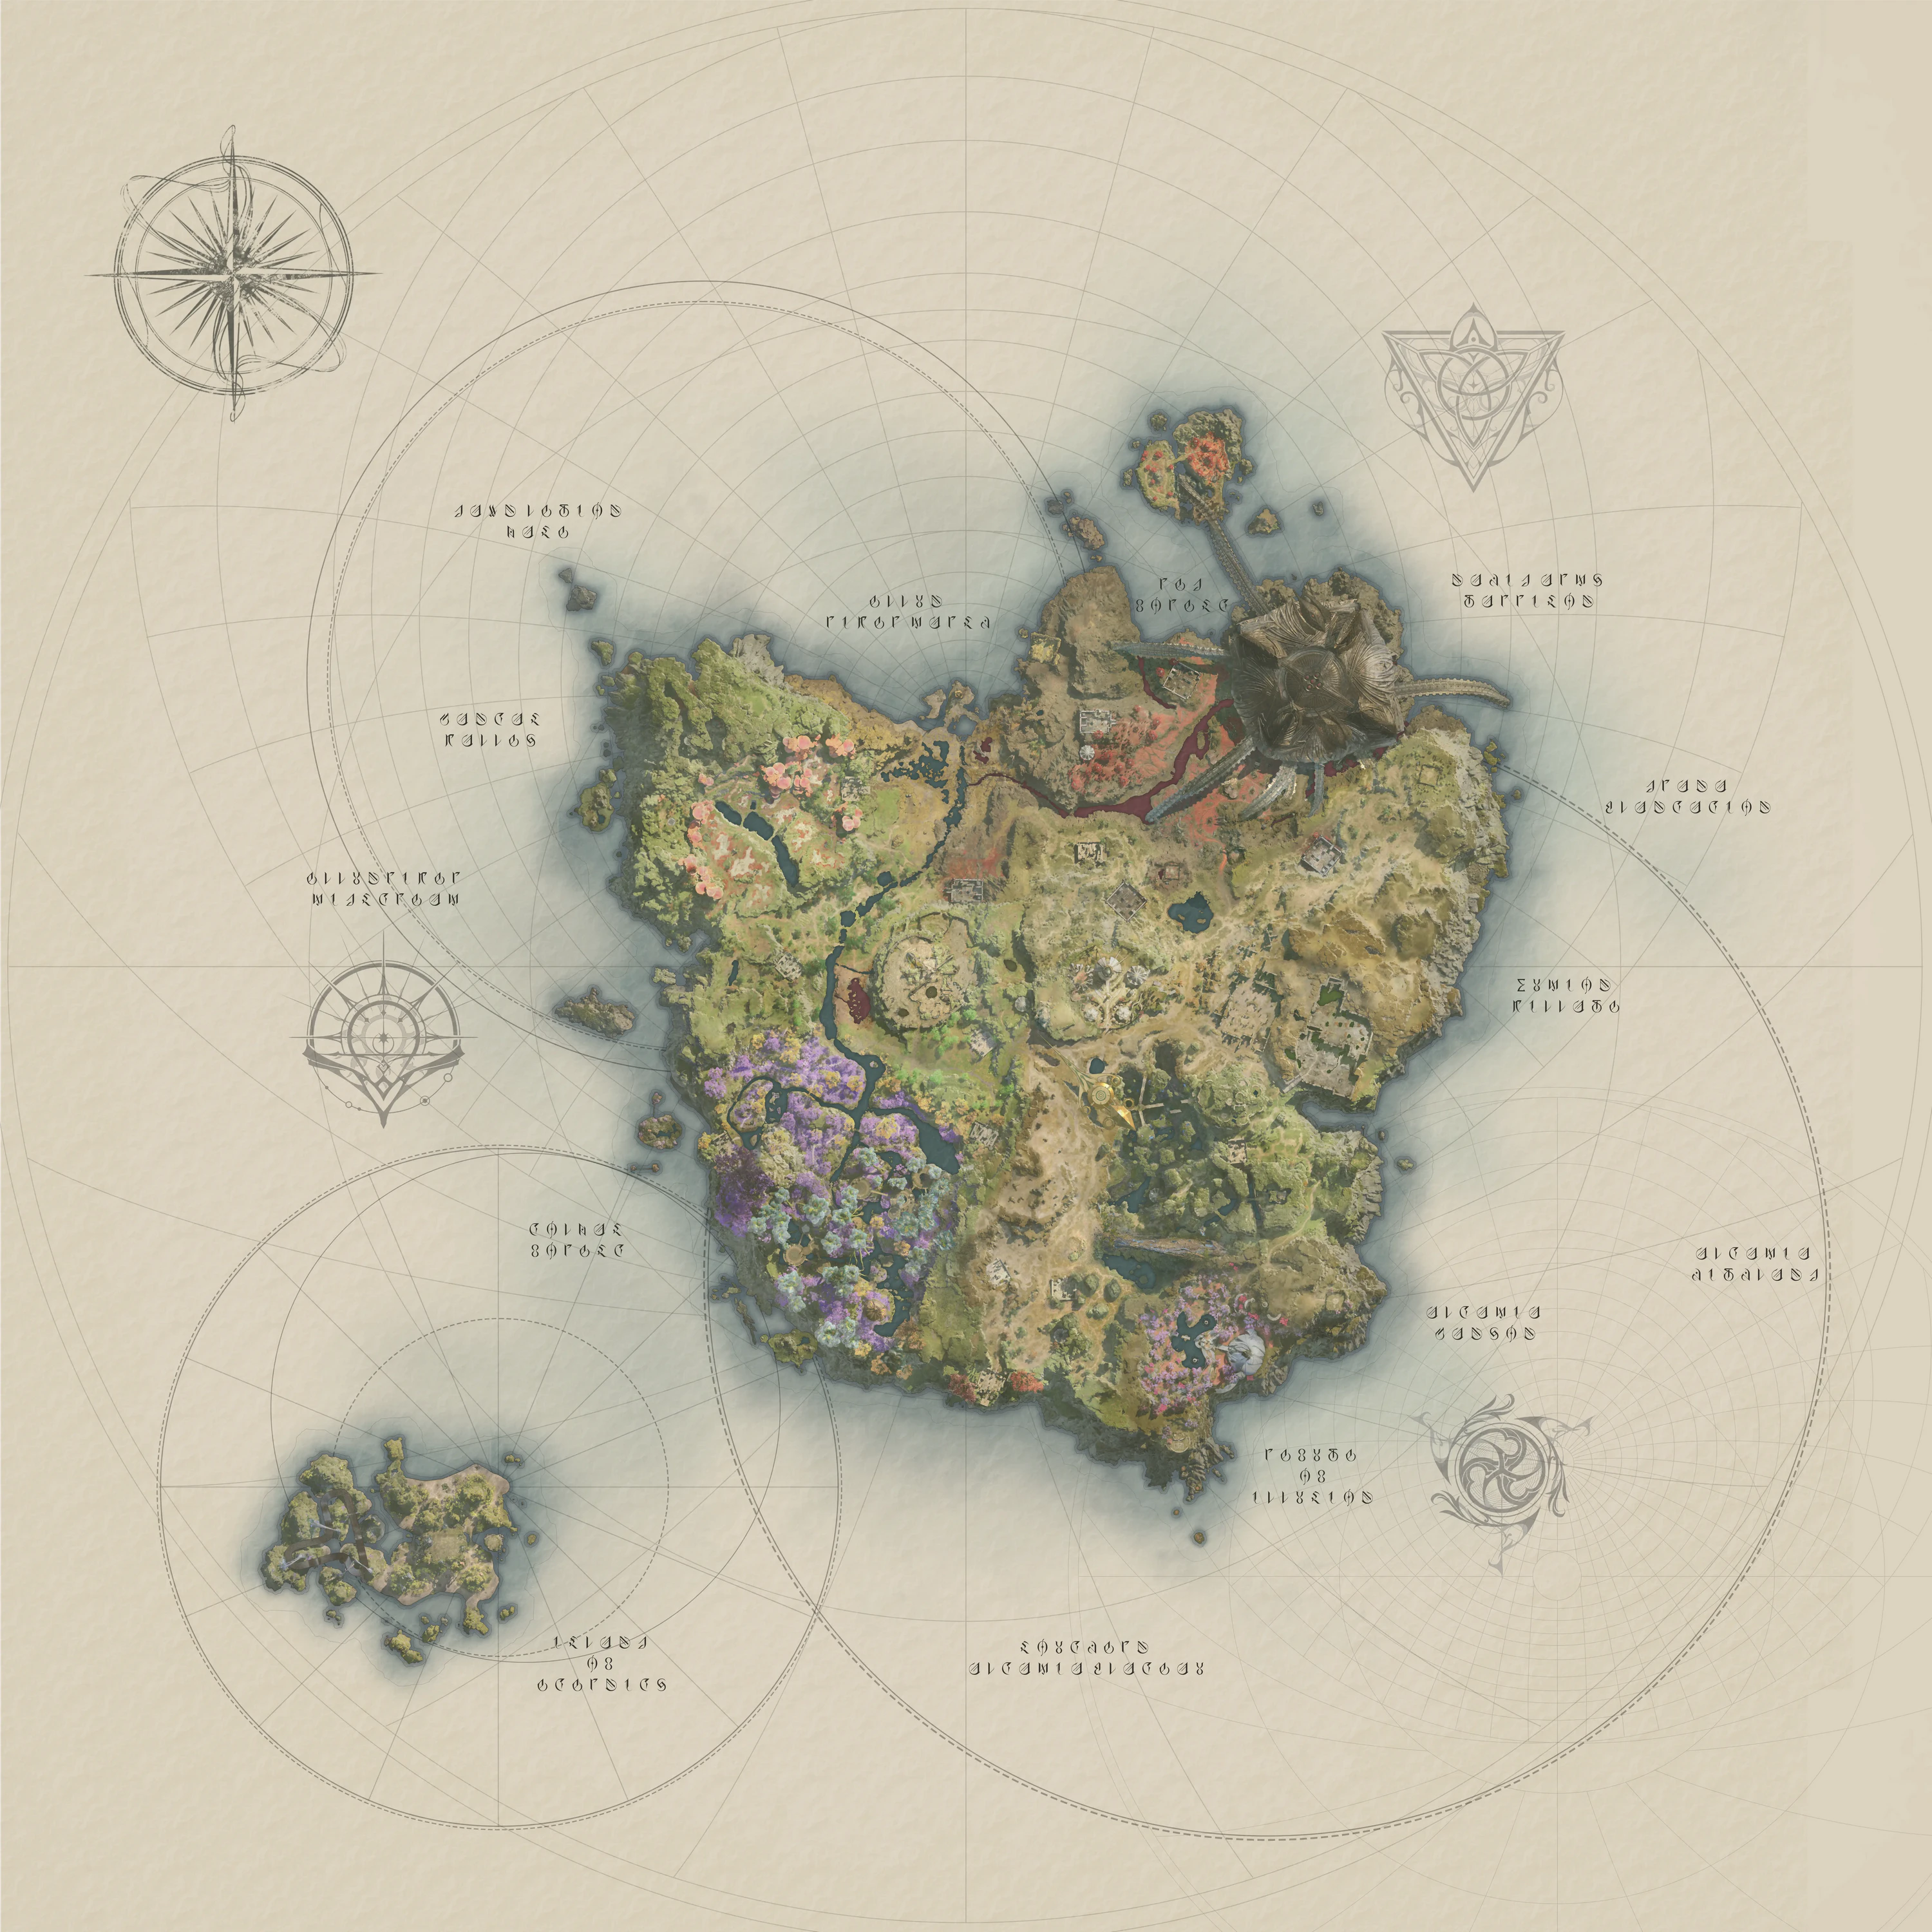
Clear one district at a time
Open the map with M, then access the home map and its Exploration filters.
Choose a compact district and mark nearby:
- Regional quests.
- Sealed dungeons.
- Strongholds.
- Empyrean Traces.
- Hidden Cubes.
Complete neighbouring objectives in one circuit. Mark finished targets, claim available rewards, and then move to the next district.
Combining objectives into one route is generally more practical than making separate trips for each reward type.
Complete district quests
Elyos characters should complete the relevant progression quests in Verteron. Asmodians should complete the equivalent quests in Altgard.
Read each objective, combine overlapping tasks, and turn in completed quests. Use Wisdom Stone and Daevanion Crystal items from your inventory if the rewards have not already been credited.
The complete launch set of district quests provides:
- 58 Wisdom Stones.
- 58 Daevanion Crystals.
These are permanent progression resources worth collecting during levelling.
Complete sealed dungeons
Open Home Map → Sealed Dungeons, enter a marked seal, complete its objective, and claim the one-time reward.
After leaving, check the completion marker before moving to the next seal.
The launch set contains 61 sealed dungeons for each faction. Each provides two Wisdom Stones and two Daevanion Crystals.
Across all 61 seals, the rewards total:
- 122 Wisdom Stones.
- 122 Daevanion Crystals.
Combined with the 58 of each resource from district quests, the complete route provides 180 Wisdom Stones and 180 Daevanion Crystals from these two reward sources.
Collect Belt Enhancement Scrolls from strongholds
Clear your faction’s strongholds and collect their Belt Enhancement Scrolls.
The launch set contains 15 strongholds, each providing two scrolls, for a total of 30 scrolls.
Complete the first story stronghold while the quest already takes you inside. Check its completion before returning to the area later.
Collect Empyrean Traces and use the Monolith
Collect reachable Empyrean Traces during your map circuits. If a marker appears above or below your character, check different floors, ledges, and possible flight routes.
Return to the Monolith to claim unlocked level rewards, including rewards that support amulet progression.
On Global, the Monolith does not award skill points.
Open Hidden Cubes
Find a Hidden Cube on the map and check your inventory for the correct key before interacting with it.
| Opening method | Reward |
|---|---|
| With a key | 1,000 Soul Crystals |
| Without a key | A base reward of 100 Soul Crystals plus a random extra reward |
The key is character-bound. Do not plan to transfer it to another character through storage.
Decide whether to use a key before opening the cube, because the two methods provide different rewards.
Fill both Clash Rune slots
Look for district quests that reward a Clash Rune Chest. Claim a suitable chest and use it to fill both equipment slots before pursuing expensive rune enhancement.
Examples of quests that reward rune chests include:
- Elyos: Cursed Blue Mineral in Aullaeu Village.
- Asmodians: The Future Within the Past in Uruthumheim.
Check the reward before turning in the quest to ensure that it provides the intended chest.
Review progression after every map circuit
After completing a district, review your inventory, skills, Daevanion boards, and equipment.
Use progression items, allocate available points, fill empty slots, and record remaining objectives. Then decide whether to clear another district or move into newly unlocked content.
Completing an objective strengthens the character only after its reward has been claimed and applied.
4. Belt, Amulet, and Clash Runes
Keep the belt and amulet
The belt and amulet are permanent progression items that continue through grade upgrades. Exclude them from mass extraction and avoid selling them.
They follow separate upgrade chains:
- Noble belt: Defensive progression.
- Revelation amulet: Offensive progression.
Story and Ascension rewards contribute to these systems, so keep both items even when other equipment is replaced.
Upgrade the belt to +10
Navigate to Enhancement → Enhance for ordinary enhancement, and use Substance Morph, usually accessible with Alt+H, for grade upgrades.
To advance the belt:
- Collect the correct Belt Enhancement Scrolls.
- Check the selected belt and its grade-up recipe in Substance Morph.
- Confirm the required materials and Kina.
- Perform the upgrade.
- Continue the enhancement and grade progression for the new grade.
Belt enhancement to +10 is guaranteed when using the required scroll and listed materials. Recheck the recipe and costs after reaching gold grade.
Progress the amulet through the Monolith
Use the Empyrean Traces system to obtain Monolith rewards and amulet enhancement scrolls.
Enhance the amulet to +10, then inspect its Substance Morph recipe for the next grade. Match any missing scrolls to unclaimed Monolith rewards.
A Belt Enhancement Scroll cannot replace an amulet scroll. Always verify the recipe and selected item before performing a Morph operation.
Enhance Clash Runes carefully
After filling both Clash Rune slots, take each rune to +1 first.
The launch version guarantees the +1 enhancement. Before attempting +2 or higher, inspect the success chance and failure consequences.
Failure at +2 or higher destroys the rune, and there is no pity guarantee. Establish basic progression before risking scarce resources on higher attempts.
5. Pets and Genus Insight

Unlock pets through ordinary progression
Open Pets, select a pet, and check its required soul source. Identify which creatures drop the necessary souls.
Combine those kills with story quests, district objectives, and gathering whenever possible. Unlock the pet once you have collected enough souls.
Choosing a pet appearance and developing the pet collection are separate tasks. Collecting different pet types helps progress the corresponding Genus Insight boards.
Pet unlock and level requirements
The launch version uses the following soul requirements:
| Pet progression | Additional souls required |
|---|---|
| Unlock the pet | 5 |
| Reach level 2 | 25 |
| Reach level 3 | 75 |
A pet therefore requires 105 souls in total to progress from locked to level 3. The launch pet level cap is 3.
After each stage, confirm that the upgrade has been applied and inspect any available collection rewards.
Develop Insight across all five genera
Open Pets → Genus Insight to review the available Insight boards.
There are five Genus boards, each containing nine slots. Level pets from different genera to progress their corresponding boards.
Check which board gains experience and which slots become available. Higher Insight levels unlock more analysis options.
Choose pet targets based on accessible soul sources and useful effects rather than developing only one pet type.
Avoid locking weak early analysis results
Under Genus Insight → Analyze, use the lock icons only when preserving a valuable result justifies the cost.
Before Insight level 10, favour inexpensive analysis without locks. An unlocked base roll costs four Soul Crystals and 1,000 Kina.
Evaluate the quality of the result after raising Insight before deciding whether to preserve a line. Locks increase the cost, and saving one attractive early result may not provide good value.
Save Genus presets for different activities
Save one Genus configuration for your main PvE content and another for PvP if needed.
Before entering an activity, confirm that the intended preset is active. Compare the total effects of the entire set rather than choosing a configuration based only on the colour of a single line.
6. Skills, Specialties, Stigmas, and Daevanion
Develop two core active skills first
Open K → Skills → Mastery and select two frequently used active skills.
Prioritise important active skills, bring them to level 8, and manually select a useful Specialty perk. Then strengthen your core skills towards base level 10 and add useful passive skills.
Skill points raise an individual skill to level 10 at most. Gear, Daevanion boards, and Arcana can provide additional levels beyond that limit.
Select Specialty perks
Open an active skill’s window and inspect its Specialty options.
The available slots unlock at the following skill levels:
| Skill level | Specialty progression |
|---|---|
| 8 | First slot |
| 12 | Second slot |
| 16 | Another option becomes available |
| 20 | Third slot |
Select a useful perk in the first slot at level 8 and review the selected perks whenever the skill level changes.
An unlocked but empty Specialty slot provides no perk. Passive skills do not have Specialty perks.
Unlock and develop Stigmas
Complete the required Ascension chain to unlock the Stigma system.
The four Stigma slots unlock at character levels 22, 27, 32, and 37. The launch Stigma level cap is 20.
Invest in equipped Stigmas you actually use instead of spreading materials across the entire collection.
Potential sources of Stigma Shards include:
- Nightmare.
- Shugo Festa.
- The Abyss Shop.
- Relevant PvP rewards.
Compare these sources with your current progression needs before spending currency.
Develop the four regular Daevanion boards
Open U → Daevanion to access the regular boards:
| Board | Unlock level |
|---|---|
| Nezekan | 12 |
| Zikel | 20 |
| Vaizel | 30 |
| Triniel | 40 |
All four regular boards use the same pool of regular Daevanion Crystals.
Build short paths from the centre towards core skill bonuses and useful nodes. Check the cost of the entire path and your remaining crystals before buying anything.
Filling one board indiscriminately can delay development of the other three.
Prioritise PvE nodes by purpose
For PvE progression, begin with core skill levels, Combat Speed, and Damage Boost. Then compare other offensive core nodes and attack bonuses.
If survival is the main problem, choose a defensive bonus that addresses the specific encounter.
This is a selection principle, not a universal build. Class, equipment, and available skills affect which nodes are most useful.
Develop Azphel separately for PvP
At level 45, develop the Azphel Daevanion board for PvP when needed.
Azphel uses the separate resource Daevanion Crystal: Azphel. Keep regular Daevanion Crystals for the four main boards.
Read the full currency name before purchasing or allocating resources. Azphel provides PvP effects and does not replace regular Daevanion progression for PvE.
Claim and spend Daevanion Crystals
Collect regular crystals through levelling and home-map rewards. Use eligible inventory items, then allocate the credited resource to planned board nodes.
The Nightmare Shop may offer additional crystals, but compare them with other needed purchases before spending.
An inventory item and the resource balance already available on a Daevanion board are not the same thing.
7. Progression After Level 45
Reaching level 45 unlocks the next stage of equipment and content progression. Work through the available story rewards and permanent upgrades before committing to repeated dungeon farming.
First steps at level 45
Continue outstanding main-story quests and finish the weapon and Guard rewards. Inspect your inventory and fill missing equipment slots.
Then prioritise inexpensive guaranteed upgrades and remaining permanent home-map rewards.
The Guard is a separate equipment slot. Filling an empty slot may provide better value than heavily enhancing one existing piece.
Understand the progression gates
The following thresholds describe the Global launch progression. Use the in-game entry windows to check current requirements, rewards, available entries, and energy costs.
| Content | Character level or GS requirement | Main progression purpose |
|---|---|---|
| Draupnir Exploration | Level 45 and 700 GS | Armour and Guard progression |
| Conquest: Krao Cave | Level 45 and 700 GS | Weapon and accessory progression |
| Conquest: Draupnir | Level 45 and 700 GS | Armour and Guard progression |
| Conquest: Urugugu Canyon | 1,400 GS | Weapon and accessory progression |
| Conquest: Vakron Sky Island | 1,400 GS | Armour and Guard progression |
| Transcendence Tier 1 | 1,600 GS | Arcana progression |
| Transcendence Tier 2 | 1,900 GS | Arcana progression |
| Transcendence Tier 3 | 2,200 GS | Arcana progression |
| Transcendence Tier 4 | 2,500 GS | Arcana progression |
| Conquest: Fire Temple | 2,100 GS | Weapon and accessory progression |
| Conquest: Ferocious Horn Den | 2,100 GS | Armour and Guard progression |
| Ludra raid | 2,800 GS | Ten-player raid progression |
Meeting an entry requirement does not guarantee that a character is ready to complete every party encounter or mechanic.
Draupnir: the first 700 GS step
At level 45 and 700 GS, enter Expeditions → Draupnir → Exploration.
Make three credited loot claims to obtain the one-time Bakarma choice. Loot claims count, not simply boss kills.
Before selecting a reward, compare your equipped armour and identify the weakest useful slot. Claim the completed selection before continuing with additional runs.
Conquest at 700 GS
Use Krao Cave for weapons and accessories. Use Draupnir for armour and Guard progression.
Check dungeon rewards, entry requirements, remaining entries, and energy before joining. Learn the encounters at a manageable difficulty.
Character level 45 is required for this stage.
Conquest at 1,400 GS
When the next tier becomes available, progress through:
- Urugugu Canyon: Weapons and accessories.
- Vakron Sky Island: Armour and Guard.
Check Exploration and the relevant reward counter for a one-time armour choice. Select content that addresses an actual equipment gap instead of choosing a dungeon solely because it is newer.
Transcendence at 1,600 to 2,500 GS
Transcendence takes place in Shattered Arkanis and Deus Research Base.
The four tiers open at the following GS thresholds:
| Transcendence tier | GS requirement |
|---|---|
| Tier 1 | 1,600 |
| Tier 2 | 1,900 |
| Tier 3 | 2,200 |
| Tier 4 | 2,500 |
Choose a manageable tier, learn its mechanics, and use the rewards to improve Arcana.
Fill all five Arcana card slots before committing to repeated farming. Check the gate for the selected tier, because entering a difficulty that you cannot complete wastes the opportunity.
Conquest at 2,100 GS
Continue using the dungeon that matches your weakest equipment slots:
- Fire Temple: Weapons and accessories.
- Ferocious Horn Den: Armour and Guard.
Read the guaranteed-reward counter and available exchange options before committing to repeated runs.
Equipment from this tier has its own item level, which is distinct from the character’s overall GS.
Nightmare: regular solo progression
Open Menu → Nightmare, select an available stage, and learn its dangerous boss attacks.
The launch allowance is two entries per day, stored up to 14. Check the refill timer and balance so that entries do not remain capped.
Spend Phantasmal Fragments on your current progression bottleneck, such as Stigmas, Daevanion progression, or another useful Nightmare Shop reward.
The Abyss: requirements, locations, and time allowance
The Abyss requires level 45 and 1,000 GS. Entry is through your faction’s portal.
- Elyos: Verteron’s Garden of the Illusion God, near East Observatory.
- Asmodians: Altgard’s Black Claw Village, near Impetusium Lower Path.
The launch time allowance is seven hours per week. Monitor the remaining time and prepare your return route.
Decide whether the trip is primarily for Abyss Points (AP), quests, pet souls, or PvP before entering.
Spend Abyss Points according to your needs
Open the Abyss Shop and compare available rewards with your character’s progression requirements.
Potential purchases include Stigma Shards, Azphel crystals, and other available resources. Identify the intended purchase in the current shop before saving AP for it.
The launch Global Abyss Shop does not sell equipment. An AP-funded PvP necklace is not part of this progression route.
Use Ascension Trial entries before reset
Open Menu → Ascension Trial to review unlocked tiers, rewards, and remaining entries.
Improve your character during the week and use remaining entries before reset at a manageable difficulty. Check the in-game gate and reset timer rather than waiting until the last moment.
A late run is useful only if enough time remains to complete it.
Ludra raid at 2,800 GS
At 2,800 GS, prepare for the ten-player Ludra raid.
Before the attempt:
- Select your PvE preset.
- Prepare consumables and relevant Stigmas.
- Agree on your role with the group.
- Learn the encounter mechanics.
- Check weekly rewards and energy.
The GS requirement is a minimum entry gate. Group composition, correct role execution, and mechanics determine whether the attempt succeeds.
8. Odyle Energy, Arcana, and Events
Prevent Odyle Energy from reaching its cap
Check the Odyle Energy counter in the content menu whenever you log in.
The launch version regenerates 15 Odyle Energy every three hours. Capacity is:
| Account status | Odyle Energy capacity |
|---|---|
| Without membership | 560 |
| With membership | 840 |
Regeneration above the cap is lost. Membership increases capacity but does not remove the need to monitor the counter.
Plan a useful loot claim before reaching the cap.
Understand what consumes Odyle Energy
At level 45, a standard dungeon reward claim costs 40 Odyle Energy.
Read the price and claim type before confirming. Energy pays for claiming loot rather than simply entering a dungeon.
Entries, unclaimed runs, and additional claims have separate rules. Monitor those counters independently instead of treating every dungeon attempt as the same type of cost.
Fill all five Arcana card types
Open Arcana and review the five card types:
| Card type | Main role |
|---|---|
| Chalice | Can support active or passive skills |
| Parchment | Covers active-skill groups |
| Compass | Covers active-skill groups |
| Bell | Covers passive skills |
| Mirror | Covers passive skills |
Fill all five slots with useful available cards.
Compare the actual skill line and how it supports your core skills. A higher card grade does not automatically make a card better for your character’s build.
Upgrade cards and transfer their experience carefully
Use the Arcana enhancement and training systems to develop selected cards. Cards can progress to +5.
Before investing in a card, check whether it supports a core skill or fills an empty slot.
When replacing a card, inspect the experience-transfer preview for the old card before confirming the operation. Compare the final result before extracting or consuming a useful card.
Manage Shugo Festa keys
Open Menu → Shugo Festa → Festival Shop.
The launch allowance is three keys per day. Stored capacity is:
- 12 keys without membership.
- 21 keys with membership.
Where possible, use keys at level 45 for level-appropriate rewards.
If your key balance reaches its cap early, spend keys so that incoming keys are not wasted. Prioritise progression resources over optional purchases.
Participate in field bosses
Open M → Exploration → Field Boss and check active bosses and their timers.
Inspect the reward, travel to the location, and participate while avoiding frontal attacks and large danger zones. Claim the reward and determine how it contributes to your progression.
Use the current in-game map timers rather than relying on an old schedule from another region.
Complete daily and seasonal objectives
Review Duty, Daily Dungeon, and Season objectives.
Complete useful available activities before reset and combine season goals with your normal route where practical.
Before spending seasonal currency, compare the current shop limits and available purchases with your resource needs. Event timers, quantities, and prices may change.
9. Equipment Enhancement and Item Management
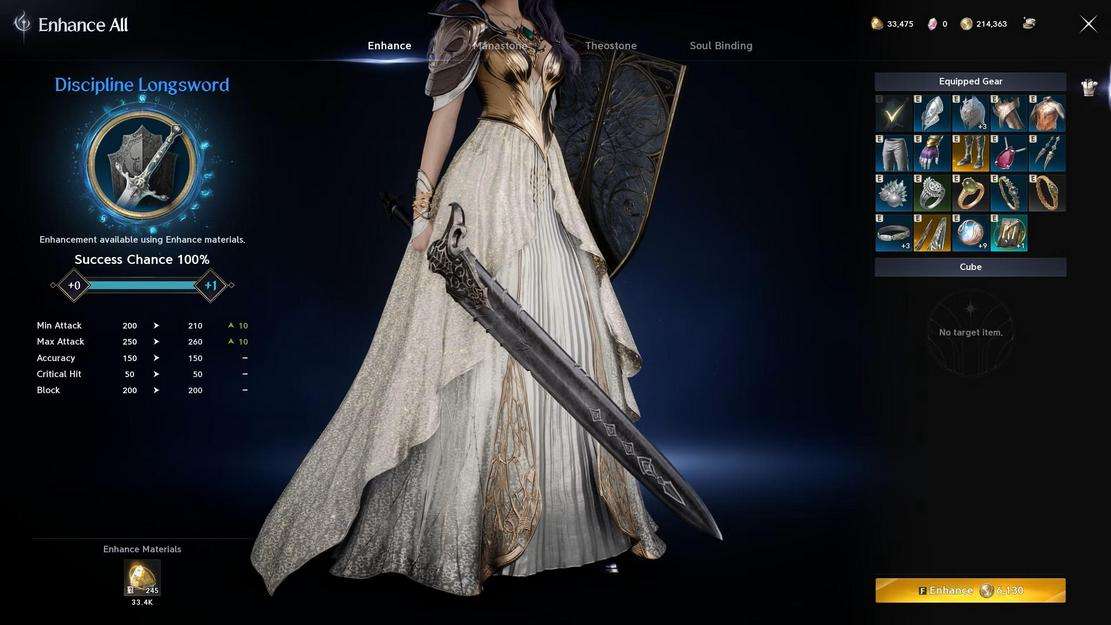
Compare items before equipping or replacing them
Read the tooltips for both the new item and the item currently equipped.
Compare:
- Base attack or defence.
- Useful stat lines.
- Skill bonuses.
- Equipment grade.
- Existing enhancements.
- Item level.
- The equipment slot being replaced.
- The likely timing of the next replacement.
Higher GS opens more content, but an item’s practical value for your role also matters.
Determine whether a new item is temporary or suitable for long-term investment before spending resources on it.
Understand ordinary enhancement caps
Ordinary equipment enhancement caps depend on the item’s grade:
| Equipment grade | Enhancement cap |
|---|---|
| Rare | +5 |
| Epic | +10 |
| Unique | +15 |
Standard enhancement is guaranteed through +10. Attempts above +10 have lower success chances, so inspect the chance, materials, and Kina cost before committing resources.
A failed standard enhancement attempt above +10 consumes resources without destroying the item. Clash Runes follow different failure rules.
Prioritise useful equipment investments at level 45
Fill empty equipment slots and apply inexpensive guaranteed upgrades first.
If damage remains the main obstacle, consider enhancing the weapon and Guard towards +10. Reserve expensive attempts above +10 for long-term equipment that is unlikely to be replaced soon.
You do not need to maximise every armour piece before beginning useful farming.
Understand Amp as a separate operation
Amp or Amplify is different from ordinary enhancement.
After meeting the required standard enhancement, open the upgrade window and check whether the selected item supports Amp. Available Amp levels depend on the item’s level and series.
Read the item’s requirements and cap before purchasing materials. Heroic equipment caps from Asian versions do not apply to Global gold equipment in this progression route.
Choose the correct Soul Binding operation
Open Enhancement → Soul Binding and check the intended operation before confirming.
| Operation | Effect |
|---|---|
| Bind | Improves existing line values |
| Sync | Rerolls one line |
| Reset | Rerolls all lines |
Verify the selected operation and required consumable. An unwanted property on one line does not necessarily justify replacing all the good lines.
The Soul Binding window shows the required costs and materials.
Evaluate Soul Fuse on long-term equipment
Under Soul Binding → Soul Fuse, inspect the preview and compare the extra line with its cost.
Use Soul Fuse only after deciding whether the equipment will remain useful long-term. The extra Soul Fuse line does not carry through Transfer, so a costly perfect roll may be lost when the item is replaced.
Before a later Transfer, inspect which lines and upgrades will survive.
Transfer compatible Unique equipment
Open Enhancement → Transfer and select the source and destination items.
Choose compatible Unique items and inspect the result preview. The following can carry over where supported:
- Regular Soul Binding lines.
- Supported Enhancement levels.
- Supported Amp levels.
Check item-level bands and the required Transfer Stones before confirming.
Soul Fuse, manastones, Theostones, and Potential do not carry as regular transferable upgrades. Consider this when deciding how much to invest in the source item.
Choose compatible manastones and Theostones
Under Enhancement → Manastone / Theostone, select stones with effects that support your intended activity.
Evaluate weapon or Guard Theostones by their triggered effects. Keep inexpensive stones in temporary equipment and reserve valuable stones for long-term items.
Accessories and other equipment types accept different manastones. Check compatibility in the socketing window before attempting to install a stone.
Do not automatically extract gold equipment
Before extracting a gold item, inspect its conversion options under Substance Morph → materials and check whether it could be useful for Sync or Transfer Stones.
Compare your character’s needs with the cost of replacing the item. Exclude useful equipment from mass selection until you have decided whether it should be retained, converted, or extracted.
10. Gathering and Crafting

Unlock gathering at level 10
On Global, gathering unlocks at character level 10 through Essence Extraction.
Choose a resource needed for your next recipe and check the gathering requirement of each node. Build a compact route and revisit reachable nodes without unnecessary teleports.
A level-one gathering route does not apply to this launch progression.
Choose the crafting profession for your target item
Review the relevant recipe before investing in a crafting profession.
| Profession | Main products |
|---|---|
| Handicrafting | Bows, staffs, and accessories |
| Blacksmithing | Swords, greatswords, daggers, maces, and Guards |
| Armorsmithing | Armour |
| Alchemy | Books, orbs, potions, scrolls, and manastones |
| Cooking | Food |
Select the profession according to the item you intend to craft and the materials available to you.
Level crafting through accessible processing recipes
Gather suitable ore or gemstones, process them, and craft useful simple items.
For Handicrafting, one example is the following progression:
- Sapphire Gemstone.
- Sapphire Decoration.
- Sapphire Ring.
Check the experience gained and the cost at each stage. There is no guaranteed number of nodes or minutes required to reach a crafting level, because skill, route, and competition affect the yield.
Complete promotion quests before advancing a profession rank
When your progress reaches the current rank cap, find the corresponding promotion quest through the gathering or crafting NPC in the capital.
Accept the quest before gathering or crafting its required item. Complete the task, turn it in, and verify that the new cap has been unlocked.
An item made before accepting the promotion quest may not count towards its requirement.
Gather airborne Odyle safely
Under Essence Extraction, select a district containing several reachable airborne gathering nodes.
Plan height changes and landing points. Use available air currents, monitor flight resources, and keep a safe return path.
Gathered Odyle is a crafting material. Odyle Energy is a separate resource used for dungeon loot claims, and the two must not be confused.
Plan for rare materials
Check the requirements of your target recipe before choosing a farming area.
Keep rare wood and high-quality Odyle needed for the next crafting tier. Compare excess materials with current market prices and demand before deciding whether to retain or sell them.
Avoid spending scarce ingredients merely to obtain a small amount of proficiency when a later recipe may need them.
Craft the first Unique Dragon item
For the launch level-62 Unique Dragon item, inspect the matching level-44 Artisan’s Splendent base and the required dragon materials.
Character level remains capped at 45 in this progression. An item level of 62 does not mean that the character must reach level 62.
Verify the exact base named in the recipe. Do not purchase a supposed level-60 base solely because an older route recommends it.
Follow the crafted equipment upgrade chain
The launch crafted item-level chain is:
62 → 70 → 78 → 86 → 94 → 102
For each step, inspect the recipe, required materials, and upgrades that will be preserved.
An upcrafted item becomes bound to the character who crafts it. Complete this progression on the character intended to keep the equipment, preferably your main character.
Understand crafting success and special results
Normal crafting can fail. Compare the recipe’s success chance with your current proficiency before crafting in batches.
Upgrading an existing Dragon series item and obtaining a special-result variant are different mechanics. A guaranteed upgrade does not guarantee the special-result version.
A 25% success rate is not universal across all recipes. Read the relevant success and special-result values before committing materials.
Compare Market purchases with Substance Morph
Before buying a material, compare the exact item required by the recipe with the Market and Substance Morph options.
Calculate the total costs of:
- All ingredients.
- Kina.
- Morph operations.
- Operation limits.
- Other required materials.
Check tradeability and binding. A bound version of a material is different from a tradeable version, and not every item is compatible with every recipe.
Purchase only the missing quantity after verifying the exact name and recipe requirements.
Choose your first crafted equipment piece carefully
Compare the potential gain from crafting a weapon with the benefit of filling missing accessory slots.
Choose a manageable long-term upgrade path and secure the required materials while preserving Kina for other progression needs.
There is no universally cheapest crafting order for every server. Current Market prices and available equipment drops can change the decision.
11. In-Game Macros
Assign a macro key
Navigate to Settings → Key Settings → General → Gameplay → Macro and assign a convenient key to the in-game Macro action.
A default macro key may be unset. Check your control mode, ordinary input, defence, and movement bindings before changing your layout.
Start with a keyboard key and test the macro on a safe target.
Create a macro in the client
Open K → Skills → Macro → Add Macro.
Add the required hotbar keys in the editor. Inspect every step because a newly added step may default to a basic attack.
Start with a short sequence of available attacks and test it in combat. The editor uses hotbar keys, so moving a skill to another key changes what the macro does.
Assign several skills to one hotkey
When placing multiple skills on one key through the quick-slot grid, verify their placement and trigger order.
Test what happens while the main skill is on cooldown or fails to meet its conditions. A multi-skill hotkey operates as a priority system and does not guarantee that the same rotation will execute every time.
Tune delays and retain manual control
Keep Skill Queue enabled and adjust macro delays according to the client’s actual response.
If steps are skipped, check:
- Skill conditions.
- Key bindings.
- Skill Queue behaviour.
- Delay settings.
- Whether the selected skill can execute.
The editor’s minimum delay does not mean that every ability can execute at that speed.
Keep defence, movement, and important burst windows under manual control.
12. Market, Economy, and Alternate Characters
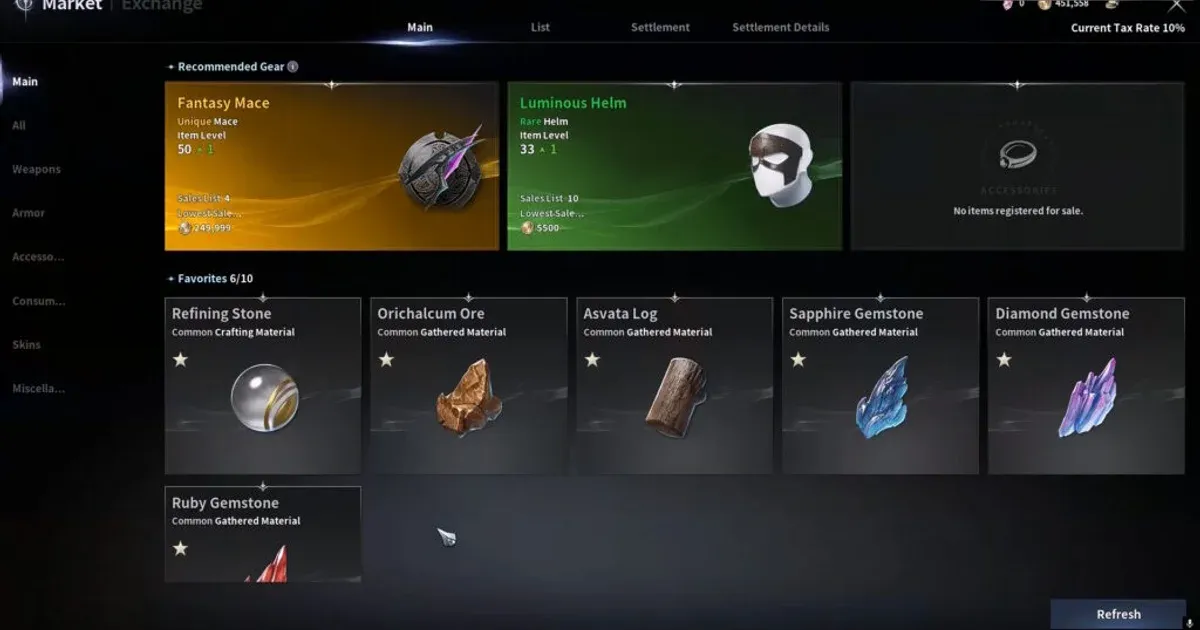
Understand Global Market requirements
At level 45, check the Market and the requirements for buying and selling. Trading through the Market requires active membership.
Direct player-to-player item trading is unavailable at launch, so do not plan progression around a personal trade window.
Before buying, compare complete item names, quantities, binding status, and listings.
Measure actual farming returns
Choose one material, such as wood, leather, Odyle, or a required crafting component.
Record:
- Time spent farming.
- Quantity collected.
- Consumables used.
- Travel time.
- A realistic selling price.
- Other expenses.
Compare net results across different routes. A Market listing price does not guarantee that the item will sell, so include demand, expenses, and travel time when evaluating profitability.
Calculate crafting costs before selling
Before crafting for sale, calculate the costs of every ingredient, Kina, normal-crafting failures, and unsold stock.
Start with a small batch and expand only after actual sales and a fresh demand check. One listing is not enough evidence to justify a bulk purchase.
A recipe that was profitable previously may become unprofitable when prices or demand change.
Develop alternate characters after establishing your main
Develop an alternate character when doing so will not interfere with important main-character activities.
Progress its story until Expeditions unlock, decide what the character will farm, and check which systems share activity limits across the server.
An alternate character can consume limits shared with the main character. Its individual energy balance is only part of the calculation.
Use Server Storage correctly
Open Storage → Server Storage and check whether each item or currency is eligible.
Use Server Storage for permitted tradeable materials and Kina between characters. Keep character-bound resources with their original owner.
Dungeon equipment, many progression currencies, and bound items do not become transferable simply because Server Storage exists.
Preserve Kina for the next progression gate
Prioritise essential missing materials, useful equipment slots, and guaranteed upgrades.
Reserve enough money for the next content tier, travel, and crafting instead of spending the entire balance on random rolls.
Set the reserve according to your current goal and server prices rather than using a universal fixed amount.
13. Daily and Weekly Session Checklist
At login: check resources and timers
Start with a brief review of resources that may reach their caps and activities with limited entries.
Check:
- Odyle Energy.
- Shugo Festa keys.
- Available dungeon entries.
- Nightmare entries.
- Ascension Trial entries.
- Weekly activities and reset timers.
- The currently selected PvE or PvP preset.
- Completed rewards that must be claimed before further progress.
Prioritise anything that is about to expire or stop accumulating.
Choose one primary goal for the session
Identify a concrete result before beginning a farming route.
Examples include:
- Fill a missing equipment slot.
- Unlock the next content tier.
- Collect required Wisdom Stones or Daevanion Crystals.
- Complete a district.
- Obtain a required crafting material.
- Improve the weakest useful equipment piece.
Choose one main activity and combine nearby useful objectives with it rather than splitting time across several unrelated farms.
Prepare before daily and weekly resets
Review timers in the relevant content windows and complete useful daily objectives before reset.
Use expiring weekly entries and allow enough time for long dungeon or raid runs. Check seasonal purchases and limited rewards before events end.
Do not assume every region resets at the same time. Use the reset timer displayed by your server.
Before logging out
Review your inventory, Market listings, equipment, and next objective.
Use earned resources where appropriate or place eligible items in Server Storage. Check saved presets and consumables, and inspect unsold listings.
Record the next concrete progression step and the materials it requires. An organised inventory and a clear next goal reduce preparation time during the next session.



Be the first to comment