
Volcalidus Locations
Digsites:
- Dawn Rest: Starter spot. Got lava, a torch, shovel, bucket, pan, and an extra map. No bucket sales here.
- Scoria Chamber: Costs 5000 coins. Underground lava like Mildews Aquifer.
- Shattered Breach: 5000 coins. Near ice, with a lava thingy that ends in a pool.
- Waterside: 5000 coins. Between two places, with a lava pond out back.
- Cinder Footing: 5000 coins. Between Dawn Rest and some outpost, near a volcano base, with a little lava flow.
- Lumberton Bluff: 5000 coins. On an iceberg, lava pool around.
Towns:
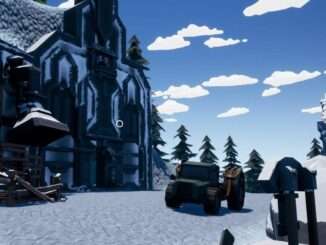
- Lumberton Harbor: Starter town. Got a jeweler, basic tool shop, a king’s quest with a free Lava Truck and map, and a boat service.
- New Glade: Museum, tool shop, traveling merchant, craft shops, and a place for Mod Shop.
- Burville: Conveyor and scrapyard, almost empty store with a special tool rack.
- Shattered Outpost: Forge, powerworks, vehicle store (with Lava Truck), conveyor and building part stores.
- The Barrens Harbor: Boat to some island, needs tickets.
- Mot’s Island: Cool vehicles, race track, and a boat back.
Stock Markets:
- Iron, Gems, Jewelry: New Glade.
- Gold: Shattered Outpost.
- Weapons: Lumberton Harbour.
Abandoned Miners:
- 3 hidden spots on the map. One in Barrens, two near Ice Shelves.
Volcalidus Mechanics
Scout Guild Tokens:
- What They Are: Blue tokens with a cool snowflake. Same vibe as the ones from Bastion but for the scouting crowd.
- How to Get: Finish quests or scrolls given by NPCs.
- Use Them For: Buying stuff at island shops or snagging boat tickets to check out Mot’s Island.
Fossils and Relics:
- Fossils: There are 36 of these hidden treasures, scattered across 65 potential hiding spots. The Barrens have a couple.
- Collecting Fossils: Hand them over at the Museum’s Collection Box for a heap of Scout Guild Tokens. More bones, more tokens.
- Relics: Each dig site has a unique relic, which is tough as nails (explosives can’t touch them). Turn these in for the Ice Wand at the museum, no full dinosaur needed.
Rewards for the individual milestones are:
- 1 Bone, 100 Scout Guild Tokens
- 12 Bones, 1000 Scout Guild Tokens
- 24 Bones, 3000 Scout Guild Tokens
- 36 Bones, 5000 Scout Guild Tokens
Forge Marks:
- Where They’re Not: Forget finding them in The Barrens.
- How to Collect: Use the Lava Hauler to grab these icy giants. Grab one, and another pops up somewhere.
- Refining Them: There’s only one place to refine these – Shattered Outpost. Though you can technically refine multiple at once, it’s a bit of a headache.
- Why Bother? Drop them into the Crucible at the Masterwork Forge for either a boost or a bust on your crafted items. Could be a game-changer or a deal-breaker.
Known Buffs:
- Hand Tools (Icepick / Shovel): Speed Bonus, Dig Size Bonus
- Drills: Speed Bonus, Output Size Bonus
- Harvesters: Vein Bonus, Output Size Bonus
Building Stuff:
- Setting Up Shop: New Glade’s the spot. Buy crates from the traveling merchant, and plop your shop down. No take-backs once it’s down.
- Costs: From basic setups to fancy operations, building a shop costs a mix of hardstone, iron, and the fancier cloutium bars.
- Fixing Miners: Those Abandoned Miners aren’t going to fix themselves. Stockpile materials to get them back in business for some sweet, sweet rewards.
- East Shelf: 800 Hardstone Block, 1200 Iron Bar
- West Shelf: 2300 Hardstone Block, 1400 Iron Bar, 30 Cloutium Bar
- The Barrens: 9800 Hardstone Block, 900 Corestone Bar, 400 Cloutium Bar
Abandoned Miner Mechanics:
So, you’ve got these giant, old-school oil rig things called Abandoned Miners scattered around the island. They’re like your personal loot factories, pumping out either iron or gold, hardstone or shard, or corestone or cloutium depending on where they’re parked. Each spot has its own max weight limit and pumps out loot at a different speed. Like, East Shelf is all about iron or gold up to 300wt, trickling in at a snail’s pace of 1wt every 10 seconds. West Shelf and The Barrens have their own gigs, with West Shelf spitting out stuff way faster.
Ice Mechanics:
The higher you go in a digsite, the more ice you run into. Top levels are basically a freezer, always giving you ice. If you’re shoveling, you’re only getting ice, no frost rock nonsense. Drills are all about the location: more ice on top, more frost rock below. Got ice? Chuck it in the Ice Melter to get water for your conveyor belts. Ice melts into water, but frost rock just gets rejected. Different drills and shovels have their own ice output, with some fancy bonuses based on your gear.
Vehicles:
Lava Truck’s the ride you get for free from the King’s Boat, but you can also buy it or other lava-themed rides like the Lava Thaw, Hauler, Bike, and Roller on Mot’s Island. Prices vary, but they’re all about helping you navigate and dig through different types of frosty terrain. Plus, you can upgrade to dig through even tougher snow at the T2/T3 Stores.
Basically, you’re running a one-person mining and ice melting operation with some cool rides to help out. Keep an eye on those production rates and weights, and don’t forget to upgrade your gear to maximize your loot and efficiency.
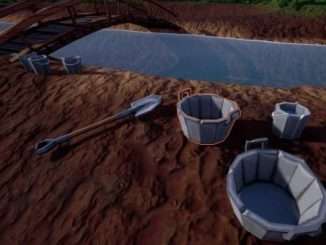
Hand Panning on Volcalidus:
So, the deal with hand panning on Volcalidus is a bit different from the usual grind. Here’s the lowdown:
- First off, snow acts like dirt here. You can shovel it straight into a bucket or go directly for the pan.
- When you shovel snow, it turns into ice. Feels like a magic trick, right?
- Got a bucket full of ice? Dump that chilly stuff into your pan. Next up, you gotta heat things up by either dunking the pan in lava or pouring lava from a bucket right onto the ice. If you’ve got lava dripping from pipes, that works too.
- As the lava does its thing melting the snow/ice, resources pop up like magic. No need to brush or scrub; just let the lava do the heavy lifting.
- Pro tip: If you leave your pan sitting in lava, it’ll keep spawning resources as you shovel in more snow/ice, one scoop at a time.
- But watch out, leave that pan in the lava too long and it’ll fill up with lava. Pull it out, toss in some fresh snow/ice, and bam, new resources pop up and the lava levels drop.
- Oh, and if you’ve got a bucket full of snow/ice, dropping it directly into lava is like the ultimate clean-out.
- For those looking to clear snow quick, lava dripping from pipes or poured from a bucket/pan will melt through snow, leaving holes. Rake those holes to clear snow off your claims with ease. Just remember, dripping lava won’t touch Perma Frost (that’s the tougher Tier 2 and 3 snow/dirt).
- Lava setup? Your intake pipe runs at 250% pressure. Add intake boosters for a total of 370% pressure, which is right on par with T2 water pressure back on Bastion.
- Don’t forget, your lava pipes need filters to keep your machines from breaking down. You’re looking at needing 5 filters to get that lava nice and clean.
Basically, it’s all about using lava to your advantage, turning snow into resources with a bit of heat. Just keep an eye on your gear and pressure levels, and you’ll be golden.
Volcalidus Glade Constructible Shops
- New Glade’s got 5 spots where you can set up shop.
- To get your shop started, hit up the Traveling Merchant’s Tent. It’s right across from the Museum.
- Inside, you’ll find crates with everything you need for your shops.
So, grab those crates and get to building wherever you see a spot in New Glade.
T1:
- Smelter – c1320
- Dull Ice Shovel – c22 (No Skull in Speed and Dig Size Bonus)
- Dull Icepick – c122 (3 Skull in Speed and Dig Size Bonus)
- Dull Ice Rake – c124
- Tier 1 Logic TNT – c120
- Lava Drill – c430 (1 Star in Speed Bonus)
- Dull Shovel Masterwork – c230 = 80 Iron
- Dull Icepick Masterwork – c230 = 80 Iron
- Lava Harvester Masterwork – c215 = 400 Iron, 80 Cloutium
- Lava Drill Masterwork – c240 = 500 Iron, 100 Cloutium
T2:
- Extended Tool Rack – t280
- Common Ice Shovel – t694 (3 Skull in Speed and Dig Size Bonus)
- Common Icepick – t742 (3 Skull in Speed and Dig Size Bonus)
- Common Ice Rake – t245
- Lava Thaw Booster – t180
- Tier 2 Logic TNT – t360
- Lava Drill – t430 (1 Star each in Speed Bonus and Output Size Bonus)
- Common Shovel Masterwork – t320 = 620 Iron, 540 gold
- Common Icepick Masterwork – t320 = 620 Iron, 540 gold
- Lava Intake Booster Masterwork – t1400 = 300 Cloutium, 800 Corestone
- Heavy Lava Harvester Masterwork – t2020 = 300 Cloutium, 600 Corestone
- Heavy Lava Drill Masterwork – t2100 = 400 Cloutium, 700 Corestone
T3:
- Advanced Ice Shovel – t2350 (3 Skull in Speed and Dig Size Bonus)
- Advanced Icepick – t1240 (3 Skull in Speed and Dig Size Bonus)
- Advanced Ice Rake – t280
- Extended Tool Rack – t280
- Lava Thaw Booster – t180
- Tier 3 Logic TNT – t450
- Logic Mini Nuke t1800
- Lava Drill – t430 (1 Star in Speed Bonus, 2 Star in Output Size Bonus)
- Advanced Ice Shovel Masterwork – t480 = 120 Cloutium, 370 Corestone
- Advanced Pickaxe Masterwork – t480 = 120 Cloutium, 370 Corestone
- Prospecting Helmet – t430
Jeweler:
- Buys items like other Jewelers. No trip to Lumberton required anymore.
Ticket Office:
- Boat Ticket to Mot’s Island – t200
Volcalidus Ores and Resources
Frost Rock:
- Think of Frost Rock as the cooler cousin of those Dirt Chunks from the base game. You can get resources from them, but forget about using a shovel; only drills can break these bad boys.
- Value? 1 point for every weight unit (wt) you haul in.
Ice:
- Ice is pretty much your go-to resource like Dirt Chunks back in the day. You can melt it down for water in your pipes or dig up some goodies from it. The deeper you go, the more ice you’ll find.
- A basic shovel scoop gives you 1wt of Ice. Got a buffed shovel? Expect to dig up more ice with each scoop.
- Each wt of Ice is also worth 1 point.
Hardstone:
- Now, Hardstone is the tough stuff. You can’t just smelt it; you need to refine it with a Hardstone Refiner to get anything out of it.
- This one’s worth a bit more, clocking in at 8 points per wt.
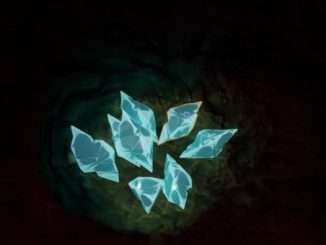
Diamond:
- Diamonds are your best friend here, not as rare as Onyx, but still pretty darn valuable.
- A whopping 250 points per wt. That’s the kind of loot that’ll make your wallet happy.
So, you’ve got Frost Rock and Ice for the basics, Hardstone when you’re looking to step up your game, and Diamonds for when you hit the jackpot. Keep an eye on your tools and where you’re digging to make the most out of each material.
The Drop Rates for Ores + Hardstone and Diamond:

Useful Tips
- Tip for Finding Bones: When driving with your truck zoom out as much as possible and look around.
- Pro-Tip: If you leave the hauler on the crafting platform, do not enter it before the press lifts back up… It sends you flying across the map.
- If you want to buff a heavy harvester n not take all to the scrap yard, toss them into a logic destroyer. Place it down to work, then drop item in. Must place in a bought claim. It’s fun, but driving all ti the scrap yard might be faster but less fun.
- Tip for New Players: When driving alot with your truck, always handy to have a pan or 2 with water/lava to refuel, the amount of times i forget to fuel my truck in the past was insane.
- Pro-Tip: You can Precision Place the bulletin board in the truck bed against the cab to have the map easily accessible without leaving the vehicle.
- Dig deep! The deeper you place your drills, the better the resources will be. Be sure to give your Harvester better pressure / filtered water too, to help improve the resource output too!
- Pro-Tip: Polish gems before they go into the compressors, not right after they come out of the harvester. Also put a valve before the polisher belt, so if you want you can turn off the gem polisher and just collect ores. Then delete all raw resources n clear your unpolished gems.
Be the first to comment