
An actually frustration-free guide to Engineer: Zero Sum Challenge.
Guide to Engineer: Zero Sum Challenge
All credit goes to Vostok 1!
Engineer: Zero Sum is an Engineer Challenge that unlocks the Thermal Harpoon Ability. It takes the utility slot, and Engi’s default Utility is the Bubble Shield. To get the Challenge, you need to finish charging a teleporter with 0 enemies on the map. Do notice the difference between “finish charging a teleporter” vs. “going through the teleporter”.
The catch here, as is stated on the wiki, is that if you charge the teleporter to max, but keep the teleporter boss alive, enemy spawns will stop. Then, the teleporter will only finish charging when you kill the boss. This gives you an indefinitely long window to finish off any enemy that’s not the boss.
So far this all sounds very straightforward… On paper. BUT. The most common issue you’ll encounter is an stray enemy ruining the challenge. You will easily miss a Wisp high up in the air. Or some other mob on the other end of the map. You also do not want a Beetle Queen as the teleporter boss, because she can summon Beetle Guards, ruining your progress. If only there is a way to guarantee that all enemy types are grounded and actively chase you! Oh wait…
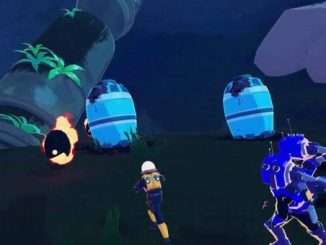
And this where the Artifact of Kin steps in. It guarantees that all enemies are of the same type. This includes the teleporter boss, who will be overridden with an elite. You can load into the map and immediately see which enemy is chosen. If it’s not the enemy you want, you can exit and repeat. I highly recommend Stone Golems, y’know, the one that shoots laser from the eye. Your Bubble Shield conveniently blocks the laser. they also move slowly enough that by the time a Stone Golems walks into your Bubble Shield, they are close to dead. If you’ve faced them before, you know all their attacks can be dodged relatively easily. Stone Golems make a loud noise when walking, and will actively chase you. Isn’t this so very nice? Load into the map, see Stone Golem, charge teleporter, kill all regular ones, kill boss, profit. Never will you feel the frustration of hunting down a wisp.
A few points to be careful of: After charging the teleporter to 99%, You MUST clear all other mobs before the teleporter boss. This means you should be very careful of any splash damage, homing damage, or ally damage. As sad as it is, you should avoid getting any ally, even including your turrets, lest they accidentally kill the boss. My advice is to use Artifact of Command and only get defensive items. You don’t need any damage items anyways, so better to play safe. Consider disabling SotV, as that adds the Mending Elite. If the boss spawns as one, It will significantly hinder your progress.
Good luck in getting your Heat Seeker Missiles. I mean thermal harpoons.


Be the first to comment