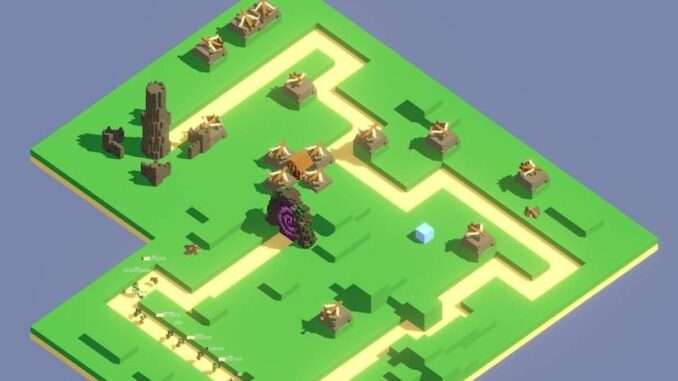
Clarifying some game mechanics and strategies.
Guide for Newbies
All credit goes to Ohm is Futile!
FAQs
- Q: What does putting towers higher do?
- A: It not only increases their range, but also their base damage. You should always use higher terrain if possible.
- Q: Is there a downside to selling towers?
- A: If they are level 1, then no. However, towers can be upgraded by paying money and they will gain levels over time naturally. Selling upgraded towers only returns the purchase price of the tower, not the value of any levels gained.
- Q: How do priorities work?
- A: The order in which priorities are put in does not matter. Each priority you set has a hidden value. For example, if you use Most Health + Most Armour, your tower will aim at whatever in range has the the most cumulative hitpoints of both of those. Progress is always implied. If there are two targets with the same value, then your defenses will shoot the closest to the tower. Check the section on priorities for more info.
- Q: How do towers level?
- A: They gain experience over time based on what they target within their range, even if they don’t fire. For example, this means you can control which stats will level on tesla towers for example even if they hit everything in their range.
- Q: How do universities work?
- A: They need to be next to an occult shrine. Those usually start spawning around level 25 and later, but they are not guaranteed to appear. Once you place a university, depending on your upgrades and the cards you picked, they will have a percentage associated with Health/Armour/Shields. You can also pay to increase the percentage on a particular stat. Then, every time you start a level, a dice is rolled for each stat and each university. If it succeeds, every tower will deal more damage of that type. It’s a potentially powerful mechanic, but it is essentially gambling and you could get unlucky.
Priorities
Priorities are super useful and even if your turret isn’t actively firing, it affects which damage type they level for. Basically, they gain XP for what they target rather than what they damage. If they spent most of their time “looking” at health only targets, then that’s what will level.
Obviously, you also want your turrets to shoot at the things they’re good at killing, so here’s a few combinations that I like:
Anti-ram
- Most Armor
- Least Shield
- Slowest
Quite straightforward. With things like ballista with slow arrows, this will usually cause them to focus fire too.
Anti-runners
- Least Shield
- Least Armor
- Fastest
Good for killing weak enemies before they wander into some other turret’s range and cause that one to fire and go on cooldown for instance. You can replace the stats for something like least armor and least health later in the game when the fast enemies are shielded.
Generally I recommend focusing on one stat for maximum damage. Two can work for turrets meant to pick off stragglers but avoid jack of all trades if you can.
Feel free to suggest more clever combinations in the comments!
Upgrades
In the current state of the game, the only way to remove a card from your unlocks is to reset your XP. This not only locks everything, but also sets your XP to zero, so be careful. Any card you unlock (yellow background) can appear whenever you get a chest or upgrade in game as long as you have the prerequisites. This can quickly pollute your upgrade pool if you’re not careful. This can be mildly annoying to nearly disastrous if you’re going for certain achievements.
General Tips
- Focus on what the towers are good at when it comes to upgrading them. Ask yourself why you’ll want to unlock that tower in a game and if you’ll have other towers to pick up the slack in other ways. For example, do you really want to unlock armor and burn damage on shredders?
- The haunted house is pretty terrible. It has hidden upgrades, consumes mana, and takes around 5 to 10 levels to even pay for itself. Even when it finally pays for itself, it earns a pathetic amount of money. Avoid.
- The different damage over time upgrades are nicer than they look, but poison is probably your best bet. Poison can slow if you stack enough, and shields are a pain. Bleeding is nice for the extra 5% crit chance if you get the upgrade, though. The weakest is probably burn damage.
- Mana banks are quite good, though they are less efficient than siphons (125g per mana/s vs 100g). The main thing is they simply don’t require a mana crystal and the added maximum mana is pretty nice to avoid going from 100 to 0 with every shot if you invest heavily in mana towers.
- Universities are debatable. I’m pretty sure they unlock hidden upgrades such as 5% crit chance for all towers which is quite good, but their own pay off is quite luck-based.
- Mines are a similar case. The chance to repair and extra hitpoints are massive for carrying runs through leaks, but then again it might not be enough to save you. It is a single card though, so not the worst for polluting your deck of upgrades.
Damage over time tips
- Health and shield regen are the most problematic. Consider either unlocking at least shredders and poison sprayers and/or unlocking bleed/burn/poison upgrades for mortars and/or tesla towers as those will spread DoT effects quite nicely.
- The generic DoT upgrades at the bottom left of the upgrade screen are quite good. Creeping cough is a good alternate source of slow and eviscerate adds a bit of crit which helps everything.
- The DoT upgrades work by increasing the cap on the maximum DoT “used up” every second. Be careful of getting those upgrades early as it can cause the DoT to run out early.
- Trail of blood, fire and flames, and vile consumption upgrades are good force multipliers.
- Exsanguinate, ignite, and expunge can be very powerful but you need to invest in both DoT upgrades and crit chance.
- The DoT upgrades on shredders/flamethrowers/poison sprayers are more powerful than the generic ones, but they are also require more upgrades overall to access and will cause DoTs to run out even faster. This can make them rather detrimental by polluting the deck and causing DoTs to run out literally too fast.
Towers
Ballista
As the starting tower, they are very good and hard to beat early game in terms of cost vs DPS. However, they are single target, which is probably the main difficulty for the ballista only achievement.
Very good against health by default, can be upgraded to be decent against armor and shields.
Best upgrades for ballistas: slow, the first +1 to each damage type as it unlocks DOT upgrades for ballistas which makes the second half of the game so much easier to handle. You can skip if you have the corresponding DOT from another source, especially if that source is AoE.
Mortar
Unlocked by default and very good AoE, especially with upgrades considering it doesn’t cost mana. Travel time can result in a shell going to waste if the target dies before the hit lands though.
Very good against armor, decent against health, and weak against shields.
Best upgrades for mortars: explosion radius. Range is a double-edged sword as greater travel time means even worse chances to hit properly. Other damage types are decent, especially if you are going for the ballista and mortar only achievement.
Tesla Tower
Although it was just nerfed, it is still a very good tower. The range is minuscule but it hits everything within it. Be careful, priorities matter for leveling. Consumes mana.
Very good against shields, decent against health, weak against armor.
Best upgrades for tesla towers: obviously, shield upgrades lend themselves to the tower’s natural strength. Unlocking one level of each damage type and using it to apply DOT is a valid strategy. Going for a high level tesla tower with extra crit chance and quality over quantity upgrades can still turn this into a bit of a monster.
Frost Keep
A good force multiplier, but does not quite work the way you’d expect it to. This tower actually has no AoE and instead spawns projectiles within its radius. The more of the path it covers, the more snow flakes it generates. Even though it doesn’t directly fire at enemies, priorities will influence how it levels. Consumes mana.
Good against health, average/weak against armor/shields.
Best upgrades: range is great since rate of fire depends how much of the path it covers. Since the more recent updates, this tower can dish out a surprising amount of damage.
Encampment
Puts mines with a small AoE on the map at random within its radius. The speed at which it lays mines is related to how much of the path it covers, so placement is especially important and trying to get it to put mines in a specific spot by limiting its coverage will significantly hurt its overall DPS. Even though it doesn’t directly fire at enemies, priorities will influence how it levels.
Very good against armor, decent against health, weak against shields.
Best upgrades: range since it also increases DPS, bleed/burn/poison can be advantageous since it has AoE.
Shredder / Flame Thrower / Poison Sprayer
All three of these towers perform similarly. Shredders send discs along the path while the other two spray a spot. They all have some level of AoE and apply the corresponding damage over time effect which stops all regeneration for that health type. Flamethrowers and Sprayers consume mana.
Good against against health/armor/shields respectively.
Best upgrades: ironically, these towers are probably best left with as few upgrades as possible. The main exception would be the bottom line of upgrades that increases how much bleed/burn/poison they apply. Investing in their other upgrades does make them more powerful but it requires a significant investment in upgrades compared to taking the generic DoT upgrades.
Lookout Tower
Passive tower that targets something (red cross at the monster’s feet) based on your priorities. That target takes more damage based on the tower’s own multipliers. This is best used in places where you have a lot of towers to take advantage of the bonus.
All the stats start relatively low but favour health and shield damage.
Best upgrades: although potentially a great force multiplier, it is likely better left alone and upgraded in game with gold as it could potentially add a lot of upgrade cards to the pool.
Radar
Sends a little plane at very long ranges to attack enemies. The plane needs to physically navigate and attacks rather infrequently but does quite a bit of damage.
Good against health, decent against armor and shields.
Best upgrades: another one that is probably best left alone. Even the base range is incredibly big. It attacks too slowly to spread DoT effects. I recommend upgrading it ingame with gold or letting it level on its own.
Obelisk
Short-range doom laser with essentially no cooldown. Great at either singling out targets or even cleaning up a lot of low health enemies. Range is short but not overly difficult to work with. Consumes mana.
Good against armor, decent against health, weak against shields.
Best upgrades: very powerful as is. You may want to fully upgrade it for the passive damage bonus, but probably avoid the bleed/burn/poison upgrades. They’re good but there are better ways to spread DoT.
Particle Cannon
This is essentially a sniper tower. Slow-firing, high damage, and long range.
Good against shields, decent against health, weak against armor.
Best upgrades: you may want to consider the range upgrades as the base range is good but not as extreme as you might think. I would not recommend getting the other upgrades just to avoid polluting the upgrade pool. Not the greatest at spreading DoT either.


Damage ups (the +x upgrades) apply to the multiplier, not the base damage.
I feel this can be easily overlooked.
Extremely helpful. I’ve played a lot of rounds, but priorities made little sense to me. Usually just changed the first one and left the rest to progress.
I’ve had pretty good success with mines, and my last mine+ballista run was my smoothest yet. The trick is to only keep mines on the nearer half of your pathways and to try to keep one or two of the mob paths as relatively short so you really spread out the overall waves. They need time to put out a bunch of mines and replenish them. Range upgrades help them tremendously and you can get them to 20+ RPM, and you can place several encampments together to stack up lots of mines in your killing fields. They do a great job taking care of bats and missiles near the end of the game, letting far more of your towers focus on the big threats. The poison upgrade (punji sticks) + creeping cold means they’re more effective frost towers than frost towers, and without using any mana too.
frost towers (when upgraded enough) increases the cap of slow to a whopping 90% requires a lot of investing and a other source of damage usefull utility
With regard to mines, go big or go home.
I have defeated Single Defense and Double Defense runs with only mines (no Ballista, Universities, Haunted Houses etc.). Place most of your mines near your tower and then begin spacing them out in front of it (as these are hit, they will be replaced) so you have defense in depth. A heavy minefield can take out the Boss in three squares or less. If you use other towers, target near death units in advance of your minefields as these small units take out mines just as well as high level units so it is good to eliminate them with other towers. Mines have the lowest upgrade cost (same as Ballistas so consider upgrading them as soon as new minefields become cost prohibitive). As BonesBro said, space out your waves so they are arriving at different times and your encampments have time to replenish your minefields.
Small enhancement: Instead of ” Selling upgraded towers only returns the purchase price of the tower ” it should be ” Selling upgraded towers only returns the current purchase price of this tower type “
How do I get mana
I disagree on haunted houses been poor. All 4 upgrades is 20 gold extra per round. You can get ALOT of haunted houses out on the field. It’s the only way i was able to spam 189 ballistaes in the only game I succeeded in ballista only.
I can understand why you’d value them. I’d have to play around with them more, but I’ve had runs where it’s a struggle to get one grave per house. If you go for a single grave, it’s a 100 gold and takes ten turns before you get any return assuming you aren’t getting more upgrade cards and even with full unlocks upgrade cards are rather valuable. To me it’s extremely hit or miss and unreliable for the pollution it adds to the deck.
By comparison, you can get +2 gold per kills with banditry for a single upgrade.
Nice guide!
My haunted houses usually end up paying for themselves 3-5 times, so I never skip those.
I also never skip universities, as they end up collectively adding about 40-70 levels to all my towers when I do ballista only runs. If I run other towers I can afford to invest even more money into universities and get about 70-100 additional levels on all towers that way. Not sure why you think it’s debatable. 😀
Mines however are useless and should always be avoided. Once you start leaking and begin to invest money into mines instead of damage, then you are already almost guaranteed a bad or mediocre run. Money should be invested into more towers and universities.
I have sinked about 70 hours into this game at this point.