Overview
Being familiar with the game’s basic controls will give you an edge while playing. Mastery of the game’s vehicle controls will play a key role in combat later on.
Character Controls
Control your character using the directional keys [WASD] and by moving your mouse . The directional keys [WASD] correspond to forward, left, backward, and right, respectively.
The mouse is used to control the direction in which your character is facing.
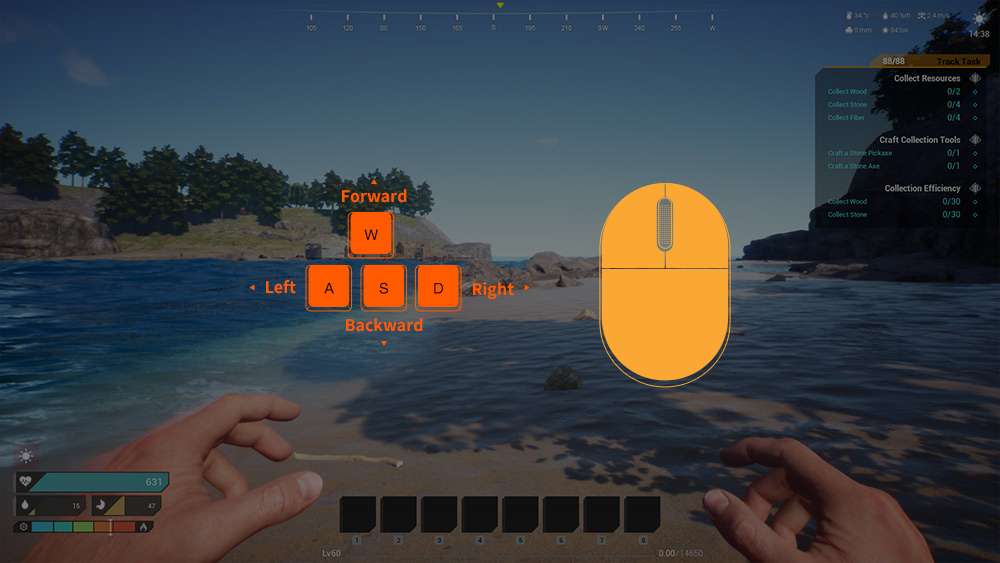
The Front’s default key bindings are as follows:


- Esc: Opens the game’s settings menu.
- W: Move forward/Ascend ladder/(In vehicles) Accelerate
- A: Move left
- S: Move backward/Descend ladder/(In vehicles) Decelerate
- D: Move right/(When item is selected in inventory) Discard item
- Shift: (When W is pressed) Sprint/(When piloting a vehicle) Scope/(With firearm equipped) Hold breath
- Space: Jump
- Ctrl: Crouch
- 1-8: Use items on the shortcut bar
- R: (When weapon is equipped) Reload/(When placing a structure piece) Rotate/Repair
- E: (When piloting a vehicle) Start or stop engine
- F: Collect/(when facing water) drink
- Y: (When piloting a vehicle) Toggle headlamps
- H: (When facing target) Show/hide target attributes
- C: (With item selected) Use or equip item/Cancel bow pull/(When piloting air vehicle with jammers equipped) Fire jammer
- X: Toggles structure replacement mode. Can only be used when placing a structure.
- Z: Command Followers
- H: (When piloting air vehicle) Hover
- B: Inventory
- Tab: Crafting interface
- O: Tech interface
- T: Talents
- L: Tasks
- G: Squad interface
- M: Map
- K: (With weapon or tool equipped) Inspect weapon
- =: Auto walk
- F11: Switch window mode
- Alt: (With weapon equipped) Switch ammo type; must be used with middle mouse button
- Enter: Open and close chat window
- Left-click: Attack/Fire/Throw/Select
- Right-click: (With gun equipped) Aim/Quick transfer item/(When placing structure) Switch structure type/(While piloting vehicle) Zoom
- U: Mail
Ground Vehicle Controls
Starting at Level 16, players can unlock the Vehicle Factory tech from the Tech interface [O].
All ground vehicles in the game, including harvesters, tanks, assault vehicles, etc. as well as vehicle-related spare parts and ammunition need to be crafted at the Vehicle Factory.
- Placing Vehicles
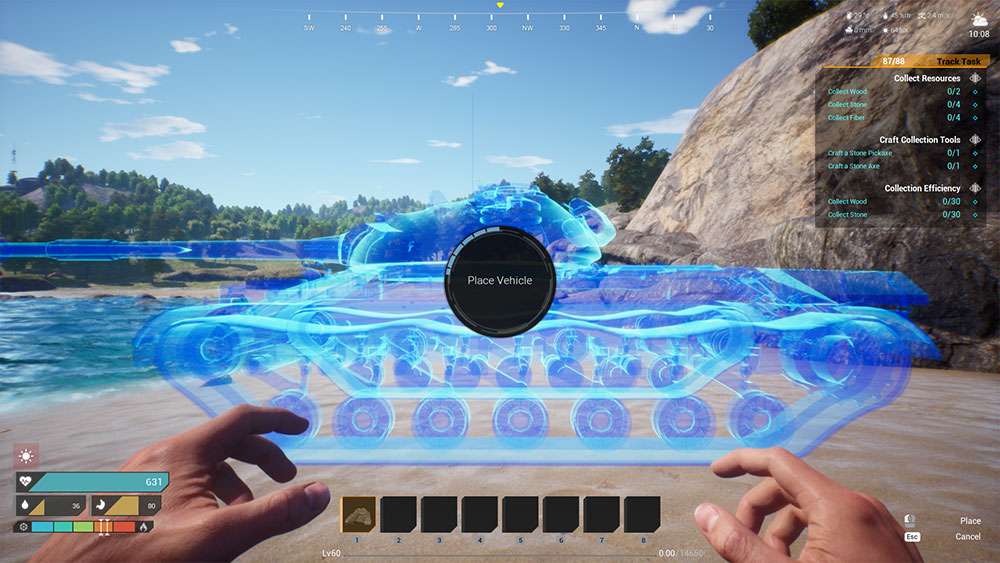
Once your Vehicle Factory has finished crafting a vehicle, click and hold [LMB], then drag the vehicle to your shortcut bar.
Use [WASD] to position your character where you would like the vehicle to be placed, then press the corresponding shortcut key to take out the vehicle.
Click [LMB], and wait for the gear to finish loading. Your vehicle will then be placed.
- Operating Vehicles
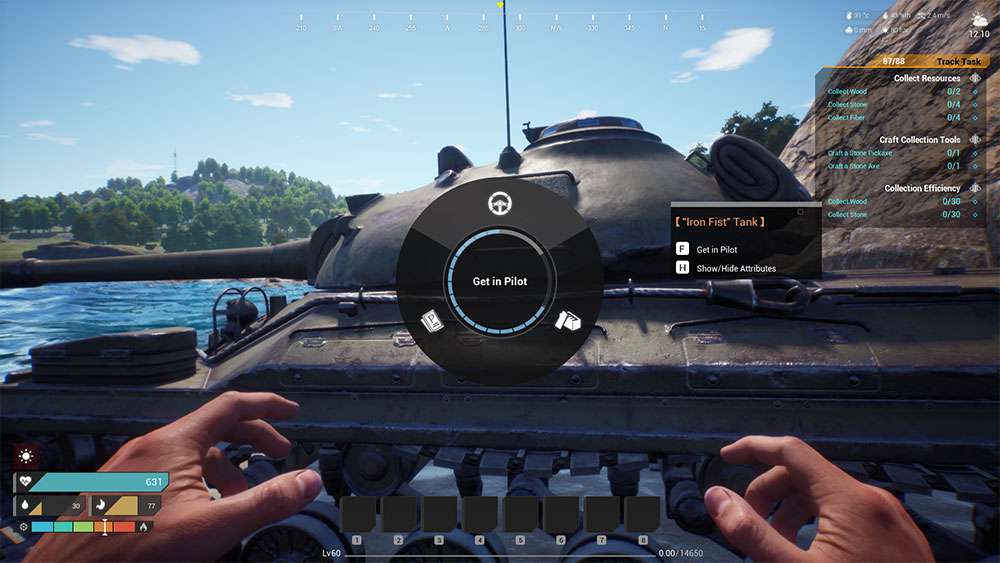
Once your vehicle has been placed, use [WASD] to move next to it, then press and hold [F] to open the interaction menu.
Which options are available to you will differ depending on the vehicle, but generally, the menu will feature the following interactions: “Get in Pilot”, “View Vehicle”, and “Reclaim Vehicle”.
With the interaction menu open, move the mouse and click [LMB] on “Get in Pilot” to begin piloting the vehicle.
- Starting Vehicles
Vehicles require gasoline to start. Once in the pilot’s seat, press [B] to open your inventory, then use [LMB] to drag gasoline from your inventory to the vehicle’s gas can, then press [ESC] to return to the game. Once your vehicle has gasoline, press [E] to start it.

- Vehicle Movement
Controlling your vehicle’s movement is similar to controlling your character. Use [WASD] to move, and slide the [Mouse] to control the camera.
- Attacking
There are two types of vehicles: work vehicles and attack vehicles. Work vehicles are mainly used for transportation and collecting resources, while attack vehicles are used in combat.
Using tanks as an example, tanks can only attack once started, and shells need to be placed in the “Vehicle Ammo Rack.” While driving a vehicle, two crosshairs will appear on your screen.
The solid circle represents the driver’s field of vision, and the dotted circle represents the gun’s crosshair.
When a target is within the dotted circle, you can shoot using [LMB]. You can also press [SHIFT] to aim accurately before using [LMB] to fire.


Airborne Vehicle Controls
Starting at Level 16, players can unlock the Vehicle Factory tech from the Tech interface [O].
All airborne vehicles in the game, as well as vehicle-related spare parts and ammunition need to be crafted at the Vehicle Factory.
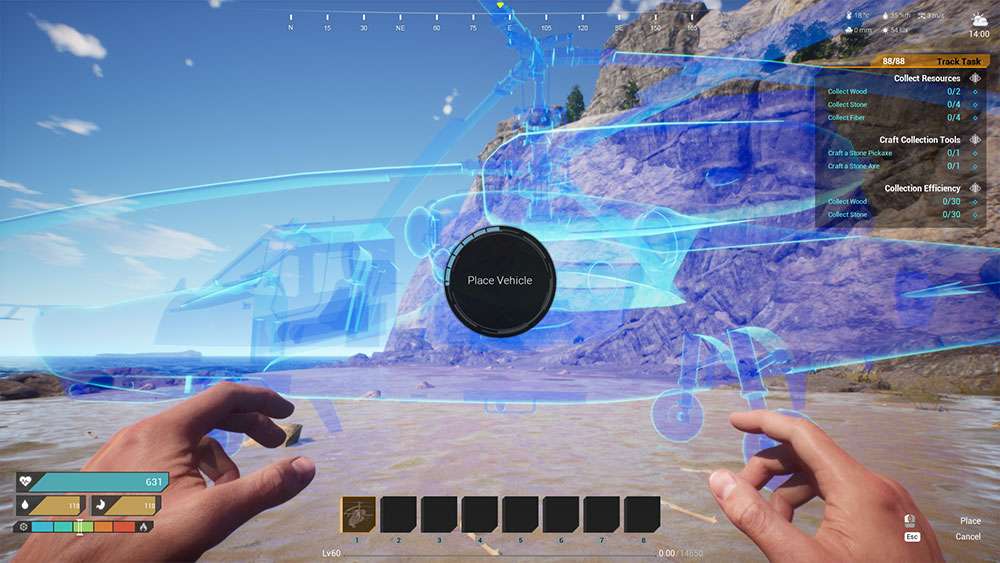
- Placing Vehicles
Once your Vehicle Factory has finished crafting a vehicle, click and hold [LMB], then drag the vehicle to your shortcut bar.
Use [WASD] to position your character where you would like the vehicle to be placed, then press the corresponding shortcut key to take out the vehicle.
Click [LMB], and wait for the gear to finish loading. Your vehicle will then be placed.
- Operating Vehicles
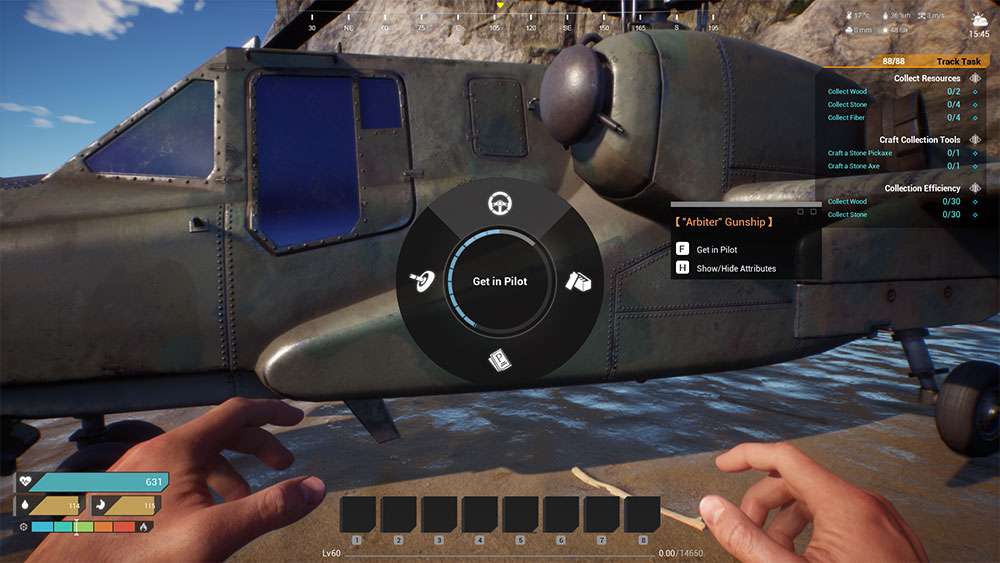
Once your vehicle has been placed, use [WASD] to move next to it, then press and hold [F] to open the interaction menu.
Which options are available to you will differ depending on the vehicle, but generally, the menu will feature the following interactions: “Get in Pilot”, “Get in Gunner”, “View Vehicle”, and “Reclaim Vehicle”.
With the interaction menu open, move the mouse and click [LMB] on “Get in Pilot” to begin piloting the vehicle.
- Starting Vehicles
Vehicles require gasoline to start. Once in the pilot’s seat, press [B] to open your inventory, then use [LMB] to drag gasoline from your inventory to the vehicle’s gas can, then press [ESC] to return to the game. Once your vehicle has gasoline, press [E] to start it.

- Vehicle Movement
Compared to ground vehicles, airborne vehicles have a complex control scheme. Airborne vehicle controls include take off, move forward, move backward, hover, descend, ascend, and land. Before you can master an airborne vehicle, you will need to understand its instrument panel.

- (1) Lift: Used to control a helicopter’s ascent and descent. Press [W] to increase lift, and [S] to decrease lift.
- (2) Horizontal Speed: Indicates the flight speed of the helicopter.
- (3) Level: Indicates the tilt of the helicopter.
- (4) Altitude: Indicates the distance from the helicopter to the ground.
- (5) Vertical Speed: This is divided into 5 segments. The center segment represents 0. When the pointer is below 0, you are descending. When the pointer is above 0, you are ascending.
Take off: Once the engine has been turned on, press and hold [W] to increase lift and take off.
Move forward: Upon taking off, continue to hold [W] to maintain lift, and at the same time pull the [Mouse] back to tilt the helicopter’s nose downward. You will notice that your speed begins to increase. Make sure that you do not tilt too far forward, or you will lose control and crash.
Move backward: Hold the [W] to maintain lift and push the [Mouse] forward to tilt the helicopter’s nose upward. You will notice that your backward speed begins to increase. Make sure that you do not tilt too far backward, or you will lose control and crash.
Turn: Slide the [Mouse] left and right to turn. You can also press [A] or [D] to turn quickly.
Hover: While in flight, press [H] to hover.
Descend: While in flight, pull the [Mouse] back to tilt the helicopter’s nose downward. The helicopter will then begin to descend.
Ascend: While in flight, press and hold [W] to increase lift, at the same time gently pushing [Mouse] to tilt the helicopter’s nose upward. The helicopter will then begin to ascend. How much it ascends depends on your lift and the angle of the helicopter’s nose. Upon reaching a certain altitude, the helicopter will no longer be able to climb, and will then only be able to descend, or move at a horizontal trajectory.
Land: Position the helicopter above the location where you intend to land, then press [H] to hover. Once your speed reaches 0, press and hold [S] to begin landing.
- Attacking
Helicopters have two types of weapons: 1. Machine guns; 2. Missiles.
To operate a machine gun, you simply need to sit in the “Gunner’s Seat” and add the proper ammunition to the “Vehicle Ammo Rack.”
Missiles can only be used when a launcher is attached to the “Vehicle Gear Slot.” The type of launcher you’ll want to use differs depending on the target. Types of launchers include air-to-air launchers, air-to-surface launchers, and more. Launchers can only be equipped within 30 meters of a Vehicle Factory. If two types of launchers are equipped at the same time, you can use the 1 and 2 keys to switch between them. When a target is within the aiming reticle and is marked red, it means you have locked onto that target. Once locked on, click [LMB] to fire.

- Warnings and Evasion
When an enemy locks onto and fires upon your helicopter, a “Warning” indicator will flash in the middle of the screen. At this time, you will need to fly out of the way of the incoming projectile or press [C] to use jammers.


Be the first to comment