

Protea Build Guide with Tips (2026)
Protea is a cast-heavy Warframe that benefits from Casting Speed. Her passive rewards careful timing of ability casts, while her Grenade Fan, Blaze Artillery, and Temporal Anchor provide offensive, defensive, and utility options.
Passive
Every fourth ability cast gives Protea’s ability +100% Ability Strength.
Grenade Fan
Protea throws a spread of grenades. The grenade type depends on whether the ability is tapped or held. The input behavior can be inverted in Options → Gameplay.
Shrapnel Vortex
Tap the ability to deploy three lingering shrapnel fields.
The fields:
- Deal continuous Slash damage.
- Constantly stagger enemies.
- Have a chance to apply the Slash status.
- Can damage enemies through walls because they do not require line of sight.
Shield Satellites
Hold the ability to deploy four floating probes that attach to Protea or nearby allies.
When picked up, a Shield Satellite:
- Instantly restores shields.
- Provides continuous shield regeneration until it expires or the shields are broken.
If the shields break while a Satellite is active, the Satellite is consumed and doubles the Shield Gate duration.
Shield Satellites do not affect Warframes without shields, including Inaros, Kullervo, and Nidus.
Their regeneration is continuous, allowing shields to recover even while taking damage, unlike natural shield recharge.
Blaze Artillery
Protea can deploy up to three auto-targeting turrets. They fire at enemies within a 130° frontal cone.
Each turret:
- Fires three shots per second.
- Has infinite body Punch Through.
- Deals Heat damage in a 2-meter area of effect.
- Has a 100% Status Chance.
- Gains +100% damage for each enemy hit, stacking per enemy hit.
Turrets have a base duration of 3 seconds, which scales with Ability Duration.
They target enemies within 30 meters and require line of sight. Their targeting range scales with Ability Range.
For quickly building damage stacks, place turrets in chokepoints or corridors, or combine them with enemy grouping.
Turrets do not have a special interaction with ragdolled enemies that allows them to ramp up their damage faster.
Augments
Temporal Artillery
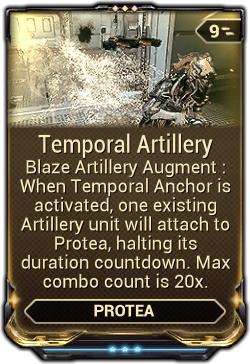
While Temporal Anchor is active, one of Protea’s Blaze Artillery turrets follows her.
The attached turret:
- Has its combo capped at 20x.
- Gains 360° coverage instead of only targeting enemies in front of it.
- Has its timer paused while Temporal Anchor is active.
Because the turret’s damage is capped, snapshotting Protea’s passive on the ability becomes more important to compensate for the damage limitation.
Repair Dispensary
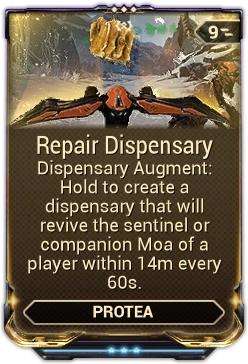
After creating Energy Orbs, Dispensary generates a special pickup for Companions.
The pickup:
- Restores 20% of the Companion’s maximum Health.
- Reduces its incapacitation timer by 12 seconds.
This augment increases Dispensary’s cycle time, causing its other pickups to take longer to spawn.
Temporal Erosion
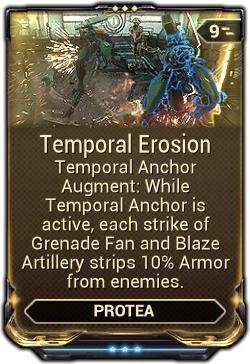
While Temporal Artillery is active, Protea’s damaging abilities permanently apply Armor Strip.
Shrapnel Vortex can be overlapped to strip enemies’ armor very quickly, potentially reaching a full strip almost instantly.
Arcanes
Possible Arcane choices include:
- Arcane Concentration or Molt Efficiency for maximizing Ability Duration.
- Molt Augmented.
- Molt Vigor.
- Arcane Steadfast for free casts, particularly when using low Ability Efficiency or running squads with Brief Respite.
- Arcane Energize.
For a weapon-focused build, options include Arcane Fury, Arcane Precision, Arcane Tempo, and Arcane Hot Shot. Temporal Artillery can passively stack Arcane Hot Shot.
Subsumes
Protea’s Dispensary or Temporal Anchor can be replaced with a Helminth ability.
Dispensary is entirely stationary, which can be inconvenient for mobile missions, and its energy gains can be outsourced elsewhere.
Temporal Anchor provides lots of utility but is ultimately janky in most aspects and costs a lot of energy to play around.
Armor Strip
Armor Strip can replace the need for Temporal Erosion or Temporal Anchor entirely.
Possible options include:
- Terrify
- Ophanim Eyes
- Tempest Barrage
Enemy Grouping
Possible grouping abilities include:
- Larva
- Ensnare
Larva has the tightest grouping, but can run into terrain issues and has the smallest grouping range.
Ensnare is very consistent, but requires aiming at an enemy.
Roar
Roar double dips on Blaze Artillery’s Heat damage.
Nourish
Nourish is another possible subsume option.
Archon Shards
Suggested Archon Shard distribution:
- 2 to 4 Crimson Shards for Ability Duration.
- 1 to 2 Amber Shards for Casting Speed.
- 1 to 2 Amber Shards for Parkour Velocity.
Stat Priorities
The main stat priority is:
- Ability Duration
- Ability Strength
- Ability Range
Ability Duration is the highest priority because it applies to every ability.
General Tips
Protea is a cast-heavy Warframe and wants Casting Speed to make her kit feel smoother. If Shards are not available, use Natural Talent or Madurai Focus.
Augur mods and Brief Respite are not recommended for Protea because gaining shields will override the extended Shield Gate duration from her Shield Satellites.
Even the small amount of shields gained from casting abilities can end the extended Shield Gate timer.
Grouping can be outsourced to:
- Scyotid
- Proboscis Cernos
- Telos Boltace
- Nautilus
- Magnus Anomaly
This frees up the subsume slot and removes the need to build for as much Ability Range.
Damage dealt by Companions or allies does not count toward Protea’s Temporal Anchor.
Archon Vitality doubles the amount of Heat statuses applied by her turrets.
Heat DoT damage makes up a low portion of Blaze Artillery’s total DPS until reaching higher levels.
Temporal Anchor Tips
Place Dispensary and Shield Satellites at the Anchor Point to prevent death after rewinding.
Cast Temporal Anchor with full Energy and Ammo to avoid returning to low resources.
After the rewind begins, Protea can enter Operator form to move freely.
Once the rewind finishes, transferring back relocates Protea to the Operator’s position instead of the Anchor Point.
The quickest way to scale the nuke is by using high-burst weapons, such as:
- Magistar Incarnon
- Kuva Hek
- Tenet Plinx
Playing around Temporal Anchor consumes a lot of Energy. It is recommended to use positive or neutral Ability Efficiency, or use free casts from Arcane Steadfast, Zenurik Focus, or Mystic Bond.
Be the first to comment