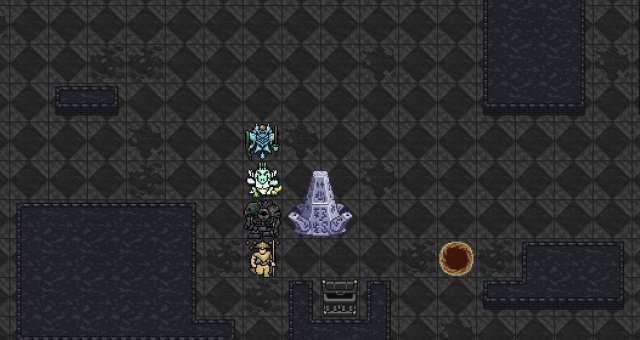
This is a pretty simple and straightforward guide on a build to sleep through content. There are many overpowered builds. This is just one and it’s not even the best one or the most efficient version of itself. But, it is funny wiping out bosses before it’s even my turn using mobs I found in the starter areas.
Guide to Hell Knight Build
Class and Perks
For this build, we’ll be using Hell Knight to make use of his Firestorm mainly. But also, the ability to give all your creatures Hit All Enemies and guaranteed Critical Strike.
You’ll want (probably in this order)
- Kindling – This makes the first creature in your party cast Firestorm hitting all enemies and applying Burning. As such, you want to make sure you’re putting your highest Intelligence creature in your first party slot. Still keep using Attack Artifacts and Upgrades. You will be adding Attack to Intel for damage shortly and you don’t want to shortchange your Splash and Crit attacks or any Attack First orbs you pick up.
- Inner Focus – Increases the damage of all the core components of this build. Firestorm, Inner Destruction, and Corpse Explosion. Even boosts Pyromania later down the line.
- Magma Diver – This gives all your creatures splash adjacent attacks and a chance to critical strike. Eventually, it will turn your team into powerhouses.
- Massacre – Turn your splash adjacent into ALL enemies.
- Reckless Abandon – Guaranteed critical strikes is very good.
- Pyromania – This pairs well with Kindling and Inner Focus giving all your team a chance at serious spam damage when combined with all the double casting we’ll be adding.
- Indomitable – Depending on what stage you are in the game, you may need to take this sooner rather than later. It prevents your party from being attack-silenced assuming the opposing team isn’t dead at the open of the fight.. which is the ultimate goal.
Everything after that is really preference. A second attack is good. Increased Critical Damage is good. It’s all what you want to do and if you customized your team later on.
Fusions
This list of fusions is certainly not the best but, it is the easiest and earliest to acquire. It is designed to give all the triggers needed while also providing good survivability and a wide range of debuffs. The places I list to the right of each creature is the easiest place I found to find them. Check your Bestiary for more locations. Keep in mind you can’t collect souls to make a new copy if you have one pending already. Make them as soon as you get them or have enough essence.
Make sure you’re combining them in the order given. The second creature determines the element and we need specific elements open to make the build work. There is some leeway but you need to maintain 3 red gem creatures and 1 black gem creature.
- Ebony Ent – Blood Grove
- Noxious Smog – Caustic Reactor
Ebony Ent adds Mending to your team which combines with Hemlock Ent to provide 45% healing every turn. Noxious Smog is used for the poison debuff, +75% damage added, and red spell gem usage.
- Exiled Satyr – Blood Grove
- Noxious Smog – Caustic Reactor
Exiled Satyr is used to reduce one-shot capabilities of some random encounters and bosses. Noxious Smog is again for the debuff, damage, and red slot.
- Hemlock Ent – The Swamplands (Or Rarely Blood Grove)
- Gimp Mummy – Frostbite Caverns
Hemlock Ent is to provide the second half of the 45% heal from Ebony Ent. Just some added survivability for extended fights. Gimp Mummy is like the Noxious Smog with a Cursed debuff, +75% Damage, and a black gem slot.
- Oculum Leech – Cutthroat Jungle
- Gimp Mummy – Frostbite Caverns
The Leech adds Leeching to all your team allowing them to heal for 25% of any damage they do. Just more added survivability. The mummy is the same as before. The order of these two does not matter much but I took the Leech first for looks. The second black gem slot is not needed so the mummy could be swapped for another +75% debuff creature you find later on. For now, I left it as cursed since it was the most effective one I had access to when fusion unlocked.
- Crazed Leper – Caustic Cauldron
- Pilwiz Peasant – Blood Grove
The order here is preference again. They’re both Nature. Crazed Leper adds the essential Corpse Explosion trait that makes this whole thing work. The Pilwiz adds the Bleeding Debuff and +75% Damage.
- Pilwiz Peasant – Blood Grove
- Thunder Salamander – The Swamplands
Pilwiz again adds the debuff and +75% damage. Thunder Salamander adds Double Casting to all of your team’s casts as well as a red gem slot. It is essential to the build for both reasons.
Artifacts
This part is pretty basic and completely depends on your resources. You want all of your team to have Attack based artifacts. So, Swords upgraded with Attack, Attack/Intelligence, Attack/Defense, or Attack/Speed. In that order of priority if possible. You’ll be able to break these down into materials and make specific ones later on. Attack applies to almost everything the team does once the relevant perk is unlocked adding Attack to Intelligence for casting. Defense keeps you alive. Speed is only useful for some very specific fights.
Having something in a slot, though, is better than nothing. Use what you got if it will increase damage in some way. The trick slot should always be filled with something that has a percentage chance of a debuff (Sleep, Stone, etc) on damage. This is particularly important for your first slot creature as he is the front line first responder. The 15th tier slot only has one useful ability for this build – Throat Slash and that is minor at best. There may be others but I have not run into them. You still want to increase the tier of your Artifacts though as it increases the percentage bonuses on the existing upgrades.
Example Sword:
- Attack – Attack – Attack/Intelligence – % Sleep on Damage – Throat Slash
Spell Gems
This is one of the most important parts of the build.
Three of:
- Inner Destruction – % Chance to Cast Twice – Damage Increase by %
Equip these to your three red creatures. They don’t need to be cast. They trigger at the start of each enemy’s turn. It not only gets cast twice from the upgrade but also from the creature trait which can also trigger the upgrade. Damage increase is to make sure it keeps scaling with you.
One of:
- Absolute Corruption – Generous – % Chance to Attack
This spell goes on your black and turns all buffs on a target into debuffs or removes them. It is extremely useful and necessary against some shielded or overbuffed targets. Generous gives this spell to all of your creatures and chance to attack allows you to possibly get a swing in while you’re using it.
Optionally, three of:
- Molten Armor – % Chance to Cast After Attacking
These go on your reds to make them less squishy and more stabby during prolonged fights. Gives you some damage and a shield just for attacking like you were already going to do. The damage applies to your Attack so it not only goes to your primary attack but also, with the perks mentioned before, to your splash and casting damage.
How’s This All Work?
When you first enter a battle, your creature in slot 1 will immediately cast Firestorm on all enemies. This will do significant damage and apply a burn to anything that survives. It has a chance to cast a second time as well due to the creature trait. If it kills any enemy, that enemy will Corpse Explosion from the other trait which damages all enemies. This can double cast as well. If Corpse Explosion kills something, it will trigger Corpse Explosion as well including double cast.
If, by this time, there is still anything left alive and they go first, Inner Destruction will trigger on the beginning of the enemy’s turn up to 3 times naturally (One for each red spell gem we have on). This can double cast from the spell gem upgrade and each of those can double cast off the creature trait. Anything that dies will trigger Corpse Explosions that double cast, and so on.
If anything else managed to survive that ♥♥♥ storm and you actually need to click a button, your attacks hit the entire enemy team, can hit twice, can trigger pyromancer from each enemy hit and hit the entire team once per enemy left alive with Burning on from Firestorm, then can double cast from the creature trait once per enemy left alive with Burning on. I generally see 20-30 pyro triggers per button click.
If you get hit, all your creatures have Mending + 45% Mending Bonus + 25% Leeching on Damage Dealt.
If you run into an enemy with shielding, absorb, defense, or some other type of buff that is making things difficult, you can use any one of your creatures to cast Absolute Corruption (Because of the Generous spell gem upgrade) turning the buffs into debuffs without using your spell gem casts on the real one. Or target the trash mobs for execution and hope the chain casting blows through any absorbs or defense.
If you run into enemies with reflect shields that are innate and not buffs, you’re pretty ♥♥♥. You just have to hope you kill more than one of them per your creature deaths. At least all the double casting and double attacks happen even if your creature dies during the process.
If you run out of all spell gem casts for Inner Destruction, how the hell did you do that? But, it won’t matter. All of your creatures are critical aoe striking and healing power houses.


Be the first to comment