
This is just a simple guide for clearing your save data in Ultrakill.
How to Wipe Your Data
If you need to reset your Ultrakill progress, perhaps to attempt a speedrun or a self-imposed challenge, the following steps will guide you. The data clearing process is straightforward and should be completed within five minutes.
Step 1: Disable Cloud Saving
Every time you being and end a session in Ultrakill, its save data is uploaded to Steam’s cloud service. While this is good for normal usage, the problem with this is that even if you managed to clear out the save data files, Steam will automatically re-implement the lost files. We’re trying to start fresh after all.
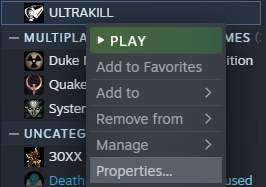
To disable this, we must access Ultrakill’s settings / properties. To do that, you must right click on Ultrakill in your library, and click on the “Properties” button.
Once you click on the button, a new window will pop up showing off various options to choose from. The one you want to focus on is in the “General” tab under “Steam Cloud”. Uncheck the marked box and that should disable Steam Cloud!

And that’s it! Now onto the next step.
Step 2: Accessing the Saves Folder
Now that we’ve disabled Steam Cloud, we must now access the Saves folder for Ultrakill. These files are actually very easy to access, so I’m going to assume that you’re someone who’s not quite keen to navigating Steam’s folders. Luckily, steam has a built-in option that allows you to easily access the game’s files.
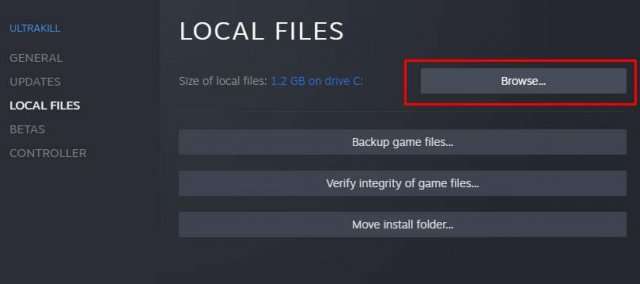
First, go back to the properties window for Ultrakill. Then navigate to the “Local Files” section (it should be under “Updates”). Then click the “Browse” button. This should open up a Window for File Explorer showing off the contents of Ultrakill. You’ll immediately see a folder called “Saves”.
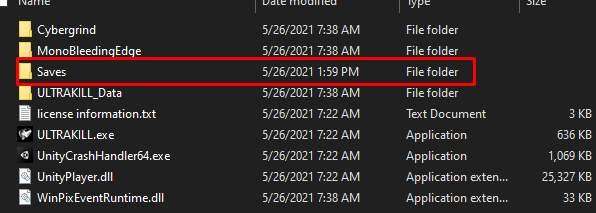
Now if you want to retain your previous data, I highly suggest renaming the Saves folder to “Saves_OLD” and creating an entirely new Saves folder. Otherwise, just go into the contents of the folder and delete everything from the folder.
You’re Done!
…And that’s it! No, really. It’s that simple. You can repeat this process multiple times and it’ll still yield the same results. To revert the process, make sure you still have your old data backed up. And just replace all the old files with the new ones.


Be the first to comment