This probably will only prove clear to someone who has played the game normally. This isn’t an in-depth walkthrough, but based on a few things I noted while making my roughly 20 different attempts at the run. The collectibles were left behind for this. Things may be vague or skip certain sections, as this was purely based of notes I had for my playthroughs. With that, should you choose to read it, I hope you find this useful.
Contents
Hard to the Core Tips
All credit goes to Xineon413!
The Basics
- The first, fairly easily-guessed thing you should know is that running and jumping are your friend. I’d recommend stealth in certain monster-inhabited rooms, but majorly you’ll want to be fast and precise with your movements.
- Jumping crosses greater distances than simple running, but you can only do so many before Six gets tired. When she starts zig-zagging a little, you’ll want slow down, sometimes even go to a full stop for a few moments, as long as it takes for her to straighten back up. Certain object interactions seem to ‘restore’ her energy, though.
- Monsters have ‘ranges’ at which they detect and respond to you. Don’t get too close, and be sure you can make the distance before you try running past instead of crouching or walking. That’ll pretty much always set them off.
- You’ll have to start a new file each time you try.
- It takes one single death to spoil the run. If you think it’s too close a shave, pausing and reloading the checkpoint is a valid option. Beware though, if that eye symbol shows up, it’s too late. They see all.
- You can use those ruined runs for practicing your trouble points, though!
The Prison
The notes I have for this section are as follows:
- The chair in the hangman room doesn’t have to be up against the door for you to reach the handle from it. There’s a distance you can jump, and that way you can waste less time.
- You don’t have to wait, if you’ve opened the door you can immediately drop and start running through. It’s the same with the lever at the end of that next room. You can jump off and run right through the gate as it opens.
- In the leech room, you pretty much go straight, running and jumping over them.
- That first winch takes two revolutions. You can turn them from the right side as well as the left, too, so don’t let the game’s standard placement fool or endanger you.
- When you go to enter the prison proper, use your arrow keys to get through the bars. The mouse is far more of a liability.
- Running and jumping can get you through the toy area before the power comes back even once.
- The prison eyes flicker back and forth a little like real eyes, and sometimes you can cause them to look your way early. Stay careful about the edges (I don’t know if it’s purely a me problem, but having the lighter out at all causes Roger to notice me in the bedroom. I don’t use it there as a result.).
- Hunger can stop you at varying points in its special rooms. See if you can get further before its onset.
- In the room with an electrified door and climbable crates, if you leap from the edge, you can reach the moving crates on a chain at full speed.
The Lair
- Amusingly, the first deaths I had here were from flying off the stairs. Be careful of your positioning.
- In the house, you don’t need the case all the way to the lever.
- You can run through the elevator door as it opens, carrying the monkey to quickly start it again.
- When you’re hungry, run and jump until you can’t.
- When in the stringing-up room, run and jump to close your distance to that cage, but rather than waiting out Roger within it, climb, run over and leap from it , sliding through the vent. Do it right and he won’t even hear you get to it.
- That winch only takes one revolution, and if you get it turned far enough the trap door will continue to open, leaving you free to jump before Roger gets into the room.
- Ah, the shoe pit… Running start, leap, then move to the middle platform. When you make it there, make sure to run straight across it and not toward the screen, else it’ll be pretty much instant death when you drop.
- Run, slide and jump to avoid him in the next part, he’ll stop at that little light spot, giving you time to run and hide.
- Once you’ve climbed up from the lower level of the next room, toss the monkey back and hurry to the vent, going through as he passes. The brown dolls do not make noise! Run through them, avoid the near monkey, climb the drawers.
- Time the shoe carefully, with the clocks.
- For that library, once you’ve climbed, drop a block down to the right side of the shelf, run across the rest as soon as he’s gone after it, slide and drop.
- The tv button can be pressed directly.
- The piano winch takes three revolutions, just two will kill you.
- Do not let go of the door past the cart early!
- The moment his hand moves to the side in the vent you can run past.
- Slide to get past the cage in the chase.
- In that room, wait for him to start reaching the dumpster, drop off, wait for the other arm to start moving away, run and jump to get to the bars. You can jump over his arms.
The Kitchen
- This place is somewhat easy for me, so I’ll have less notes than for others.
- Run and jump onto the bag so you can mount the first or second available hook.
- Hunger isn’t as unmanageable here. Jump to cross as much distance as you can.
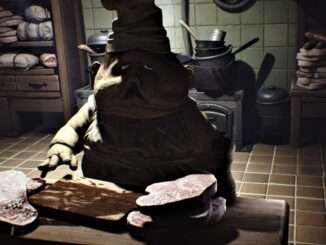
- The Chefs are not particularly hard to avoid or lose alone. This one can be passed by crouching and moving slowly as he works, getting down the stairs, then running across and back to the shelf to climb. Smashing a jar on his head is complimentary, but will take time. It’s your choice.
- As long as you move quickly to climb his bedside…dresser? You can get to the top or nearly so before he’s turned the light on. Wait for him to leave, that distant door to close and you’re scott-free.
- The tactic once you’re back down doesn’t really change, you’re just heading to the lock.
- Three sausages, second or third swing, you can hop over.
- Run and jump to and fro the lever, hide, crouch to get by him then sprint to the elevator.
- After he’s gone past your vent, this is a room I recommend just stealthing through until you’ve activated the grinder. Then you just run.
- The washing room is simple enough. Run and slide past that hole to the hook room, trigger the change, hide while he snoops, walk then run and slide back under.
- After you’ve climbed, hooked and ridden along, drop on the dish bin right before the waiting Chef, jump and pelt your way to the table, slide, jump, climb, jump and hold tight to that hook.
The Guest Area
- So, intro area, run and jump along the pipe, climb the ladder, go through then leap to the front left to grab that chain (I once went straight right when I arrived there and dropped into the seething ocean below. Ouch.).
- Once you’ve reached the guest dining rooms, keep moving at a steady pace. Run and jump.
- The most troublesome area is the long table with various facing to and away from the camera. It’s hard to make it across in one go. Swerve carefully between them and don’t be afraid to use a broken run or other file to practice them. The middle is best for the last third or so of it.
- Sail past the guests in the back, swing, walk to lure the bumbling one who’s on all fours, climb the table once you’ve lured him into bashing it, then leap over and run before sliding to the vent.
- Last set of bars, a run and hiding session with a chef, then you’re in the clear.
- Honestly, as long as you keep running and jumps, and rest in between, you can make it safely through the rest of the Guest area.
- The last chase there is one where you must keep going, no matter how tired Six seems toward the end.
The Lady’s Quarters
- Honestly, once you’re in here, you’re pretty much done.
- You can speed through the area until you get into her room, creep behind her at a crouch, then resume moving at a fast pace through the rest of the zone.
- Before heading through the locked door, let Six rest a little so she can outrun the Lady and slide through the end to the hall unimpeded.
- For the final confrontation, I’m afraid there’s no way to really speed things up besides running with the mirror in hand.
- The Lady’s appearances are mainly dramatic, timed with the song and only the song.
- After all that, go straight out and don’t move to either side more than necessary.


Be the first to comment