
Friends won’t play with you today? Not willing to risk a party of randoms? Just prefer having the caves to yourself? No problem! Are you struggling with completing missions on your own? That’s where this guide comes in to help. None of these tips are meant to be imperatives, just suggestions for making solo a bit easier and more enjoyable.
Single Playing Guide for New Players
Step 1: Don’t Play Scout
This comes first not because of its importance, but because of how common it is. We get posts on the forums semi-regularly about how BS solo is and how it’s so unbalanced, and a vast majority of the time, almost without fail, the person is playing scout. This may seem odd to some players, but Scout is the worst solo class. Allow me to explain;
- Scout’s Mobility Tool is the Least Versatile
That’s not to say it isn’t powerful; it’s a thirty meter teleport with infinite ammo on a four second cooldown. However, that’s all it can do on it’s own. Scout relies on his teammates to do a lot of the unique things that he does. On his own, his tool is only really useful for crossing the cave quickly and easily, which any class can do to some extent.
- You Don’t Need That Mobility Anyway
Bosco can do a lot for you. He can mine minerals, fetch large objects, and more. You don’t need to travel thirty meters straight up to get that mineral because Bosco can do it for you. The only thing you need to worry about as a solo player is getting from one end of the cave to another, which every class can do to some extent.
- Anything You Can Do, Bosco Can Do Just As Well
Bosco can provide light, fire support, easy access to minerals, and lots of utility (more on all of this later). Those are all Scout’s major niches, and Bosco treads on all of them.
- The Thing You Need the Most is Firepower
And Scout just doesn’t deliver. He is – by design – the weakest class in a firefight. He trades that power for his mobility and accuracy, but he kind of sucks when it comes to taking out crowds. Because your number one priority as a solo player is to stay alive at all costs, having weak firepower is extremely bad. Solo games are scaled down, sure, but you still get some large crowds that Scout just doesn’t have the tools to effectively deal with, especially for a new player. This all leads to solo Scouts getting swarmed, overwhelmed, and killed where a different class would have punched through.
So Who Do I Play Instead?
Play Driller. He solves most of these problems:
- His mobility tool is the second most powerful in the game, and debateably the most versatile. It takes some creative thinking to use to it’s fullest potential, but it’s more than enough for a solo player.
- His weapons all make mincemeat out of swarms. They’re all easy to use and can handle most of what solo will throw at you.
Step 2: Don’t Play Point Extract
Point Extract – the game mode where you are collecting the large blue gemstones – is another almost omnipresent feature of solo complaint threads. It’s never explicitly stated, but Point Extract has a unique mechanic: The longer you stay in the mission, the more enemies spawn. This is by design, and it’s meant to keep players moving quickly and put pressure on what would otherwise be a fairly simple mission type. However, since solo missions – and especially solo Point Extract – tend to take longer than missions with a cooperative team, you get to see the full effect of this feature, and it’s not fun.
If you play solo Point Extract, you need to be on point and move at a fast pace throughout the entire mission. This can be difficult, especially for someone who doesn’t know all the tricks for going fast yet, so it’s generally best to avoid this mission type until you’re confident playing your hazard level (I would also avoid Escort missions, but not as much).
Step 3: Utilize Bosco to the Fullest
Bosco, your personal drone, can do so much more than just shoot, but despite this another incredibly common solo-related complaint is that Bosco is useless. Mission control isn’t really exaggerating when he says “Use him right and he’ll do half the job for you”.
Hold Ctrl to pull out your scanner, then left click on a buried gem, ore vein, or compact dirt. Bosco will start mining. He can mine any ore in the game (including Oil Shale) and does so without needing any form of assistance. These ores are dropped on the ground in the form of chunks that you can collect. Bosco does not lose any ore when he mines.
He can dig up and carry almost every heavy object in the game, with the sole exception of drilldozer fuel canisters. He can carry large gems, Mini M.U.L.E. legs, eggs and Aquarqs, cargo crate batteries, even transmitter nodes. He’ll hold onto it until you give him another command or press X to call him to you. He’ll even toss anything he is holding straight to you if he is close enough.
Bosco can also provide light. Direct him to a non-ore, non-gemstone, non-dirt patch of ground and he’ll emit a large amount of light. When upgraded, the light is comparable to that of a Scout flare, and it’s infinite and can be redirected at will. Just remember that you need to call Bosco back to you using the X key (or whatever you have shout bound to), otherwise he’ll stay pointing at the wall for upwards of thirty seconds.
The X key is important for using Bosco; it makes him literally drop whatever he is doing and come to you. This can be useful if he takes off after a Webspitter and you need him back near you. However, you shouldn’t spam it. Similar to spamming the M.U.L.E. call, spamming X actually slows Bosco down, since he needs to discard his current task (even if that task is already returning to you) and recalculate his path. Bosco can’t not hear you. One press will do.
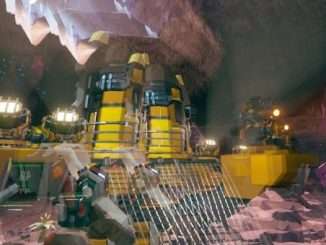
When playing an On-Site Refinery mission, you can direct Bosco to broken or unassembled pipes (pipes that have a framework set but still need to be constructed by holding E) and Bosco will assemble the pipeline and fix leaks. This can make the setup portion much less tedious.
You can direct Bosco at a specific enemy and he will attack that enemy until it dies. This can be very useful for taking out Spitballers without exposing yourself, getting that pesky Webspitter that you just can’t seem to hit, or keeping the pressure on a Menace or Trawler. It’s worth noting that Bosco gets severe tunnel vision when you do this, and he won’t shoot anything else until you call him back or his target is dead.
Whenever you go down or get grabbed, Bosco immediately drops whatever he is doing to try and revive or free you, no call needed.
Proper usage of Bosco can make missions substantially easier. The only things Bosco can’t do is carry minerals and grab secondary items, because then he would probably be able to just do the whole mission on his own.
Oh, and remember to upgrade him. You can find the terminal to the right of the weapon upgrade terminal.
Step 4: Prioritize Shooting
Bosco can mine for you. Bosco can provide light for you. You should be directing Bosco to do these things while you focus on keeping all the enemies dead. Bosco can only revive you a certain number of times. That means that if you go down too much, you’ll fail the mission. Your priority as a Solo player should be staying alive at all costs, and that includes killing the enemies as fast as possible. That’s not to say you should do nothing but shooting, but if you’re getting attacked, don’t rely on Bosco to keep the enemies off your back. Let Bosco mine while you shoot, not the other way around. Remember that all the enemies are after you at all times, which means that you’re under a lot more pressure to kill them quickly. This also means electric-fence style builds with things like Sticky Flames and similar are extra effective, since the enemies aren’t divided between four targets.
Step 5: Ration Your Resupplies, Not Your Ammo
The amount of Nitra in a mission doesn’t scale to the amount of players. The amount of available racks on a supply drop doesn’t scale either, nor does the amount of ammo each rack restocks. Because of this, you have access to four times the ammo you normally would – 200% back from each resupply instead of just 50%.
This makes ammo conservation a non-issue, as the sheer amount of ammo present in the mission combined with not needing any form of team consent to call it (because you have no team) gives you so much potential it’s practically impossible to use it all bar some circumstances where you get an unlucky map seed with next to no Nitra.
However there’s one caveat; You can’t hold 200% ammo at once. Resupplies restock more total than you can carry, which means that while you shouldn’t worry about ammo conservation as much, you do need to think about where you place your resupplies.
Think of it this way; you want the resupply in a place where you could conceivably burn through 150% of your ammo before moving on. This means placing a resupply in a tunnel in a Mining mission is a bit wasteful, as you can only really grab two of the racks before you’re long gone. Place your resupplies in the main caves, or if playing other mission types, anywhere you expect to be or frequently return to (or even have the ability to return to quickly and easily). It might also be helpful to wait until you are almost completely out of ammo to call a resupply, rather than just at 50%.
This might not seem important, but just remember that you’re spending more ammo than normal on each swarm since you are the one doing all of the shooting.
Step 6: Never be Afraid to Lower the Hazard Level
Seriously. If you’re struggling to complete missions on a given hazard level, there is absolutely no shame in lowering it by one. Since you’re playing with zero other people, exactly zero other people will know, and even fewer will care. The difference in rewards is fairly small, and no amount of extra rewards makes up for the enjoyment you’ll get by removing the frustration of a difficulty that might be too hard for you.
Not enough? Fine. I’ll prove it:
Hazard 1 has a +25% reward bonus. Haz2 has +50%, Haz3 75%, Haz4 100%, and Haz5 133%. These are added to the base 100% rewards for actual totals of 125%, 150%, etc. Then the mutator bonuses and length/complexity bonuses are added on. Because all of this is additive the differences between the hazard levels are much smaller than they appear. For example, the difference between Haz1 and Haz2 is actually only 20% more stuff, even less if you factor in length/complexity/mutator bonuses. Since you only get 25% of the stuff you mined when you fail, with no bonuses for the primary or secondary, you might as well get nothing from a failed mission.
So without going over every single equation, if you only ever play length 1 complexity 1 mutator-less missions (which will basically never happen), and that all missions take the same amount of time regardless of hazard level (not the case), the math boils down to this:
- If you fail more than 1 out of every 6 Haz5 missions, you’ll get more rewards playing haz4.
- If you fail more than 1 out of every 7 Haz4 missions, you’ll get more rewards playing haz3.
- If you fail more than 1 out of every 6 haz3 missions, you’ll get more rewards playing haz2.
- If you fail more than 1 out of every 5 haz2 missions, you’ll get more rewards playing haz1.
Of course, lower hazard levels are easier which may lead to less enjoyment, but if you’re not having fun on the hazard level you’re playing then you shouldn’t need this proof to lower it. The TL:DR here is that the only thing that matters about what hazard level you choose is how much fun you’re having.
Step 7: Experiment With Your Loadouts
Solo requires a few different strategies than when playing with groups. AoE and electric fence-style builds are more effective since all the enemies are going to the same place (you). Conversely, builds that are slow and clunky or that work best with someone watching your back are weaker, since you won’t get as much breathing room. The upgrades menu may seem daunting, but just remember that you keep all the upgrades you buy and can switch between them at no cost. If you have the resources, experiment with swapping a few upgrades around, or try a different weapon combination.
A few rules of thumb for building for solo:
- Ammo-light builds are not as bad as they sound. Remember, you have lots of available ammo.
- Bosco can proc the shock effect on enemies he shoots (with an upgrade), so anything that combos with that is good.
- Close range is generally more valuable than long range.
- AoE and electric fence-style builds (like Turret Arc overclock, Sticky Flames builds, the Sludge Pump in general, or any Minelets overclock) are extra effective.
- Friendly fire isn’t as much of a concern since there are no friendlies to fire (Just don’t blow yourself up).

Be the first to comment