

Plague Dokuta: Decay Shadow Elf Build
The Plague Dokuta Decay Shadow Elf build focuses on maximizing Seed-Bomb damage through the Blightseed set while maintaining high critical hit chance, consistent poison application, and frequent spell casts. The build can clear Hard Tier 3 content at competitive speeds, performing on par with some other strong builds, although it does not reach the level of the most powerful configurations.
The gameplay is relatively simple in concept but risky in practice. It requires frequent skill usage, careful concentration management, and consistent maintenance of Temporal Echo and poison effects.
Core Build Setup
Recommended Spells
The four core spells are:
- Sap Artillery: Filler damage while other abilities are on cooldown.
- Toxic Slice: Quickly applies five poison stacks.
- Seed-Bomb: The primary damage skill, especially when combined with the six-piece Blightseed set.
- Plague Shards: Consumes poison stacks, triggers Temporal Rot, and helps maintain Temporal Echo.
The fifth spell slot is flexible. Available options include:
- Forest Heart: Can double Sap Artillery’s damage, but bosses can destroy it with a single hit, and it has a long cooldown.
- Erupt: Provides one additional poison stack at the start of the rotation when using the Putrid set.
- Fireburst: Ignites poison pools created by Seed-Bomb.
- Entangling Roots: Provides a movement slow and additional poison application.
- Black Hole: Useful for clearing groups of enemies.
- Backstep Strike: Provides utility and a quick way to disengage after a combo.
Choose the fifth spell according to the encounter and preferred utility.
Recommended Pets
Blight Crow is essential to the build’s playstyle because it provides an additional source of poison application.
Alternative pets offer quality-of-life benefits:
- Moon Cat: Makes concentration management easier.
- Silver Cat: Improves survivability.
Attribute Distribution
Intelligence is the primary damage attribute. The remaining attributes should meet spell requirements and support consistent gameplay.
| Attribute | Recommendation |
|---|---|
| Intelligence | The primary damage stat. Aim for approximately 40 points. |
| Energy | Invest at least 8 points to use Toxic Slice. |
| Agility | Invest at least 12 points to use Toxic Slice. |
| Memory | Optional. Increase it if concentration capacity is too low or if using Black Hole. |
| Charisma | Increase it if using Black Hole. |
| Physique | Invest enough to improve survivability and consistency. Approximately 10 points is a reasonable target. |
Physique is particularly valuable in boss encounters. Surviving attacks and completing a fight in one attempt can be more efficient than achieving a faster damage-focused clear that requires several attempts. Additional survivability can also allow you to absorb certain attacks, such as the wolf’s channel attack or the Corrupt Treant’s poison, potentially improving damage output in those situations.
The build can be adjusted to suit individual preferences while retaining its core damage and poison mechanics.
Equipment and Gear Sets
Recommended Gear Configuration
The six-piece Blightseed set is mandatory for the build’s main damage strategy. The remaining equipment slots can be adjusted according to the stats available on dropped items.
A recommended configuration is:
- Blightseed: 6 pieces
- Putrid: 3 pieces
- Graveveil: 2 pieces
- Flexible slot: 1 piece
Perfectly optimized set combinations are possible, but farming ideal pieces can require substantial time for relatively small gains. Prioritize useful stats on obtainable equipment rather than spending excessive time pursuing a theoretical best-in-slot configuration.
For easier access to the desired stats, prioritize farming Blightseed and Putrid, then use either Convergence or Graveveil, depending on which pieces have better stat rolls.
Blightseed: 6-Piece Set
Blightseed is mandatory.
Its six-piece bonus multiplies Seed-Bomb’s damage, producing substantial burst damage and leaving poison pools after the explosion. The additional damage is central to the build’s rotation and is the primary reason for using this set.
Putrid: 3-Piece Set
The three-piece bonus provides +10% Decay Damage, increasing the damage of the build’s skills.
Putrid is relatively easy to farm for relevant stats and is a reliable source of additional damage.
Gloomfang: 2-Piece Set
The two-piece bonus provides:
- +8% Decay Damage
- +8% Concentration
Gloomfang offers strong value for a two-piece combination and may be an excellent choice alongside other two-piece sets. However, it is difficult to farm because it is found only in chests.
Graveveil: 2-Piece Set
The two-piece bonus provides +8% Decay Damage.
Graveveil is relatively easy to farm in Goblin Caves, making it a practical source of additional damage. However, its equipment can roll physical stats, so finding suitable pieces may take time.
Convergence: 2-Piece or 3-Piece Set
The bonuses are:
- 2 pieces: +5% Magic Damage and +3 Spell Haste
- 3 pieces: +10% Concentration Regeneration
Convergence provides useful quality-of-life benefits through Spell Haste and Concentration Regeneration. It is also relatively easy to obtain while farming Blightseed, making it a good starting option.
Convergence pieces can roll other damage types, including Fire, Ether, and Ice, so obtaining the desired stats may require additional farming.
Forest Linked: 3-Piece Set
The three-piece bonus provides:
- +10% Decay Damage
- +10% Thrust Damage
Forest Linked can be a good option, but its pieces can roll physical stats and are harder to farm. This makes it less convenient to assemble than some alternatives.
Rootbloom: 3-Piece Set
The three-piece bonus causes Entangling Roots to summon three roots instead of one, applying six poison stacks.
However, Entangling Roots scales its damage from Strike Damage, limiting its damage contribution in this build. Use Rootbloom if the equipment has favorable stats or if maintaining poison is difficult.
Relevant Gear Stats
Prioritize stats that improve direct damage, critical hits, spell frequency, concentration management, and survivability.
| Stat | Importance |
|---|---|
| Decay Damage | Increases damage across the build. |
| Decay Piercing | Increases damage across the build. |
| Magic Damage | Provides another source of damage. |
| Crit Damage | A major damage stat, particularly on the main stat line of amulets and badges. |
| Crit Rate | Helps maximize critical hits and is especially valuable on the main stat line of amulets and badges. |
| Spell Haste | Important for casting Plague Shards frequently. |
| Concentration Regeneration | Helps sustain continuous spellcasting. |
| Concentration % | Helps with concentration management. |
| Flat Concentration | Provides additional concentration capacity. |
| Concentration On-Hit | Helps sustain spell usage. |
| Armor | Improves survivability. |
| HP | Improves survivability. |
| Poison Damage | Provides a small increase to poison tick damage but should not be actively prioritized. |
Poison Damage affects poison ticks, not direct spell damage. It provides only a minor damage increase and is not worth chasing at the expense of more important stats.
Most concentration-related stats should be sought on charms, while Crit Rate and Crit Damage are important priorities on the main stat lines of amulets and badges.

Combat Mechanics and Damage Rotation
The build revolves around maintaining Temporal Echo, keeping enemies poisoned, triggering Temporal Rot whenever possible, and sustaining enough concentration to cast skills throughout the fight.
Core Combat Priorities
1. Maintain Temporal Echo continuously.
Temporal Echo provides +24% Crit Rate. The goal is to maintain its effect for the entire encounter through the Toxic Slice and Plague Shards combination.
2. Keep poison active on the target.
Poisoned enemies take increased damage through the relevant damage bonuses. Maximum poison stacks are not necessary for maintaining these bonuses, but the enemy must remain poisoned after Plague Shards consumes stacks.
3. Trigger Temporal Rot off cooldown.
Temporal Rot provides additional damage on a six-second cooldown. Consuming poison consistently helps activate this damage as often as possible.
4. Manage concentration.
There are two main approaches:
- Weave auto-attacks between skill casts to maintain concentration while continuing to deal damage.
- Fight at midrange and focus on casting spells, using concentration potions when reserves become low.
The first approach helps sustain concentration throughout the fight, while the second prioritizes spell usage and requires potion support when concentration runs low.
Recommended Opening Rotation
The following sequence describes an ideal opening:
- Apply Toxic Oil.
- Cast Seed-Bomb.
- Cast Toxic Slice to apply five poison stacks.
- Trigger Blight Crow to apply an additional ten poison stacks.
- Cast Plague Shards to consume five poison stacks.
- Allow the delayed Seed-Bomb explosion to occur.
- Cast Sap Artillery.
- Continue using skills as they become available.
The timing of the crow’s poison application can vary. It may apply poison before or after Toxic Slice, or fail to apply it during the opening while a boss performs its initial animations. The important requirement is to have at least five or six poison stacks available for Plague Shards.
Seed-Bomb is used early because its explosion is delayed. However, its placement must account for enemy movement. For example, the wolf always lunges toward the player after entering the arena, so placing Seed-Bomb at its spawn location will prevent the attack from dealing its full damage.
Understanding Plague Shards and Temporal Rot
Plague Shards consumes five poison stacks and triggers Temporal Rot while applying Temporal Echo to the enemy.
Temporal Rot’s Decay Burst deals the same damage whether five or ten poison stacks are consumed. Consuming more than five stacks does not increase the burst damage.
What matters is that poison remains on the enemy after the consumption. This preserves the damage bonus against poisoned targets.
Toxic Slice and Plague Shards form the core of the build because their interaction allows Temporal Echo to be maintained continuously, preserving the +24% Crit Rate bonus.
Plague Shards should be kept on a short cooldown, ideally around two to three seconds, to maintain frequent damage and poison consumption.
Maintaining Poison During Combat
Once the fight is underway, maintaining poison becomes relatively easy. The Blight Crow, Seed-Bomb’s poison pools, and Toxic Slice provide sufficient poison application to keep the rotation running in most situations.
The four core skills establish the primary rotation. The fifth skill can be inserted wherever it fits best.
Using Fireburst with Seed-Bomb
Fireburst can be cast shortly after Seed-Bomb to ignite the poison pools created by the explosion.
This is particularly useful against Gotburg and Smashmouth. Igniting the pools yourself helps prevent enemies from setting them on fire, which can otherwise result in a one-shot against the player.
The number of Seed-Bomb seeds that explode affects the resulting damage. If only three or four seeds explode, the damage can be higher in a fight where more seeds successfully detonate. Blight Crow’s poison application may also not occur during a particular opening, even though poison is generally applied during normal combat.
Spell Explanations
Seed-Bomb
Seed-Bomb is the build’s highest-damage skill when used with the six-piece Blightseed set.
It applies poison slowly after its explosion and creates poison pools that can be ignited. Its damage is delayed, so placement and timing matter.
A cooldown of approximately six seconds is typical for the described setup.
Plague Shards
Plague Shards is the build’s primary poison-consuming skill.
It consumes five poison stacks, triggers Temporal Rot, and applies Temporal Echo. Its cooldown should ideally remain around two to three seconds to provide consistent damage and maintain the core combat mechanics.
Toxic Slice
Toxic Slice is a fast, low-cooldown poison applicator that provides five poison stacks.
It uses stamina, which makes concentration management easier, and works with Plague Shards to maintain Temporal Echo.
Sap Artillery
Sap Artillery provides filler damage whenever the other skills are on cooldown.
It is a straightforward way to maintain damage output between the build’s main attacks.
Forest Heart
Forest Heart can double Sap Artillery’s damage.
However, it has a long cooldown, and bosses can destroy it with a single hit. It can also attract enemy aggression, making it an unreliable choice in some encounters.
Erupt
Erupt deals relatively little damage but provides one additional poison stack at the beginning of the rotation.
Use it only when running the Putrid set.
Fireburst
Fireburst ignites poison pools.
Although enemies and bosses can ignite these pools themselves, using Fireburst provides more control over when the pools explode. This can help deal damage while preventing enemies from triggering the pools in dangerous circumstances.
Entangling Roots
Entangling Roots deals relatively little damage because it scales with Strike Damage.
Its primary value is utility. It slows enemy movement by 25% and applies two poison stacks without Rootbloom. With the Rootbloom three-piece bonus, it applies six poison stacks instead.
Black Hole
Black Hole is intended primarily for clearing groups of enemies. It can eliminate entire groups in a single cast, making farming faster and cleaner.
It requires additional consideration when allocating Memory and Charisma.
Backstep Strike
Backstep Strike is an optional utility skill that provides a quick way to disengage after using a combo.
Temporal Rot Passive
The Temporal Rot passive is used to apply Temporal Echo, which slows enemies more as its stacks increase. Temporal Echo is used primarily to increase critical hit chance.
After being applied, Temporal Rot lasts approximately six to seven seconds. This duration aligns well with Plague Shards when the skill is used off cooldown.
Temporal Rot also deals damage every six seconds. Consistently consuming poison helps trigger this damage as often as possible, providing an additional source of DPS.
Skill Tree Optimization
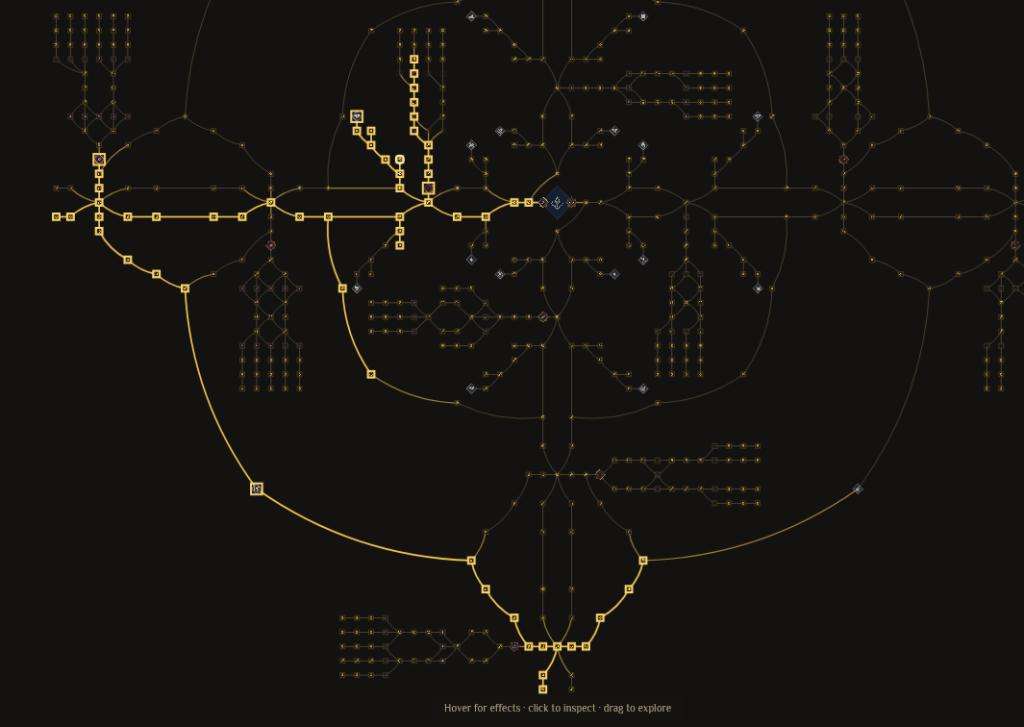
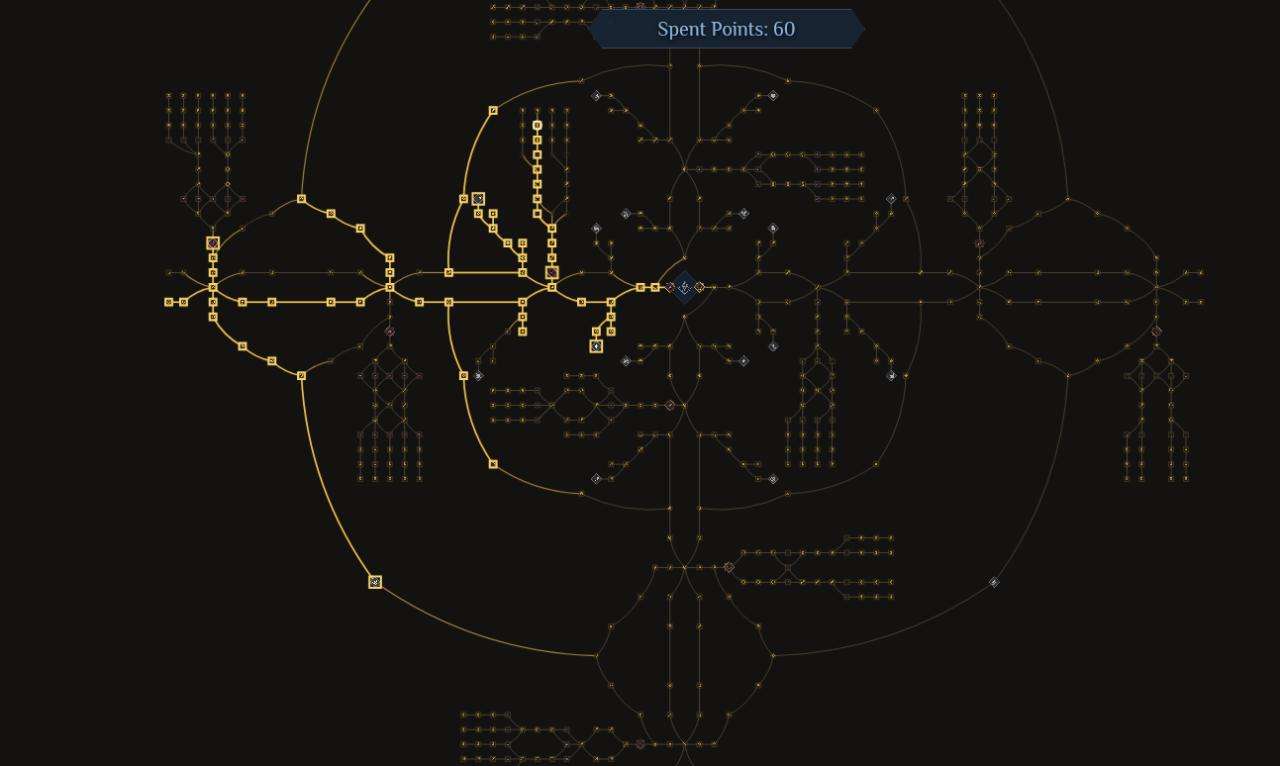
The build uses workarounds in the skill tree to achieve a relatively high critical hit chance for a Shadow Elf.
Some Crit Damage and Spell Haste nodes can be sacrificed to improve other aspects of the build, depending on equipment and personal requirements.
Consider the following adjustments:
- Plague Shards Cooldown: Invest in cooldown nodes if Plague Shards cannot reach an approximately two-to-three-second cooldown.
- Temporal Echo Duration: Increase its duration if maintaining the effect throughout the fight is difficult.
- Critical Hit Stats: Adjust the balance between Crit Rate and Crit Damage according to equipment and available skill tree options.
The main objective is to maintain the core rotation without sacrificing too much damage or concentration sustain.
Alternative Build Variants
Several alternative Decay Shadow Elf configurations can perform similarly to the primary build. These variants allow different skill choices and skill tree investments while retaining the general Decay playstyle.
Outbreak Variant
The Outbreak variant invests points into Plague Shards so that it applies poison instead of consuming it.
With an approximately six-second cooldown, Outbreak aligns well with Temporal Rot’s cooldown.
However, poison management becomes more difficult because Outbreak consumes ten poison stacks, compared with the five consumed by Plague Shards in the primary configuration.
Depending on preference, the skill tree can be adjusted to provide more Crit Rate through the lower portion of the tree or more Crit Damage.
Alternative Temporal Echo Configuration
Another variant requires substantially more investment and abandons the Temporal Echo critical hit tree line.
This configuration relies on investing in the node that converts the skill into a poison-consuming ability. After the investment, the skill has an approximately eight-second cooldown.
It also requires investment in Plague Shards to apply poison and maintain the necessary poison consumption for the rotation.
Future Build Development
The flexible fifth spell slot leaves room for further experimentation. War Banner and Magic Circle are potential additions whose effectiveness remains to be evaluated.
The build can also be refined as additional content becomes available, particularly through alternative skill combinations, equipment rolls, and skill tree adjustments.




Be the first to comment