
The basics of Ascension, How to use them, and some tips and tricks also builds that can help using them in higher level Curse stages.
How to Unlock Ascension
To unlock the Ascension skill tree for the first seven characters you must have purchased all upgrades(and maxed them) in the regular skill tree.
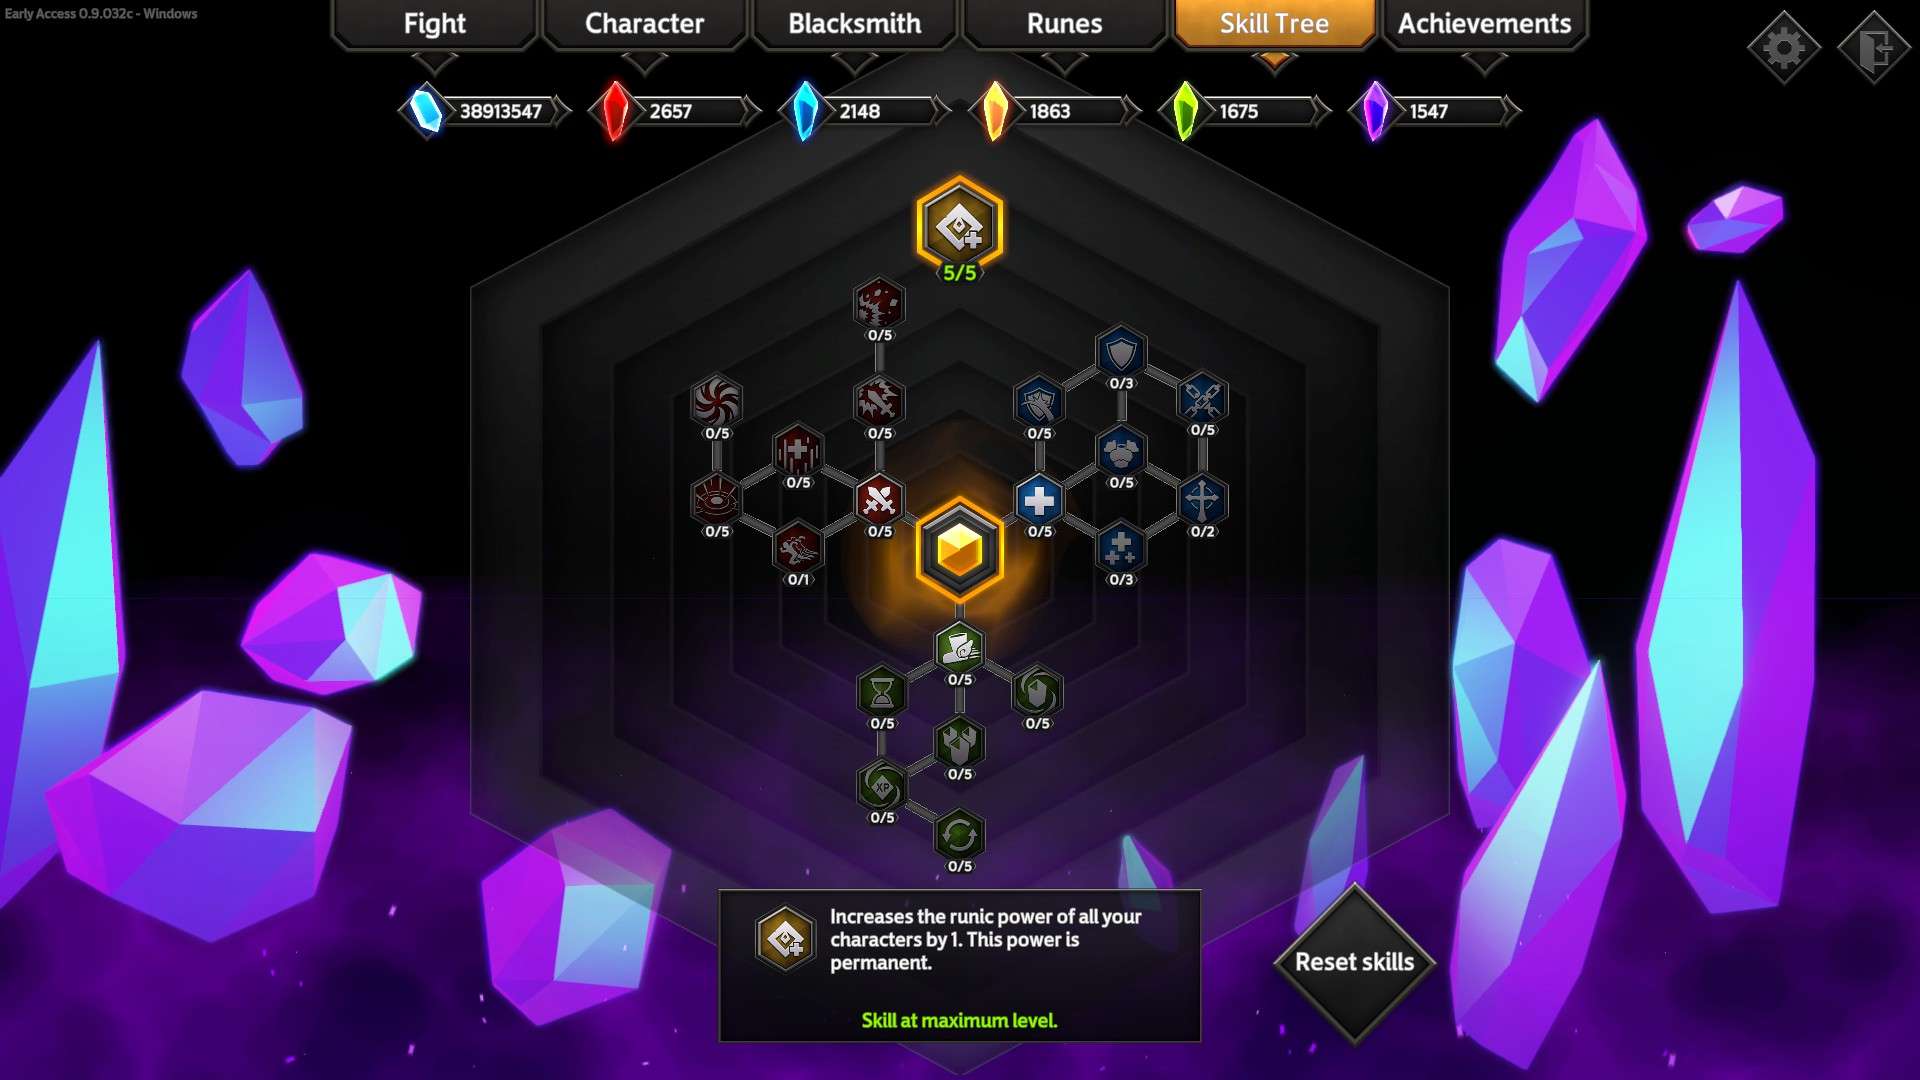
To unlock the full regular skill tree you need(Not sure if the runes count or not at the top but, if they do I cannot calculate those because resetting purchases doesn’t reset runes brought)
- Minor Soulstones = 325,000
- Red Soulstones = 41
- Blue Soulstones = 16
- Yellow Soulstones = 17
- Green Soulstones = 14
- Purple Soulstones = 29
You have now unlocked the Ascension skill tree for the first 7 characters! I will not list the skill tree or the materials needed because at the time of writing this the update is fairly new. (This guide is just meant to help with using the ascensions).
Barbarian Ascension
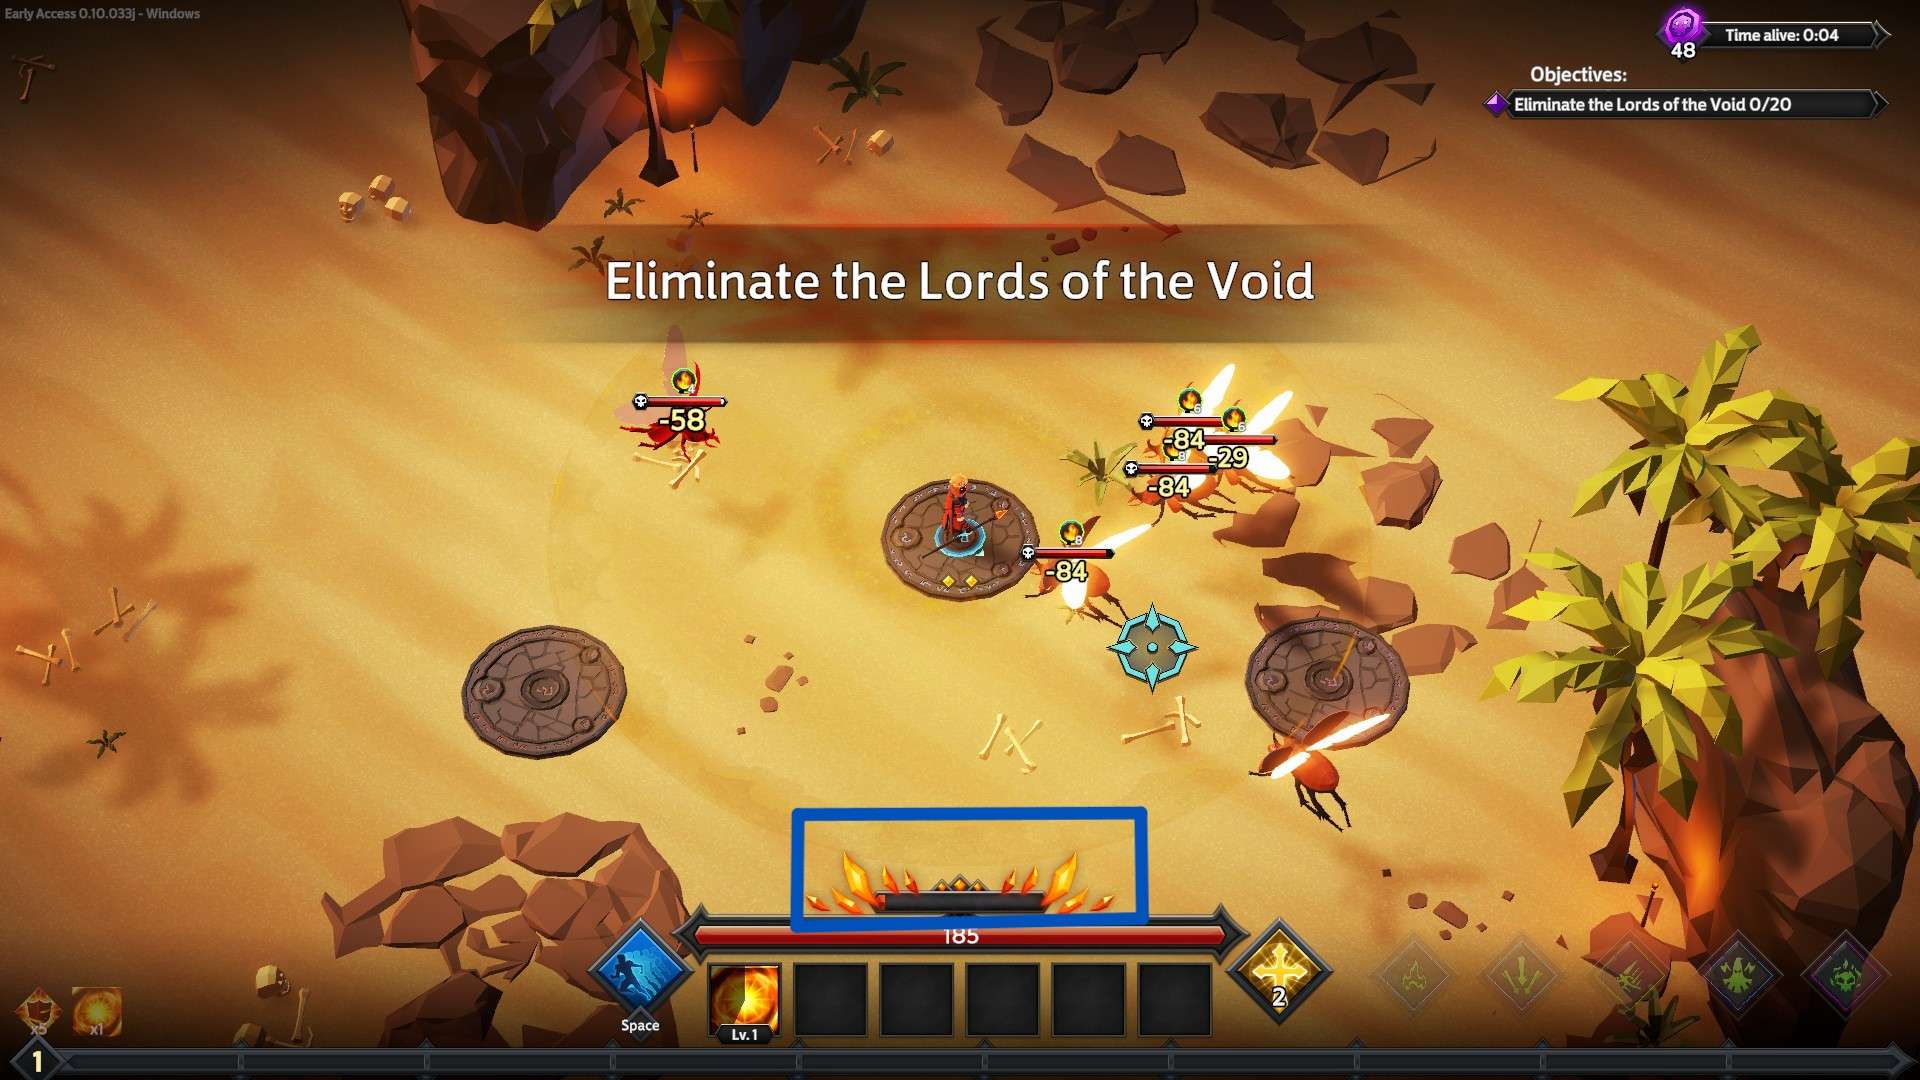
The first on the list is the Barbarian Ascension.
This will be the shortest one as his is pretty simple.
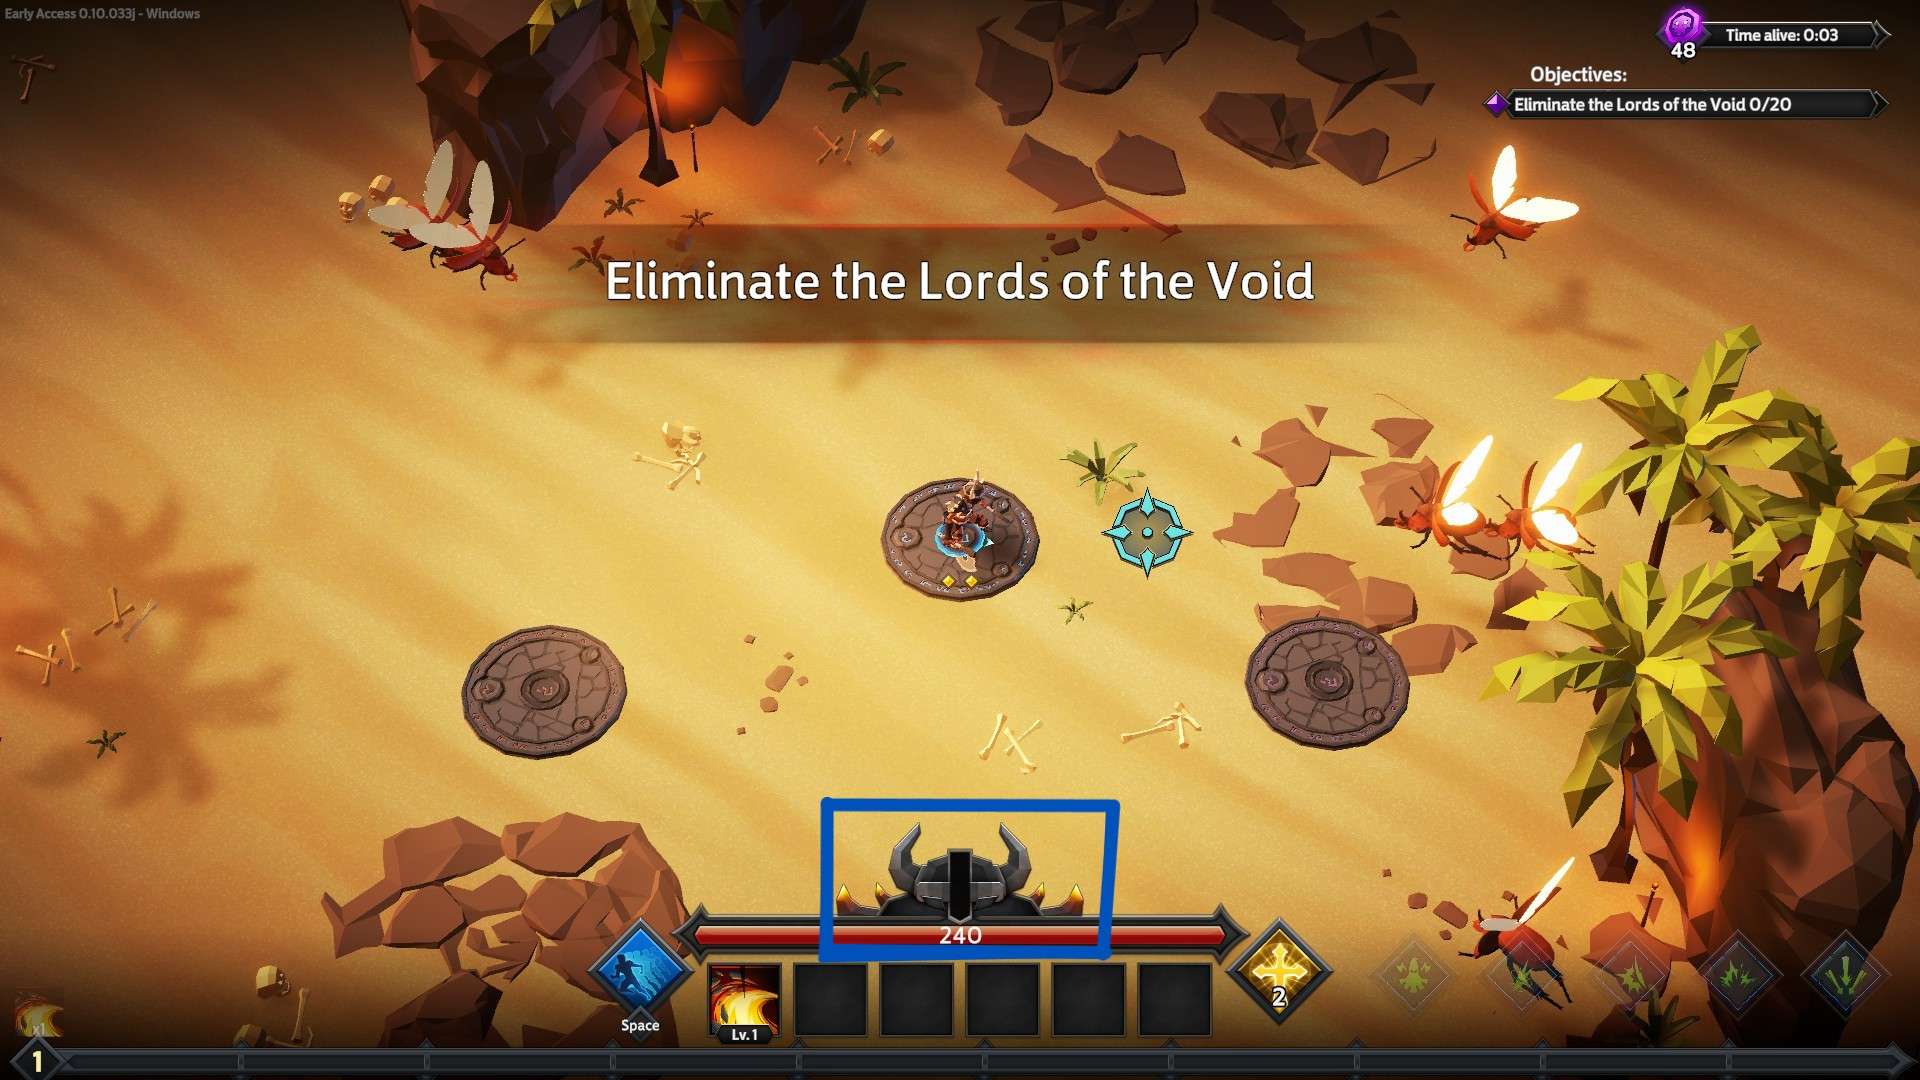
The bar in the blue square fills up every time you kill an enemy. When the bar fills to the max his ascension will activate. Once activated you will gain his perks(perks are listed when you hover over the bar.) Also once activated the bar will drain over time.
Tips for Barbarian
The Barbarian is pretty simple. Just kill things and the bar will build up!
Runes that are great with Barbarian:
- Critical Mastery: The Barbarian crits A LOT. The more damage you deal, the faster you kill, which means the easier it is to charge his Ascension. If you can get his crit chance to high levels you will be dealing insane damage and over 100% have a chance to crit more than once on the same enemy(the crits stack so for instance if you have 200% crit chance you will do 4x dmg each hit instead of 2x dmg)!
- Executioner: This skill is more for if you are going for Overlord or Endless runs. Stack the debuffs you get from leveling up plus the synergistic ones and you should get about 40-45% extra dmg.
- Multicast Madness: The more you cast, the more times you use the skill, the more you kill. I would take this if you aren’t using Scent of Blood in your build. If you are using Scent of Blood and Bloodlust in your build you may not need this rune.
- Recklessness: There is no downside to taking this rune for the Barbarian! You will be taking damage at some point anyway and he needs more damage to kill faster. Win-Win.
- Recommended skills: Scent of Blood+Bloodlust+Any ability that adds a bunch of bleed or hemorrhage stacks to enemies.
The Barbarian is really that simple. Any build I would recommend at least fit one of three criteria in recommended skills. By the way did I mention the Barbarian is simple?
Pyromancer Ascension
Second is Pyromancer!
To active Pyromancer’s Ascension you have to wait until the highlighted bar is full. Pyromancer’s Bar fills up over time but, each time you are hit the bar will decrease. When the bar is full a portal will appear where you were standing when the bar filled. Once you go to the portal you active Pyromancer’s Ascension and you will gain the perks(which are listed when you hover over the bar). During Ascension Pyromancer’s bar will gradually decrease and also decrease when you are hit by an enemy’s attack.
Tips for Pyromancer
Runes that work best for Pyromancer:
- Executioner: The Pyromancer needs all the extra damage he can get. While you will most likely always be doing damage, many times you won’t be dealing enough damage.
- Dash Mastery: For Pyromancer’s Ascension to work at full capacity you have to prioritize not getting hit. Dash mastery helps by increasing the distance you dodge.
- Weapon Expert: The Pyromancer’s basic skills tend to not be all that great(except the second weapon). Even though his weapon’s second abilities tend to not do much help for him either sometimes it’s better than nothing.
- Multicast Madness: The Pyromancer needs Multicast! He has many abilities with Damage over Time effects and stacking those will be beneficial.
- Singular Focus: The Pyromancer actually has some pretty decent skills that are good with Singular Focus. More of a “For Fun” pick than a “meta” pick.
- Fire Inclination/Fire Mastery: These two I put together because they both work for if you want to go for a fire build. The more fire skills you unlock the better these skills are. If you are on Curse 48 though, you will need The Spellblade’s fourth weapon unlocked to really do a fire build.
- Generalist: This skill is good if you’re going for a build that is not a full fire build. Extra damage is always good for the Pyromancer.
Recommended Skills: Uhhhh…Combustion???
Sadly I cannot recommend much in any way to help The Pyromancer. While The Pyromancer’s Ascension is nice with the rapid fire Dragonic Flames, it…doesn’t add much else besides extra damage and not even a lot of damage. Sadly anything I could recommend for This Ascension I would recommend using for The Pyromancer in general. The Pyromancer’s fourth weapon I guess builds around this ascension by default. You also need one of The Pyromancer’s runes from the ascension skill tree to make use of it so don’t know whether to include a build for that or not because that build is around the rune not necessarily the ascension itself.
Houndmaster Ascension
Third is the Houndmaster
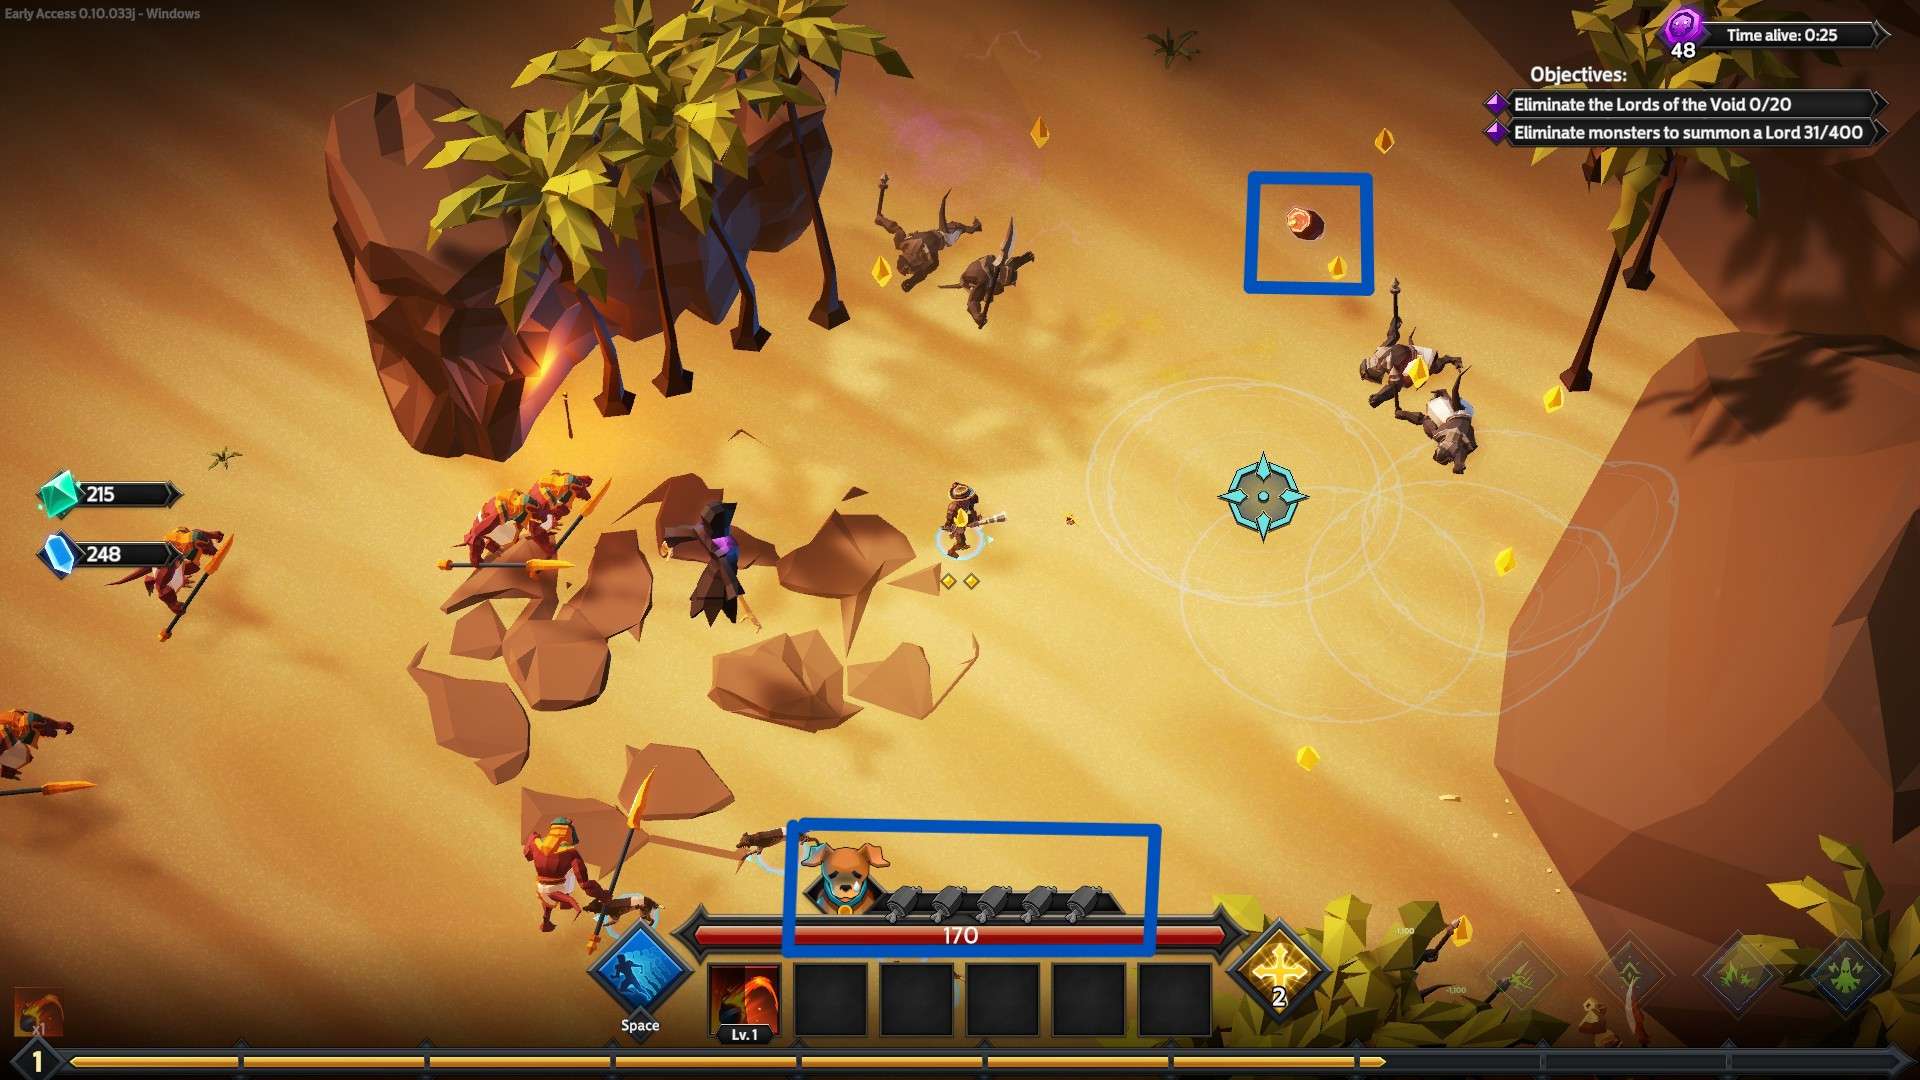
Houndmaster’s Ascension is a bit different from the other’s. Unlike the other’s the Houndmaster himself doesn’t get any extra benefits from the Ascension but, his companions(the hounds you see next to him when picking him) gets extra benefits. When you defeat an enemy there is a random chance that the enemy will drop meat. When you pick the meat up the hunger bar will fill up. Technically your companions are Ascended the moment one “meat bar” is full as each one grants a benefit by itself, but I will count the Ascension as all of them being filled. Once you collect enough MEAT your companions will gain all the benefits(which is listed if you hover over the hunger bar) Once full your companions hunger will gradually decrease(during my playthroughs however once it was maxed out, it wasn’t hard to keep them fully fed).
Tips for Houndmaster
The Houndmaster’s Ascension is based on the companions and from what I know of(correct me if I’m wrong here) the companions aren’t affected by any runes or skills you decide to use with the Houndmaster. Any tips I could give here would be in a general Houndmaster guide. Not much else to say here.
Here is what each companion does:
- First Weapon: damage and inflicts Wound
- Second Weapon: damage and inflicts Fragility
- Third Weapon: damage and…I don’t know what the debuff is and what’s it called.
- Fourth Weapon: damage and inflicts Fragility.
Spellblade Ascension
Fourth is The Spellblade!
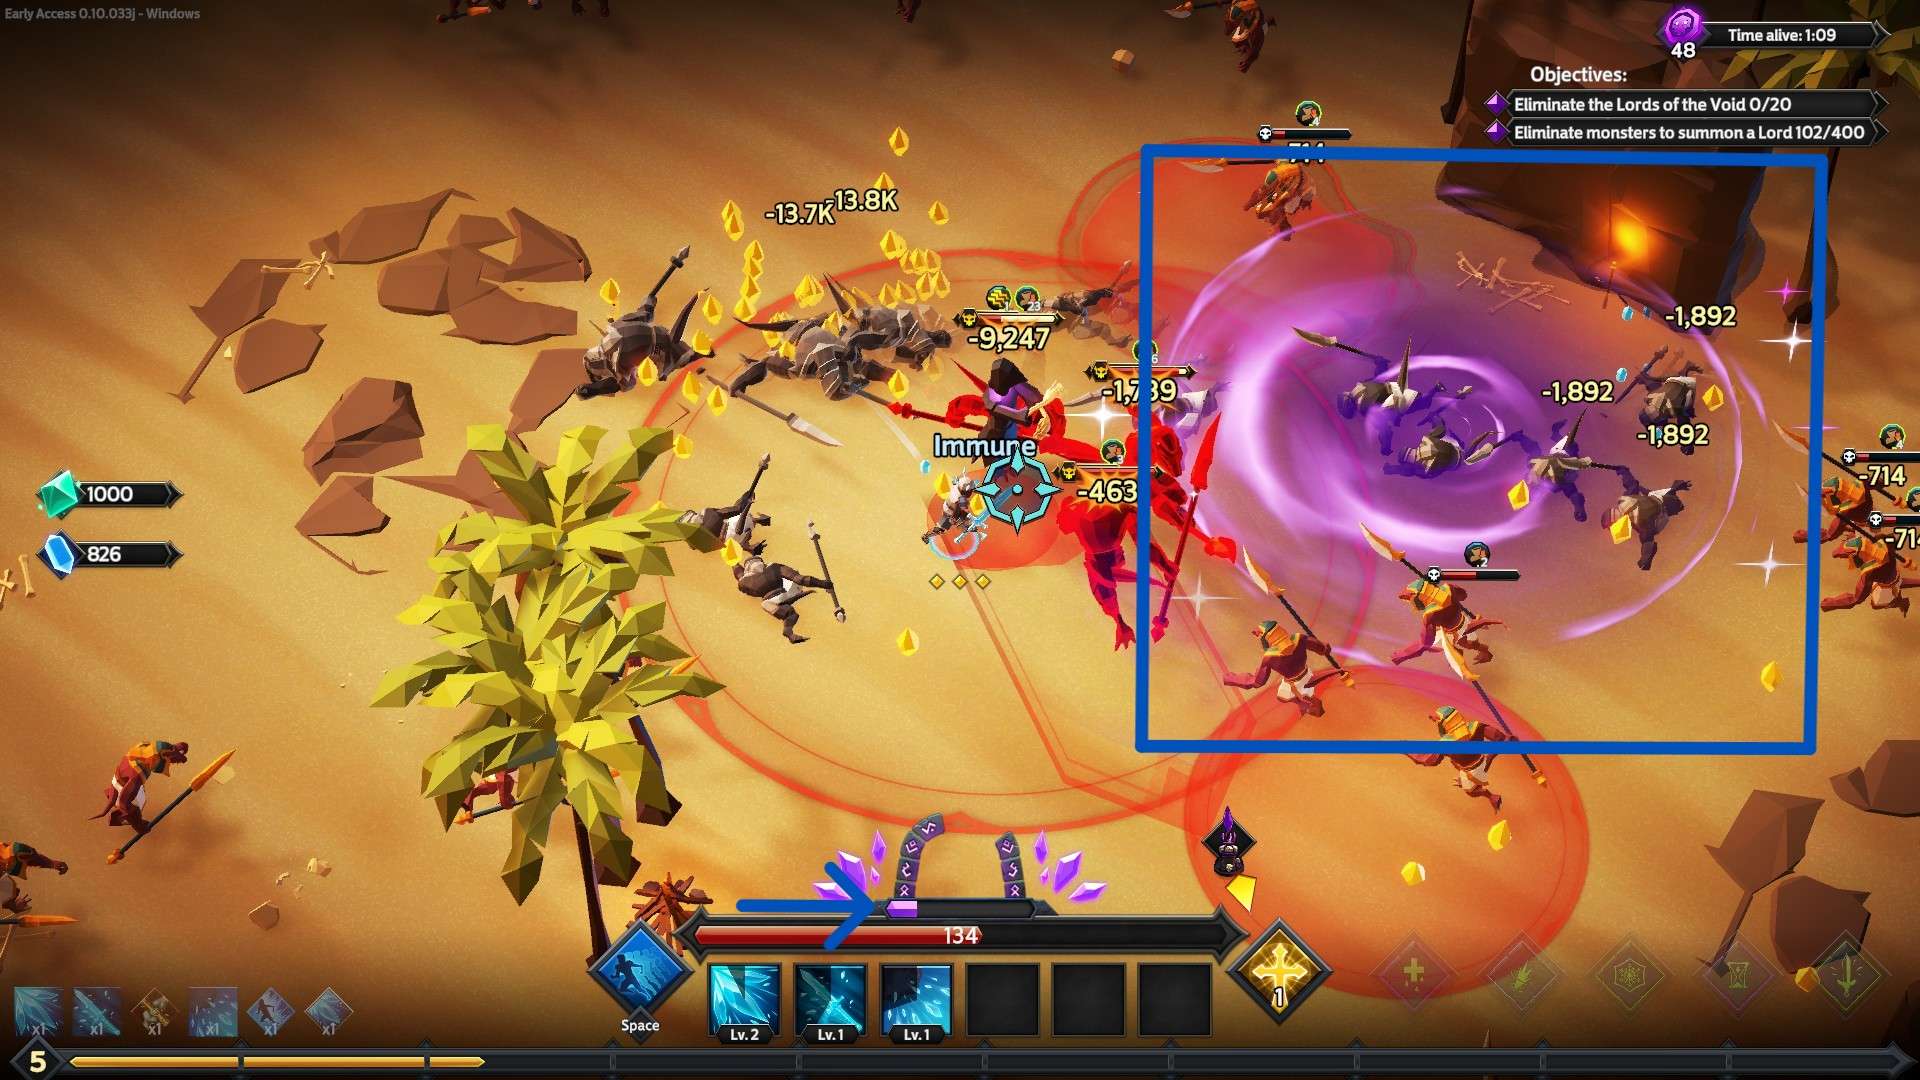
Spellblade Ascension is a bit tricky. To active the Spellblade’s Ascension you have to stand in the purple pool highlighted. When the bar fills up to 25% a portal will appear near you. If you step through the portal The Spellblade will Ascend and you will get benefits(which are listed when you hover over the bar). Each of his perks are gained depending on how full the bar is when you go through the portal and even if you go beyond the threshold while ascended for the next perk(which is very unlikely) you will not gain the perks even if you reach the next threshold.
Tips for Spellblade First: Astral Beyblade
Now we are getting to the interesting ones! Recommended Runes for the Spell Blade! There are three ways you can go about using his Ascension.
The first one is what I like to call the Astral Beyblade! This one is concentrated on killing enemies as fast as possible while utilizing dodging and positioning to get Spellblade ascension going.
Recommended Runes:
- Arcane/Slash Inclination: You will want to get to Arcane Blade as fast as possible because you will be using all the vulnerable and expose stacks to kill enemies. Also getting Bladestorm is great for early game.
- Dash Mastery: Remember I said that dodging and positioning will be the most important thing because you will have to know how to stay in the purple area while dodging and fighting enemies off at the same time.
- Multicast Madness: This will help you cast multiple times meaning increased stacks of vulnerable and expose meaning more damage from Arcane Blade!
- Recklessness: For this build it is a double-edged sword. It’s nice to get the extra damage but, you will always be living on the edge of defeat. Recommended for those that like living on the edge or mastered this particular playstyle.
- Weapon Expert: Only if you need the extra help at the beginning. Uppercut(first weapon) is good when you don’t have crit and wound synergy and astral overload(second weapon) is good as a starter but, both will fall off as you progress through the stage.
- Recommended skills: Arcane Blade, Bloodlust, Arcane Power.
- Arcane Blade: Bread and butter of this playstyle! Without it there is nothing.
- Bloodlust: Helps with Cast frequency and movement. Some of the Spellblade’s skills can be slow so getting extra cast frequency is good and the movement helps with dodging.
- Arcane Power: Only if you are getting bad RNG. If you are getting good RNG with the Multicast upgrades on your skills you can skip this one.
Second: Frost Knight of Steel
This build is opposite to Astral Beyblade. It concentrates on using Armor, HP, Ice, and Titan’s Cleaver. In my opinion this is the easiest of the three to use. It’s simple but, effective. The point of this build is to have enough Armor and HP to tank any damage you take and fill the Ascension gauge. This build is the most versatile because you have an easier time controlling when you want to grab the ascension compared to the first and third tactic. The recommended runes and skills are based on using The Spellblade’s Third Weapon.
Recommended Runes:
- Thrust Mastery: It’s needed to get Shield Wall. You can go for Shield Bash as well but, I find Titan’s Cleaver to be better for this build.
- Weapon Expert: The second ability turns all stacks of slow into paralysis. Slower enemies are always good and comes in handy if you are getting overwhelmed.
- Ice Inclination: Ice is your main method of attack. Getting Ice skills will be crucial for success.
- Sure-Footed: Helps with damage mitigation.
- Recommended skills: Shield Wall, Titan’s Clever, Ice Vortex
- Shield Wall: This skill will be how you will be able to take hits from enemies and not die.
- Titan’s Cleaver: This skill damage Scales with how much armor you have. The more armor you have, the more damage it deals!
- Ice Vortex: This skill deals damage based on the amount of slow and paralysis stacks on the enemies. Ice Inclination will get you the Ice skills you need to increase the damage you deal. Ice skills apply slow or paralysis automatically. Once you get the synergy for slow you will also start applying fragility as well so, more damage!
Third: Inferno Swords
This build concentrates on using the Fourth weapon’s second ability and stacking burn and melt to kill all the enemies around you. The biggest issue with this build is that you are very vulnerable if the fiery swords cannot kill the enemies or they concentrate on one side of you because once the enemies get past them you won’t have enough damage to kill them yourself. This build’s Runes and skills are based around The Spellblade’s Fourth Weapon.
Recommended Runes:
- Weapon Expert: You need this weapon’s second skill to do anything! Might as well get it at the start!
- Multicast Madness: Multicast Madness helps your summoned swords to hit multiple times! If you are lucky you could also get a lot of swords early on.
- Fire Mastery/Inclination: You need fire spells to help with the burn stacking.
- Executioner: Helps with damage if the enemies happen to get past your swords.
Recommended skills:
- Fiery Blades, Firestorm, Bladestorm, Combustion,
- Fiery Blades: Bread and butter of this build. Can’t function without this skill.
- Firestorm: Swings around a big area dealing damage and applying burn to enemies when hit.
- Bladestorm: Same as firestorm but, you need the burn debuff from leveling up to get the same effect as firestorm…which you will get anyway so you can apply more burn!
- Combustion: Applies burn to any enemy that walks into the range of this attack. You can add all the debuffs from leveling up and get a bunch of stacks really fast if you also have multicast.
Arcane Weaver Ascension
Fifth is the Arcane Weaver!

Arcane Weaver is pretty simple. Over time some crystals that look like the one highlighted will fall from the sky, you collect them, and once the circle fills up Arcane Weaver will Ascend! While Arcane Weaver is Ascended you will gain the benefits listed(which you can see when you hover over the circle bar). While Ascended the Arcane Weaver’s Ascension bar will gradually drain. Not much else to say here.
Tips for Arcane Weaver
The Arcane Weaver is also simple. Collect the magic stones and get the effects of Ascension!
Recommended Runes:
- Singular Focus: This is basically the crux of the meta build of 6 beams.
- Executioner: You will be firing off a lot of attacks with the extra multicast from Ascension so, might as well stack some debuffs for extra damage!
- Holy Inclination: If you are going for the Light Beam build.
- Arcane Inclination: If you are going for the Arcane Beam build.
- Multicast Madness: Probably the character this is meant to be used with. Multicast on multicast on multicast! Let whatever skills you use go mad!
Recommended Skills:
- Light beam, Arcane beam, Lightning Beam.
Basically The Arcane Weaver is multicast crazy! Any skills you want to see go off multiple times, use it on this character and enjoy! Wait on using the beam builds though because after you use any of them once…NOTHING will compare to the damage that build will do. You have been warned.
Sentinel Ascension
The Sixth is The Sentinel!
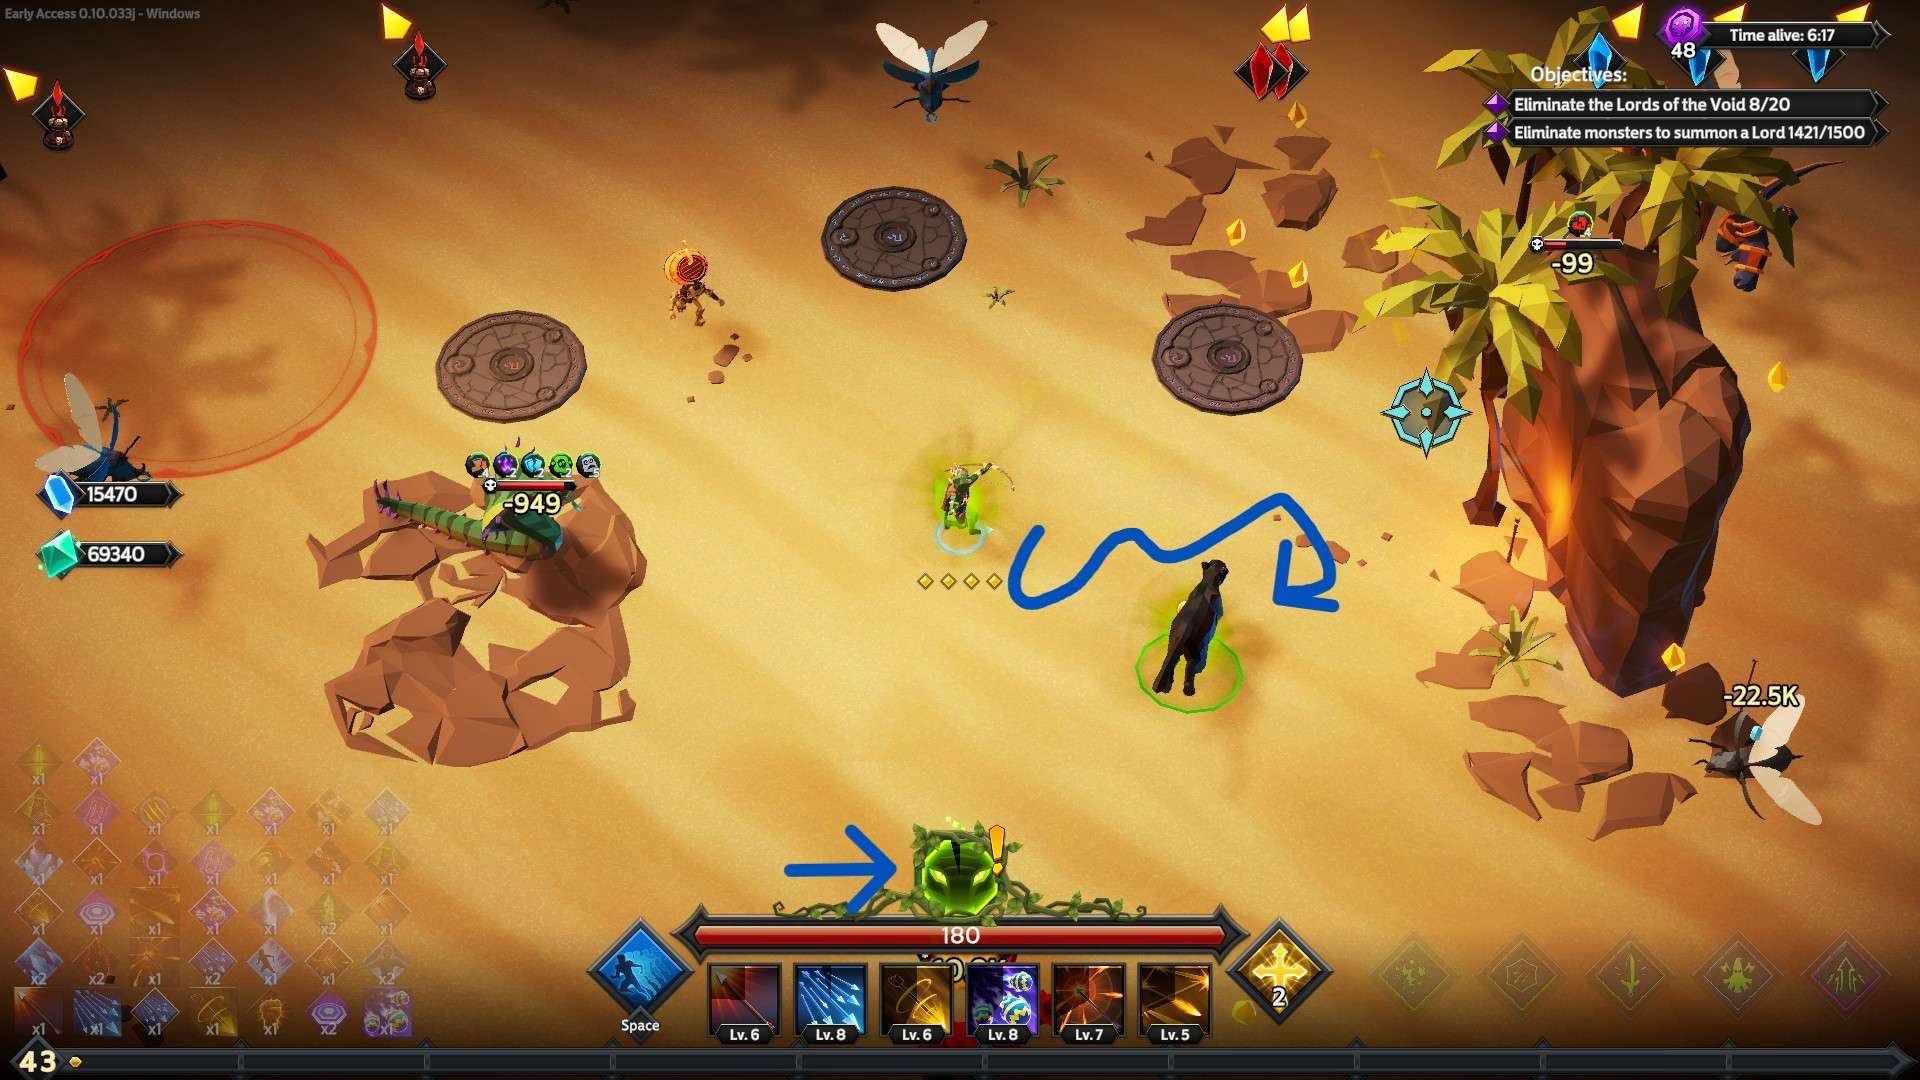
Another tricky one here! To Ascend The Sentinel you have to find the animal that the curve arrow is pointing toward. Follow the animal until the Ascension bar goes from grey to fully green and the Sentinel will Ascend! When Ascended the Sentinel will gain benefits(which you can see if you hover over the ascension bar). When the Sentinel is Ascended the bar will gradually decrease(go from green back to grey) and once it’s empty you will dismount the animal. I’m not sure how the game determines where the animal spawns and when so, will have to do further testing on that.
Tips for Sentinel First: Remember when Ice Had Long Cooldowns?
The Sentinel’s Ascension is hard to use but, when you master it, you can do some crazy stuff. It’s best to have the Dash Mastery rune in general because since you have to “chase” your Ascension you will be dodging a lot. This build however mitigates some of these problems! It uses Ice, slow, and paralysis to keep enemies off of you. Once you ascend your basic weapon and your ice skills will start to go crazy!
Recommended Runes:
- Dash Mastery: Pretty much need this if you plan on using the ascension after the first bosses appear unless you know exactly how and when your tame spawns.
- Ice Mastery: Needed to get the ice skills to slow the enemies down
- Ice Inclination: Needed to get said Ice skills faster. This one is less mandatory but, really useful if you want to hurry and get the build going.
- Multicast madness: Useful for the spread shot. Multi casting is great for Ice Vortex as well.
Recommended Skills:
- Spread Shot, Ice Vortex, Severe Cold, Freezing Blow.
- Spread shot: Used with slow debuff from level ups to apply slow really fast. Once you ascend you will start applying slow really fast!
- Ice Vortex: This is the finisher skill for any ice build. Without this you won’t be dealing much damage
- Severe Cold: Unlocked from getting The Elementalist second weapon. It is very useful for bouncing around and applying slow to each enemy hit. When ascended this will fire off like crazy!
- Freezing Blow: Unlocked from getting The Elementalist second weapon.Turns all your slow stacks into paralysis. This will slow down the enemies immensely allowing you to just concentrate on getting your mount.
Second: You look Quite Fragile… Here’s a Bomb!
This build focuses on using Fan of Bombs with the Sentinel’s first weapon basic skill to apply a bunch of fragility. It also uses other bombs that inflict fragility and weakness to a bunch of enemies at once. This build is very fragile so get that Dash Mastery out because you will need them dodges!
Recommended Runes:
- Dash Mastery: You need to move as fast as possible. Dash mastery helps with this and dodging as well.
- Multicast Madness: Extra casts for all my fragility and weakness debuff needs? Yes please!
- Bomb Mastery: Used to get the Weakness Grenade, Debilitating Bomb, and Fan of Bombs.
- Bomb Inclination: Gotta get that Fragility going as fast as possible!
Recommended Skills:
Anything that applies Fragility or Weakness debuff.
- Fan of Bombs: This is the special skill of the Assassin’s third weapon. You need to unlock said weapon to get this skill. This skill damage scales with the amount of fragility and weakness stacks on the enemy. Since Fragility and Weakness increase how much damage you deal, you already have a way of stacking damage built in!
With both builds there is two obvious problems… Your luck of where your tame spawns and getting the bar filled while trying to fight off enemies at the same time. That has more to do with the Ascension mechanic than the builds themselves though.
Paladin Ascension
Last one(for now at least) The Paladin!
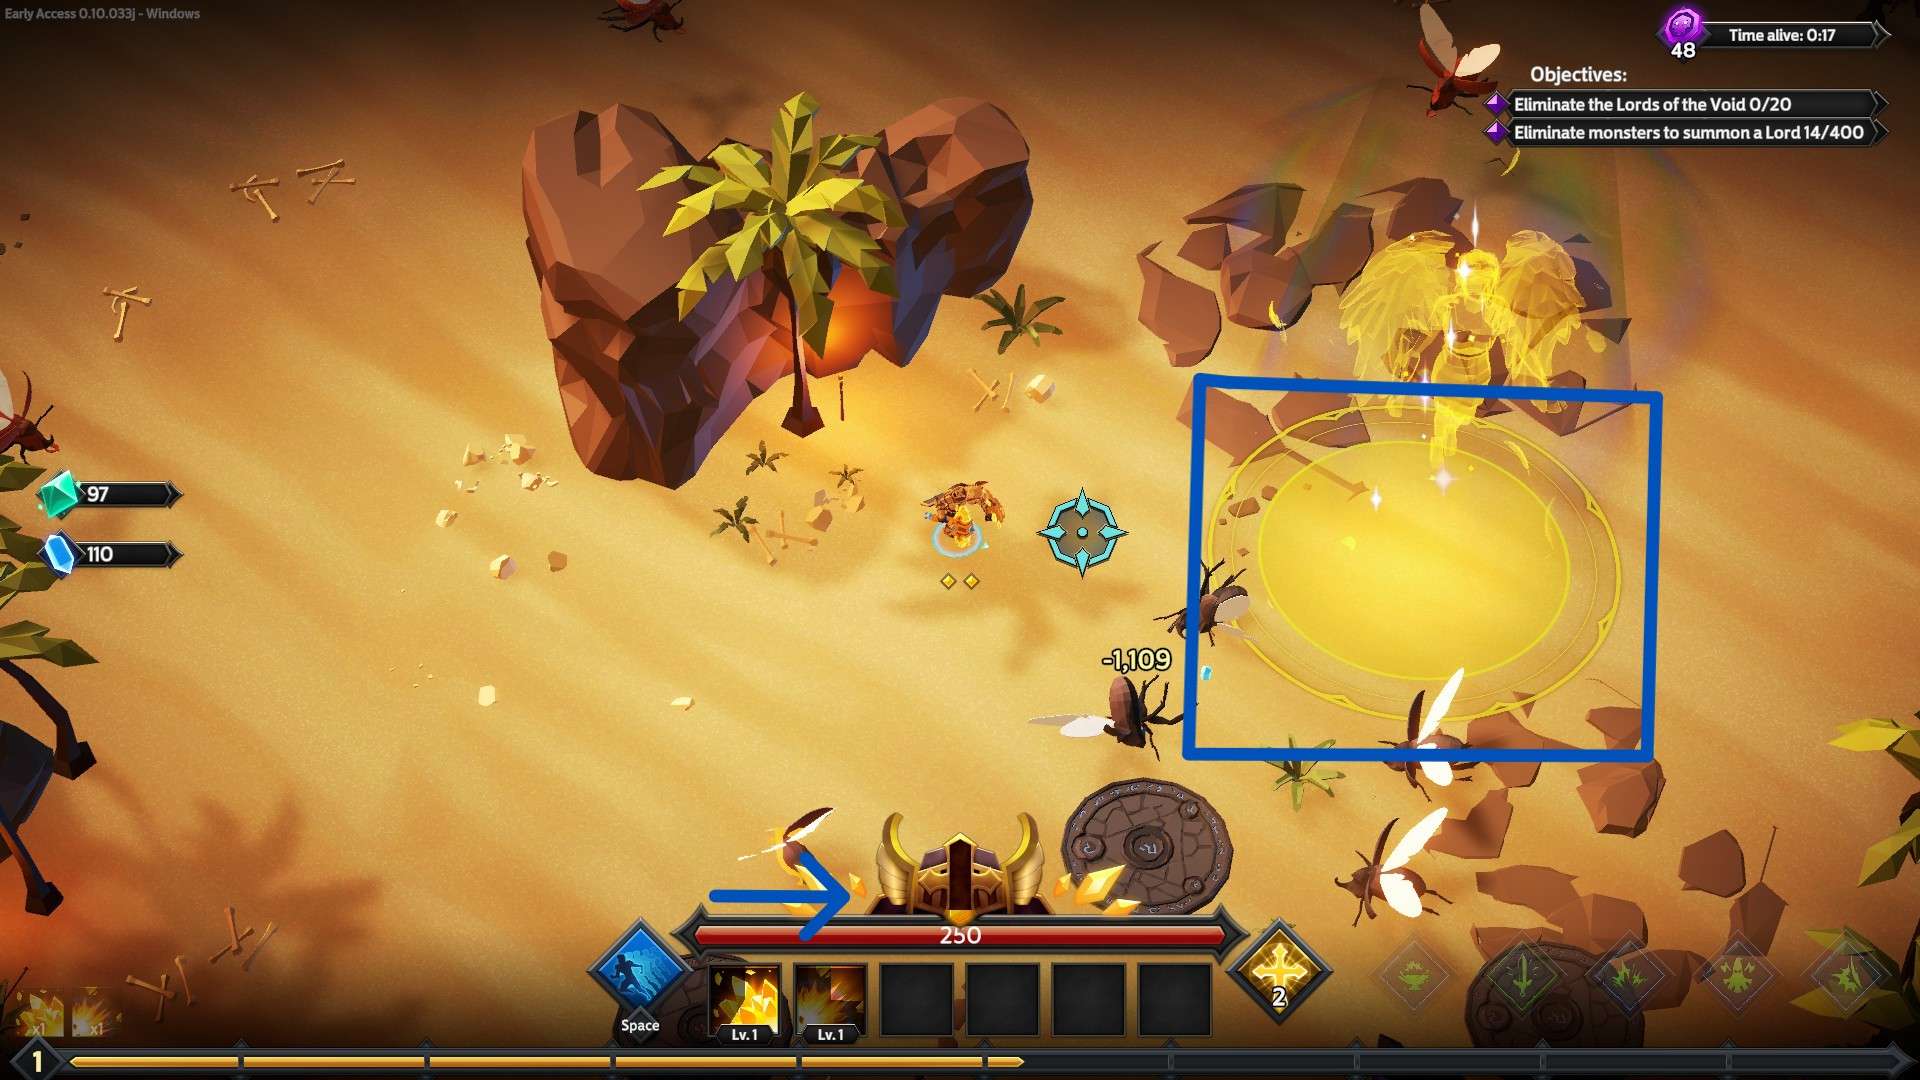
The Paladin’s Ascension can be hard to use but, awesome when you master it. Periodically the angel and the circle in the highlighted area will appear. If you stand in the circle until the angel disappears it will fill the bar at the bottom. Once the bar is filled the Paladin will enter it’s Ascension! While the Paladin is Ascended you will gain benefits(which you can see when you hover over the ascension bar)! Also the Paladin’s Ascension bar will gradually decrease while in this state.
Tips for Paladin
So I took a hard look at the Paladin, I looked at the Paladin, looked at his abilities, looked at other abilities, looked at what you get from Ascending the Paladin. I have come to the conclusion that the Paladin is so overpowered that trying to make a build concentrating on using the Ascension actually makes the Paladin WORSE than just using the Paladin normally! I recall every time I tried to use the Paladin’s Ascension during a playthrough, I always died faster than just playing normally…
There is a small trick however, if you can time your movements right before the circle shines and the angel start to disappear you can get the bar filled up that way but, I wouldn’t concentrate on it too much. There is not really any Runes or skills I could recommend building around this Ascension because 1) it’s hard to stand in such a small circle and time your movements so precisely 2) The Paladin doesn’t really need it.
If anyone has any build suggestions that concentrates on the Ascension feel free to post them in the comments(obviously credit will be given to you in the guide).
Personal Tier List
A personal tier list for the Ascensions.
Rating: 1 out of 5
- Barbarian: 5/5. You get the Ascension by just playing the game! You get extra benefits for playing the game! What more can you ask for?
- Pyromancer: F in the comments/5. While The Pyromancer doesn’t have any requirements to activate the Ascension, The Ascension itself also doesn’t do anything… Maybe later updates will boost the effectiveness of this one.
- Houndmaster: 3/5. The Ascension makes the hounds less…useless. Their damage is also surprisingly high! If you are doing Overlord or Endless run then they fall off really fast.
- SpellBlade: 3/5. While you have to build around this one it’s awesome when you do. The effects you get from this ascension is crazy. You go from small damage to nuking enemies! This makes up for having to dance around in the small purple waves.
- Arcane Weaver: 4/5. The Ascension is pretty solid! You collect shards and then get to start multicasting like crazy! Only small issue is that if you go into overlord/endless it will be harder to collect the shards.
- Sentinel: 2/5. The Sentinel’s Ascension mechanic is…interesting. While I like the mechanic, it is also very impractical. Trying to chase after an animal while fighting is a sure way to get yourself killed.
- Paladin: 1/5. The circle is small, you have to time the effect precisely to fill the gauge if you don’t want to stand in the circle, and the Paladin doesn’t even need the Ascension anyway. If you do get it though it does give you pretty powerful effects so…that’s the only reason it’s not a 0/5. Basically too much work for something you don’t even need.


Be the first to comment