
Guide to Cajon Pass Route
Overview
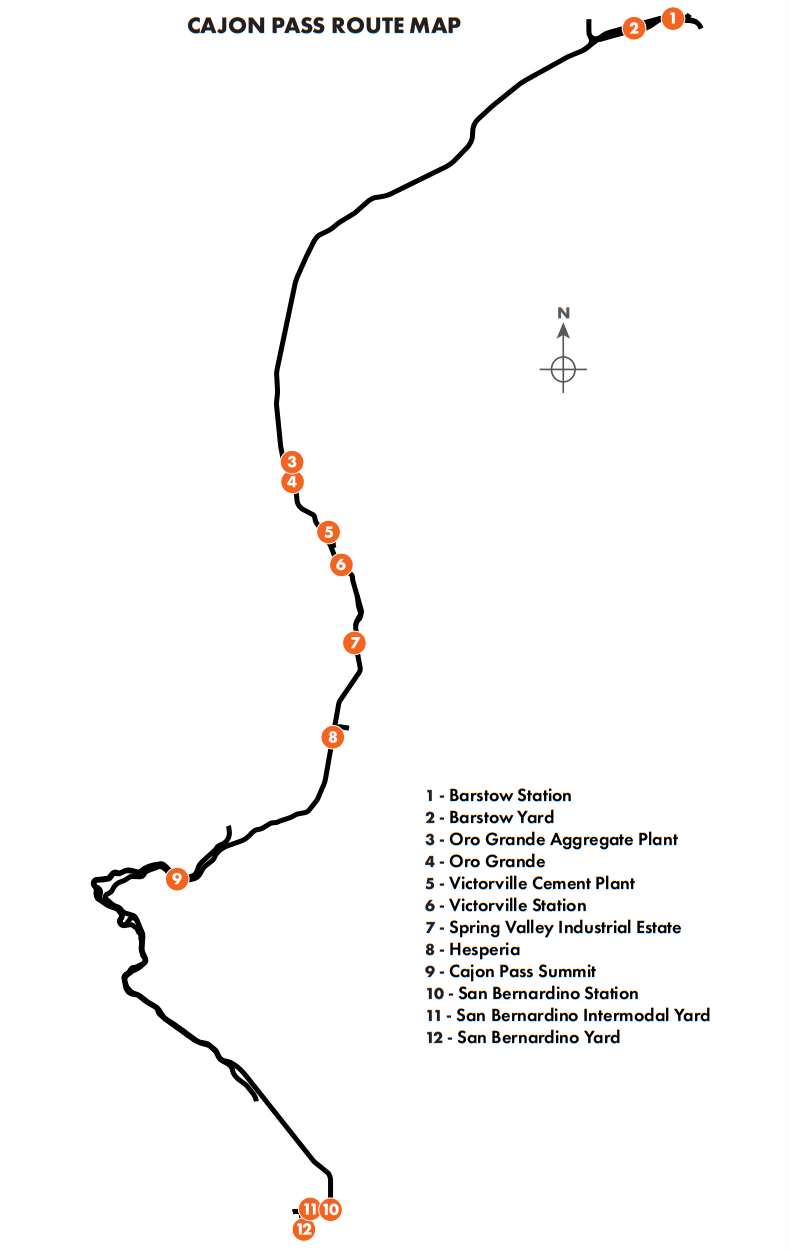
A legend arrives! Cajon Pass is an 85-mile, desert laden and mountainous freight corridor through the rugged throws of sun-soaked California. Along this route, BNSF motive power climbs and descends tough grades, as steep as 3%, with the heaviest of freight tonnage in-tow. Master the art of hauling these trains over summits and down valleys, and take on other challenges such as switching and local duties in and out of the sprawling yards that bookend the tips of the pass at Barstow and San Bernardino.
Cajon Pass Tips & Tricks
- It’s a limit, not a target! As tempting as it may be, don’t feel too attached to sticking to the speed limit, you certainly won’t be able to as you haul over 10,000 tons uphill, and if you’re cresting the summit to begin a descent, if you’re already doing line speed, you’re already going too fast. Slow and steady wins the race, check out the in-game training to practice braking with a long train and cresting a gradient with dynamic brakes.
- Don’t forget Rule 14L, the horn sequence when approaching a Grade Crossing; as you approach, start ringing the Bell, then do a Long-Long-Short-Long toot of the Horn, finishing as you cross over the road.
- Carrying out switching duties? Make sure you don’t bump into freight cars at high speed, use the Independent Brake to approach safely – also make sure at least one knuckle coupler, either yours or the car’s, is open so they can connect.
- There are many route tasks to complete, with route maps to place safety signs to put up, water caches to refill and food trucks to visit.
Route Map
Click to enlarge…
BNSF ES44C4
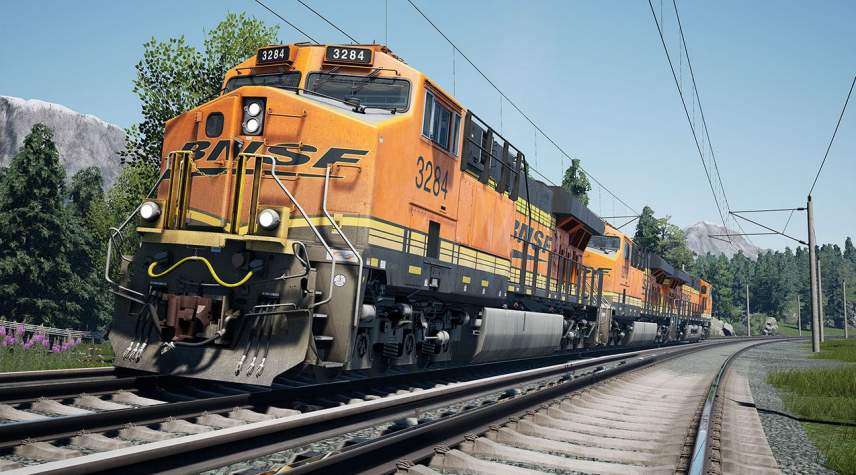
The ES44C4 represents some the latest innovations among the GEVO range of American freight locomotives. BNSF use their fleet of ES44C4s to tackle the harshest of conditions, as their unique ability to automatically adjust their weight distribution means freight can keep on the move, with less risk of slipping. At 4000 horsepower a piece, this stallion of US freight can work in large groups on single trains, and support both rear and mid-train distributed power for the toughest of grades.
Quick Start
This Quick Start sequence represents the basics you will need to follow to get this train moving – follow along with the Training Module of this train in the Training Center or when you start a Scenario or Service.
- Insert the Reverser Handle.
- Press the Banking Comm Button.
- Move Reverser into intended direction of travel.
- Set the Headlights Switch to Bright Aux.
- Set the Generator Field Switch to On.
- Ensure the Independent Brake is fully applied.
- Set the Automatic Brake to Release.
- Apply 3-5 notches of power on the Throttle.
- Slowly Release the Independent Brake as Tractive Effort rises.
Cold & Dark Start
This Cold & Dark Start sequence represents when the train is fully powered down. You may use this as a reference to get familiar with how trains are started and practice the full start-up sequence by spawning on-foot in the Training Center.
- Climb up onto the front of the locomotive.
- Enter the cab by interacting with the cab doors.
- Sit down in the Engineer’s seat.
- Insert the Reverser Handle, leaving it in Neutral.
- Set the Control and Generator Field Switches to On.
- You may now start the engine, stand back up.
- Set the Fuel Pump to On.
- Lift the Control Cover.
- Rotate the Engine Control switch to Start.
- Hold down the Engine Start button for 5 seconds.
- Once the engine has started, return the Engine Control switch to Run, and close the control cover.
- If you wish to drive with Cab Signals enabled, close this Fuse.
- Sit down in the Engineer’s seat.
- On the left-hand monitor beneath the windscreen, ensure that the Brakes are set to Lead and Freight modes, if they are not, press F8 on the keypad, then F4, and finally F3 and F2
- Press the Banking Comm Button.
- Release the Handbrake (wheel at rear of the locomotive).
- Move the Reverser into the intended direction of travel.
- Set the Headlights Switch to Bright Aux.
- Fully apply the Independent Brake.
- Set the Automatic Brake to Release.
- Apply power to the locomotive by moving the Throttle Handle (Notch 1 for light engine, Notch 4 when hauling a train), the power you need may vary based on the weight, length, and position of your train.
- Once power is being applied, gradually release the Independent Brake.
BNSF SD40-2
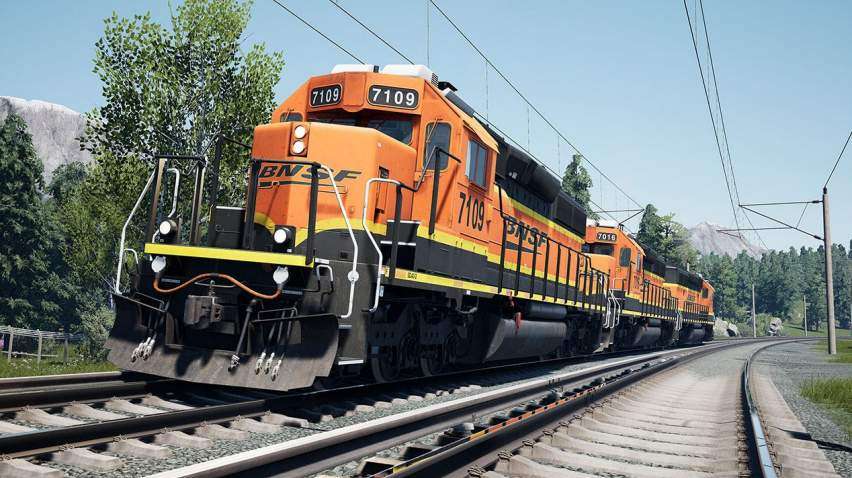
An all-American hero with decades of hard-working experience, the SD40-2 has been the backbone of US freight railroads since its introduction in 1972, with over 3900 examples spread across the States. Their age has seen them pushed towards local duties while newer equipment takes on the frontline work, but that doesn’t make them any less of a common sight, with BNSF themselves owning hundreds upon hundreds of the type, all inherited from mergers as they grew into the Class I Railroad they are today.
Quick Start
This Quick Start sequence represents the basics you will need to follow to get this train moving – follow along with the Training Module of this train in the Training Center or when you start a Scenario or Service.
- Insert the Reverser Handle.
- Press the Banking Comm Button.
- Move Reverser into intended direction of travel.
- Set the Headlights Switch to Bright & Ditch Lights.
- Set the Gen Field Switch to On.
- Ensure the Independent Brake is fully applied.
- Set the Automatic Brake to Release.
- Apply 3-5 notches of Power on the Throttle.
- Once power is being applied, slowly release the Independent Brake.
Cold & Dark Start
This Cold & Dark Start sequence represents when the train is fully powered down. You may use this as a reference to get familiar with how trains are started and practice the full start-up sequence by spawning on-foot in the Training Center.
- Climb up onto the front of the locomotive.
- Enter the cab by interacting with the cab door.
- Sit down in the Engineer’s seat.
- Insert the Reverser Handle, leaving it in Neutral.
- You may now start the engine, stand back up.
- Open the Fuse Cabinet on the back wall.
- Check all the switches, and if open, set the Main Breaker to Closed.
- On the back wall panel, ensure the Isolation Switch is set to Start/Stop/Isolate.
- Exit the cab via the back door, walk halfway along the locomotive to the Engine Room.
- Unlock the latch and open both doors.
- Hold the Starter switch in the Prime position for 10 seconds.
- Then hold the Starter switch in the Start position for 10 seconds.
- Once the engine has started, you can test it by cranking the Governor Handle.
- Close the Engine Room doors, in the correct order, and lock the latch.
- Re-enter the cab.
- On the back wall panel, set the Isolation Switch to Run.
- If you wish to drive with Warning Devices enabled, close this Fuse.
- Sit down in the Engineer’s seat.
- Set the MU-2A Valve to Lead or Dead.
- Set the Cut-Off Valve to Freight.
- Move the Reverser into the intended direction of travel.
- Set the Front/Rear Headlights to Bright & Ditch Lights as appropriate.
- Set the Generator Field Switch to On.
- Release the Handbrake (handle on the nose next to the front cab door).
- Ensure the Independent Brake is fully applied.
- Set the Automatic Brake to Release.
- Apply a few notches of Power with the Throttle.
- Once power is being applied, slowly release the Independent Brake.
Be the first to comment