

8K DMG ARC Build
This build focuses on damage while balancing energy, ammunition, mobility, survivability, and precision aiming.
Modules
Turret Traverse
Turret traverse is not necessary because the default speed is fast enough for engaging targets. For precision aiming, manually limit your traverse speed for greater precision. This also makes traverse speed bonuses irrelevant for this playstyle.
Extra Damage
Extra damage is a worthwhile investment.
Starting Energy
Starting energy provides the highest benefit for its investment among the remaining points available for the build. It provides approximately two shots’ worth of energy.
Ammunition
Both ammunition modules are necessary for the components used in this build.
Speed
Speed is very important for changing positions and getting into position early at the start. However, investing in components for additional speed is detrimental because this build can already reach 57 km/h.
Hull Traverse
Hull traverse is not necessary if you preposition your hull.
Base Dispersion
Base dispersion is fine with both shell types and does not affect precision aim time.
Energy Modules
Investing enough points into the energy modules provides too little benefit. Use bushes wisely instead.
Maximum Health
Maximum health provides one of the best benefits for the remaining available points. It can allow you to survive another shot or two.
Precision Aim Time
Precision aim time is critical for this build because the reload time and precision aim time match up exactly when a reload is completed.
You can still switch targets without increasing precision aim time by limiting your traversal speed. This makes traversal speed bonuses irrelevant for this playstyle.
Reload
The reload module is critical for maintaining the timing of the build.
Aim Speed
Aim speed is not necessary for the timing.
Gun Depression
Extra depression helps for certain positions.
Growth Keystone
Growth Keystone provides a greater benefit if you preposition.
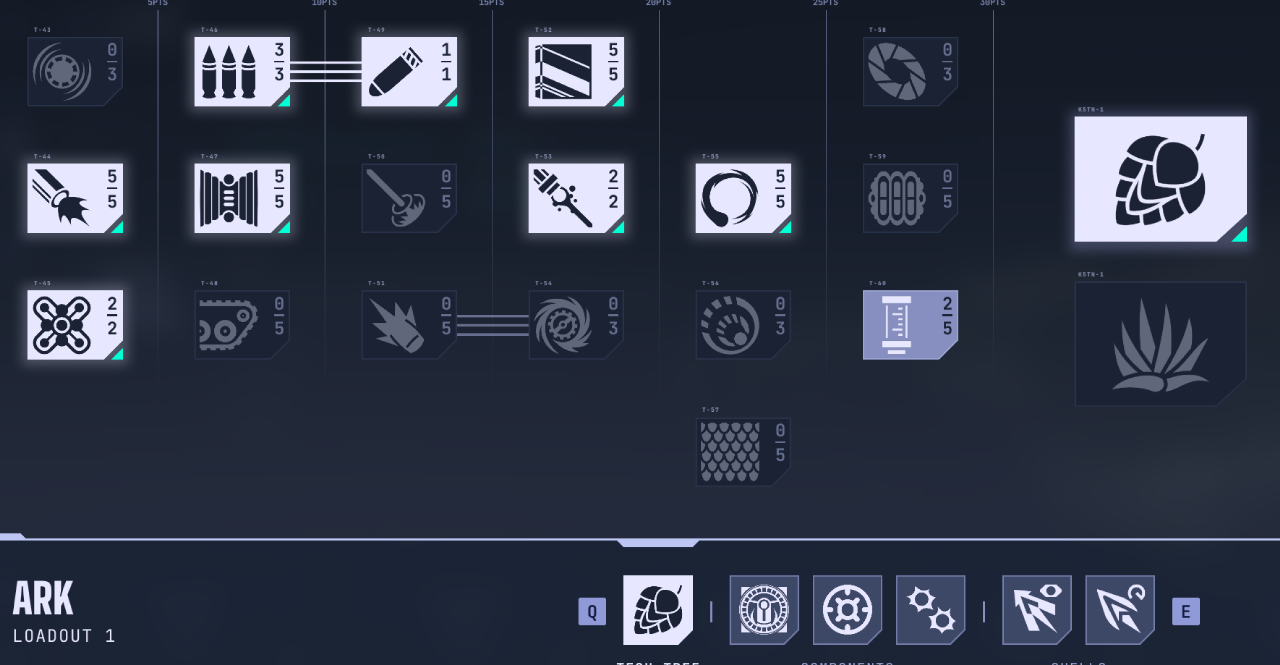
Components
Quick Slots and Sensitive Sights
Quick Slots and Sensitive Sights are critical for the timing of this build. Always use secondary shells.
Hot Chamber and Duplicator
You can replace Hot Chamber with Duplicator if you want more ammunition.
Hot Chamber adds the most DPS for a single component without requiring module hits.
Shell Choices
Spotting Shells
Spotting shells have no downsides.
Unstable Shells
If you want more DPS, use unstable shells.
Lightweight Shells
Switch to lightweight shells whenever you move around.




Be the first to comment