
In this comprehensive guide, I will walk you through ULTRAKILL’s Pacifist route, step by step. PS: This guide does require you to find a lot of secrets, so make sure you’ve thoroughly explored the game (or don’t care at all) before attempting the Pacifist route.
Contents
Definitive Guide to Pacifist Route
All credit goes to tbramblet!
Foreword
Firstly, I would like to clarify that despite popular beliefs, ULTRAKILL does indeed have a Pacifist route. While this route does not exclude harming all enemies, it does totally and completely exclude killing any.
Getting Started [Tutorial and 0-1]
The first step in finishing the Pacifist route is starting the Pacifist route.
Be sure to select the “Harmless” difficulty.
Once you have control of the character, it’s important to first understand the psychology of V1.
V1 is actually a really nice guy, but he unfortunately has a poor appetite consisting entirely of blood.
Make no mistake; blood is good for you. However, blood can contain many diseases, and in many parts of the world it is illegal to ingest it, although fortunately Hell is without law.
Despite these risks, V1 refuses to eat or drink anything else, and because blood does not contain all the necessary nutrients required in a healthy diet, his mental health has declined excessively, causing violent outbursts.
Now that you can fully empathize with V1’s mindset, look for the boarded up doorway with the “KEEP OUT!” sign (It may be hard to find, but I promise it’s there.). V1’s initial inclination is to punch the boards, however we want to avoid any acts of direct violence, so instead jump towards the boards and ground-pound. This should break the boards. If it doesn’t, keep trying.
Proceed through the rest of the tutorial, up to the point where you are told to douse yourself in fresh blood. Since we want to reform V1’s diet and mannerisms, simply walk past the 3 gentlemen and exit the room through the door behind them.
Finish the rest of the level as normal. Once you reach the next area, slide under the boards instead of breaking them. This will help to further establish a sense of calmness and self-control, as opposed to V1’s usual habits.
Once you pick up the gun, charge-shot the window above the locked door. Inside the now-exposed secret room, there is a vent leading to the other side. Traverse the following corridors by dashing over the Filth, instead of killing them.
Eventually, you will enter a room that will lock you inside with 2 Strays. Run straight to the door and toss coins and shoot them until all enemies stop attacking you (Since all enemies were killed in unfortunate accidents while you were training your aim shooting coins, you have not murdered them, but simply committed manslaughter.).
The following areas can be harmlessly leapt through, since the doors never lock. Once you are locked inside the final room with the Malicious Face, (it should look something like this: (T_T) ) get above the face and repeatedly ground-pound into it until it has a heart-attack. You have not directly killed the Face.
Level 0-2 and 0-3
The first few rooms and corridors can be skipped by simply avoiding enemies and going straight through the doors. Once you reach the room with the locked doors, practice your aim by shooting at coins until all enemies go home.
Once the doors unlock, notice the fallen vent cover in the room outside. Use ground-pound and quickly jump to get into the vent, and then take the skull inside. proceed into the room with the crusher. Lure all enemies into the crusher. The Strays can be tricky, but can be manipulated if you walk right up to them and try to push them towards the crusher. Once you have navigated to the next Checkpoint, do not go forwards, instead entering the door on your left. Place the blue skull on the pedestal, and enter the secret exit.
Survive.
Once you have escaped to 0-3, enter the first large room and jump up to the exit door. Instead of entering the door, use a pistol charge-shot to break the glass far above you, and then ground-pound-jump and wall-jump until you reach the door above. It may take several tries, but it’s possible.
If you’ve already played through the game and have a save, just use a shotgun overcharge/malicious railgun shot.
Once you’ve reached the door, immediately turn around and jump to the second door behind you. Ascend the stairs and enter the final room. Use coins and ground-pounds to make the Swordsmachine pass out. If the Swordsmachine sleeps in a very awkward position, (limbs entirely separated from body,) do not be alarmed. This is normal.
Complete the level.
Level 0-4 and 0-5
The first few areas can be skipped as usual, however once you reach the room with the locked door, just use like coins and ground-pounds to be inconspicuous idk anymore
Continue through to the next locked room. Once in the locked arena, lure all enemies onto the glass panels and cause your finger to slip multiple times in rapid succession. Remember to retain some panels for the second wave of Filth, specifically panels close to the sides where the Filth can drop down onto the glass, or walk onto it directly. Once all enemies have been killed in unfortunate accidents, proceed and finish the level.
In 0-5, stay away from the Cerberus to make it use it’s orb-throwing attack. it won’t use the attack again until it has dashed and stomped, so stay close to it after it throws the orb to quicken the rotation. When it gets to its orb-throwing attack, dash right under its feet to make it damage itself with the explosion. (Keep in mind that as it moves quite far forwards when throwing, getting the position right can be tricky.) Damage can be avoided if you jump as soon as the orb is thrown. This can be a time-consuming process, and you will not be blamed for getting tired of the music.
Once the second Cerberus awakens, use both of their orbs to damage them. Make sure to damage both of them equally, and try to make them take each other out at the same time, for dramatic effect. If that doesn’t work, just make the final remaining Cerberus destroy itself with its orb throws.
Level 1-1, 1-2, and 1-3
Entering level 1-1, take a moment to relax, then throw a coin into the fountain in the first room.
Calm your mind in the next area by doing tedious stuff.
Reaching 1-2, head straight for the elevated door, ignoring the enemies. Once inside, you’re due for an aim-practice session, shoot some coins. Once the Schisms and drones come, however, you can lure drones down and make Schisms shoot them. Make sure the drones are close enough to the Schisms that when they blow up, the Schisms die.
Proceed and grab the blue Skull, then go out and get the red Skull, all while avoiding enemies. Once in the final room, use coins to accidentally kill the streetcleaners, then use the drone’s suicide rushes to kill as many Strays as possible. Stomp the rest, and blame it on the taco bell you had making you weigh more.
In 1-3, head to the right (indoors, blue key) and go straight ahead through to the room with the Malicious Face and the orange beacon. Ignoring the Face, wall-jump up the beacon’s cage and drop down into the room below. Grab the blue Skull, and then go forwards. Navigate through the following 2 rooms until you reach the hallway with the 2 Schisms and the Streetcleaner. this room will be important later, so we’ll label it the Stupid Dog. Make your way back to the main room and put the blue Skull down, then return to the Stupid Dog. Use a ground-pound jump (careful not to stomp any of the enemies) to go through the window that the Streetcleaner broke through, and pick up the soap. Go back out to the main room and go down the now-open hallway. When the boss emerges, throw the soap at him to give him the soap. He’ll use his teleportation powers that he definitely possesses to go to his bathtub and take a nice bath (Any blood or gore is just part of the teleportation process!).
Level 1-4, 2-1, 2-2, 2-3 and 2-4
Entering level 1-4, go straight ahead all the way to the blue door, and shoot the stained-glass window above it. This is to save time because we both know we’re lazy. Once in the arena with V2, simply dodge for a really long time. It’ll eventually use his shotgun cores to kill itself. (Try to make sure it’s running straight towards you and is low to the ground when it’s charging the explosives.)
Once V2 absolutely plays itself, grab its arm and finish the level.
In 2-1, simply navigate the entire level without harming any enemies, similar to how you would navigate any other bridge you would go to. Unless you’re a psychopath.
In 2-2, once again just ignore all enemies, and shoot all the power boxes.
In 2-3, Go straight up to the door on the top-left. Once in the waterfall room, practice aiming on coins for a while. Everything will clear up in no time. Once you have the blue Skull, return to the main room and use a shotgun core to break open the cracked wall to the left. Once in the large room, use the crushers to kill cause unfortunate accidents to befall all enemies. Except those 3 stupid Soldiers who refuse to move, just practice your coin-shooting. Use the crushers for the second wave as well.
Once back to the main room, parry the Mindflayer’s attacks back into it by timing an explosive right before it fires them. In the last room, use the Mindflayer’s laser to kill all the enemies, then parry its orbs back into it. Practice your stellar aim on some coins on any remaining enemies.
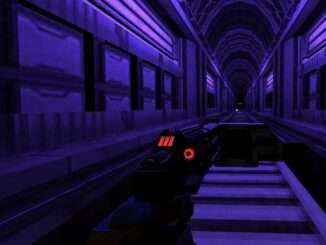
In 2-4, ride the tram up until a rude hand stops you. This hand is a common occurrence in this railway and, in and of itself, is not alive. Destroy it with as much firepower as possible.
Once you place the red Skull on the pedestal and King Minosn’t appears, fist-bump him until the voices inside his head come out. These guys don’t change much, except you can fist-bump their projectiles as well. Continue fist-bumping until he falls alseep. Unfortunately, Minosn’t has been down bad lately, so to help him out, go into his mouth and check it out for infections.
Level 3-1
In 3-1, ignore the Malicious Face, making it a Sad Face, and go into the next room. Use the acid and the Mindflayer’s laser to kill all other enemies, preferably using the acid to kill the Cerberus. Once they’re all dead, deflect the Mindflayer’s orbs back into it, and then use the acid to bathe the remaining Streetcleaners (They hate baths.).
Once you enter the next room with the 3 Cerberi, let the first two wake up, then go below the platform and hug the wall, as the wall is very lonely. The Cerberi will eventually kill themselves with their orbs, however you might need to jump up to encourage them it attack. Once all 3 Cerberi have disposed of themselves, the next room is pretty straight-forward. Go to the front-right corner, and wall-jump up the side of the stairs. Then continue walking down the dark bridge, and go through the door.


this is one of if not the BEST ever guide that i have ever had the pleasure of reading i wish that more people could have seen such beauty. and this is actually helpful as well so its pretty awesome. keep it up dude.
PS: of course when i go to your steam page the first thing i see is undertale with 349 hours of gameplay lmao it just lines up perfectly