
A full basic guide about V Rising. Find usefull information about V Rising and how it works.
Keep in mind that you could find some spoilers here so be advised!!!
Server Game Modes
There are different types of official servers, in addition to the possibility of creating our own servers and games with rules adapted to the way we like the most.
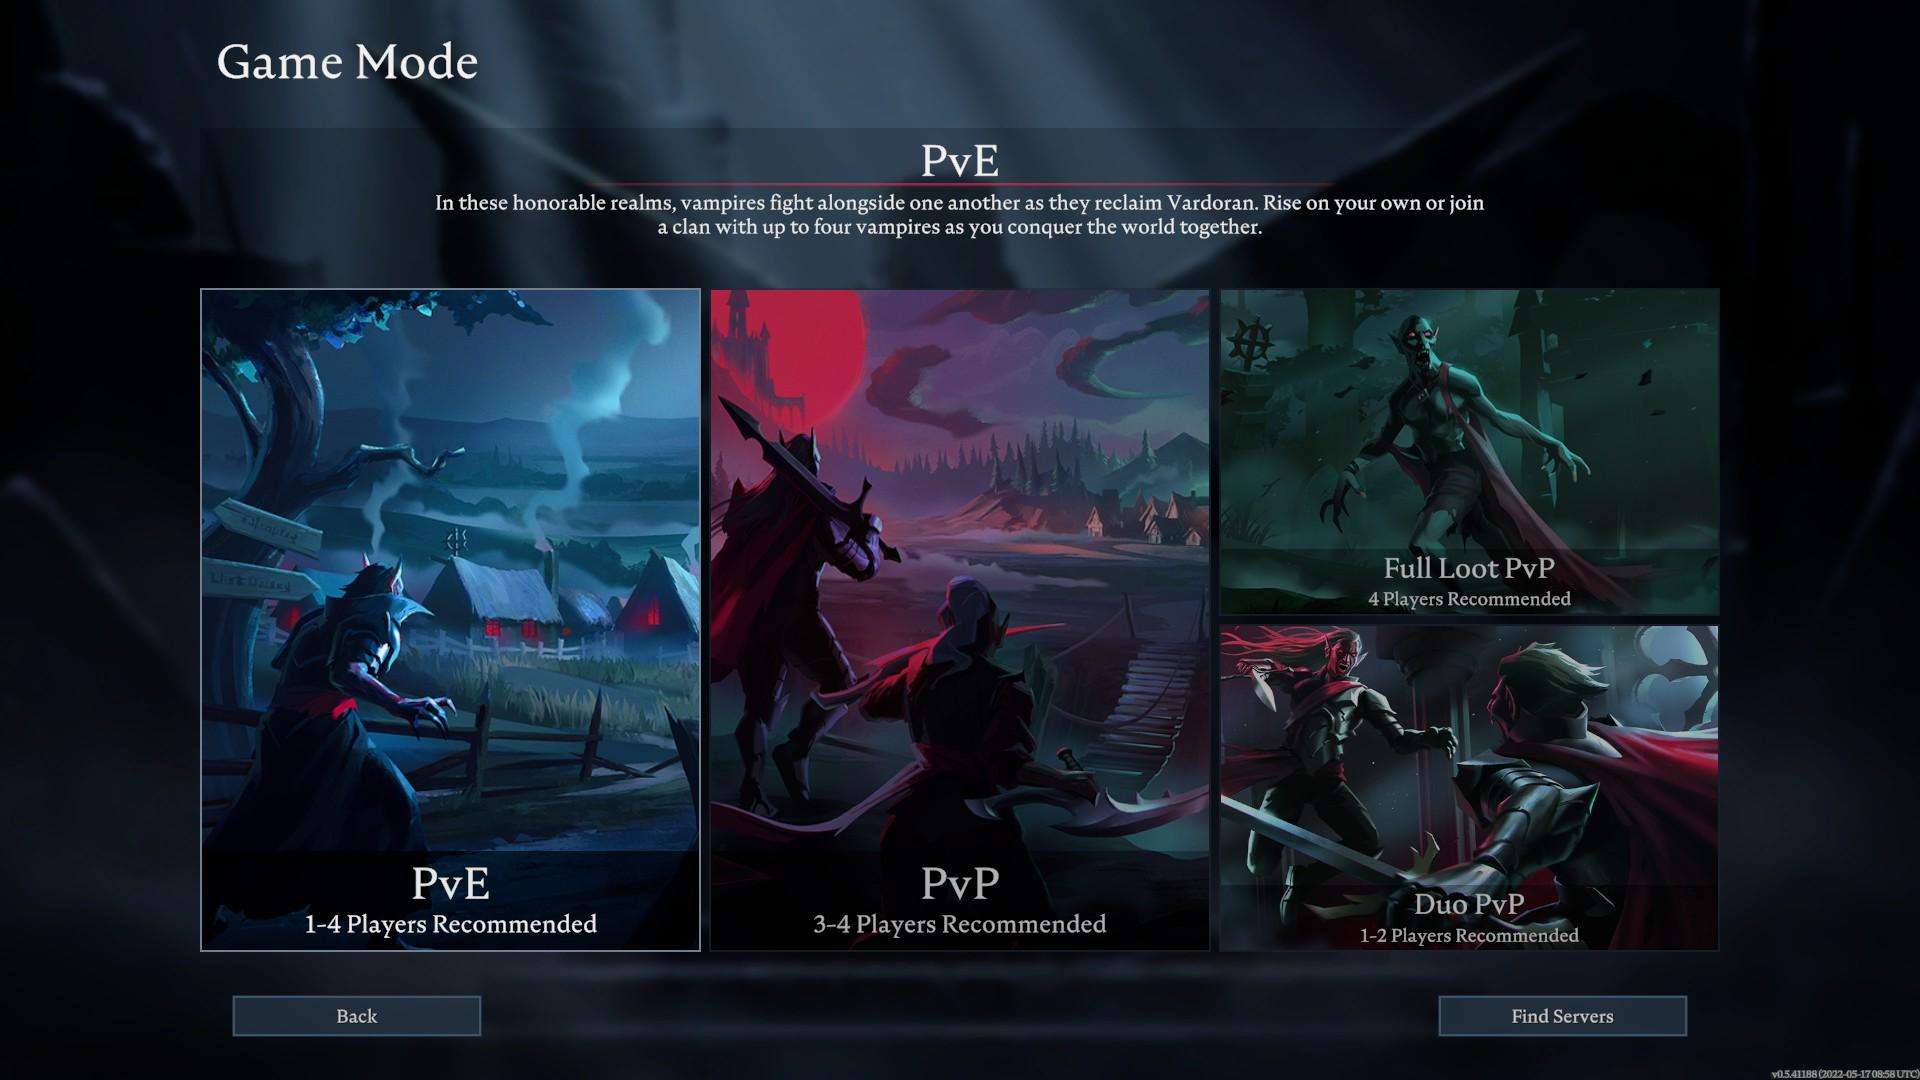
The official server modes are:
- PvE: Purely PvE servers, no PvP or castle siege between players. Recommended for 1-4 players.
- PvP: Servers with PvP between players. When you die you will lose what we have in the inventory but not the equipment or the tools. Recommended for 3-4 players.
- PvP+: PvP full loot servers. When you die you will lose everything that our character has. Recommended for 4 players.
- PvP Duo: Similar to PvP servers but only allow 2 people per clan (group). Recommended for 1-2 players
Bosses – V Blood
You can press O to check all Bosses in the game. To be able to see what skills, recipes or things that this bosses can unlock you have to be close to the level of the boss.
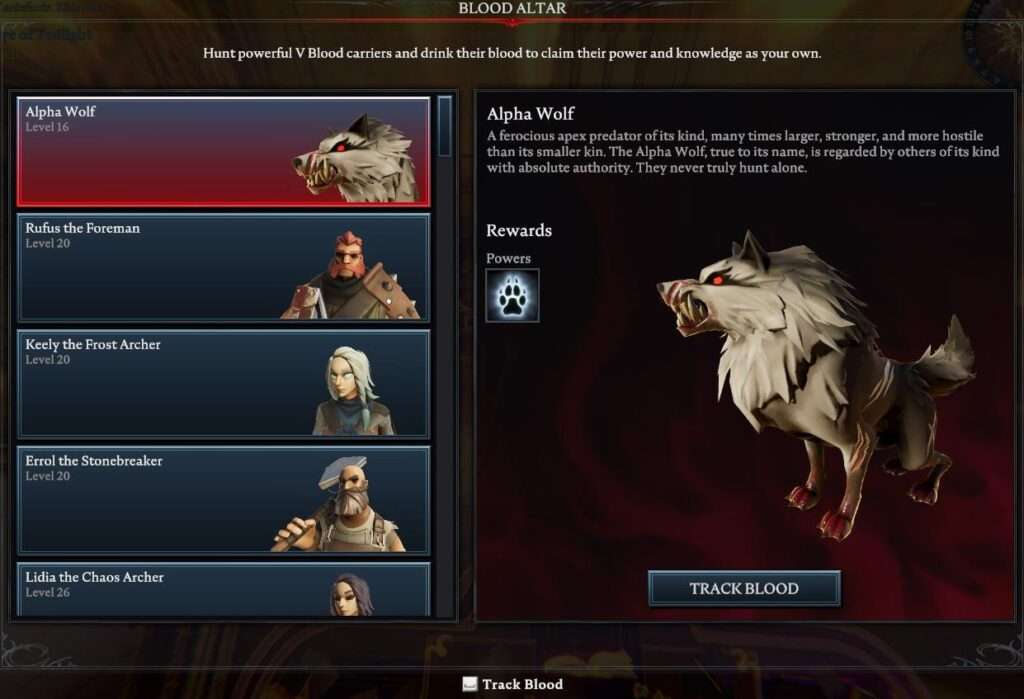
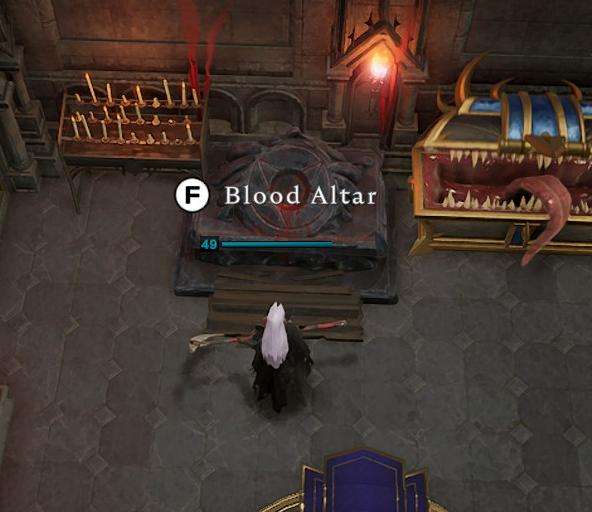
To be able to find this Bosses you have to build a Blood Altar in your castle. This will allow you to track them and be able to find them in the world. A line of blood will show up every 5 seconds around your character showing you in which direction you have to go.
Blood Types
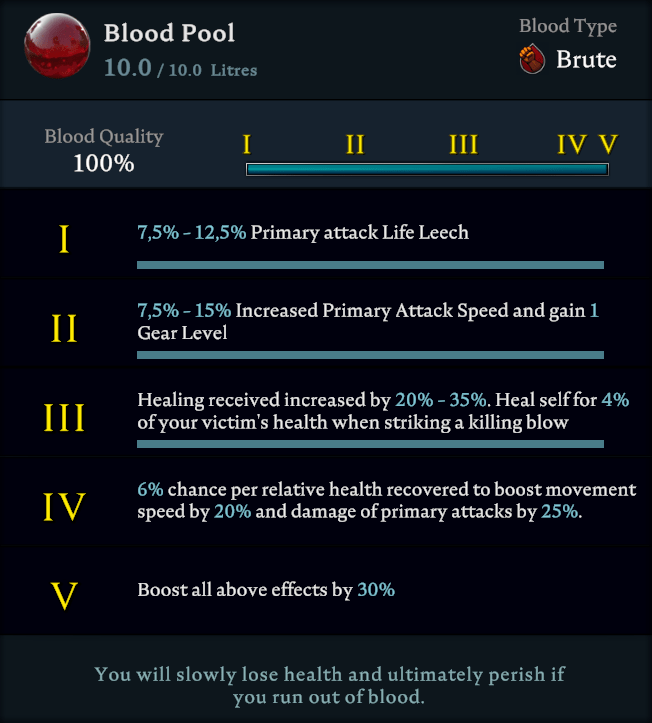
There are 6 different types of blood you can get ingame, each on with their own buffs.
To change your blood you have to drink blood from an enemie, to do this you first have to lower their HP until you can press F.
You will get a Type and a % of quality. Higher quality grants you more buffs in that blood type.
You can click on each image to make it bigger.

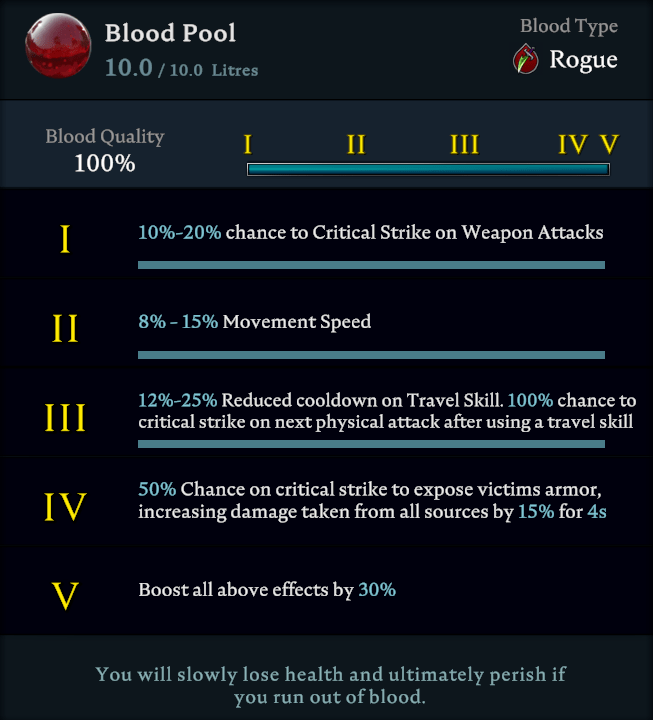

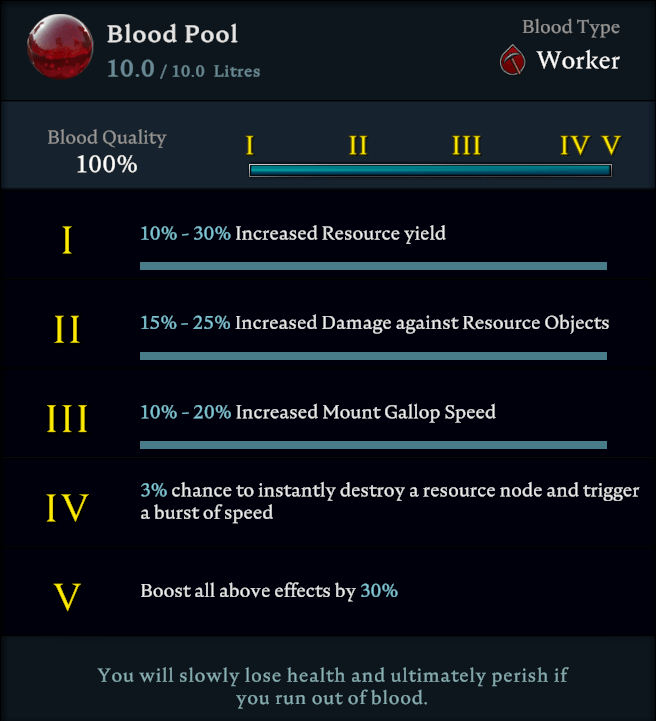
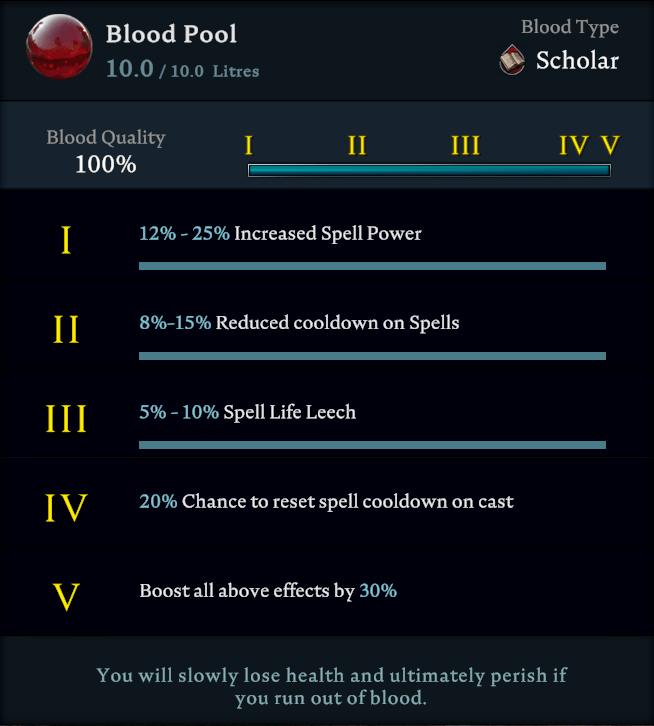
How to Build a Castle
First you have to choose a good location for your castle. Is highly recommended to build it on a mountain and not in a plain field.
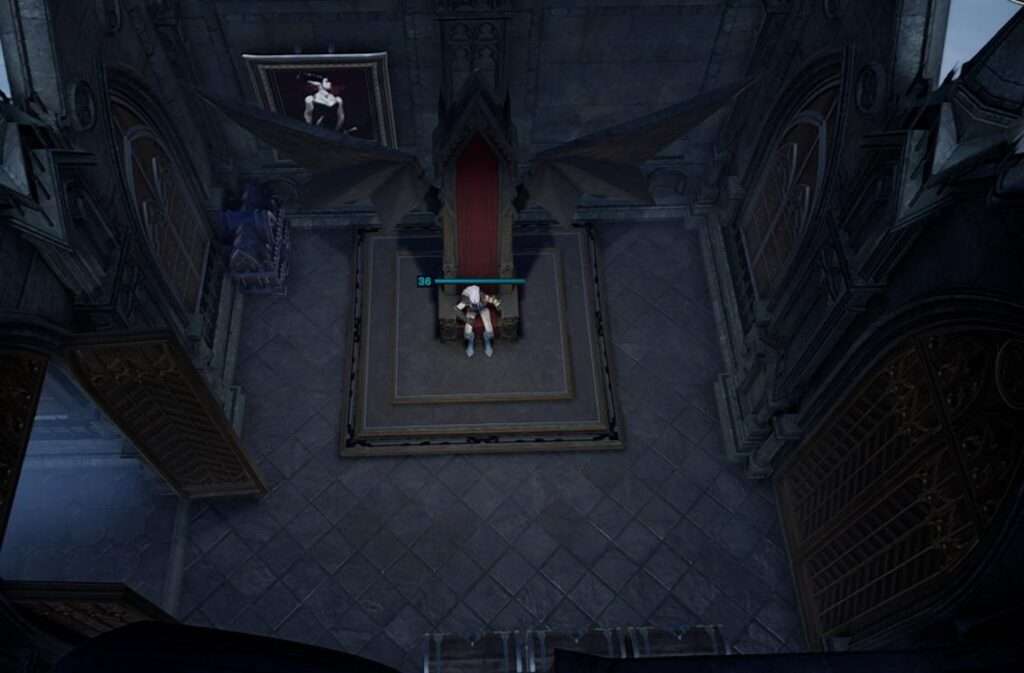
First you have to choose a good location for your castle. Is highly recommended to build it on a mountain and not in a plain field.
- Place the Castle Hearth. Keep in mind that this is the core of your castle so build it somewhere where you can protect it easier.
- Fill it with Blood Essence. You can get this from most of humanoid enemies.
- Place borders. They have to be connected to the Castle Hearth and you have a limit of them. To increate the border limit you need to upgrade the Castle Hearth.
- Place walls, furnitures and all the stuff you need.
How to Get Servants and Servant Types
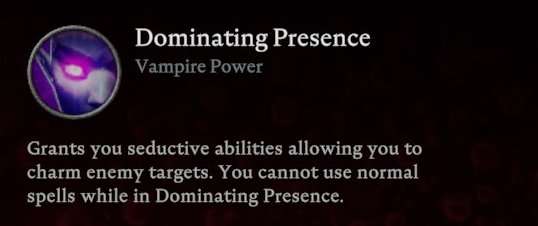
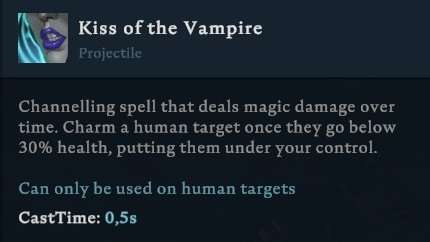
Before be able to get servants you will need to be in Dominating Presence this will allows you to use Kiss of the Vampire a skill who seduce humans to make them follow you.
You will unlock this skill following the quest line, just right after you build the first Servant Coffin and interact with it.
How to Get a Servant
- Find a human, you can look for them in human towns, farms roads, military camps or other places.
- Check is blood type %, the higher the better.
- Cast Kiss of the Vampire. This will be draining HP from the target and when the HP is below 30% the human will be seduced and will follow you. (You can lower the HP first attacking the target and then use the Kiss).
- Bring the seduced human to your castle.
- Put the human in a Servant Coffin.
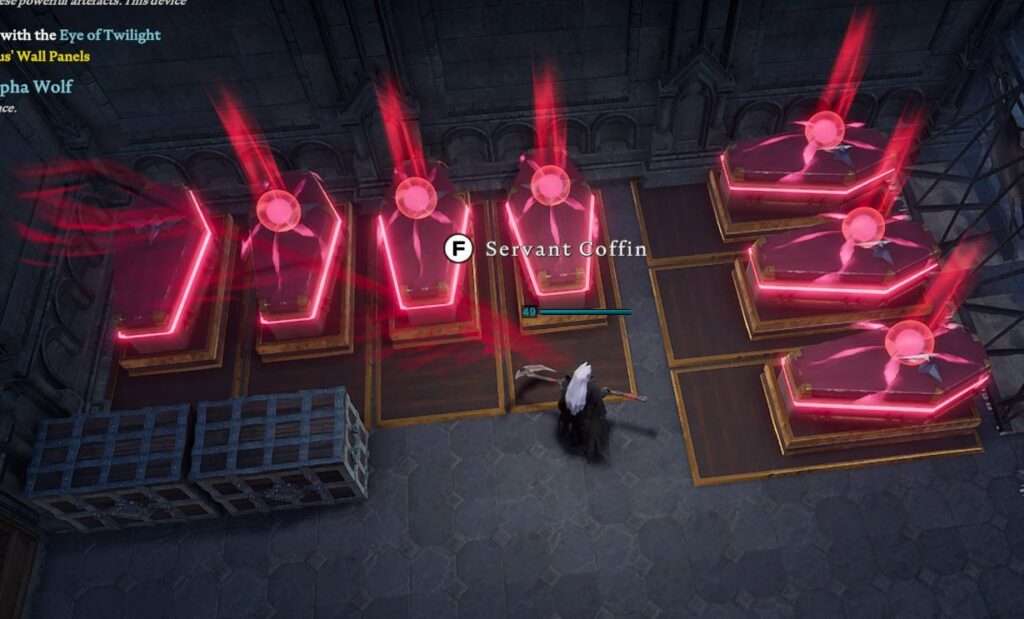
- Wait until the human is transformed into a servant.
- Raise your servant.

Servan Types
When you are looking for a servant is important to keep in mind the blood type, blood quality and the region of the map you are getting it.
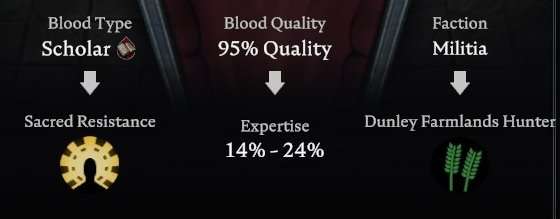
- Blood type: Reduce difficulty in 100 points in a specific zone type.
- Blood quality: Determine how many expertise the servant will gate. Expertise determine the power of the equipment.
- Faction: Will grant a 20% buff on a specific region of the map.
Blood Type -> Servant Type:
Brute
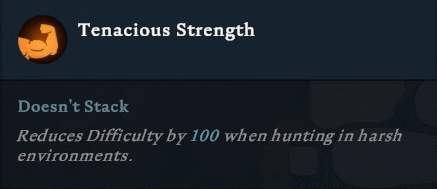
Rogue
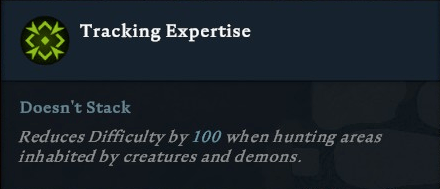
Warrior

Worker
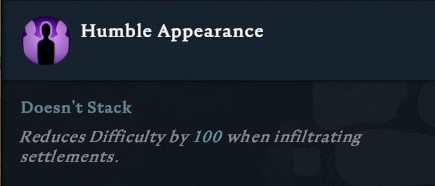
Scholar

Make Your Servants Work
To make your servants work you will need to build a Castle Throne to be able to give them orders.
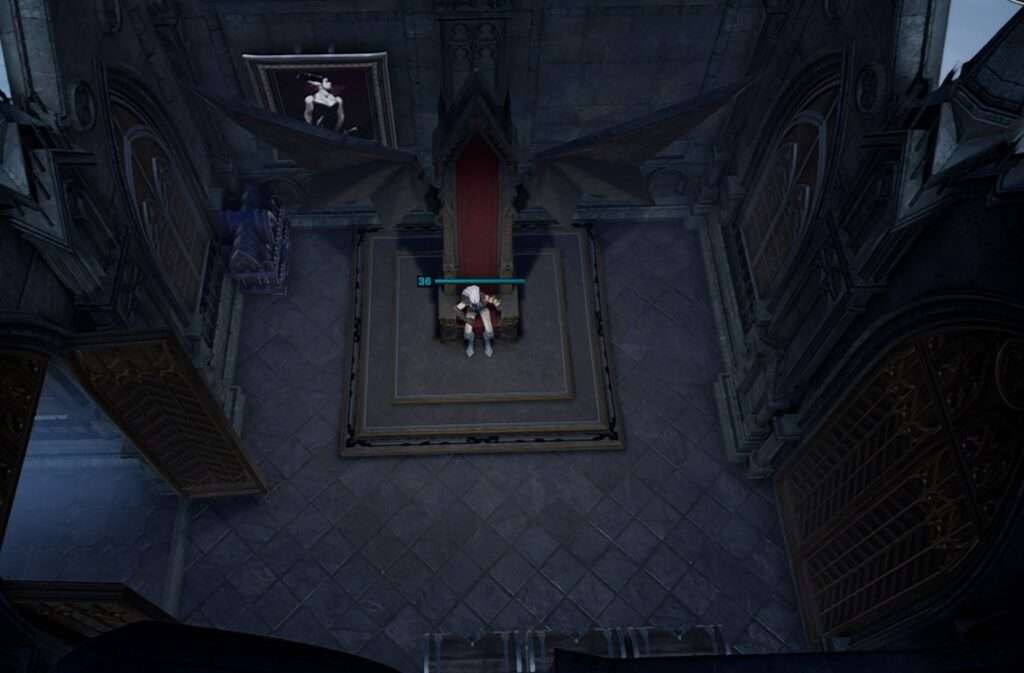
Sitting on the Throne will show up a map where you can see zones where you can send your servant to gather resources for you.
Keep in mind you have to equip your servants to make them have a good gear score before send them to expeditions. Your servants can fail the expedition and die, but you can resurrect them with blood in their respective Servant Coffin.
Ingots and Where to Get Them
There are different ingots ingame:
Copper Ingot
- Recipe: No recipe.
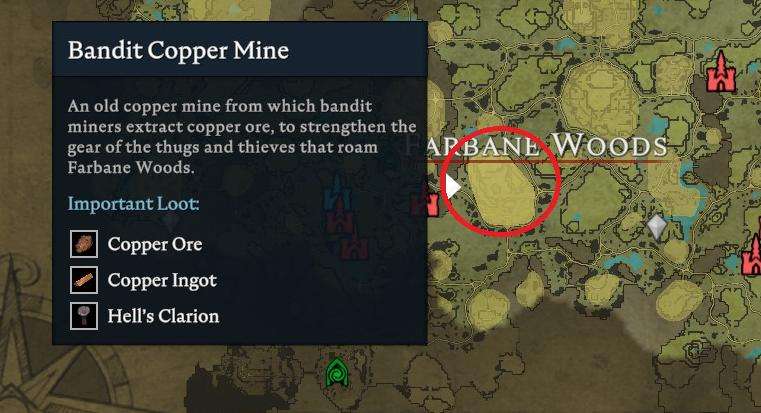
- Where to get: You can obtain Copper Ore in almost all zones of the map or find the Bandit Copper Mine in Farbane Woods zone.
- Craft: Melt Copper Ore in the Furnace.
Iron Ingot
- Recipe: Recipe from Quincey the Bandit King (Level 37)
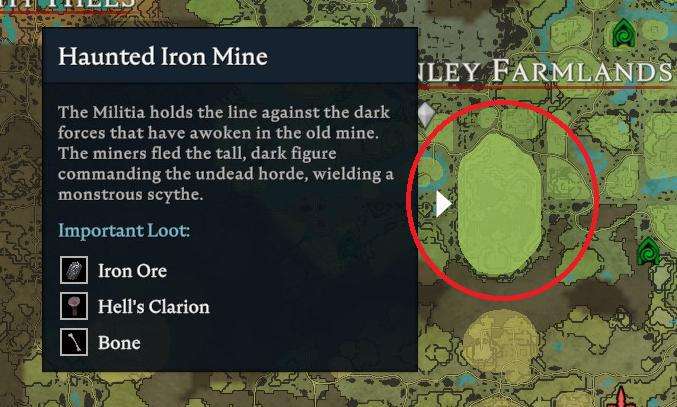
- Where to get: You can obtain Iron Ore in almost all parts of the map (not in Farbane Woods) or find the Haunted Iron Mine in Dunley Farmlands.
- Craft: Melt Iron ore in the Furnace.
Keep in mind you will need 12 gear level weapon to be able to mine it.
Dark Silver Ingot
- Recipe: Recipe from Octavian the Militia Captain (Level 58)
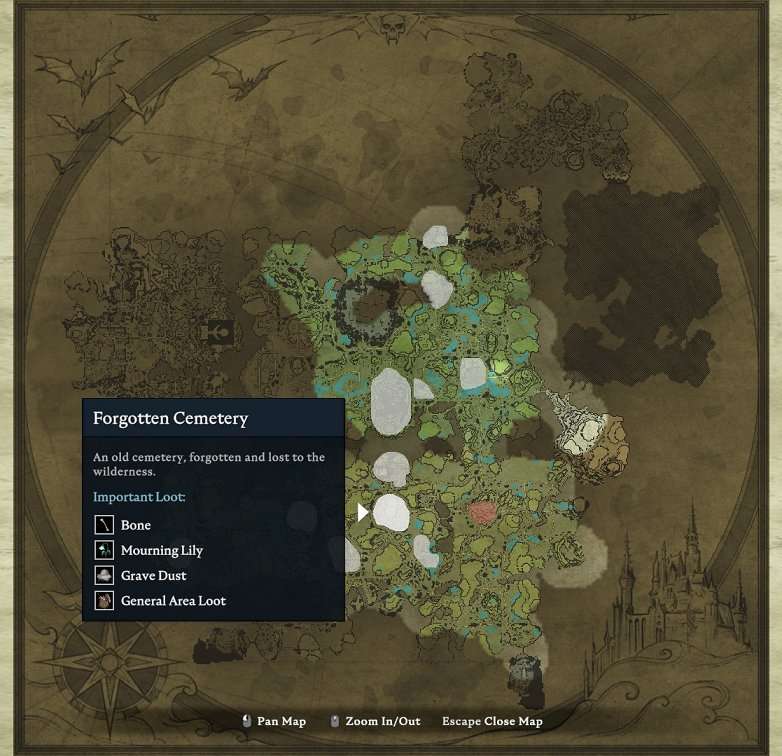
- Where to get: You can obtain Silver Ore in Silverlight Hills area or in Sacred Silver Mine (is a zone in Silverlight Hills). You can obtain Scourgestone from high level mobs or in Church of the Damned (is a spot north of Dunley Farmlands).
- Craft: Melt Scourgestone and Silver Ore in the Furnace.

Gold Ingot
- Recipe: Recipe from Azariel the Sunbringer (Level 68)
- Where to get: You need to craft it in the Furnace or a rare drop from V blood mobs or elite mobs in Silverlight Hills.
- Craft: Melt Sulphur and Golden Jewellery in the Furnace. You can obtain Golden Jewellery from V Bosses or rare drop from elite monsters. You can obtain Sulphur in almost all zones of the map. Also you can craft it in the Furnace when you unlock the recipe killing Clive the Firestarter (Level 30).
Skill System and How to Unlock New Skills
We can have seven different skills in our hotbar:
- Weapon skills: Left mouse, Q and E.
- Travel skill: Spacebar.
- Basic skills: R and C
- Ultimate: T

At the very beggining you only will have the first weapon skill, two basic skills and a travel skill. You have to defeat V Blood bosses to unlock the rest of them.
Weapon Skills:
They change every time you change your active weapon. To get the 2nd and 3th skill you need to use higher tier weapons.
Travel Skill, Basic Skills and Ultimate:
You can change them from your skill book pressing J.
To unlock skills you have to kill V Blood bosses and drink their blood.
Weapon Skills
Each weapon has it own skills and they change everytime you switch your active weapon.
Weapons ingame (using low tier weapons will only unlock 1 or 2 skills):
Sword:
| Skill | Effect | Cooldown | CastTime |
| Primary Attack | Melee combo: 35%/35%/40% | No cd | 0,2s |
| Whirlwind | Spin around and slice nearby enemies dealing 35% physical damage every 0,25s for 1,1s. | 8s | Instant |
| Shockwave | Send forth a shockwave dealing 70% physical damage and launching the enemy hit into the air for 1,6s. Recast the ability to teleport to the target striking it three times, each strike deals 25% physical damage. | 8s | 0,6s |
Axe:
| Skill | Effect | Cooldown | CastTime |
| Primary Attack | Melee combo: 45%/45%/55% | No cd | 0,25s |
| Frenzy | Dash forward and strike the first enemy dealing 100% physical damage. Enter a state of frenzy that increases your movement speed by 25% and increases attack speed by 30% for 0,8s on a successful hit. | 8s | 0,3s |
| X-Strike | Throw two axes in the shape of an X. Each hit deals 85% physical damage and slows the enemy for 1,5s. Hitting the enemy where both axes intersect inflicts a 2s incapacitate. | 8s | 0,5s |
Mace:
| Skill | Effect | Cooldown | CastTime |
| Primary Attack | Melee combo: 50%/50%/60% | No cd | 0,35s |
| Crushig Blow | Vault towards the cursor and slam your mace into the ground dealing 110% physical damage and inflicting a 2s fading snare. | 8s | 0,7s |
| Smack | Smack enemies in fron of you dealing 50% physical damage, knocking them back and incapacitating them for 1,2s. | 9s | 0,35s |
Crossbow:
| Skill | Effect | Cooldown | CastTime |
| Primary Attack | Single projectile: 115% | 0,55s | 1s |
| Rain of Bolts | Fire a salvo of 5 bolts into the air that rains down on your enemies dealing 40% physical damage each in an area and inflicts a 1,5s fading snare. | 8s | 0,4s |
| Snapshot | Fire a quick bolt that deals 75% damage, interrupts casts and inflicts a 2s fading snare. | 8s | 0,3s |
Reaper:
| Skill | Effect | Cooldown | CastTime |
| Primary Attack | Melee combo: 50%/50%/55% | No cd | 0,3s |
| Tendon Swing | Swing your reaper dealing 125% physical damage to nearby enemies, knockint them back and inflicting a 2s fading snare. | 8s | 0,2s |
| Howling Reaper | Throw a howling reaper that spins in place dealing 20% physical damage every 0,25s for 2,5s. The initial projectile hit slows enemies for 1,5s. | 8s | 0,5s |
Karambit:
| Skill | Effect | Cooldown | CastTime |
| Primary Attack | Melee combo: 27,5%/27,5%/35% | No cd | 0.15s |
| Slashers Skill – Elusive Strike | Dash back and forth slashing at your enemies dealing 60% physical damage and inflicting a 2s slow on each hit. | 8s | 0,2s |
| Camouflage | Enter a state of camouflage, increasing movement speed by 25% for 3s. Your next primary attack deals 80% physical damage and incapactitates the enemy for 3s. Uising any skill breaks camouflage. | 10s | Instant. |
Spear:
| Skill | Effect | Cooldown | CastTime |
| Primary Attack | Melee combo: | No cd | 0,3s |
| A Thousand Spears | Perform a multi-stab attack, dealing 30% physical damage 8 times. Recast during the effect to perform a thrust attack dealing 50% physical damage and knocking enemies back. | 8s | 0,35s |
| Harpoon | Throw a spear that deals 70% physical damage and pulls the enemy towards you. | 8s | 0,8s |
Active, Travel and Ultimate Skills
There are 5 different group of skills in V Rising: Blood, Unholy, Illusion, Chaos, and Frost.
You can combine skills from different groups to make your own build. To unlock this skills you have to beat different V Blood bosses that you will find in the world.
| Group Skill | Short description |
| Blood | Primarily focus on life steal and self heals. |
| Unholy | Primarily focus on debuffs. |
| Illusion | Primarily focus on summon ilusions. |
| Chaos | Primarly focus on Chaos debuff, which is a debuff that causes damage over time. |
| Frost | Primarily focus on chill and frozen debuff. |
Each of this groups have Basic, Travel and Ultimate skills.
- Basic skills are active skills, like ranged spells, AoE, shields and more.
- Travel skills are used for movement and dodge attacks as well as reposition yourself.
- Ultimate skills are more powerful that the others but have higher cooldown.
Blood – Unholy
Blood:
| Skill | Type | Description |
| Blood Rage | Basic | Shield self and nearby allies for 110% of your spell power and increase attack speed by 25% for 4.5 seconds. |
| Blood Rite | Basic | Blocks attacks for 1.5 seconds, healing for 30% of spell power and dealing 100% magic damage in an AOE that also knocks back nearby enemies. You cannot be hit when the counter attack is triggered, making it an excellent defensive option, even against groups of enemies. |
| Crimsom Aegis | Basic | Applies a shield equalling 200% of your spell power — this shield can also be given to allies when targeted. Will also knock back nearby enemies once the shield is applied. |
| Sanguine Coil | Basic | Launches a projectile that deals 75% magic damage, along with 40% life steal on hit. If used on an ally, it heals them for 100% of your spell power, along with 40% to the user. Very versatile due to being usable on both allies and enemies. |
| Shadowbolt | Basic | Projectile that deals 200% magic damage while also snaring enemies for 1 second. Trades the sustain of Sanguine Coil for a significant damage boost, and some crowd control. |
| Veil of Blood | Travel | Dash in movement direction, turning invisible for 2.2 seconds. After attacking while hidden, deal 25% extra damage while healing 5% of max health. This ability leaves a doppelganger on use, which tricks NPCs into attacking it. |
| Heart Strike | Ultimate | Dashed forward, hitting all enemies for 150% magic damage while healing self for the same amount. Also causes an explosion at the end of the dash, dealing 150% magic damage. |
| Crimson Beam | Ultimate | Channels a beam that deals 150% magic damage to enemies, and 100% healing to allies hit — user is also healed for 25% of spell power per hit. Lasts for 4 seconds. |
Unholy:
| Skill | Type | Description |
| Corpse Explosion | Basic | Causes AOE explosion in target area, dealing 125% magic damage and snaring enemies for 1 second. Good for crowds of enemies, or keeping another player at bay. |
| Pestilence | Basic | Launches 3 projectiles, dealing 40% magic damage each. Knocks enemies back on hit, while also causing them to take 25% more damage for 5 seconds. The debuff makes this a great combo with any weapon or attacking ability, even ultimates. |
| Purgatory | Basic | Summon an AOE for 1.2 seconds that heals allise for 40% of spell power, and slows enemies. Detonates afterwards, causing 75% damage to enemies and the same amount in healing to allies. Great for PvP brawls where everyone is clumped together. |
| Unstable Mosquito | Basic | Summons mosquito that tracks enemies, exploding after 1 second. Explosion hits nearby enemies for 60% magic damage, while also making them take 25% more damage for 5 seconds. As with Pestilence, this can be combined with most other weapons and abilities. |
| Veil of Bones | Travel | Dash in movement direction, turning invisible. The first attack while invisible launches a projectile dealing 25% magic damage, which can also bounce to other nearby enemies on hit. This is another ability that causes enemies to take 25% more damage for 5 seconds after being hit as well. |
| Volatile Arachnid | Ultimate | Summons multiple spiderlings that track enemies, exploding when near for 100 magic damage. Leaves a lingering cloud that deals magic damage and slows enemies by 25%. Excellent for AOE crowd control, though enemies can avoid the spiderlings. |
Illusion – Chaos – Frost
Illusion:
| Skill | Type | Description |
| Mist Trance | Basic | Blocks attacks for 1.5 seconds, teleporting to mouse target location once hit. Also resets technique 1 of weapons. Great for weapons like axe that can cause high burst damage with their first technique. |
| Spectral Assassin | Basic | Summons Spectral Assassin at target location, causing a 125% magic damage AOE that knocks back enemies. The Spectral Assassin does this multiple times, with any enemies hit also having reduced damage dealt for 5 seconds. Useful for drawing aggro away from you, and hitting multiple enemies in closed spaces. |
| Spectral Wolf | Basic | Launches a projectile that deals 100% magic damage on hit, while also snarding and reducing damage dealt by 30% for 5 seconds. Can also jump to 2 nearby enemies, though the damage is heavily reduced. Still useful when dealing with a small group of enemies, mainly in PvP. |
| Veil of Illusion | Travel | Dash in movement direction, turning invisible for 2.2 seconds. Deal 25% bonus damage on your first primary attack while stealthed. This also leaves an illusion at your starting point, which fires projectiles that deal 40% magic damage. Using Veil of Illusion while invisible will teleport you to the first illusion, spawning another one in your previous location. |
| Mirror Strike | Ultimate | Dash forward, dealing damage to enemies with the target area. Deals a total of 600% magic damage, but this is split between all enemies affected (i.e. 2 enemies would receive 300% damage each). Also weakens enemies hit by 30% for 5 seconds. |
| Spectral Guardian | Ultimate | Summons Spectral Guardian at your location, shielding allies for 125% of your spell power and attacking with a close range AOE for the same amount. Lasts for 7 seconds, shielding allies every 1.5 seconds. |
Chaos:
| Skill | Type | Description |
| Aftershock | Basic | Line AOE that deals 100% magic damage. Also afflicts Chaos Burn on hit. |
| Chaos Barrier | Basic | Increase movement speed by 10% while blocking all attacks in front for 2 seconds. Launches 75% damage projectile forwards when shield is hit, dealing Chaos Burn to enemies. |
| Chaos Volley | Basic | Launch 2 projectiles, dealing 125% magic damage each and inflicting Chaos Burn. |
| Power Surge | Basic | Remove negative effects and shield for 150% spell power. Buffs movement speed and attack speed by 25% while shield is still active. Shield can be applied to allies. |
| Void | Basic | Summon exploding orb at target location, dealing 70% magic damage and inflicting Chaos Burn. |
| Veil of Chaos | Travel | Dash in movement direction, turning invisible for 2.2 seconds. Deal 25% bonus damage on your first primary attack while stealthed. Leaves an illusion at the starting point that explodes for 50% magic damage. Using Veil of Chaos again while stealthed will allow you to dash again and spawn another exploding illusion. |
| Chaos Barrage | Ultimate | Launch 4 orbs that deal 75% damage on direct hit, with an additional 75% to all nearby enemies when they explode. Also inflicts Chaos Burn. |
| Merciless Charge | Ultimate | Charge forward, grabbing first enemy hit and dealing 125% damage. Deals 100% damage in an AOE and stuns enemies when ability is over. |
Frost:
| Skill | Type | Description |
| Crystal Lance | Basic | Launch projectile dealing 150% magic damage, inflicting Chill on hit. Explodes on impact, with smaller projectiles launching out dealing 50% damage each. |
| Frost Barrier | Basic | Increases movement speed by 10% while also blocking attacks in front of you for 2 seconds. When the barrier is hit, 8 AOE waves are launched dealing 50% damage each and inflicting Chill. |
| Frost Bat | Basic | Launches exploding projectile, dealing 100% magic damage in an AOE and inflicting Chill. |
| Ice Nova | Basic | Summons AOE that deals 100% magic damage on hit and freezes Chilled enemies for 4 seconds. Will also Chill enemies hit that don’t already have the status effect. |
| Veil of Frost | Travel | Dash in movement direction, turning invisible for 2.2 seconds and shielding for 125% of spell power. Deal 25% bonus damage on your first primary attack while stealthed, along with a frost AOE that deals an additional 50% magic damage and inflicts Chill. |
| Artic Leap | Ultimate | Leap towards target, dealing 225% magic damage in an AOE. Spawn additional rings of ice outwards, freezing enemies hit for 6 seconds (other players are only frozen for 3 seconds). |
Vampire Powers
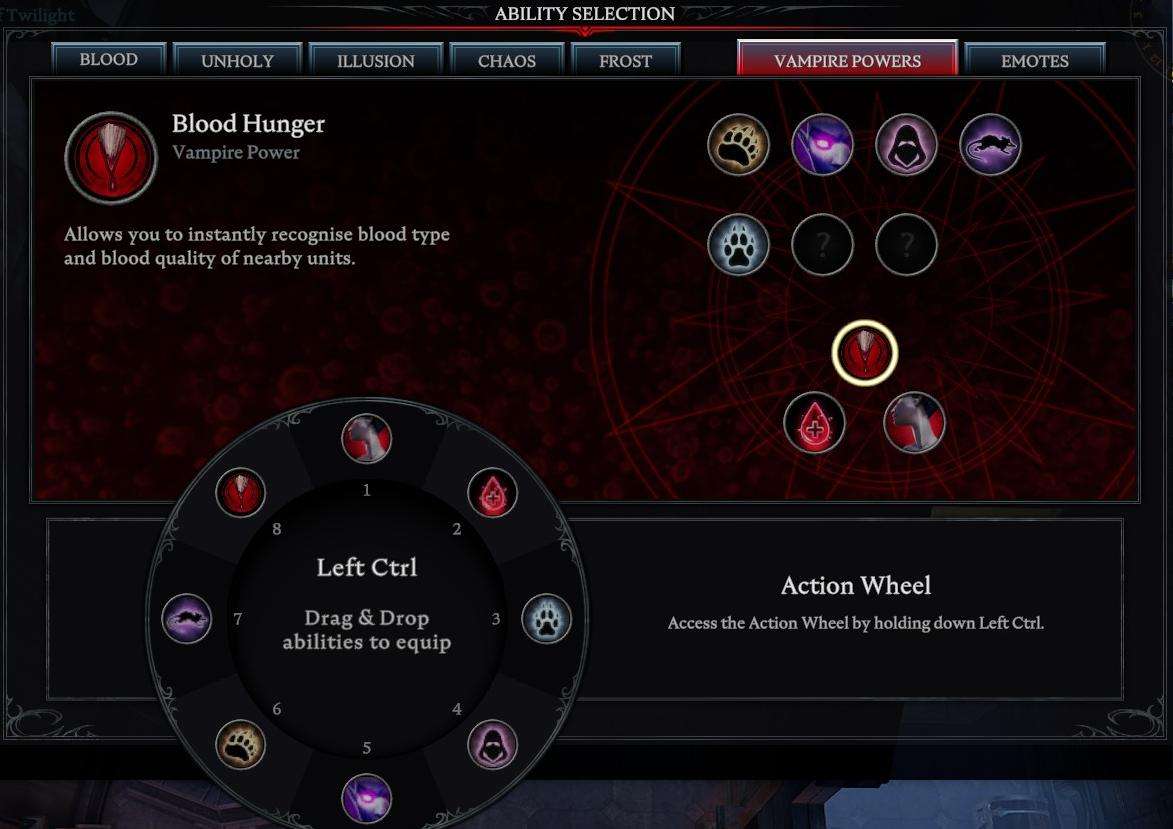
You can use your Vampire Powers holding CTRL key and selection which you wanna use with the mouse. If you want to turn off a vampire power hold CTRL and hold the mouse in the middle of the selection wheel, then release CTRL.
Change Form
Bear Form: Turn into a bear. Resistance +25%, movement speed +15% and reduce damage taken 25%. While in bear form you regen HP faster.
Human Form: Turn into a human. Allow you to sneak around unnoticed in human settlements. Some human enemies can still detect you. Allow you to interact with human traders (you need silver coins). You consume more blood while in human form.
Rat Form: Turn into a rat. Makes you harder to be noticed for your enemies. No HP, name or info over your character which is helpful for hidde against other players.
Wolf Form: Turn into a wolf. Movement speed +45%.
Blood
Expose Vein: Allow other vampires to drink half of your blood. This will give them the same type of blood you have.
Blood Mend: Consume 0,2 liter blood per second to recover 4% of max HP.
Blood Hunger: Allow you to check blood quality and type of nearby enemies.
Soul Shards
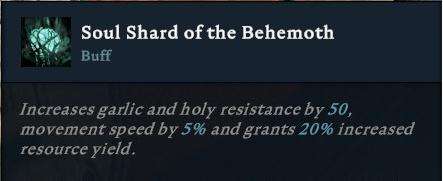
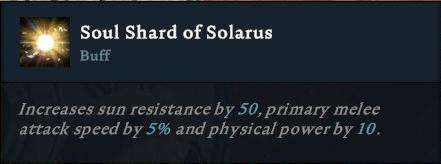
Souls shards are one of the main objetives to obtain in the game. There are only 3 soul shards in PvP servers, 1 of each type and fight for them (in PvE servers it can be more than 3 shards and more than 1 of each type) is a must because of the buffs you will get from them.
To get a Shard you have to be the first one to kill each one of the last three bosses in the game. Each shard will grant you a 2 hours buff with different resistances and powers.
Behemot
Winged Horror

Solarus
When you kill the boss you will get the shard as a normal item and you will have to carry it to your castle, but keep in mind that when you have a shard in your inventory you will be moving slowly and you will get more damage from your enemies.
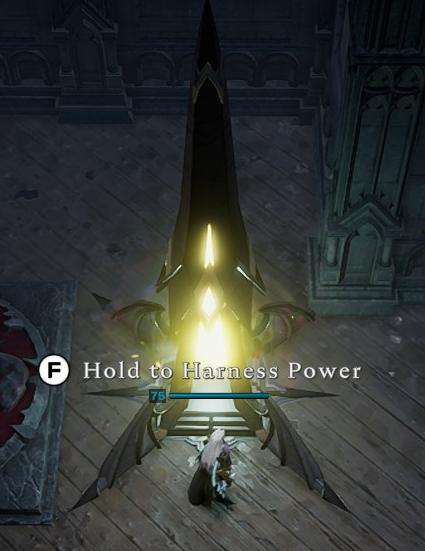
To place a shard in your castle just move the shard to your inventory bar and use it.
Useful Tips
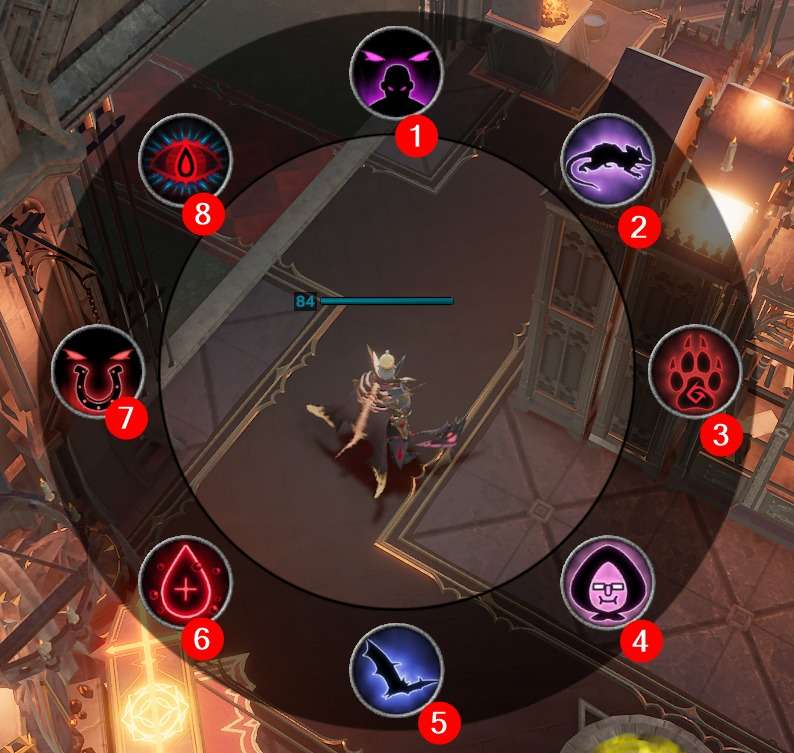
Shift + [Num] to use Vampire Powers
If you press Shift + any number from 1 to 8, you’ll quickly use the dedicated vampire power in the wheel slot. I just noticed this today by accident, so maybe it’ll be useful to others as well. No more holding Ctrl and dragging mouse over.
How to delete servers from your continue list
Here is how to delete servers from the continue list. Open windows Explorer, and navigate to the following.
- C:\Program Files (x86)\Steam\userdata\12345678\1604030\remote
1234567 will be your steamid, it won’t be this number. Inside the remote folder you will find ServerHistory.json file, edit it with notepad then save the changes.
Entries look like this:
{"SessionGUID":"1234abcd","Name":"example server name","ConnectAddress":"SteamIPv4://123.123.123.123:9876","HideInContinue":false,"QueryPort":9877,"UTCLastPlayed":1234567890,"Version":1,"UserId":123456789}The newest server is the last entry on the list, you need to delete the entire entry including the {} and the comma at the end if its the first entry on the list. Save changes then start the game and you should be good.
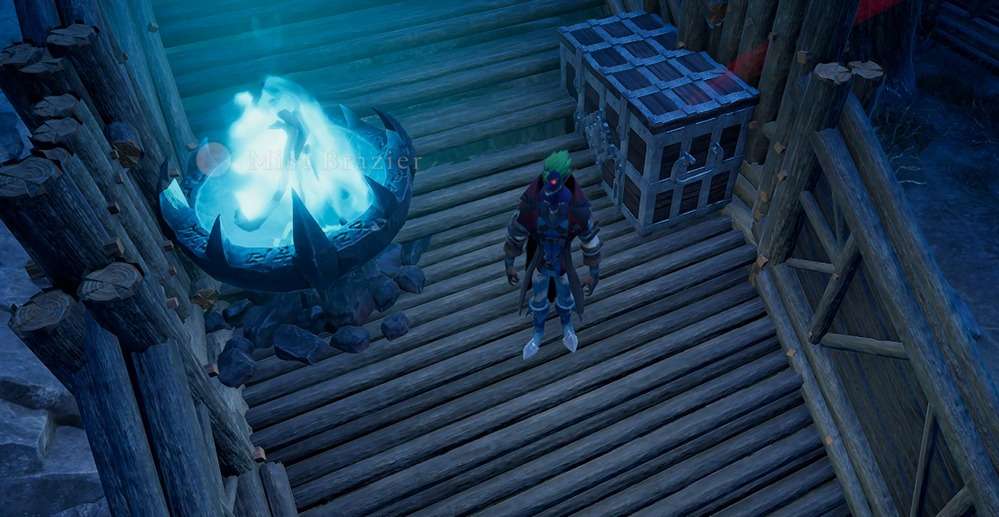
Place items on the staircase
Not really a “guide” but if your staircase is more than 1 square in length, you can save a little space if you place the right items on it. Iv’e found a box and a Brazier are good for farming and looting.
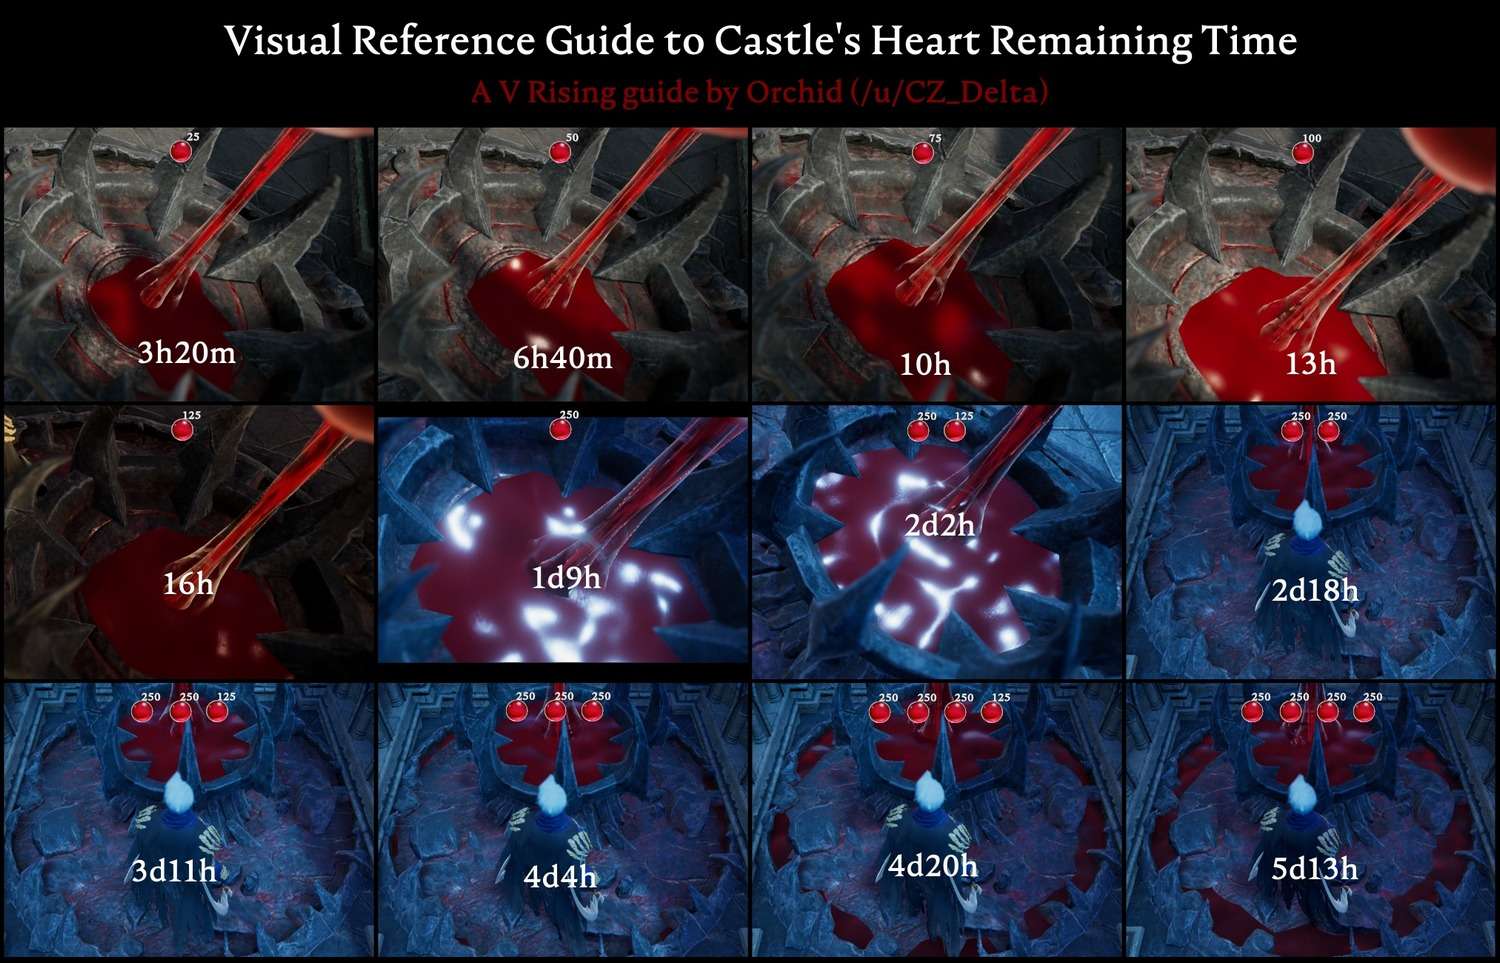
Visual Reference Guide to Castle’s Heart Remaining Time
Click to enlarge…
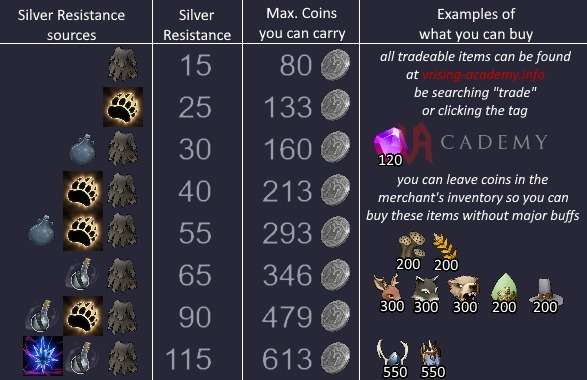
How many Silver Coins you can carry depending on your Silver Resistance
Reminder that you need to be in human form in order to interact with merchants.
Two merchants roam the roads of Farbane and Dunley and they are diffucult and honestly meaningless to track. However, Ottar is always located in a house in Brighthaven Slums. I recommend using bat form to quickly visit him with silver coins in your inventory.
Click to enlarge…
Scourgestone farm tips
I should keep this secret since nobody else is talking about it, but the Dunley Monastary is actually amazing for scourgestone, especially if you have the shard so you don’t need a potion. There are 4 coffins in the monastery, each having 0-3 scourgestone. I typically leave the monastery with 4-8 scourgestone, plus tons of glass and quartz if I loot the rest of the monastery.
I started this run at the beginning of the night, and it’s less than average because a bug seems to have removed one of the coffins on my server, so I only looted 3, not 4. They’ll respawn in time to do another run before the holy potion wears off as well. Done on official PvE, with behemoth buff but no worker buff.
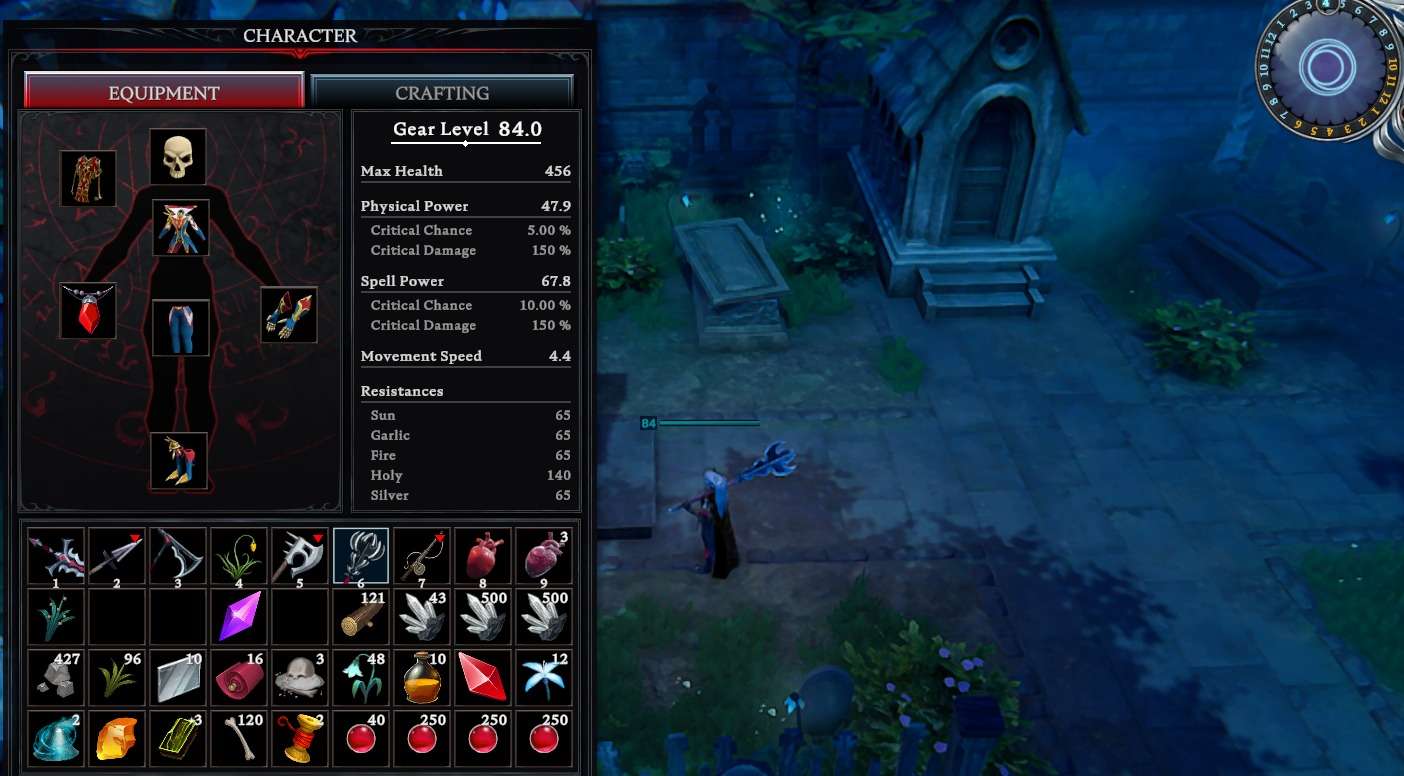
Locations of the coffins:
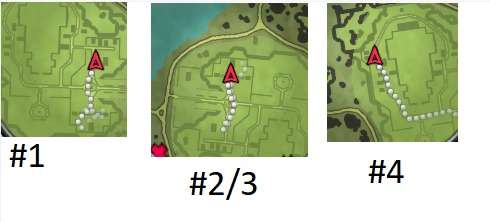
The coffins respawn by the next night – I just did another run and got 6 scourgestone. That’s quick enough that you can do at least 2 runs on one holy potion, however the quartz does not respawn as quickly so you’ll just be hitting the coffins.
Mechanics questions and what people ask in the chats
How do I create Paper, Scrolls and Schematics?
- You have to unlock the Paper Press on the Study, randomly. Then, it will appear on your build menu.
The lockboxes are too small, I need dozens of them! Is there any solution?
- Yes. You will unlock bigger storages units: Storage Shelves on Research Desk; Storage Locker and Blood Case on Study; and Cabinets and Wide Blood Case on Athenaeum. AND STORE EVERYTHING.
Where can I find the floors to create the rooms for certain craftings?
- Forge and Alchemy unlocked with the Research Desk; Tailors, Library and Crypt on the Study; Prison and ‘Regulus’ (Jewel crafting) on the Athenaeum.
How big should I create the rooms beforehand?
- For Library, you only have the Paper Press. For Alchemy, the Blood Press, Alchemy Table, Vermin Nest. For Jewel Crafting, only the Gemcutter Table and the Jewelcrafting table. For Tailor, you have Tannery, Loom and the tailoring bench. For Workshop, the grinder, the sawmill and the woodworking bench. And for the Forge you have the furnace, the simple workbench, the smithy and the anvil. All other stuff can go anywhere.
I reached the mission to drink Solarus blood. Should I go?
- Nope. Solarus is lvl 80 and you can’t beat him without the best equipment on the standard settings. You need to do every boss on the blood altar and craft the best gear available step by step before even trying Solarus.
What is the current max equipment level?
- 81 before defeating Solarus, 84 after defeating him and crafting the Blood Key (an amulet)
I got a soul shard! But I don’t know what to do with it…
- Put it on your hotbar (the first row in you own inventory) and cast it, like a spell. It will give you a building that you can put in your castle to use the buffs. After that, you can unequip it. It will dissappear from your stashes after a while.




Iron Ore required weapon level is incorrect. its 12 (merciless)… unless server settings can change that and it’s been changed on me
the peasants start showing up caged super early in-game before the skill is available leading to frustration.
This is the best guide for the game, hands down. overall, great guide. i love the weapon skills part myself. 😛
when i comes to servants i found beating the shit out of them then using kiss is faster.